Showing posts with label prototype. Show all posts

Thursday, 31 July 2025

interwoven beaded bracelet

Pin It now!
As promised, here is another pattern and technique reveal from my bead tatting post back in May. All relevant links are listed at the end of this post.
A simple name - Muskaan's Interwoven Beaded Bracelet, made using four shuttles with pre-strung beads on each and Barbara Arango's variation of the Interlocking split rings technique.

Above is a practice pattern I am sharing. As you can see in the inset, traditionally 4 shuttles are used and the split rings are tatted simultaneously, lying close to each other. The idle pair of shuttles is passed through the open SR and then the ring is closed so that the next SR will is encapsulated and overlap with the previous. video link at end

Barbara used the flexibility of 4 shuttles to distance the SRs with a chain between two SRs. She used it to create the desired effect in a round doily! 
Practice Pattern: 
To keep track, I used 4 different thread colours in each shuttle....
Sh1: yellow; Sh2: cream; Sh3: pink; Sh4: blue.
I started with two normal rings.
Sh1) R1: 18. dnrw, SS
Sh2) Ch1: 6.
Sh3) R2: 18. dnrw, SS [insert R1 through R2]
Sh4) Ch2: 6.
Sh1) SR3: 9 / 9. dnrw, SS  [pass shuttles 3 & 4 back to front through SR3 before closing it]
Sh2) Ch3: 6.
Sh3) SR4: 9 / 9. dnrw, SS  [pass shuttles 1 & 2 back to front through SR4 before closing it]
Sh4) Ch4: 6.
Continue the SR steps for desired length.
Posting the shuttles front to back will give the opposite overlap.

Having 4 shuttles meant I could have beaded strings instead of Barbara's chains between the SRs! Which led to the bracelet above. 
Muskaan's Interwoven Beaded Bracelet   ©May2025
String all 4 shuttles with seed beads. In my model worked with Anchor Pearl Cotton size 8 ---
Sh1 & Sh2 with teal thread, CTM, and purple seed beads
Sh3 & Sh4 with dark purple thread, CTM, and yellow seed beads

Follow the process and instructions as explained in the practice pattern. However, instead of chain, slide beads from both shuttles before starting the next ring or SR. 
Sharing only the repeated portion of the pattern ---
Sh1) R1: 3 [- 3]x7. Slide 5 beads from Sh1 & 2. dnrw, SS
Sh3) R2: 3 [- 3]x7. Slide 5 beads from Sh3 & 4. dnrw, SS [insert R1 through R2]
Sh1) SR3: 3 [- 3]x3 / 3 [- 3]x3Slide 5 beads from Sh1 & 2. dnrw, SS [pass shuttles 3 & 4 back to front through SR3 before closing it] 
Sh3) SR4: 3 [- 3]x3 / 3 [- 3]x3Slide 5 beads from Sh3 & 4. dnrw, SS [pass shuttles 1 & 2 back to front through SR4 before closing it] 
Repeat SR3 and SR4 for desired length. 
Posting the shuttles front to back will give the opposite overlap.

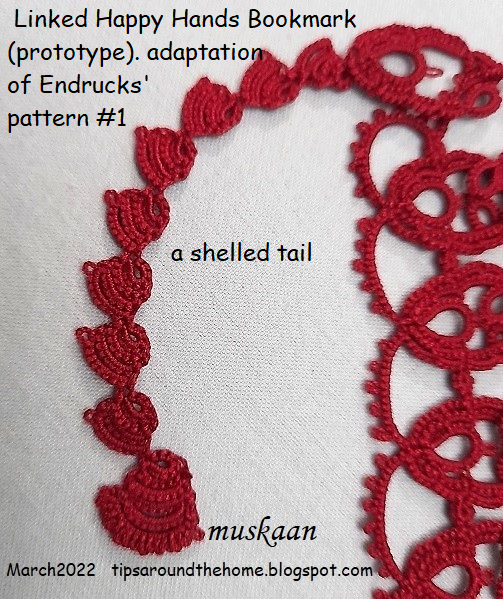
I ended with a curled ring (see inset) that works as a toggle for a quick & lazy finish.

Note: The beads are a slightly different size. Unfortunately I can't find my notes but I remember there was a little TIP I wanted to share. Oh well, perhaps I will find it some day and make a proper PDF presentation. 

Future Ideas - Add more beads in place of the picots. Throw off rings or decorative picots on one or either side. Attach more braids with same or additional colour for a broader version. The alternate SRs can differ in size or different sized threads can be used.

UPDATE (18th Aug, 2025) - Splocik has used the tweaked braid as a foundation, adding rounds around it, for two bookmark versions here - https://oczka2.blogspot.com/2025/08/zakladka-na-podstawie-motywu.html

💛💛💛

INTERWOVEN  versus  INTERLOCKING

Often the two are used interchangeably in tatting terminology. Confining myself to the split ring braids,  there are several techniques and effects that tatters have created over the years. These may range from a single row of split rings (called a SR braid or cord), or a double row where the SRs are interlaced and lie adjacent to each other. 

Or the braids may lie 'stacked' with overlapping SRs. These are the SR braids that are interwoven where the SRs from two braids lie intertwined through each other. These are also called interlocking SR braids and can be made with either 2 or 4 shuttles - two independent braids woven through each other; a foundational braid encapsulated within the second on-going braid; simultaneously tatting the SRs using 4 shuttles. 

Then there is the 3D chain maille effect where each subsequent SR lies at right angles to the previous one just like in interlocking chains and links in jewellery. I prefer to call these 3D SR braids Interlocked and the 'flat' ones Interwoven. This gives a more exacting visual especially since there are several ways to interweave and interlock the braids, whether 2D or 3D. 


Related Posts and Links -
 
 
Simple interweaving - https://tipsaroundthehome.blogspot.com/2024/03/exciting-firsts.html 
Interlocking split rings 2 Karen Cabrera Lesson 79 - https://www.youtube.com/watch?v=ZR04RLHdmA0   (2 shuttles)
Interlocking split rings 2 Karen Cabrera Lesson 80 - https://www.youtube.com/watch?v=BBrDRLFibO8   (4 shuttles)
How to start and end SR without a knot - https://tipsaroundthehome.blogspot.com/2016/11/beginning-or-ending.html 
SR braids, including beaded, some with pictorials - https://tipsaroundthehome.blogspot.com/search?q=SR+braid 
Interlaced SR braids with pictorials and patterns - https://tipsaroundthehome.blogspot.com/search?q=interlaced+SR
Tatting with Beads - a few effects - https://tipsaroundthehome.blogspot.com/2025/05/bead-tatting.html

Thursday, 26 June 2025

quick tatting

Pin It now!

 I first shared a pic of my Fan Palm motif or pendant here - https://tipsaroundthehome.blogspot.com/2025/05/bead-tatting.html . Now I have the pattern ready --- 

Fan Palm Motif/Pendant by Muskaan (March2025) pattern PDFhttps://drive.google.com/file/d/16amEUnVT7ERSySRJqbMsj0af0Xu_MFsP/view

It is a simple motif that can be worked with a ball and shuttle and the beads are not pre-strung. 

It is a prototype I made to show beads over/on a picot. These beads are slipped over the long measured picots at the time of joining. Or they can be slipped over the picot while it is being formed, and held with a paper clip or marker. I prefer the former to avoid beads and clips getting in the way of smooth tatting. 

Measuring the Picot (including using beads as a picot gauge)https://drive.google.com/file/d/1Kk6rtyIUvo5JFA5u3vE3ruU2Z7zQ9fuq/view


I deliberately chose to do a mock ring since I did not know how big I wanted it. And then made an under-over or alligator join across the start of the chain. There are several ways to make the under-over join (alligator join is only one of them). Refer to my pictorials here - https://tipsaroundthehome.blogspot.com/2018/05/mock-rings-1-under-and-over-join.html  and https://tipsaroundthehome.blogspot.com/2018/05/mock-rings-1-u-o-join-continued.html

The diagram in the PDF is simply a guide. You can choose to tat with two shuttles if you wish to empty them of leftover threads. You can even work the mock ring as a true ring and without need for an under-over join. 

For a plain, flat leaf, avoid any beads on the picots. 

I used 4mm beads, but you can choose smaller ones and adjust their number accordingly. Oh dear, I've been so flaky lately that I forgot to take a pic of this on a chain. Hmm, not too difficult to imagine, right?

This is such a quick tat, really, and easily adaptable to any thread and bead size. Or go all around for a floral motif! Hope you enjoy the pattern. 

Friday, 28 February 2025

DAL 2025 challenge

Pin It now!

 Well, I wanted to show some techniques/effects for glossary entries and decided to create a motif to incorporate them. It resulted in a very simple motif, nothing fancy. It may not even be original though I did not refer to or look for any patterns. and it's still a work in progress. 

I kind of like how it looks so far and it could very well be the starting center for a larger motif, if you wish to participate in yet another Design Along (DAL). Tat this two-round motif and then design as many rounds as you wish around it. Sharing your stitch count/pattern is highly appreciated. All will be shared in my blog.

NOTE: I started with a single-shuttle rosette with the intention to cut away later rounds and reuse it for other samples, hence I cut off the thread and hid tails. However, you are free to climb out by making the 6th ring a split ring. Remember to use two shuttles for continuous tatting.

Muskaan's DAL 2025 Challenge


Round 1 - Rosette - one shuttle or two shuttles, continuous thread
ringA: 5-6-6-5. do not reverse work
ringB: 5+6-6-5. do not reverse work
Repeat ringB till you have a total of 6 rings, joining the 6th ring to the first ring.
Cut and hide ends OR climb out with the last ring as a split ring.

Round 2 - Curled Rings  (CR)- one shuttle and ball or continue with two shuttles.
CR: 10-10. Curl around any rosette ring. 
Chain: 2 (-2)×9. Repeat all around. 
NOTE: Picots are 3.5mm high or open picot is 7mm long. [My motif is worked in Anchor size 20, which is similar to Lizbeth size 10).

Hope you like the motif and would be interested in designing and tatting more rounds. Leave a comment or contact/tag me on Facebook or Instagram.

Take it away, friends!

My next round is already decided which is why I have all those picots in the 2nd round. Will share when it is finished. 

Some of my previous DALs can be found here -  https://tipsaroundthehome.blogspot.com/search/label/DAL

And tutorials/videos for all techniques can be found here - https://tipsaroundthehome.blogspot.com/p/tatting-resources.html


UPDATE (12th March 2025) - the first batch of lovelies! -- https://tipsaroundthehome.blogspot.com/2025/03/colour-me-happy.html

Monday, 26 August 2024

starburst fringe

Pin It now!

In my last post I had shared several adaptations of Corina Meyfeldt's Tatted Fringe. Lots of ideas swirled in my head to try out a quick practice pattern, applying all three adaptations viz., tatted fringe, spot/luggage tag fringe, and tatted fringe picot. While I am not fully satisfied with the outcome (it looks especially messy in photographs), there is a lot of scope to play and try something better and different.

This is the Fringe Star - a kind of practice pattern with a lot of possibilities. 
I got so involved that I forgot to take some process pics.

I started by tying the white (Anchor size 40) shuttle thread with metallic Madeira (Astro 2, No.40) and tatting a chain with measured adjoining picots. This took longer than I bargained for coz the metallic thread is really really fine. However the colourway is beautiful with a range of shades.

Now since the thread was so thin, I feared the picot might turn out to be too small. Hence, after snipping off the tips and dividing them into 5 clusters (eyeballed, not counted!) I divided each further and added a luggage tag in the center of each using Sanbest #34. 
And I wanted a small cluster in the joining picot as well. So, I direct tatted 3 adjoining long picots at the start and between the 5 clusters. 
Future Idea 1 - My original idea was to make layered rings with graduated fringe picots. But somewhere along the way, I decided to simply add the fringe between rings for now.
  
With all the prep work finished, I pushed the clusters further into the shuttle and started tatting. The star body is a simple rosette of 5 rings (6 - 8 - 8 - 6)x5 joining to adjoining ring(s).

However, before starting the ring, bring forth the fringes (Fr) into the loop for the ring.
    For first ring tat 6ds, Fr, 8ds, FrPicot, 8ds, Fr, 6ds. 
    For next 4 rings, tat 6ds +(join to ring: push the Fr towards the top of the picot and join below it), 8ds, FrPicot, 8ds, Fr, 6ds.
    Join last ring to first.

Insert sequin and bead and sew down with the tail and hide the tail end or use it to suspend the star. Trim the fringes.
I wanted a starburst kind of shining aura, hence the long fringe. It is very sparkly when seen in person.
I repeat, it looks especially messy in pics, but there is always room for improvement. 
Future Idea 2 - Use a circle of tatted fringe for the base of a rakhi!!! Or how about fireworks?!

OBSERVATIONS - I'd like to point out that each adaptation has its advantages and this little pattern will help you realize this. 
  • For a fringe picot it is advisable to tat the chain as in Corina's original. 
  • But for spot treatment or to sprinkle a different colour randomly, luggage tags are preferable. 
  • Now if you need fringes on both rings and chains in FS/BS tatting, then you will have to decide and plan beforehand. Decide the number of fringes needed. Then tat the chain in segments of DS and RODS (reverse order DS). 

Future Idea 3 - Tat a motif with spot fringes in rainbow colours! 

Thursday, 26 October 2023

wanna multiply

Pin It now!


Well bowing to popular demand yesterday, I worked on the pattern presentation today. Remember, it is still a prototype pattern that could do with some improvements. If you give it a go, please do share your model pic and notes. We can finalize the best fit and include it in the pdf with due credit.

E37 Multiply Me Flower Flake by Muskaan, Oct2023 pattern - https://drive.google.com/file/d/1-CSg9lDj56eogt2hLPrT8yvYP2kd7LYA/view

My notes and a couple of ideas are included in the pdf, which I don't want to repeat here.
Hope you enjoy tatting it and please do send in any feedback you have. 

UPDATE: I had another idea - using the same stitch count as the flake, tat only Five repetitions for a Star!

Related Posts - 
https://tipsaroundthehome.blogspot.com/search/label/E37 - my E37 journey! Check out the versatility of this motif.

Tuesday, 23 May 2023

solution

Pin It now!

 Remember my problem and the mood to give up on my own 3rd round design? Well turns out there were two possible solutions! Anna Bonelli suggested something in Italian which, though lost (on me) in translation actually threw up the first solution to my mind! After making the join I could leave some bare core thread, work and interlace the large ring, then go back and cover the bare thread with 'tied' stitches using the 2nd shuttle!

Anna then tatted a sampler to show what she meant, and that is the solution I adopted. Notice the ring is now horizontal instead of vertical, and I made it smaller too.
Meanwhile I had this idea to use block tatting at the tip. It caught my imagination and between these two elements I allowed my shuttles to do the work, starting with treble tatting arches.
 
I like how the block appears like a flame. 
In several places I hadn't made any picots. Used a finer crochet hook to clear enough space for a join.
To offset any denseness, I did the bare thread thing in the center. I could use dot picot strings, but wouldn't it be overkill?
Just like the Josephine Ring at the tip of the 'flame' is an overkill, right? Although I cannot decide on the JR above the treble tatting arch.
I was going to include decorative picots, but I like the clean lines here.

So what is your verdict? 
I am open to suggestions since I haven't yet started tatting. Oh and this time I'll be using a muted shade of yellow.

So far the design-along has roped in 12 tatters: 1 diagram only; 5 models only (1 WIP); 5 models with patterns; and 1 late starter. I will collect them all in a Google Doc with shareable link so feel free to join the game whenever you can .... 
My journey so far -
Many many thanks to Anna Bonelli for her wonderful solution that got me going!

Wednesday, 10 May 2023

wear me Endrucks

Pin It now!

 Game of the Month in our FB group is to tat one or more pieces of jewellery preferably using beads. After all it is something we can gift our mother this month. 

Game of the Month#WearMeEndrucks May2023 


And for this we released one more directory of patterns, ideas, and models derived from Frau Endrucks' original 44 patterns! Here it is for you to enjoy - 
Jewellery from Endrucks Directoryhttps://docs.google.com/document/d/1ns-C3xQq4CA1tjZwGxFIyKWelLJbqwXJ/view

This is the 9th directory, I already shared links to the first 7 directories in an earlier post and they are also listed at the end of each directory. Meanwhile the 8th collection consists of angular polygonal motifs, including 90 degree corners. -
Motifs- Angular from Endrucks Directory - 


So far I haven't had time to tat anything new for this game. However today I finally picked up my shuttle to tat a prototype of a motif derived from pattern #28. It was so quick to tat! I used a ball and shuttle, ctm, and avoided beads since my main purpose was to see if the stitch count worked. The long ring at the base is supposed to be replaced with a tear drop in my final model.

Clearly a bit of tweaking of the counts will render a heart pattern. However so far I will allow it to remain an earring or pendant. 

What changes would you suggest to improve the design so far?

Further links are in the top right panel of this blog. If you tat something please do let us know either in the comments or send us an email. If it is your first Endrucks' pattern you will receive a gift, too!

With thanks from Ninetta and Muskaan

Monday, 27 March 2023

antics

Pin It now!

 This is again a motif I tatted back in Feb for the #pickmeEndrucks game before my enforced break. After a fortnight at the compy I had picked up my shuttles to tat this center from Endrucks' doily #42.  

E42. It is tatted in one pass using split chains to climb out. I hate how badly the split chains came out - lack of practice I guess. However I enjoyed my little tatting break - it felt so good to have shuttles in hand again.
Worked in Lizbeth size 20.
E42+E39. And my antics never stop. Just wondering how it would look at the center of a different edging (#39)

E42 + original. But my main foray was into this snowflake made by adapting the 8-repeat center into a 6-repeat snowflake. The outer round is my own pattern. This prototype is both a trial and an experimentation. Each repeat is worked a bit differently till I finally arrived at a decision.
I named it Antiks Snowflake playing with 3 words - antique pattern from Endrucks; inclusion of ANKARS motif; and of course my own antics in designing and processing this. 

The pattern is a bit on the advanced side with split chains to climb out and working the layered ANKARS motif with a thrown ring. However the layering was deliberate - I wanted a combination of old (1920) with new (early 1990s). Although strictly speaking, I did not climb out using Endrucks' shadow chains, LOL.

Even without the outermost round, the center makes a beautiful hexagonal motif that can be tiled. 

I had started this in late Feb itself. But continued towards the finish a few days back. Even sent the pattern to Anita for testing. But with a still foggy head, I made a huge error. Instead of 6 repeats, I wrote 8 (from reference to the original E42). Anyways, more about this at another time, with pics. 

So do you like the design?

Wednesday, 23 March 2022

linked hands trial

Pin It now!

 I had finished this prototype bookmark soon after this post (https://tipsaroundthehome.blogspot.com/2022/03/one-month-several-years.html) but look how long it has taken me to upload the final pics! Too much going on ....

In Anchor size 40, it is 12 cms long and 4 cms wide, all tatted in one pass.

Since the linked hands are not joined, look how they can stand up like an elongated teepee! One could also imagine hands joined in prayer?

Simple bookmark without a tail. 2 side chains (on the bottom right) are shorter (count the 5 picots instead of later 6). This was the start and I didn't like the soft stretch of the chain. Hence from the 3rd repeat onward, I added another 3ds for a better curve. 
I had made the edging for the pattern pdf here - https://tipsaroundthehome.blogspot.com/2021/11/from-one-to-many.html
Playing with a filter. This is how it looks horizontally, in case someone is thinking of an insertion. I haven't blocked it to shape. This is merely my trial piece after all. I like the simple chain trim around. A balance between dense motifs and airy edge.

What's a bookmark without a tail?! Several ideas had been spinning through my head as I worked the body. However, when it came time, here's how I went about it - made a Happy Hands motif, linking it through the top chain.
Then followed these shell-shaped blocks. The first one wasn't a nice shape, but eventually they took on a better shape. The final 'charm' is simply a larger version of the smaller shells, with a final row of picots for a wavy effect. I was playing a tight game of thread chicken at this stage.

UPDATE (July 2023) - Pattern for the tail 
pic showing tail detail and charm
Start with a ring (4 vsp 5), then a graduated block of 3 chains (6, 7, and 8) (the last chain has a decorative picot), and repeat. Please note that I used Endrucks' method of climbing to next row of block chain, viz., 1ds vsp, followed by chain stitches.
The charm at the end follows the same principle but with more number of chains (5 or 6) of which the final chain has adjoining decorative picots for a dense frill.


I would've like to continue for a longer tail, but was running out of thread on one shuttle. And sometimes one just isn't in the mood to find the ball, wind the bobbin and ....

What do you think? Should I add this tail in my final bookmark or should I add a  long tassel? 
I have a colour scheme in mind and am hoping it will work.

Hoping to post a few more blogs in quick succession ....


Sunday, 13 March 2022

one month several years

Pin It now!

It's been a month since I last picked up my shuttles today, and boy did it feel good! All my time away from life activities was being spent on the compy trying to complete presentations, diagrams, reviews, or other backroom Project stuff.

This is a prototype of Linked Happy Hands Bookmark - an adaptation of Endrucks' pattern #1 edging. If you remember, I always felt they looked like arms extended above a head, and linked together, which is why I gave it a name.

I first tried the idea of cross-linking in 2015, using size 20 Red Heart thread. Too thick, but the contrasting colours bring out the interlinked 'hands'. 
This time I picked up the straight edging in Anchor size 40 (https://tipsaroundthehome.blogspot.com/2021/11/from-one-to-many.html) to continue and see how I could turn the corner. 
I have deliberately kept it simple for now, with lots of picots to provide choices for whatever might follow later.

Because, my goal is to tat each motif in a different colour to represent the collective diversity of our Endrucks 1920 Project, like I explained in the last para here - https://tipsaroundthehome.blogspot.com/2021/03/balancing-act.html.

So what do you think? Any ideas or suggestions?

There is a lot of pattern #1 related activity and adaptations going on in our FB group. It is the pattern I have chosen for the next article to send to IOLI Bulletin. It was chosen after consulting with Ninetta and a lot of thought, for various reasons, one of them being that many tatters had gotten involved with adaptations from this motif, including needle tatting. It was also 'modernized' while still retaining the 100-year old flavour. Thus it seemed like the perfect reflection of what our Project represented - a community effort to modernize patterns from the 1920 book. There are some spectacular models that have come in but a couple are under wraps for now. Hopefully I'll be able to showcase them all in my blog a few months down the line.

Endrucks 1920 Project details , links, patterns, ..... - 
This doc is also in the process of being updated and reorganized. Takes time, though. And this time I have a deadline to meet, hence tatting will continue for the next few days, yay!


Saturday, 8 January 2022

here we go again

Pin It now!

 I shouldn't, but I am! Yeah, I should've been working on my numerous commitments, but these hearts were calling to me and I am taking life easy and don't want to regret my actions/inactions. Being tiny, they kind of fit into my Life Interrupted, so there! 

1 & 2 were what I shared yesterday - https://tipsaroundthehome.blogspot.com/2022/01/hearty-round-robin.html and they needed improvement. Enter trials 3 & 4 respectively.

I tried 2 things together. One was to make asymmetrical split rings (thanks, AlenAlea Rako), and the other was adding another row of chains below. I also added more joining picots for stability.

Trial #4 is the picoted version of trial #2 - gentle gradation - and I like it. 
TIP: This version can be made with shuttle and ball by using any of the Lock Join Plus options to change direction. ( https://drive.google.com/file/d/17zsM3JaLO7r0ajg8VOnv5IcJ-kLNqEiU/view )

Forgot to include this yesterday. The encircled portion is the heart I am trying to make. Notice how it is much broader here than in my free-standing ones? I tried to mimic the count for the most part in my first trials. But it is the pull from the rest of the round(s) that creates this stretched shape. Perle cotton versus mercerised cotton could also be playing a small part.

Here are the old and new versions together. Is there any improvement? I'm not so sure. And because I added a stabilizing picot for the long chains, the arch is higher than wider, changing the overall outline.
Picots are missing because I wasn't sure of the new count, but I think addition of decorative picots would certainly lift it up. 
Here the picots definitely perk things up! I even considered a Josephine Ring on the inner chain but Mickey Mouse came to mind.
Future idea - Make those 3 inner picots long and joined later to the curved chains, thus filling the negative space.
3 hearts in a Shamrock arrangement, just like Diana Howe had done with the Happy Heart from Endrucks' pattern #1 - https://tipsaroundthehome.blogspot.com/2021/03/lucky-hands.html

TWoT Notes: Interestingly, of the 4 hearts, 3 follow a different sequence/path! It helps to tat in multiples - each time you get a clearer picture, you focus on subsequent or peripheral aspects, .... and small pieces are just right to tat multiple times, LOL.  

So, dear tatters, what's your opinion and feedback? Which patterns should I share?

Wednesday, 19 May 2021

rosebud heart rings

Pin It now!

Recently a tatter wished to understand how these inserted rings in the Rose Circle doily were made. I, too, had tried to figure it out back in 2018 from which arose this Rosebud Heart. Following is the roughly and quickly drawn sketch I shared in the group illustrating how the rings are interlaced/stacked/inserted .... 

Note that it can be made with one shuttle and ball. It has the Russian ANKARS-style stamp on it.


After a lengthy search in my compy, pen drives, and other storage areas, I finally found my original pictures (haven't looked for the real heart yet) and decided to share the prototype pattern. You are welcome to tweak it and hopefully share the adjusted count so that we can all benefit.

Start with the central ring (each ring is 15-15) and move around, ending with the tiny mock ring at the base.
Design TIP: The central (1st) ring is squished. My tip is to increase the chain segments , thus pulling that ring upwards.

Back to the original query (may 3rd, 2021) in the Chiaccherieno FB group.... It led to a diligent search for the original designer/pattern. This is Ninetta's summary of all the findings -
'Summary: The pattern of the centipede is by Reiko Akimoto (who signed ©️ April Fool's) and the pattern was granted by the author during a course held in Japan in 2016. This information can be found on the website of Ka-ryun (link is above in my comment). Until now the scheme has never been made available online, neither free nor paid. The pink element, formed by inserting circles into each other, is similar to the one used in a JTatter paid scheme (Celtic 3), on etsy (link is above in Linda's comment -https://www.etsy.com/listing/400761825/tatting-pattern-pdf-celtic-3?ref=shop_home_recs_1).'

If you wish to see the Rose Circle doily by Reiko Akimoto (April Fool’s) taking shape, check this out - https://ka-ryun.com/category/tattinglace/april-fools/