Sunday 31 January 2021

fixtrot to foxtrot

Pin It now!

This post covers Anita Barry's round 5 and my round 6 of Carin Jansen's Angel Choir TAL doily. But the highlight is the fix that she employed! Read along ....

Detailed notes on Round 5 including climbing out options are covered in my previous post here.

This is a beautiful composition where the angels seem to be dancing under blue skies. Love the ombré effect of the gentle blues Anita has chosen! 
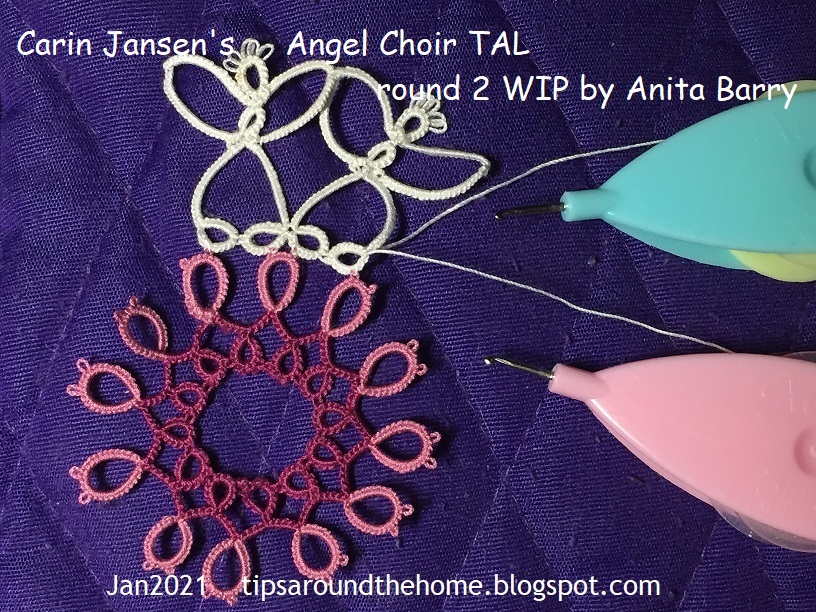
'All rings that join are frontside up and everything else is backside. Easy to keep track of frontside/backside elements.'
She used the pink lipstick case to carry the WIP doily around. Clean and easily portable.

She 'felt this round was long', even though 'the stitch counts are easy to remember and joins are simple'. Often one's mental state affects one's perspective, doesn't it? And it leads to frequent mistakes, sigh. Which is what happened.
Notice anything amiss? I didn't until she pointed it out....

'One too many chains one too many rings. I decided to sew the extra chain and the extra ring behind two other rings. I doubled them up rather than weakening the project by cutting it. The double layer doesn’t show much. I needed to look thru a magnifying glass to see where to stitch.'
We can see she is bringing the extra ring to lie behind the clover ring and the chain folds over as well. Then sewing down both!
Here's how The Fix looks (not blocked yet). Love her tip about maintaining strength of project with this fix. 
More tips in next post!

I made a mistake by notating Jan on my pics! Hence am including the next round in same post rather than spend more time in resizing and notating pics again!

Carin Jansen’s Angel Choir doily TAL – Round 6 
Techniques : 2 shuttles (ctm if one colour used), thrown rings (trefoil), lock join, SLT if 2 colours are used alternately.
Optional Techniques : climbing out/climbing in, Reverse Join (RJ) instead of lock join and SLT in 2-colour version.
[all tutorials can be found here with several more options]
Carin already has detailed instructions for each round. We are merely sharing our thoughts and ideas, with no reflection on her excellent presentation and design. Many thanks again for sharing.
One can climb out of round 5 into round 6 for continuous tatting. Pathways for different scenarios are already explained here (scroll to end).
Long chains again in this round - remember to keep snugging stitches regularly (don't wait till end of chain to snug) and make sure all stitches are in place before making the lock join.
After the lock join, I continued with only 2nd half stitch, counting this as part of the stitch count. I do this whenever adjoining chains make an acute or sharp angle. I find it keeps the adjacent chains neat and flat, with no overlap. 
Here's a pictorial on how to avoid gapsosis and keep the rings and chain flushed neatly when making thrown trefoils.
In alternate arches (which are not joined to the thrown ring below), I made the upward moving chain, switched shuttles to make trefoil, switched shuttle again, followed by 1 unflipped half stitch to create a point, before moving down to complete the other chain.
I did this because all arches looked a bit pointy in Carin's models. However, my attached repeats have curvier chains. 
The entire round is worked from the front in clockwise direction.
In Lizbeth size 80, it measures 16.5 cms now.

And another Oops from Anita, poor darling - 
Started round 6 at the base of the clover instead of the tiny picot above single ring. Needs another fix!
Life intervenes to make our lace miserable ;-P It's been 6 years since she last worked with size 80 and her eyesight is failing her this time. Motor memory and reflexes, along with magnifiers, have stepped in. 

Join us on Facebook using the tag #AngelChoirTAL on your timeline and/or the group Just Tatting.

Related Posts :
 

Wednesday 27 January 2021

the dance continues

Pin It now!

One more round completed. 

Carin Jansen’s Angel Choir doily TAL – Round 5 

pattern - http://handwerk-fee.blogspot.com/2020/11/engelenkoor.html

Techniques : 2 shuttles ctm, clover, thrown ring.
Optional Techniques : fs/bs tatting, continuous tatting (climbing out - see detailed notes below)
[all tutorials can be found here including alternatives and needle tatting tutorials]
This is the beginning where tails are hidden under a few stitches in separate elements. And this is how work progresses when we start with the clover.
Please note that the count (4) for one segment of middle clover ring is missing in the pattern diagram (but clearly mentioned in written pattern). 
When seen from the front, round moves counterclockwise. However the chains and one thrown ring are worked backside in directional tatting.
As pointed out in previous post we could have climbed out from round 4 to round 5 without cutting threads, by working a short split chain in the end, and then a split ring for the middle ring of clover. Since I wanted new colours for this round, I started fresh.
In Lizbeth size 80, the diameter is now 15.5 cms between tips of thrown rings.
This is another beautiful round - the arches with thrown rings create an elegant outline and this is another round where one can stop, if so desired.
Uggghhhh this close-up reveals a couple of round 3 (green) chains have become distorted! Oh well, if I had pinned the doily while blocking (instead of using rolling pin) I could've shaped them. I went back to check previous pics, and I think a couple of those chains were not tensioned adequately, sigh.
One needs to be careful to leave the tiny picot at base of single side rings as instructed by Carin! I forgot the first few times and had to retro-tat. Thankfully I caught them before starting next ring, except once. Yay I could untat a ring in size 80 but hopefully never again. 
Clovers are good practice to avoid gapsosis.

NOTES for one-pass/continuous tatting between Rounds 5 and 6 : 

1. When Round 5 is started fresh - If you wish to climb out of round 5 to round 6, start with any of the single inner rings (#5 or #9 in pattern) rather than the clover. This way the round will end at the exact point where round 6 will start!

2. When Rounds 4 and 5 are continuous - In this case, as pointed at beginning, we start round 5 with the middle ring of clover, and continue tatting in counterclockwise direction. In this scenario, in order to climb out to round 6, leave bare thread after ring #9 for a split chain, tat the 1st ring of the clover, and 
then work back over the bare thread to make split chain and both threads are in position to start round 6.
    Obviously, it works more easily when working with single colour, but ingenious tatters have found ways to work with 2 colours, hiding the unwanted as required. All tutorials listed in the Resources page (tab on top).

My round 6 is laid out to dry. Will post soon and hopefully with pics of Anita Barry's completed round(s) as well. Needless to say, I am enjoying this lovely project and learning a bit more each time.

If you wish to join us on facebook, upload your pics under #AngelChoirTAL in your timeline &/or in Just Tatting group and let us know. Rose D had also started, but now I cannot find her pics :-( 

Related Posts

Monday 25 January 2021

dancing continuously

Pin It now!

 My apologies to those who have participate in the TAL - a bit under the weather. 

Carin Jansen’s Angel Choir doily TAL – Round 4 

pattern - http://handwerk-fee.blogspot.com/2020/11/engelenkoor.html


Techniques : 2 shuttles ctm, long chains, lock join, dot (tiny ring).
Optional Techniques : 1 shuttle and ball ctm, mock picot, adding thread on a chain, substituting dot, fs/bs tatting.
All tutorials, including for needle tatting, can be found here - https://tipsaroundthehome.blogspot.com/p/tatting-resources.html

Anita Barry and I join forces to share our notes and thoughts .....
This is Anita's doily all pinned out on foam at the end of round 3. In her own words -
"I felt I needed to pin Round 3 flat in preparation for next round. I needed my Picots of the Round 3 rings to be fairly centered above each ring. That way as I’m tatting the chain of Round 4 I have correct distances from one center picot join to the next center picot join."
As pointed out in previous post, we can climb out of round 3 by working the final ring as a split ring. Then leave a tiny mock picot and continue with the chains.
I wanted to change the colour, so after making the mock picot, I added yellow ball to the green core from shuttle, hiding the yellow tail under first few stitches. 
I snipped the unwanted green (on left) and later whip stitched it under the split ring.


Cristina Reb (facebook) followed the tip to work both rounds in one pass.
Carin tells us she did the same for her white version. But a designer has to keep the pattern simple and uniform to make it easy to follow. As tatters, we have the liberty to tweak the basic framework to suit our skills. All the hard work has been taken care of by the designer!
My round ruffled, but settled beautifully after blocking with the rolling pin.

This round is made up of mainly chains with just one dot per repeat where we need to reverse work to tat it. I realised too late there was this barely visible ring - I might've gone with yellow throughout!
Worked clockwise, mainly from the front, this is a speedy row.
In Lizbeth size 80, the doily is now 12cms in diameter.
The dot is merely a 4ds ring but it serves to increase the height of the adjoining chains. Perhaps one can easily substitute these dots by simply adding a couple more ds to the chains on both sides, and a small picot to join them. The quick round will become quicker still with All Chains only. Just a thought for the lazy tatter!
TIP : We can climb out of this round as well with a short (8ds) split chain. The next round will then start with a split ring for the center ring in the clover.

If you join us on facebook, remember to tag your post : #AngelChoirTAL to allow us all to enjoy your version!
I have completed the next round and started the 6th. Wonder what you will think of the colour placement!

Thursday 21 January 2021

dance nonstop

Pin It now!

Carin Jansen’s Angel Choir doily TAL – Round 3 

pattern - http://handwerk-fee.blogspot.com/2020/11/engelenkoor.html

Last night Anita’s angels, after the 3rd round, were impaled under a ton of pins, LOL. But then they will come out beautifully rejuvenated and in shape after this acute acupressure. Meanwhile, I’ve completed rounds 3 & 4 and with more tatters joining in, I am posting my notes. Will add Anita’s in another post when I get the pics & notes, and link it here.

Techniques : 2 shuttles ctm, long chains, thrown/floating rings, lock join.
Optional Techniques :  single shuttle and ball ctm, long chains, lock join, climb out, split ring. (see notes below for details)
[all tutorials can be found here , including for needle tatting, with several more options] 

My notes, thoughts, and ideas -
It was simpler to cut off rounds 1 & 2 before starting the next round, as in the original instructions. But when there are multiple rounds/rows, one can try to find a path to work continuously. For instance rounds 3 & 4 can be worked continuously, but we need to plan ahead. Notice the arrow in above pic - I started with a chain instead of the 1st ring. This way, when the round is complete, I can climb out with a split ring. Use a luggage tag loop or simple lock join to attach thread.

The entire round moves clockwise, and tatting is from the front. 
The best way to make thrown/floating rings, while keeping the chain below perfectly curved, is to use 2 shuttles, and switch before and after tatting the ring. 
Thrown Rings can be done in needle tatting as well (tutorial & video)
The arrow above points to the split ring made to climb out to the next round. Stay tuned for next post to see how I changed colour (thread) for chain stitches while keeping the core thread same.
The round consists of long chains with thrown off rings. Keep snugging stitches regularly while working the long chains, for a neat, even, and firm arch.
Since rings are thrown off a chain, ie. worked with the 2nd shuttle, the colour of stitches remains the same throughout the round. However, if you wish to have rings in a different colour to the chains, here's an alternative.
Alternate Design/Colour TIP: Make this round Only with long chains (using one shuttle and ball, ctm if you wish), substituting the rings with a tiny picot. Then in the next round which is only chains, you can add the rings in place of the lock join, and join the ring to the respective picot. Obviously the direction of the rings will change from outward facing to inward facing, but you will have the option of more colours.
I think this makes a beautiful window ornament/decoration, doesn't it?! I love the arches!
Worked in Lizbeth size 80, the doily now measures 11.5 cms.
Some of my rings look a bit wonky, since I did not pin each ring while blocking. I continue to use the rolling pin ;-P The next round will discipline them! 
You can join in the dance while angels sing! Look for #AngelChoirTAL on facebook and in the Just Tatting group. Remember to add the hashtag when you post your version so we can all find it! 

Related Posts

Monday 18 January 2021

a quadrille or more

Pin It now!

Yesssss, we now have more tatters joining in our dance - it's no longer a tango! More on that at end of post.

Carin Jansen's Angel Choir doily TAL – Round 2

pattern - http://handwerk-fee.blogspot.com/2020/11/engelenkoor.html

Angels are what first drew me to this pattern. And to see them merrily dancing around was an added bonus. It is a very clever and creative design and hats off to the designer, Carin!

Techniques : 2 shuttles ctm, long chains, pointed chain (one stitch SCMR), picot join to right, SCMR, lock join, very small picots.
Optional Techniques : 1 shuttle and ball ctm, frontside/backside tatting, other methods for pointed chain, mock ring, blipless join, beads.
[all tutorials can be found here with several alternatives for pointed chain, joins, etc.]

As before, we share our joint notes, tips, and ideas below. Carin has already given very detailed instructions, including alternate stitch count for metallic thread, which I will try not to repeat here.
Round 1 Noteshttps://tipsaroundthehome.blogspot.com/2021/01/two-to-tango.html

 
This is a cleverly crafted angel using simple rings and chains and reverse work between them.

The 1ds SCMR creates a nicely pointed chain for the wing tips and a picot between the 2 half stitches is perfect for joining later, without adding extra length/bulk to the tip! Whether to put a paperclip to hold the picot open depends on our personal comfort and skill.

Shuttle 2 requires more thread than shuttle1 which is used for only 3 of the 4 rings in each angel. However, one can work entire round with only one shuttle and ball if the head is worked as a mock ring. After making a lock join, continue to tat a chain and make another lock join in the same picot to simulate a ring.
Each center and head ring is secured on either side with joins to a chain, ensuring good stability. 

Joining to previous wing tip can be a bit tricky in fine thread. However joining directly without SCMR creates a curved, not pointed wing. It is easier to work this SCMR with 1st half stitch, join, 2nd half stitch.
Besides joining the wings at the tips, another join can be made further down to add stability or hold shape – about 4 or 5 ds down, using a very small picot. This will not alter the overall shape. This additional join could be more important if one does not want to tat more rounds.

Many tatters prefer to work long chains with the balanced double stitch. Make necessary stitch adjustments if you use it.
TWoT Notes:  The row can move in clockwise or counterclockwise direction as seen in both WIP versions. The reason can be found in whether one is doing traditional or fs/bs tatting; whether the first ring was worked frontside or backside.
In directional tatting (fs/bs), one should be careful while making joins to avoid colour blips on the front of work. Or one can use blipless joins.
For frontside/backside tatting, you could start this round with a backside ring so that most of the tatting is then done frontside.
There is some ruffle while working the round, but settles after simple rolling pin blocking.

The last wing joined to the first is an example of picot join to the right, though one may not realise it.
Beads on the halo would sparkle. Or perhaps graduated picots? The free flowing effect of these angels seems like they are floating through air, making each angel unique.
Notice the large sunflower shape if we do not tat the top half of each angel's body? So we have a bonus option to work a large flower coaster in the right colours! And we know how to get the petals to be pointed :-D
In Lizbeth size 80, 
single Angel motif  : < 3cms high; 2.5 cms wide wingspan; 1 cm wide at base.
After 2 rounds, this doily measures 9 cms in Lizbeth size 80.

I absolutely love this colourway and am glad I did not go with my original yellow for this round. And the little ring for body is truly special with the 1ds adding a tiny 'waist'! Every project brings in new learning in some way or other.


Now for the group dance ..... 
Several tatters on facebook showed interest in doing this tatalong with us!  I might include their versions here as I blog. eg. Cristina Reb's 1st round in Anchor size 20 -
My friend, Rose Deguara, had a tip for Round 1 (which I have now included in that post) - The last inner ring needs to be joined in the round to the first inner ring, thus calling for a picot join to the right.   
Look for #AngelChoirTAL on facebook to find posts and pics; some have joined us in the Just Tatting group.
Off to do the next round, now that I have immersed myself in this orchestration ;-D

Oh, and check out how Vera has covered her bauble/ornament even though it is not Christmas - https://veragondolatai.blogspot.com/2021/01/frivolitas-gombre.html I have updated my post with this option and my own idea!