Friday 31 May 2024

inflating the leaf

Pin It now!

 As part of the ongoing #InflateMeEndrucks game in May, I couldn't resist inflating this leaf! The E15 leaf doodle post was among the top 5 for several days, enticing me constantly. The motif is such a quick tat, that I succumbed.  All links at the end of post ....

This time I made it into a pendant. Although I wouldn't mind tatting a pair as earrings.
The original motif on the left. However since there were absolutely no picots along the edge, I ended up tatting 2 motifs, adding tiny picots on the outer chains.
TIP: If the Chain H is reduced from 6 to 4 stitches (left motif), the leaf comes out flatter.
TIP: Notice that the two motifs are tatted as mirror images. I followed the same diagram, but started with a backside ring.

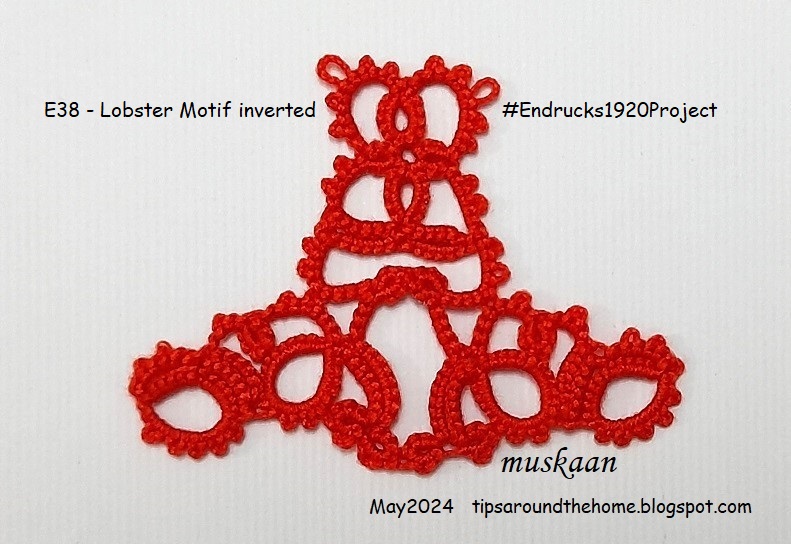
I had also sewn in the bugle bead vein in both. 
This time I followed Pitsibaa's instructions to the T. And as I had stated, it is certainly easier to sew individual motifs than to join as one tats. More freedom, hassle-free tatting, ....
And I also remembered to blot out any extra glue solution, LOL.
After it had dried, I added the beaded chain for the pendant.
I didn't stuff the center, since I wanted the beaded veins to show through.

Future Idea - Increase the length of the joining picots between the motifs instead of keeping them tiny. So that when it is stiffened for inflation a filigree effect is visible along the seams! 


Relevant Links -
All about the Inflate Me Endrucks game -https://tipsaroundthehome.blogspot.com/2024/05/is-it-plane.html  (including my first model and pictorial)

🍃🍃🍃🙐🙑🙐🙑🙐🙑🙐🙑🍃🍃🍃

And on a side note, here's another way to inflate leaves, LOL. 
This savory snack or side dish is called 'patra' or 'patode'. Arbi/colocasia leaves are layered, rolled, steamed, and sliced. They can be eaten as is (ones on the right), tempered, 'roasted' in little oil for crispiness (like the ones on the left), or deep fried. In Delhi, we don't normally get arbi leaves in the market, so I used to grow my own in pots every monsoon, using the vegetable bulb itself. Then the bought veggies were probably treated and they stopped germinating. Seeds didn't work either. 

Yesterday, my lovely hubby surprised me by finding the leaves in an online store (they have a couple of outlets as well) based in Delhi and bought them without my knowledge! He paid more than the cost of the 6 leaves as delivery charges but it was so worth it. Very good quality, large leaves. The rolled log was at least 12 inches long. After 15 to 20 years, I finally got to make and eat these. Thankfully I hadn't forgotten how, LOL. Plenty of slices still in the fridge. 

TIP: I used the soft silicon spatula to apply the paste between layers. It was so easy, quick, and mess-free!

Thursday 23 May 2024

reading is cool

Pin It now!

We're facing a heat wave for the last several days with no respite in sight; temperatures soaring to 44-45C. But these great reading materials have a cooling effect when I encounter so much inspiration, beauty, and possibilities! And not least that I had a bit of contribution to make as well.

Chronologically .....

Ninetta had already sent me her very first book in Italian along with exquisite gifts and this time I received her English edition of 'Tatting is a Serious Matter' again with fabulous gifts! The package arrived in mid-December but I only now got around to taking pics. Her book is such a treasure, a pleasure and a great addition to any tatting library. Read about it here - https://ninettacaruso.blogspot.com/2023/11/tatting-is-serious-matter.html
  • At the top is a painting on real papyrus! The Syracuse papyrus produced by Flavia Massara from the Galleria Bellomo..
  • The exquisite bobbin lace bookmark was specially made by Luigia Tosin. Many thanks, Luigia.
  • The butterfly is one of two designed by Ninetta for the Progetto Farfalla MG - a fundraising enterprise for children's care. Anybody can send in a lace butterfly to the overall specifications. I had intended to design one in tatting, too, but sadly didn't get around to it.

Ninetta's tatted pieces always put me to shame. So fine, so dainty, so tiny!
She remembered that I hate to tat bare thread patterns and sent me the classic wheel.
A very special surprise was the ENDRUCKS' banner she tatted for me. We partners in crime both have one now!

Wandering Wheels (2011) by Karey Solomon is a booklet with lots of block tatting/coils, also gifted by Nin. It was such fun reading it and the way Karey has applied the technique to cute patterns. Turns out she had also done what we now call BBT - a block that is tatted in reverse direction, ie, from top row to bottom row. She used it for the tatted spiral/coil (calling it the tatted wheel), working it from the out in.

Can't thank Ninetta enough for her friendship, partnership, mutual respect, and support! Not to mention these delights in the mail. 

'Designing with Friends' is the article I submitted and was published in the IOLI Bulletin Spring 2024 issue. It is about the DAL Celtic Snowflake 'challenge' and includes the complete pattern for my version and pics of all the versions sent in by the lovely participants. I must thank Liz Redford and her team for a beautiful layout and their diligence. 

In fact, an octogenarian had tatted Five versions when the game was first posted a year back, but didn't know where to send it. On reading this article she saw Anita's name and contacted her and now I have all 5 of her models in the collection, along with her patterns.
This is the design-along (DAL) first two motifs and participants had to design the 3rd round.
And its first anniversary motivated a new participant to tat an ice drop version.

All participants have graciously shared their respective patterns in their own individualistic style. I had intended to draw diagrams for the ones missing them, but simply cannot find the time (nor the weather!) to do it quickly. Hence I might make the doc public and continue with the diagrams at my own pace.

Brenda Rewhorn, the Chairperson and current editor of the Ring of Tatters newsletter had requested me to write about the Endrucks 1920 Project. She said a shortened version of the one published in IOLI bulletin (Summer 2022) would suffice. However, so much has happened since then.... the Project has evolved and is continuing to grow and diversify. Hence I wrote a brand new article titled 'Endrucks 1920 Project - Evolution and Revolution' and it was published in their Spring 2024 issue. 

Couple of days back I received a complimentary copy of their newsletter and the content is absolutely great! So many lovely tatting patterns, and other articles, competition, etc., all dedicated solely to tatted lace. Love the newsletter (it's almost a magazine!). I still have quite a few pages to read and am hoping to tat as many of the patterns as possible.

Brenda was in Delhi earlier this year but we couldn't meet up, though we corresponded. She is a wonderfully friendly person and hopefully we will have a second chance to meet up in person.

 
So that's it for this post. Time to curl up with one of these books again and cool off with inspiring beauty and ideas. 

Thursday 16 May 2024

a simple solution

Pin It now!
 A month back, Ines-Carmen Wischniewski asked for help in a FB group. She wanted to load seed beads on an existing picot but her crochet hook was too large for the small beads. She received answers and finally this is what she came up with.... Sharing with her gracious permission.

1. The Objective - To add seed beads on the long chain picots (in the lace below). 

2. The Dilemma - Size mismatch or tools lacking. Beads are smaller or thread is thicker. 


I use the following methods whichever works for the project in hand --
  • My go-to is using a fine crochet hook obviously.
  • If possible, I use this threader which I showed here - https://tipsaroundthehome.blogspot.com/2017/07/productive-designs.html
  •  And when both these fail, I use the finest tapestry needle threaded with sewing thread. After inserting the needle through the picot, I tie the thread in a simple, slim knot. Then needle the beads and pass them over the picot. Then snip off the thread near the knot and reuse. This is very effective, but a bit cumbersome. Hence you can imagine my excitement at seeing this easy threader hack!

3. The Hacked Threader - Ines-Carmen solved her dilemma by cutting the wire threader on one side. In the photo 3 beads are loaded on the wire.

4. The Hook - The cut portion of the wire acts like a crochet hook to snag the picot. The beads are moved over this 'hook' towards the picot.

5. The Transfer - The 3 beads are then transferred on to the picot, leaving the threader 'hook' free to be removed.

6. Continue - The join is made to the beaded picot and tatting continues. Notice the hacked threader lying on the side.

I remember buying a beading wire with some findings a few years back, hoping to use it to thread beads. It turned out to be too thick for the purpose. Threader wires are fine, hence work nicely. 

The Backstory - This is where it all started. A simple insertion which Ines-Carmen thought to convert to 3D. But there were no picots. So she had this idea to sew the edges at intervals and cover the thread with bead(s). Since it worked, she decided to tat a real model but encountered the above dilemma and then found the solution! 
See the transformation into 3D earrings in this mini video - https://drive.google.com/file/d/1HmAwUzaskmukA3_gxsYVSAPjplm2NV66/view

There is always a new or different way to do things! You never know what might work or be a better option. I have a couple of projects lined up where I can use this in the near future. Also, it does not necessarily have to be beads on a picot. We can use it to add a free bead wherever required during the work in progress. 

Many many thanks to Ines-Carmen for sharing

Friday 10 May 2024

the dehydrating fridge

Pin It now!

 Is it a confusing title or have you noticed that your refrigerator can be used for more than just cooling? I've been using it to dry herbs for years, starting at least two decades back. As far as I know, it is my original idea and to date I haven't come across this tip anywhere.

I've been meaning to share it in my blog for ages, even took sets of pics at different times. Yet the occasion just never arose and several of the old pics have been discarded for newer ones.

So here's presenting five things I dry in the fridge - four herbs and bread. Good thing I took the above pic and noticed that this is all that remains of my dried coriander leaves. Time to stock up for the monsoons.

Please note that except for the 1st and last pic, all others have been taken a while back.

1. Ajwain / Oregano leaves - About two years back I had consulted some resources and had shared how to dry the leaves following a video. However I used the microwave instead of a pan. Yet, this was time-consuming especially if one has gathered a lot of leaves. Hence I went back to my tried and tested method of fridge-drying. I was skeptical at first since the leaves are thick and have a high water content. But it worked! Though it does take many more days than other herbs, but I don't have to put in any extra effort.

Above you see one twig which was washed and the leaves separated and placed over a kitchen napkin/absorbent paper. I now include the stems, breaking them into tiny pieces. Eventually they dry out and I store them in an air-tight jar in the fridge itself (just to be on the safe side). When needed, crumble and sprinkle. The 'harvest' I showed here is already drying in the fridge.

2. Dhaniya / Coriander leaves
Clean the leaves and remove stems. Spread on an absorbent sheet on a tray. Leave it in the fridge for a couple of days to dry till crisp. For these, again, I simply store them in an air-tight container and crush only when needed. I need this dried form only for a couple of months when good fresh coriander is not available.

3. Pudina/Mint leaves -
The process is again the same, although the starting pic is not of Day 1. It was already in the fridge and I pulled out the tray to take a pic. For dried mint, I grind or crush into powder since I use it a lot and make it in relatively large amounts. It works nicely as a substitute for kasuri methi (dried fenugreek leaves), too.

4. Curry / Sweet Neem leaves - In Delhi, it hasn't always been easy to procure curry leaves - a must in South Indian dishes. Which is why I always tried to have a potted plant in the balcony. Yet just before spring, the leaves/twigs, unless plucked, would just wither away giving way to new sprigs. I would much prefer to store them for use as needed.
I found many ways to store leaves which included frying them in oil, etc. None of these suited me - either their texture changed or the aroma was missing. That's when I tried my dehydrating method. Over time, this is the process I have fine-tuned....
Entire branches snipped off (or store-bought) and washed. Leave to dry in a colander for a few hours, under a fan (sometimes I stuff it in the fridge itself). Remove leaves and follow the same process as previously described. Initially they require a larger flat surface to hasten drying, but eventually they can be transferred to a bowl till completely dry and crisp. Store in air-tight bottle. Stays fresh for ages and when used for tempering, the aroma is almost similar to that of fresh leaves. They can be crushed into powder, too.

5. Bread Pieces - I make bread crumbs at home using the same process. It takes care of unused slices, too. 

Simply break the slices into large chunks, spread on a tray (no need for absorbent paper either) and allow to dry in fridge for a couple of days. Move the chunks around everyday so that they are all exposed. Again they can be transferred to a bowl when sufficiently dry, and then ground into powder for bread crumbs.
I like to coat my veg patties with two layers of fresh bread crumbs. Often some of these ground crumbs are left over (as seen in the bowl placed over the tray). These, too, can be dried in the fridge and later ground to finer powder and stored in air-tight container.

So this is my story of how my fridge does extra work to keep us stocked with dried herbs, etc.

Please note that if you live in a high humidity area, the drying time may increase, but the effort will not.


To recap -
1. Wash, remove stems, leave to dry under a fan for some time if you wish. It speeds up the next step.
2. Spread out the leaves over some absorbent sheet on a flat tray. Try not to use fibrous material coz as the leaves dry they tend to get caught in the fibres.
3. Place in fridge for a few days, depending on the leaves. Rustle them occasionally to allow equal chance for exposure.
4. Once they are a bit dry, you can conveniently shift them into a smaller container or bowl for further drying.
5. When dried to a crisp, store in air-tight jars as is or after grinding to powder.

This may read like a lot of work, but it is the least labour-intensive method and the dried leaves retain their aroma. The green colour is also closer to the original than store-bought herb powders or if we dry them in sunlight. See, that's another advantage of drying in the fridge - no need to cover against dust or bugs!

How do you dry your herbs or make bread crumbs? 

Tuesday 7 May 2024

is it a plane

Pin It now!

or is it a lobster?! 

It's always fun when we can get a two-in-one pattern! And this time it was simply a matter of perspective. What for so many years appeared to be a lobster, turned out to be an equally impressionable light aircraft, merely by shifting the angle!
Add a few necessary embellishments to further strengthen the look you want - that of a plane or a lobster.

I tackled two tasks simultaneously. Updating the E38 pdf with a diagram and two-shuttle instructions, and tatting this 3D figure for our May2024 game called 'Inflate Me Endrucks' in our Endrucks 1920 Project FB group. 
All relevant links are at the end of the post.
Sharing the process here ---
1. I tatted one motif of the E38 Lobster edging. However, all along the edge, small picots were made after every 2 stitches in the element/segment. It is through these picots that the 2nd motif will be attached.  
2. A second identical motif was tatted and joined along the edges of the first one.

3. Leave sufficient space open at the end to insert stuffing. Notice how the inner space is all hollow.
4. Tails of the second motif are hidden.

5. Through the open space, stuff cling wrap, filling the hollow.
Then sew in the opening using a different coloured thread (the mustard ends are visible)

6. Stiffen the model. I used a 3:1 PVA glue to water ratio. I made enough solution to dunk the model in it, turning it over and over till I was certain every portion had absorbed the diluted glue. Then I left it to dry on the little rack above the bowl itself.
I was supposed to dab out the excess glue from the tatted stitches, but forgot.

7. When completely dry, snip off the stitches in the opening and remove all the stuffing. Then sew in the opening again using appropriate thread.

8. Seen from the other side.

9. I consider this the Lobster side and even though lobsters are caught in traps/pots, I exercised some creative licence to hook it!

10. This is the plane or light aircraft side. Inserted a jump ring and then a larger hoop on top to allow it to dangle. Although dangling it at the tip of a wing would work so much better!

The 3D version can be used a pendant, brooch, charm, or simply displayed as a collectors' model .....

11. This is the motif upended. It appears like a citadel or those huge silos or oasts of old. There's always more to an Endrucks' design than meets the eye!!!
🦞✈️🦞✈️🦞✈️🦞

PROCESS: In converting the flat motifs to a 3D model, I referred to Pitsibaa's (Tinna Hassinen) video on how to puff up tatted motifs - https://www.youtube.com/watch?v=X0MInK7b65Q . The only real change I made was to join the 2nd motif to the 1st while it was being tatted. However, it was not as easy, and sewing two separate motifs would've been quicker.
TIP: I found it easier to join when the edge chains were direct-tatted (reverse stitch).
Further, this motif has a large open space which can be bridged with a thrown ring.

PATTERN: Endrucks' pattern #38 (E38) - Lobster Edging pattern pdf - https://drive.google.com/file/d/1EiWX78pK8oY8shFVGBFjdJIO0a4Y7fLh/view
This was prepared by Douglas Hill in Nov 2020 using a ball and shuttle. Ninetta and I are in the process of systematizing the presentations to include whatever is missing - diagram, written pattern, etc.  Hence this E38 pdf has now been updated with a diagram and short notation pattern using two shuttles. It is our endeavour to retain the  individualistic character of the volunteer's presentation despite the updates 

GAME: Our May 2024 game for which I made this model is called Inflate Me Endrucks. If you wish to join, all details can be found in this pdf - https://drive.google.com/file/d/1A0hdxz54JbLCGLiDbI_-g53Xh7eNqeKQ/view
Now you see why I chose this particular motif/pattern - two tasks in one. Updated the pdf and participated in the game, LOL.
Ninetta prepared a biscornu-shaped pin cushion covered on either side with two E30 square motifs. We wanted to provide as many visual options and ideas as possible. 
While scrolling through the main patterns and the directories of derivatives, it was easy to spot so many possibilities! We hope our participants will also see them.

EP LINKS: All relevant Endrucks 1920 Project links can be found in this active doc - https://docs.google.com/document/d/1w1TZBg-HIzseGEUoJ-rko7tNbtSgZY5A18Oy2Y9Hh0Y/view

✈️🦞✈️🦞✈️🦞✈️
I am also presenting this plane/lobster as my submission for 'Small Decorations' game by splocik
Check out the April entries in the round up - https://splocik2.blogspot.com/2024/05/male-dekoracje-2024-galeria-kwietniowa.html  Since I do not celebrate Christmas or Easter, etc., my entries cannot relate to those decorations. However I hope they are still valid.

Sunday 5 May 2024

harvesting

Pin It now!

 or well, pruning if you want to be too technical!

But imagine,  I snipped these from one potted plant and there were still so many twigs and leaves left! 
Here's how it looked exactly one month back (second last pic) - https://tipsaroundthehome.blogspot.com/2024/04/snapshots.html
I call that a harvest, LOL
I had gone to take only a couple of leaves for the hash brown and we decided to give the plant a trim to further the growth. This plant has given us so much pleasure, aroma, and herbs!