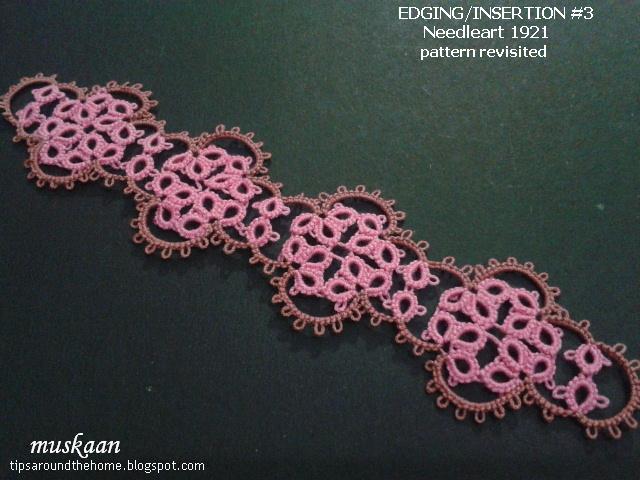
Here’s a respite from all those pictorials – another
vintage pattern made modern and 2 separate rows converted to continuous tatting.
Vintage Edging #4
Needleart
1921 (vol 8 issue 3)

3 colours? Yes I went crazy! Remember that visit to my old
craft shop after 4 years? These are a few of those lovely pastels I bought and
was dying to try out! Size 20 Anchor Mercer cottons.
The 2 rows in this sampler are tatted separately using ball and shuttle. However the schematics provided in pdf are for one-pass tatting – climbing out with 2 consecutive split rings. It is pretty easy to convert vintage patterns into continuous tatting.

Learned a lesson from the CnC edging fiasco earlier. The
first row should face the direction we tat in. Once this base is established,
it is easier to orient later rows.

I tried something different with the 2-coloured onion
rings this time. After tatting the blue chain around pink inner ring, I made an
over-under or alligator join, thus getting a complete blue circle around! No
colour blips and pretty neat result, right?
Sorry no in-process pics – I was happily engrossed in
tatting with these new shades!
Long picots on the onion rings are made using a ⅜ inch
picot gauge parallel to core thread. Thus final picot is half the size.

Instead of lock joining the Row2 chains to these long
picots, I made an onion ring join to avoid
colour blips (I would’ve got pink blips over the blue picots). Then continued
with a 2nd half stitch, counted as 1ds. Since core thread remained
continuous, care needs to be taken when tensioning the chains.
Lock joining the chain would give a more
pronounced/distinct dip.
Future
Idea : Tat Row 1
and return back, interweaving the long chains. Then start Row 2 all around this
‘Celtic’ center.
happy tatting :-)