Showing posts with label hobby books. Show all posts

Wednesday, 23 March 2022

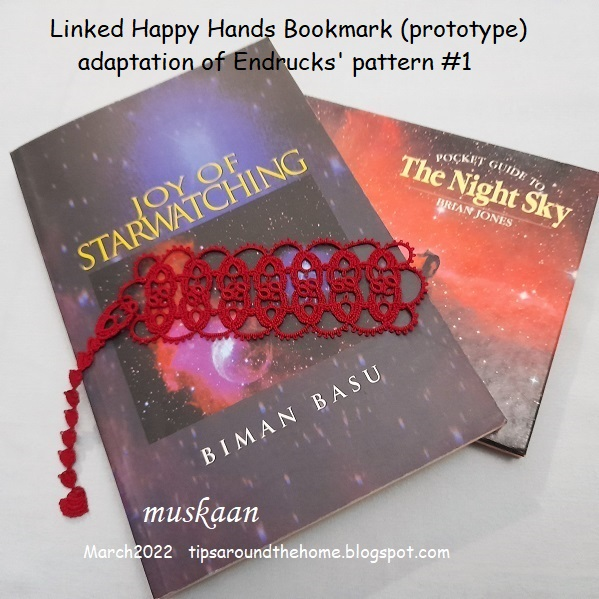
linked hands trial

Pin It now!

 I had finished this prototype bookmark soon after this post (https://tipsaroundthehome.blogspot.com/2022/03/one-month-several-years.html) but look how long it has taken me to upload the final pics! Too much going on ....

In Anchor size 40, it is 12 cms long and 4 cms wide, all tatted in one pass.

Since the linked hands are not joined, look how they can stand up like an elongated teepee! One could also imagine hands joined in prayer?

Simple bookmark without a tail. 2 side chains (on the bottom right) are shorter (count the 5 picots instead of later 6). This was the start and I didn't like the soft stretch of the chain. Hence from the 3rd repeat onward, I added another 3ds for a better curve. 
I had made the edging for the pattern pdf here - https://tipsaroundthehome.blogspot.com/2021/11/from-one-to-many.html
Playing with a filter. This is how it looks horizontally, in case someone is thinking of an insertion. I haven't blocked it to shape. This is merely my trial piece after all. I like the simple chain trim around. A balance between dense motifs and airy edge.

What's a bookmark without a tail?! Several ideas had been spinning through my head as I worked the body. However, when it came time, here's how I went about it - made a Happy Hands motif, linking it through the top chain.
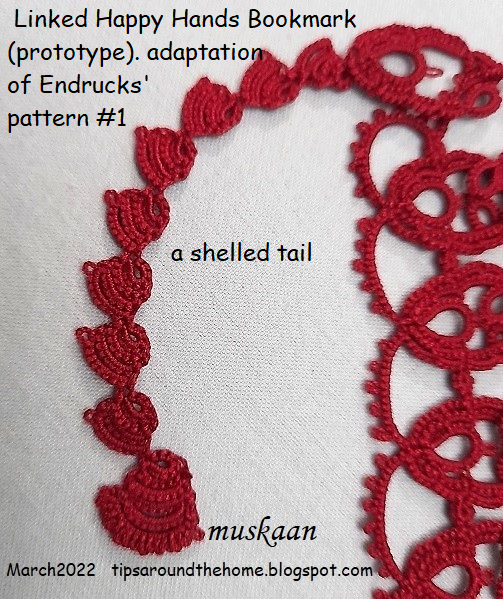
Then followed these shell-shaped blocks. The first one wasn't a nice shape, but eventually they took on a better shape. The final 'charm' is simply a larger version of the smaller shells, with a final row of picots for a wavy effect. I was playing a tight game of thread chicken at this stage.

UPDATE (July 2023) - Pattern for the tail 
pic showing tail detail and charm
Start with a ring (4 vsp 5), then a graduated block of 3 chains (6, 7, and 8) (the last chain has a decorative picot), and repeat. Please note that I used Endrucks' method of climbing to next row of block chain, viz., 1ds vsp, followed by chain stitches.
The charm at the end follows the same principle but with more number of chains (5 or 6) of which the final chain has adjoining decorative picots for a dense frill.


I would've like to continue for a longer tail, but was running out of thread on one shuttle. And sometimes one just isn't in the mood to find the ball, wind the bobbin and ....

What do you think? Should I add this tail in my final bookmark or should I add a  long tassel? 
I have a colour scheme in mind and am hoping it will work.

Hoping to post a few more blogs in quick succession ....


Friday, 1 March 2019

changing tack

Pin It now!
According to the Hindu calendar, the festival of Holi will fall on 21st March this year, meaning we can expect the cold to last till then. Taking this into cognizance, I spurred myself into knitting a blouse/tunic. It's been 5 years since my last one! Tatting has really taken over my life.

I was given this yarn and the items knit from it looked fine and were said to be warm. There was a shine which I could live with. But when I started knitting, I just couldn’t get a feel for it. It was too nylon-ish, too artificial. It is a mix of 25% polyamide & 75% acrylic. Has anybody tried something similar? What is your opinion?

I tried earnestly for a few days, but finally gave up before it was too late.  
Frogged it and pulled out yarn from my own stash.


Vardhman Little Angel.  Shade LAL011. I only have 200gms and will again have to resort to a white yoke as in this 2014 topThis is 100% acrylic (at least the current ones on their site – mine are from 2012!), but at least it feels more like wool when knitting.
This is the true yellow shade, not the lighter/pale one in other pics.

I hope to finish it in a week, but there are tatting commitments, which may result in a race against rising temperatures. Thus, I chose a relatively repetitive pattern with just enough lace and change to keep my focus and retain interest.  
I used UK #12 needles for the border (p2,k1) and UK #10 for pattern. This is where it reached after 2 days. 

 
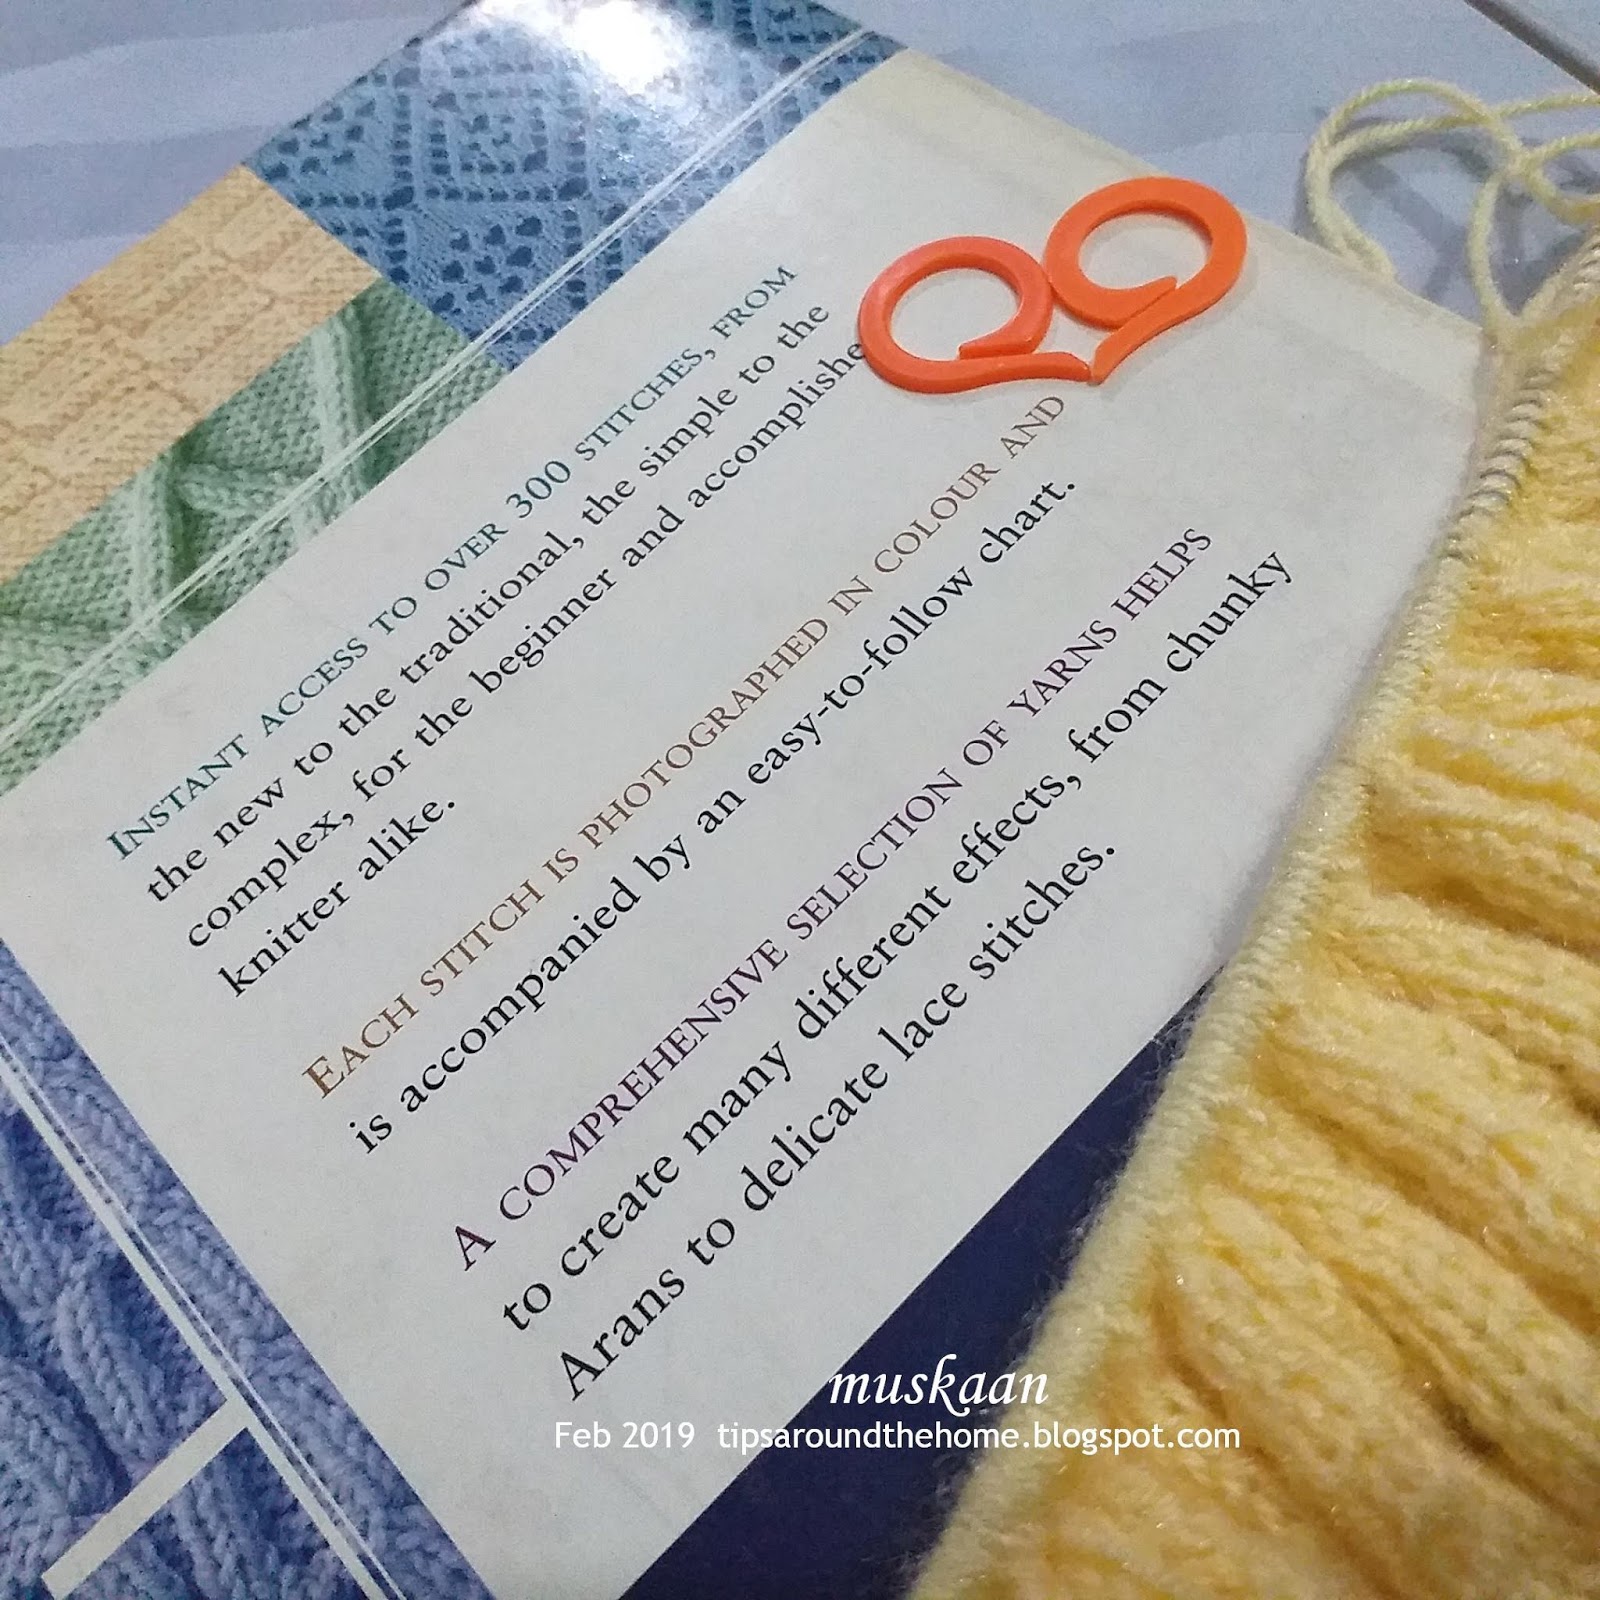
Pattern is again from my favourite book. I just naturally gravitate towards it - one of my Best and most used buys! All patterns are visual charts which I find very easy to follow and navigate. 
The one I chose, #196, is an 8+2 repeat over 16 rows. 


Saturday, 19 May 2018

I love butterflies

Pin It now!

Garden soil had been split open to sow seeds and now those seeds have split into plants with lovely blooms, attracting butterflies to split open the pollen sacs and carry on the circle of life.
Hey, don’t split!!! Promise, I’ll behave … Just trying to clue you in :-D


You have already enjoyed & appreciated the lovelies made by friendly tatters. These are my versions of make me pretty butterfly fun. And the ‘split’ comes from this month’s I Love Tatting task set by Justyna – split chains, curlicues, etc. She has compiled an incredible list of tutorials and free patterns for inspiration!
I actually have something more in mind for the task, but till I find time to tat it, this will have to do. 

Tutorials for most of the prettifying techniques mentioned here are listed on these pages -

In chronological order … I have literally used scrap threads for most.
Venetian Picots for antennae, dot picots and graduated picots
Here, I made the same mistake Lavi made, but didn’t bother to rectify it. 
These were my very first venetian picots!!!
3¼ x 2½ cms in Anchor 20 cotton

Graduated picots and twisted picots (floating)
2 x 1½ cms in 2 strands of Anchor embroidery thread

Venetian picots for antennae & 4 picots
2 x 1½ cms in Anchor size 40 cotton
The Venetian picots worked out much better in this finer thread.

Right after posting the pattern, I tatted the above 3 versions. Some of the following versions were inspired by the butterflies flying in (Anita, Denise, Ninetta).

Twisted (floating) picots and seed beads
3 x 2 cms in 3 strands of Anchor embroidery thread.
This was inspired by Denise’s 3 beads in the lower half.

Dot picots and decorative picots
This is based on Anita’s stitchcount. I like the broader span of top wings.
2¼ x 1¾ cms in Lizbeth & Anchor size 40 cottons

Since this project was a spin-off from the Common Mormon caterpillar, there just Had to be a couple of butterflies in black and yellow ...
Beads and floating beads in different arrangements
I tried something different – beaded string wrapped around the lower rings. 
These are longer than I had visualized, but let them be.
The antennae uses floating beads (FB) or fringe on chain method.
2½ x 1¾ (or 2 with bead string) cms in Anchor size 40 cotton

The wooden black bead was too large and unseemly. So I decide to remove it. 
Wasn’t as easy as I’d thought. The FB method really does hold the beads in check ;-P
Then I remembered a tip on Jane McLellan’s blog about breaking unwanted beads. 
Yes, that worked! Once broken, I inserted a scrap thread for better grip, and knotted the tips.

Onion rings (Josephine rings inside the upper & graduated picot rings inside the lower halves), twisted (floating) picots, and Curlicues (dead end chains or SSSCh) for antennae.
3 x 2¼ cms in Anchor size 20 cotton
I started with a knot for each curlicue, serving to hold in pinch, 
and worked back with unflipped stitches.

Inward picots, decorative picots, long picots, a head ring, and Venetian picot for body. 
I followed Ninetta’s directions
2 x 2¾ cms in 3 strands of Anchor embroidery thread.
  
 
A couple of side views to show the 3D effect.
When making the Venetian picot, I left the scrap thread in it and 
this served well when joining the next ring to it.


I include the Venetian picot in this month’s kocham frywolitkę task because both the curlicue and this picot are standalone or floating chains. Although in the former the stitches are unflipped and wrapped manually, in the latter each half stitch is flipped but moved in place manually over the previous stitches.

I couldn’t resist a couple more pics.
 
The background is Monet’s White Clematis an oil he painted in 1887. 
The image is in this amazing book The Life and Works of Monet by Susie Hodge.

UPDATE : My latest butterfly with floating chains tipped with Josephine knots for antennae....


Do stop by to welcome this batch of butterflies :-)

UPDATE - New arrivals (2020) from talented tatters -
 https://tipsaroundthehome.blogspot.com/2020/07/welcome-intrusions.html

Wednesday, 28 February 2018

I love tatting 3D

Pin It now!
This month’s task was laid out by Renata – my favourite kind of tatting – 3D !!! She has listed some very inspiring projects and I wanted to tat them all !!! Participants have already sent in quite a few completed projects. My apologies for not being able to comment on each blog. I’ll wait to catch up in the round-up.

As soon as I read the task, my mind started building up ideas – it was getting difficult to choose! Time (the 4thD?) always sprints many paces ahead of me. This month it went even faster ;-P 
I have ended up with a medley of past, but as yet unshared, projects.

I Love Tatting / Kocham frywolitke – February 2018
3-Dimension 


While rummaging for this star flower medallion (bottom right), I came across an old edging. It is actually the center of Renulek's 2014 Spring doily. After 7 rings, I switched direction and repeated thus getting 4 alternating segments (see collage below). At the time I was trying to create an edging but it went awry ;-P

3D Carnation
It coiled easily into a possible flower, though as in the one against black background. Intending to make that 'rose' shape, I needled green thread through all the picots. When pulling tight, I liked the carnation-style shape much better! Worked a 3-sepal calyx (tubular), then carried on down encapsulating the thick threads, with a spiral chain and added floating twisted picots for leaves. For the bottom pair I twisted 2 threads together, then hiding one again.


3D Lavender trial
Next is the overlapping onion rings trial. many of you may recognise my inspiration - a pin from ameba.jp on pinterest.
I think it came out okay, considering it the only trial I did. Need to make time to practice and make more.

3D Star Flower trial/prototype
Remember my overlapping split ring effect I shared here? This is a 5-sided medallion that emerged from that motif.
The later repeats have the right stitch count to show a balance between overlap and negative space. 
Obviously need to change the colours used. But I also want to try it with 2 thread sizes. Would a thinner thread show a better effect? This looks too bulky.


3D Kayak trials
This was a request from a kayaking enthusiast (some of you may be able to identify who ;-P). I started it in early 2015! 
Again, to create a 3D effect, I used overlapping split rings. Notice the single curled ring on the right ? And a twisted picot for the pointed end. I wanted to come back with a straight line to show depth, once the body was completed.
Thinking I had a good idea of the process, I started afresh with the tinted blue. This time I used 4 overlapping split rings for the broadest center and also flipped the overlapping SR. 
Unfortunately this is as far as it sailed ;-( Haven't had time to pick it up again.
I still think the overlapping SRs have quite a potential to create any geometric shape with faux Celtic effect.


Hope these will be accepted by the talented Renata & Justyna. I do love 3D tatting - all my early patterns are 3D freeform! 
And the book from from which this pic was taken .....


happy tatting everybody J
  

Monday, 25 December 2017

seasons greetings

Pin It now!


When Denise sent me a picture of her crocheted Santas/elves I was hooked immediately! They were a hit with the kids who received them as well. 


It would make a lovely gift wrap adornment for my niece, along with a Christmas/party themed wrapping paper for one of the books.
She kindly sent me the pinterest link. After some searching, this is where I found the original pattern 'Noelzinho' by Norminha.

There are many versions of this face, but I like this the best.
Crocheted in wool in keeping with the season - it is getting chilly here with the minimum in single digit! It measures 4 inches vertically, including the pompom.

And I also fell in love with this snowflake which Bernice worked and tatted it immediately. I’m going through a slowdown phase but this snowflake truly perked me up. I'm glad to be reminded of this blog which has so many patterns and tutorials.
Worked in size 40, it measures 2¼” across. I worked it in one pass, climbing out with a split ring.
The pattern is Snowflake for the Christmas tree by Agnieszka Michalowska 
    
I used to love Josephine Rings, but have gradually veered towards dots. Dots turn out smaller than the JRs as I had discovered earlier.
  
This is one of the rare snowflake patterns that has 7 arms! 
An error on my part had led to 7 arms on this Ice Snowflake and I didn’t discover it till months after it was shared!
In the wake of such lovely patterns, I don’t really see the obsession with 6 dendrites. Do you?


This is one snowflake I’m going to find difficult to give away, despite the watchful eyes of Santa ;-P And for 'the flower within' look, I would love to use 2 colours next time, working the rows separately.


I wish my readers a very happy, creative and satisfying future 
filled with daydreams that come true !
Z


Friday, 4 August 2017

Needleart 1921 Edging 3

Pin It now!
free vintage to modern tatting pattern

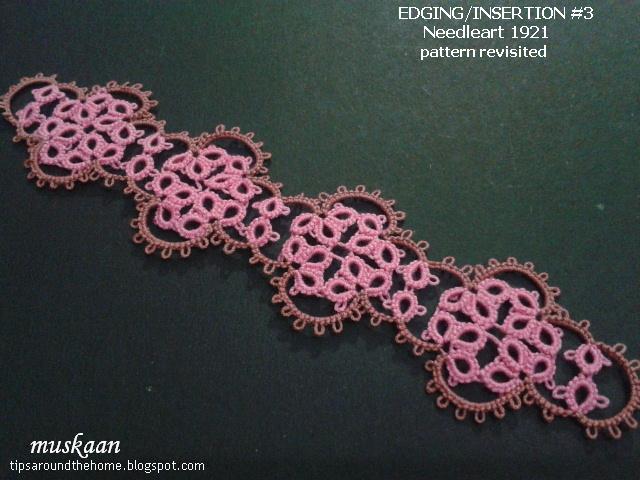
Edging/Insertion #3 Bookmark
Needleart 1921 (vol 8 issue 3) 

This is a very simple insertion – rings and chains that can be worked with one shuttle and ball. Good practice in trefoils and chains for beginners. It is a slight variation of Edging #2 which I will share later, along with a bracelet variation.

The original bellaonline article has lots of tips including how to avoid gapsosis in trefoils, and the importance of picot lengths.
I tatted it in size 40. A ⅜ inch picot gauge held horizontally is used for the central picot to which 3 other trefoil rings will be attached.
Thought about using a Swirl Join instead of central picot. But impractical to leave all those rings dangling for entire length till they are joined on the way back (see also beaded version below).

4 repeats measure about 5 inches long and 1 inch wide.

The satin ribbon is ¼ inch wide. I double-backed the ribbon and tied a simple knot at the other end.

This time the pdf does not include any written pattern. It can be accessed directly from the article. Only keep in mind that all chains are 3ds separated by picots.

TIP : when trying to figure out the stitchcount from an image, be mindful of the type of tatting. In vintage patterns we usually have traditional tatting with no distinct front or back sides. While some elements will show complete stitches, others may show half stitches at either end. Picots, or more precisely the stitches adjacent to a picot, give away the secret :-)

Had an idea to tat a bracelet, adding beads. Hmmm, size mismatch. These seed beads were too large for size 40. Abandoned and haven’t yet been able to work it in 20. Hopefully in future.

I went for a bookmark. But I’m sure you can see the numerous applications for this pattern ? Bracelet, choker, belt, .... and much more !

'Silk Ribbon Embroidery' by Ann Cox is a lovely book full of floral techniques illustrated stepwise and scenic compositions. I really did intend to embroider a few, but couldn’t find silk ribbons. Then tatting came back into my life and everything else went out ;-P

keep tatting, happily, merrily  :-)