Showing posts with label Denise W. Show all posts

Friday, 18 August 2023

differences

Pin It now!

A few months back I worked on some lattice tatting samplers. 

This one is in Lizbeth size 10 threads. Each zigzag chain is made in a different shade. 

This one is in Anchor mercerized size 20 (which is almost similar in thickness to Lizbeth size 10) threads. Only two colours, worked continuously. 
But notice the difference in the stitches?!! 
The difference in how flat and even the chain segments are in the former? 
And not to mention the sheer joy it was to tat with the former, and that Lizbeth photographs so much better.

Hmm, there are tatters who can work with any thread and their results are always perfect and spectacular. Guess I'm not one of them! Threads seem to alter the visual appearance of my models, LOL.

LATTICE TATTING is simply stacked rows of zigzag chains, each trough joined to the peak of the  previous row. You can work it in separate rows, giving you the option to use several colours. Or work it continuously in one or two colours. 
Each zigzag chain is made with a segment of double stitches alternating with a segment of reverse stitches. This automatically creates the visual zigzag effect. Depending on the length of each segment, numerous effects are possible! 

https://tipsaroundthehome.blogspot.com/2020/04/picoted-s-chain-cords.html - picoted zigzag chain (1ds,p,1rs) with pictorial and explanation
https://tipsaroundthehome.blogspot.com/2023/07/tailed.html - single stitch zigzag chain (1ds,1rs)

The above sampler is worked with 2 shuttles loaded with 2 contrasting colours. To climb up to the height in order to start the next row, I used a Lock Chain.Lock chains can be considered a very basic zigzag chain where each flipped half-stitch is alternated with an unflipped half-stitch.

Somewhere in the 3rd and 4th rows I made a mistake while climbing out. I got confused and kind of winged my way through. Hence the chains are worse than the thread be blamed for ;-P Hopefully I will find the time to try it again in a better frame of mind.

Each row in this multi-coloured sampler is tatted individually using one shuttle and ball. The threads were a gift from a loving friend, Denise W (https://tipsaroundthehome.blogspot.com/2018/06/im-on-take.html). Took me years, but I've used the samples to fairly good effect, with some lengths still remaining.

I left the threads uncut and unhidden 'coz I have yet to decide how to use this sampler (a bookmark is my guess, which means continuing for some more length). 

Wednesday, 3 November 2021

a trip to the beach

Pin It now!

Reworked patterns, in modern style, from Frau Eleonore Endrucks-Leichtenstern’s ‘Die Schiffchen-Spitzen’, 1920, for Endrucks 1920 Project.

This pattern #39 fell into my lap and it has such a range of possible effects to play with that one cannot get easily bored. Despite my resolve to not play, temptation triumphed. So come to the beach with me and let's pick up shells, pearls, oysters, and more ..... (not in chronological order)

Download Shells and Pearls pattern #39 herehttps://drive.google.com/file/d/179E9JeCMeM7RXFcq-wThF0iPiBLfQZ4_/view

Made of 2 alternating motifs, the tiny ring reminded me of a pearl between shells and called it Shells and Pearls circular edging. I broadened the shells a tad. 

Now this is how the edging should've worked out - a straight line, not a circle! But notice the picots and loose chains? We really don't tat like this in this century. 

The tautness and smaller picots resulted in a circle. There are a few more minor tweaks made, all listed in the pdf.
Notice the cute little bows? If we tat these in one colour and use white for the alternating motif (a narrower shell), we get Bows and Cravats!  

And yet, I could not resist straightening out the edging - after all that's how the Frau envisioned it. Unfortunately tweaks were needed again, at least with my tatting tension. These are also shared in the pdf.
These are all my practice pieces where I was trying out the original pattern and also tweaking to get them to be as symmetrical as possible. And I couldn't resist arranging them like a necklace with teardrop crystals. Imagine this with many more beads placed strategically!
A single shell motif could make cute earrings to pair with a complete parure made from this basic pattern!

Or a simpler necklace version with a large teardrop and those small pearls. 
Using 2 colours for a pattern presentation makes sense because one can tell at a glance which of the 2 shuttles is to be held in the hand. And I get to play with colour combinations, LOL.

And when I brought the trial stretch into a tight circle, look what emerged! A Buttercup! Those shells (or cravats) now take the form of beautiful slightly overlapping petals. An easy idea to execute in colours of your choice for the flower of your choice.

This close-up shows clearly how the shell motif leans to one side. This happens because the chains are all parallel as in block tatting. It is an inherent structural dilemma. 
From an early stage I wanted to see if it could be 'corrected' by changing the direction of the 3rd pair of chains. Also, I wanted to try a standalone 3D shell. So I took the plunge with both....

If you ignore my personal tatting flaws, the shell is now symmetrical! The 3rd pair of chains has inward picots (Block Below Tatting or BBT). They should've been tinier, but oh well. 
This is my first tatting with hand-dyed thread (HDT) - a gift from Denise 3 years back. It seemed the perfect choice with the colours of golden sand, blue waves, purple-tinged clams, green kelp, etc. and I dived in.
Huh, a clean dive would've been good. But that short distance held many other commitments and the tatting was sporadic with several day intervals in between. Not having jotted any notes, I lost my trend of thought and made several mistakes. The 3D effect needs more tweaking so this is a prototype.
That large pearl inside is a real pearl from Hyderabad - the pearl capital of India.

So here ends our trip to the beach for now. Someday I will get back to both 3D models (buttercup and oyster) to create better version. Hope some of the above ideas have caught your attention?

And don't forget to visit the Endrucks 1920 Project document to see what our wonderfully talented volunteers have contributed - https://docs.google.com/document/d/17LEVftXweztBIOWh4sL4BB7bX65ssoOsOn4oXIgCepY/view

Thursday, 18 February 2021

Palentine Day

Pin It now!

Came across this for the first time on the 14th 'Palentine Day'. Well, it doesn't have the same ring as Valentine Day, but it certainly has a far greatly reach!!! And it does not have to be limited to a single day - pals brighten our day anytime and every time. And this year, it was extra special as you can see ...

The very talented Krystyna Mura tagged me on her take of the Budding Heart! Don't you just love her vision and impeccable execution?!
Every time I write 'execution' I think what an odd word to use 'coz it evokes more gory images!
She used much thicker pink threads for the heart outline, encapsulating the finer green threads for the foliage. 
Last year she gifted me with her variation of the Blossoms Heart! A dear pal in deed, indeed 💖

Many of my readers must already have seen the pleasant surprise from another dear friend, Ninetta Caruso, who organised a tatting event on the facebook group Chiachhierino: Filo, Amore e Fantasia. They chose my Block Heart (Spring in my Heart) alongside her own very pretty Heart by the Sea to share and tat along with the participants. This online event called Un cuore per te goes on from 14th through to the 28th of this month. So join in! You can find links to both patterns and more details here - https://ninettacaruso.blogspot.com/2021/02/hearts-friends-and-flower.html. Love the pictorial she created, too.

Lovely models of these hearts are coming in everyday from our enthusiastic tatters and talented Italian tatters! More of Ninetta's than mine, but that's to be expected - she is such an exceptional designer!😁 

Also coming into my inbox are the Happy Hands Heart I shared last time. Denise W is so taken in by the little heart that she has tatted several already, trying to learn new techniques and perfect them. Can't wait to share them with you.
What I Can share, however, is HisKid's (Sue) beautiful model in a happy colourway here. It is her first time at roll tatting, but it already seems perfect!


On the 14th, Anita Barry waltzed in with news that she had completed the TAL doily, yay! We should've known that Cupid was her tatting angel 😄 I have all the material, but need some time to put it together into a post. But for those who can, check out her or my facebook timeline for pics of her completed work - love the colour composition!!!


Find all my heart patterns here (which I will update with these recent additions)
https://docs.google.com/document/u/0/d/1LpHU69wNsQspIHgvt9pihgTNhHFDRBab3I5_MDEYyNw/

Before I sign off, here's a Delightful article by Karen Bovard Sayre who nails our thread addiction through studies! Anitra Stone called it Threadus hoardicus, and sadly we tatters seem to suffer from it, with no cure in sight 🤣😁🤪

Thank you pals, you make my life WonderFull ! 💖

Saturday, 14 November 2020

charmed, I'm sure?

Pin It now!

a very happy Diwali! ek diya jawanon ke naam

Charmed Cross pendant / earrings

While rummaging for my old notes, I came across a loose sheet with the sketch of the Charmed Cross pendant. It is certainly stylized, but I wasn't sure if it came across as a cross. I thank all my facebook friends who responded enthusiastically - clear majority wanted status quo! Since time is at a premium, I have decided to postpone any experimentation but invite you to play and experiment as you wish.

Here is the journey so far - 


'Charmed' because one can fill in the large empty center with Any charm, cross, gem, or teardrop of course.
I used Floating Beads method for the teardrops. But I know most will prefer to use their own methods ;-D

One can repeat the top motif on the side arms and lengthen the base to make a more defined cross.
As a couple of tatters said it looks like a kite - so fly away with your shuttles in hand!

For earrings, make 2 of course. Simply work the same pattern if finer thread. This model is in Anchor 20 which is similar to Lizbeth 10.

For the Bookmark prototype, here's the count for the 6 extra rings and chains:

R1: 6+4-2. rw
Ch: 8 rw
R2: 6+(R1)3-3. rw
Ch: 5 rw
R3: 4+(R2)2-2-4. rw SS
R4: 6-6 dnrw SS
Ch:5 rw
R5: 3+(R3)3-6 rw
Ch: 8 rw
R6: 2+(R5)4+6 
I would like to improve on this at some future date.


Hope you enjoy tatting and playing with this pattern. And don't forget to tag me when you upload your version!

                          Many thanks to all respondents and comments

Saturday, 2 February 2019

waffling

Pin It now!
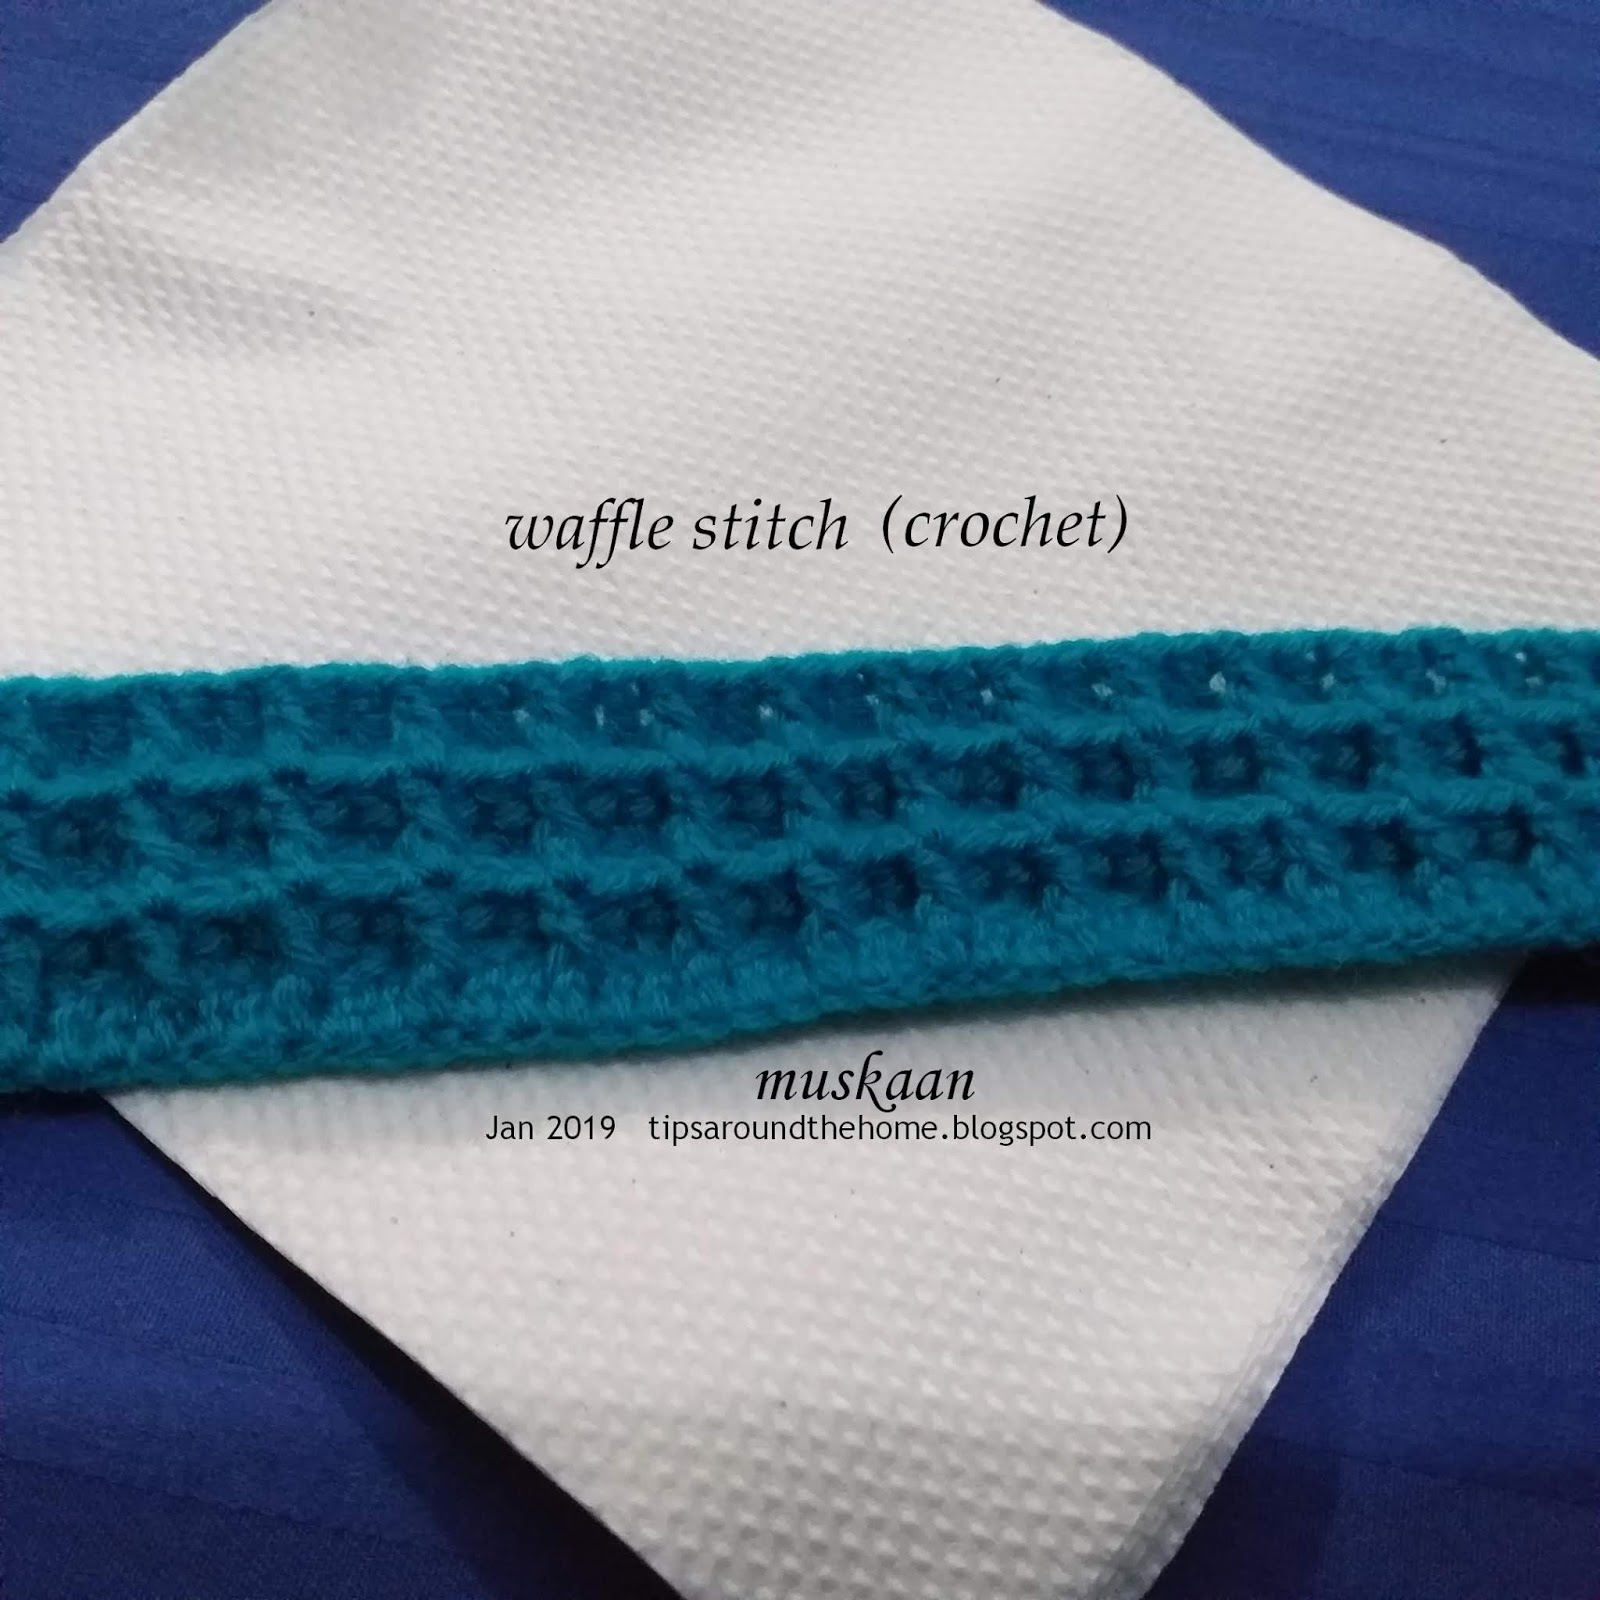
‘waffling’ [North American]  : fail to make up one’s mind.
Apt! 
I first saw Diane’s admirable waffle stitch afghan(s) and immediately liked the texture! Several months later, Denise’s enthusiasm proved too contagious to resist. And the timing was right as I was convalescing in Dec.

 
After these learning trials, I set about crocheting a cushion cover for hubby’s chair. Which is why I started out with a 15” length. But started to get bored with the single colour (wish I'd factored in some white!) and tied off, changing my plan to an afghan. This first strip is worked along the length, but rest were worked up from the shorter side.

8 strips worked so far in 4 different colours. Each measures around 15”x3½” and weighs about 20gms. Jaypee knitting yarn/wool and 2.25mm/size13 hook.
Multiples of 3 and 2 extra chain stitches to start off, so that I get the same effect on either side.
I used only 2ch to turn.
Wanted to lay them flat before posting, but …

I need plenty more, but don’t know how to arrange them yet. Lots of arrangement ideas jotted in my grid pages, however my current waffling hampers progress!
Meanwhile I had other deadlines to meet, stuff to finish.

One thing is for certain; the entire afghan won't be waffle stitch. I intend to knit a few panels/blocks using different stitches – perhaps in batches of 8.

I kind of got into a rhythm with the stitch and it went fairly quickly; it consume a lot of yarn.


‘waffling’ [British] : speak or write at length in a vague or trivial manner.
Yelp! I’m leaving I’m leaving ;-P

Monday, 11 June 2018

I'm on the take

Pin It now!
Ummm, that news is Fake ! 
Nevertheless, I did succumb to Temptation. It was a Book!  How could I say no?
Aah, heart in hand, I refused. Not once but twice and again later. Even went to Amazon looking to buy it.
She was just so deliciously persistent.  How could I break her enthusiastic heart ...
Am I that heartless ?! ;-P
So these are what tumbled out from Denise’s generous hand into my grateful lap after travelling over 12,000 kms. She had an extra copy of Billie Heisler’s book and wanted to send it to me after reading this magic pathways post

And she sent so many friends along to keep it company ....
... hand dyed threads (never imagined I’d ever hold them in my hand) – one each of Marilee & Karen Solomon, metallic, marigold, … Lizbeth size 10 from the Sweet Tart mix (okay I had asked for just one length of size 10 in order to compare with my Anchor size 20s and put the size issues to rest).
The Marigold is her first attempt at native dyeing -- I'm glad she explained it, making me treasure it even more.

.... her own tatting – priceless! It is wonderful to be able to hold someone’s tatting in hand. This ice drop has an Adorable bee hovering around it!
Isn’t that heart the cutest – “made with love”!!! And all her thoughtfulness, too, is apparent in the entire packaging.
The pink ice drop looks like a pretty flower from both sides! Photo has watered down the lovely pink shade unfortunately. It is flanked by one of her prettified butterfly.

I’m still jumping with joy unable to focus on how to use these lovelies. Hope I can do justice to all she’s sent. Suggestions are most definitely welcome.

And to top it all – a friendly handwritten card (on the top left)!
She also inserted the latest Handy Hands newsletter and their Lizbeth catalogue! The catalogue couldn’t have come at a better time. 
A couple of weeks back I received my order of 2 Lizbeth packs – the Ice mix and Sunkist mix – in size 20. The balls have shade numbers but no names and I was going to go to the HH website to hunt down each. With the catalogue in hand, I simply ticked off the fun names.
I needed solid colours to use for my pattern samples/models. We easily find conversion tables between Lizbeth 20 and other brands, unlike Anchor. I have listed a few in the Resources page (click on Tab) and will soon add more. 

So many goodies and it’s not even my birthday yet ;-P

ps: I’m most definitely not on the take ;-P I have long standing offers from generous tatter/blogger friends which I have steadfastly declined (entire loss being mine).

Can’t thank you enough, Denise ! 
You are a gem & I treasure your friendship.

Saturday, 12 May 2018

not The One but

Pin It now!
…. oh so many pretties from the friendly tatting neighbourhood.

That one butterfly we were hoping would emerge from the pot, did not. But several tatters accepted my invitation to make a butterfly pretty. I received some pics while others have blogged. I’m so excited to display their talents and uniqueness!!!

The different colours, beads, techniques, effects - 
I am quite overwhelmed with the beautification process and creativeness.
Read on for more versions (click on respective name for the blog link to their post)

In chronological order of flying in….

We frequently exchange pics of our work or chat about our current project. When I showed Anita Barry my DIP (design-in-progress) pic of cream butterflies, she was inspired to tat a single butterfly before I even shared the pattern. She used dot picot antennae and her own stitch count (which she even diagrammed and sent me).
I like how the span of the top wings spreads wider & the little extra chain in center creates a kind of torso. Overall a much better shape than mine.

Denise Wessman sent in 3 almost as soon as the pattern was posted! Well, she is Mme Butterfly/Papillon – flitting enthusiastically from one project to another inspiring everyone around her! Wish I could keep pace with her activities.
Don’t the 3 beads look cute; and what a pleasant colourway.


It came as a pleasant surprise when Wally Sosa shared her version during the online class. Excellent placement of beads especially inside the wings – something I would like to imitate. Forgot to ask, but this looks like needle tatting? 
UPDATE : Wally pointed out that it is shuttle-tatted in size 10 thread using #6 beads.

Ninetta Caruso blogged her ethereal version here. Such lovely colours and she also added a very realistic looking venetian picot body making it 3D! The downward facing picots are an excellent touch. You must read the specifics on her blog, along with her other butterflies. 

Right on the tail of Nin’s butterfly, flew in Usha Shah’s interpretation with her trademark dot picots. Converting the chains into dot picot strings added a nice texture. Peachy!!!

Pretty soon I was viewing Jane McLellan’s sunshine version and graduated picots! And she rightly interpreted the double entendre of my post title - make me pretty please. Very happy – she always comes through for me.

And I can’t thank Lavi Damian-Boja enough. She struggled with the pattern, threw away many attempts, yet persevered. I'm so glad she did. A lovely blue beaded butterfly took wing! Read her post for a tip on how not to throw away a mistake.

A reminder - For a list of techniques, inspiration, and tutorials/resources, please check out Eliz Davis' incredible compilation - An Element-al Approach to Tatting Techniques.

UPDATE : Marja has prettied her butterfly with tons of picots, including downward picots.

For my prettified versions, click here.
More new versions have flown in (2020) here!


My heartiest thanks to all who have participated and shared their versions. 
I hope more tatters join in the fun and show us their prettifications, 
whichever way it is read -

make me, pretty please !
Or
make me pretty, please !

Thursday, 18 January 2018

friendly warmth ?

Pin It now!

A long time back I had started reading the Bible and finished the Old Testament. Then my eyes gave out and I haven’t returned to it since. But one of my dear tatting friend recently suggested I read the gospel of Luke if not the rest. I have yet to do it, but this is a reminder.

This is the tweaked charmed cross pattern to look more like a cross. A floating ring on either end extends the horizontal bar, while additional rings and chains add length vertically.
Can’t say I’m happy – perhaps changing the chain direction to face inwards at some places would make it a bit better. But that is for some future day.

Worked in Lizbeth size 40. I now regret having bought only variegated and no solid colour in Lizbeth.
For some reason I didn’t enjoy working with this at all. And as you can see, by the second round I couldn’t be bothered to try to hide colour blips caused by the lock join.
Also, I didn’t snug the chain stitches properly on the right side thus getting an asymmetrical outline inside.
There was also plenty of retrotatting to do. All in all not a happy experience.

The saving grace was the lock chain tails. I’ve long admired and wanted to do those little charms along a tail and this seemed like a good project to use in.
And in order to balance the width of the cross with the slim tail, I worked a 2nd tail. Can’t have enough of bookmark tails - read my argument for multiple tails here !

What truly charmed me was Denise’s enthusiastic testing and working of the charmed cross pattern. She made little tweaks to suit her taste. Notice the charms? And the Heart-shaped glass gem in the center?! These are all meant as gifts for her church friends. She tells me that since it will be close to Valentine’s when these will be gifted, she used the heart and I guess the lovely pink shade.

Also warming my heart in this cold are these cute maple leaf earrings (she added a strand of Rexanna to the hand-dyed colourway), and 

appliqués Denise is tatting; the former again as gifts. She has a great big heart for sure, always helping with a smile and spreading warmth J

And for the record, I now have a finalized version of the charmed cross pendant to share soon.

cheers and stay warm/cool  J

Monday, 8 January 2018

charmed cross ?

Pin It now!
Off and on, for the past few months, I’ve been tatting and designing medallions - different shapes and effects. I’ve already shared some medallion patterns/prototypes
Here’s my latest, the first of this year - an oval that turned into jewellery .... 

....  Charmed ! - a cross pendant
This post only talks of the design process since it is still a prototype. The final pattern will be shared after I re-tat it. I received confirmation from an ever-enthusiastic Denise that she is test-tatting several versions - I'm just as curious to see what she comes up with :-)

I wanted to create an oval shaped inner space with chains and use trefoils instead of clovers. It is interesting to discover that clovers are more prolific than trefoils for the center.
Browsing the net and antique books didn’t turn up anything within those parameters. Or perhaps I didn’t like the ones that did show up. Either way I set about trying my hand at this shape.

1. First came the one in purple with my basic elements – chains and trefoils.
2. Both elements needed bolstering, hence anchored the trefoils to the chains, and linked ring pairs to each side in the next round and .
3. My 3rd attempt was more of a cleaning up. I shifted the ring pair to the inner chains - as thrown rings (hence outward facing). 
I now had a decent shuttle shape though a bit obese with all the holiday feasting ;-P


4. Trying to get out of my comfort zone, I tried to spruce up the 2nd round. While ending, I eliminated the thrown ring at the top to see what it would look like and to give me an option for next trial. This made it look a bit like a cross!

Drew 3 rings at the tips in above pic to create a more cross-like shape - one possible variation. Another could be with a longer lower arm. Lots to keep me busy....

5. Sewed in beads using Anchor size 40 in same colour. In case I didn’t have the same colour, I would’ve followed Jane’s tip here.

In Anchor size 20 (close to a size 10 Lizbeth), this pendant measures 2”x3”. In smaller thread it can be used for earrings.


I call it “Charmed” because one can use a charm of one's choice instead of a teardrop in the negative space. I don’t have any in my stash to show though.
It can be tatted in one pass using a split ring on the side pair to climb out, and Floating Beads method to add teardrop beads/charms. The crystals can be loaded on the shuttles.


I like how this has shaped up. Fairly elegant, even if I say so myself ;-P

However, was the initial goal accomplished?
The medallion is more spindle shaped inside and angular outside, than an oval. 
My next trial will be with a short chain between each of the trefoil rings as in the lone sketch on the left. It defeats the trefoil criterion, but may be I’ll learn along the way … 

happy tatting always :-)