Showing posts with label Diane. Show all posts

Friday, 24 September 2021

whipping up memories

Pin It now!

Remembering Carollyn Brown 

Diane shared shocking and sad news today – https://lacelovinlibrarian.blogspot.com/2021/09/memories.html

A virtual friend for real has moved to another realm taking her sweetness to share there.

I have lots of fond memories of Carollyn Brown in the short time we shared in cyberspace. And every time I whip stitch tail ends I think and thank her for finally removing the fear of hiding tail ends, and be neater too! She uploaded some videos as madtatter80  (https://www.youtube.com/user/madtatter80/videos) including her uniquely long Cluny leaves.

I first noticed her blog (https://tennbrown.blogspot.com/) when I found cute little tatted 3D flowers/sprigs! A flower a month was her personal project at the time and I would wait each month for it. Using fine threads was her forte and we can all recall her adeptness at it and her gorgeous doilies!

She could tat over and around literally anything! Be it real leaves, stones, keys, and the usual glass, baubles, buttons, and beads. But her talents were not limited to tatting. Scroll through her blog to see the wide range of skills she possessed and/or learned and applied!

In 2016, 4 of us participated in the Pinterest Challenge and she never failed to amaze me with her choice and execution of the month-end project. It also gave us an excuse to correspond and get to know each other a bit more. Always smiling always sweet.

It is such an honour that she tatted a few of my patterns and etched them in my memory forever. I had to poach this image from her blog, where she is modelling earrings from my wreath pattern. Before that she had made and modelled a brooch from my poppy pattern which became quite popular at the time.

Another admirable highlight of her blog has been her skill at calligraphy and of displaying her work in a variety of settings and placements, bringing in knickknacks in an aesthetic backdrop.

So much to learn from her, so much inspiration to emulate, so much diversity to soak in! Thank you for gracing my world, Carollyn, and leaving your indelible imprint. Keep spreading your sunshine beyond 💝💝💝

http://tennbrown.blogspot.com/2017/10/tatted-lace-poinsettia-earrings.html
https://tennbrown.blogspot.com/2014/11/tatted-lace-veterans-day-poppy-finished.html
https://tipsaroundthehome.blogspot.com/search?q=Carollyn

Saturday, 2 February 2019

waffling

Pin It now!
‘waffling’ [North American]  : fail to make up one’s mind.
Apt! 
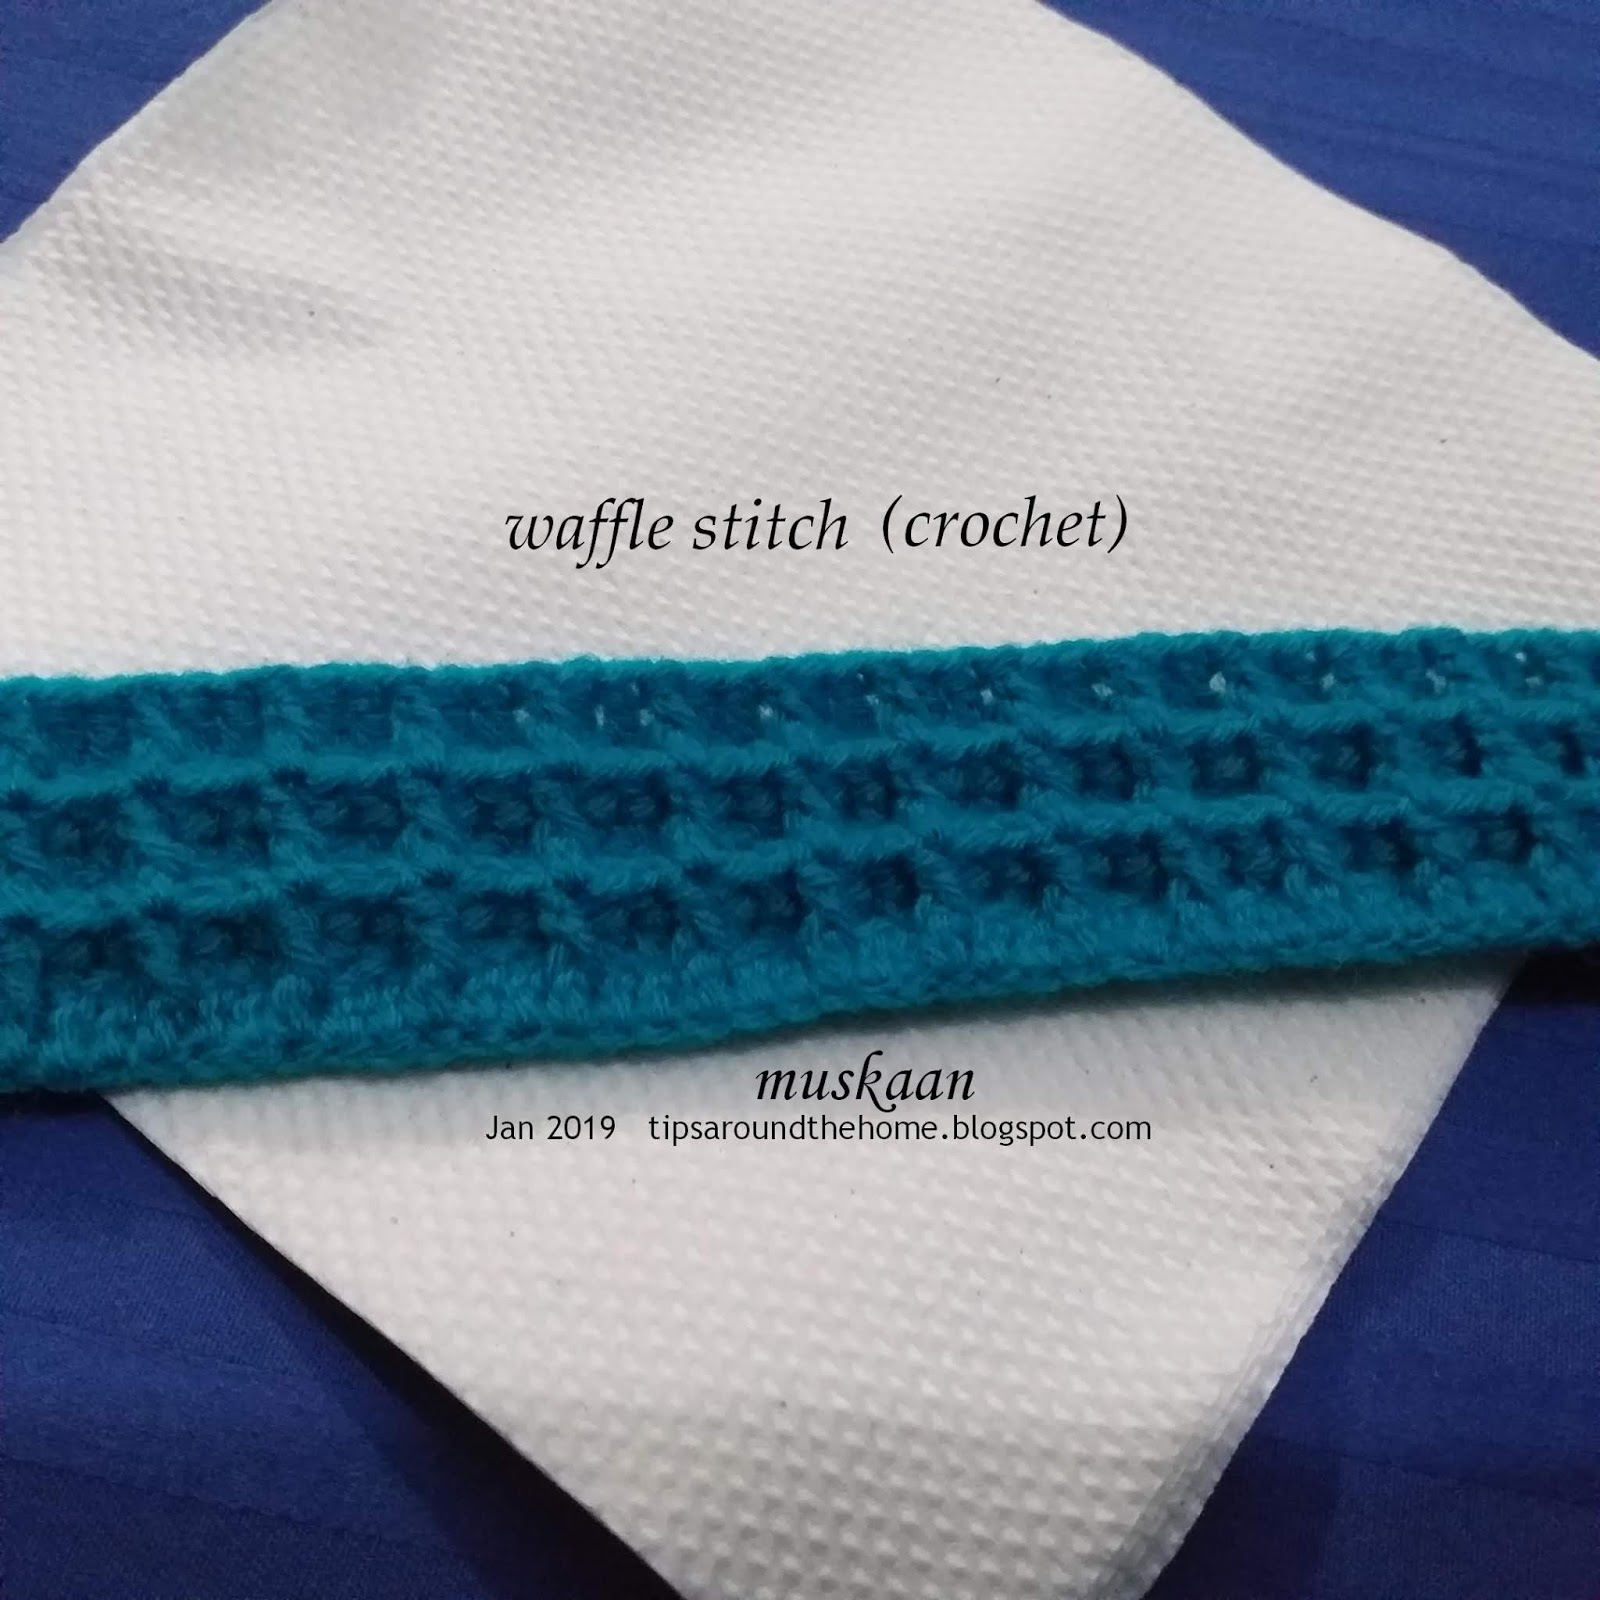
I first saw Diane’s admirable waffle stitch afghan(s) and immediately liked the texture! Several months later, Denise’s enthusiasm proved too contagious to resist. And the timing was right as I was convalescing in Dec.

 
After these learning trials, I set about crocheting a cushion cover for hubby’s chair. Which is why I started out with a 15” length. But started to get bored with the single colour (wish I'd factored in some white!) and tied off, changing my plan to an afghan. This first strip is worked along the length, but rest were worked up from the shorter side.

8 strips worked so far in 4 different colours. Each measures around 15”x3½” and weighs about 20gms. Jaypee knitting yarn/wool and 2.25mm/size13 hook.
Multiples of 3 and 2 extra chain stitches to start off, so that I get the same effect on either side.
I used only 2ch to turn.
Wanted to lay them flat before posting, but …

I need plenty more, but don’t know how to arrange them yet. Lots of arrangement ideas jotted in my grid pages, however my current waffling hampers progress!
Meanwhile I had other deadlines to meet, stuff to finish.

One thing is for certain; the entire afghan won't be waffle stitch. I intend to knit a few panels/blocks using different stitches – perhaps in batches of 8.

I kind of got into a rhythm with the stitch and it went fairly quickly; it consume a lot of yarn.


‘waffling’ [British] : speak or write at length in a vague or trivial manner.
Yelp! I’m leaving I’m leaving ;-P

Monday, 11 September 2017

while you were away, Diane …

Pin It now!
earring tatting pattern using Floating Beads methods

When I first posted a prototype, it turned out to be in Diane’s favorite colour and birth gem! These earrings Had to be hers ! So while she was away enjoying Tat Days, here’s her welcome back gift in the form of a mainly schematics pattern along with a 2-colour version. 
Since it is for our Ice Drop lady, there had to be a ‘drop’ in the name, right?! So here’s the pattern for ….

Floating Teardrops for Diane


This is a very basic and versatile pattern that can be used as earrings, pendant, or brooch. Change the number or size of beads, change the stitchcount of the 2 chain rounds, etc. to get a different look - dense, airy...as is visible in the 3 pieces photographed above.
Let your imagination & creativity soar while you enjoy tatting these up.


It is a single shuttle and ball pattern (CTM) with barely any thread on the shuttle and a Floating Beads String as center.
I have tried to diagram the 2 basic steps for FB string. Hope it is clear. Otherwise the stepwise pictorials can be found here – Floating Beads String for the beaded center, and Floating Beads - on Chain (same as in ring) for the teardrop bead.


Only thing to keep in mind when tensioning the FB string is to leave some slack on the string. This space between beads is where the joins in next round will be made.
In above pic, left one is the original & in the right one I increased the stitches in outer chains, thus highlighting the concentric arcs.


I tried a 2-colour version using 2 shuttles. 
To switch colours/shuttles for Round 2, either make a Reverse Join or a Lock Join and SLT (shoe lace trick).
2-colour version can still be worked with single shuttle if one uses Reverse Stitch chains (unflipped stitches as in split rings).

Worked in Anchor size 20 threads which probably equates to Lizbeth size 10.

UPDATE: A beautiful needle-tatted version by Amarilys Cwb - https://tipsaroundthehome.blogspot.com/2021/11/fooled-by-tool.html

This is it for now. I hope you enjoy tatting these using diverse colours, sizes and stitchcounts. Very quick to tat up too.
In case of any problems, please don’t hesitate to contact me.


drops in any form – ice or water – are always fun to tat J


Saturday, 14 January 2017

Ice drops into the sea .....

Pin It now!

... gets entrapped in an an oyster to turn into a pearl !!!!
Ice Drop made with shell and curled rings

This time I delved right into the depths of the TATemptation sea ;-P
As commented in my previous workings, I had intended to use curled rings for my next Ice Drop, and during a sunny spell I managed to find my collection of shells and other blings. In another lifetime I used them in flower arrangements and for land/sea-scaping in a tray. All my shells are handpicked from various beaches we’ve been to.
I hope Diane won’t mind my naming this composition a Sea Pearl. Why ? Coz there’s a pearl in the oyster !

Sea Pearl Pendant
From Diane’s Ice Drops

I like this shell – it reminds me of a world map. (see in collaged pic below) 
Blue represents the water (Anchor 00131, size 20) . 
Variegated colourway represents various seaweeds which have ‘embedded’ the oyster. (Lizbeth Vineyard Harvest size 20).

I had sketched the shell outline on paper, but was not comfortable with it. Instead, I kept placing the tatting over the shell to confirm that the contours were fine.
Pearl is on a large picot on first ring.
            Rings range from 18DS to 9DS, with 3 or 2 picots.
            Chains are mostly 4-2--2-4.
Worked this round in counterclockwise direction. Rings frontside, reverse work (RW), chains frontside, RW.

As I tatted the curled rings, the 'seaweeds' looked more like a lotus. My initial plan kept getting modified and in the end I chose this simple, narrow edge in order to showcase the shell markings.
This round is tried all from the front in clockwise direction. I found this easier.
Rings tatted backside (reverse order DS) and chains frontside, with No RW.
After chain, simply start ring at same point. (I used backside tatting for ring); attach to previous ring; complete and close. 
Then pull a loop of ball thread through round 1 as well as through the center picot of ring. Pass shuttle through this loop ans snug. This ensures curling of ring as well as attaching to round 1 in one movement.
            All curled rings : 6-4--4-6.
            Chains : 8 or 9 as required.

Both back and front were tatted with single shuttle attached to ball thread. 

After completion, the short blue chains didn't give a good outline to the pendant. hence, using short lengths of thread, I added another layer of chains - kind of like waves? 3 such chains were sufficient to give a better outline, as well as add some more layer, as seen in the pic below

The pendant is totally reversible, and can be worn to match the dress ! 


That's all from me for now. It was a nice break from blogging only about snowflakes :-)

I had tremendous fun again, though round 1 took longer with the continuous adjustments. Thank you so much, Diane, for such a superb enticement :-))))

happy tatting always J


Related Posts :

Tuesday, 20 December 2016

drop by drop

Pin It now!

tatted ornament/jewelry/cabochon using large glass beads, mirrors, etc.
edited Dec 21, 2016

I caved. What do you expect, when Diane keeps dropping off these gorgeous little beauties daily on her blog?! Instead of working on my planned projects, the mood got to me. I gathered all the materials, strung the beads, wound the shuttle, refreshed Diane’s excellent stepwise pictorial, and went to play, basking in the warm winter sun.

 Ice Drops
Diane (lace-lovin’ librarian) Cademartori

 Magnified !
 
A while back, some 3D movie promo scheme had sent in a pair of glasses with magnifying lens. Don’t know why I kept it, except that the lenses looked very cute. Tore off the paper specs & got to work with the lens.
The lens is a bit flat for this ornament, but had to make do for now.
It is a bit over 1”, hence strung beads for 8 repeats; 7 repeats sufficed.
Unfortunately the transparent beads don’t show up clearly in the pic, but the ice drop looks Fantastic – DH was impressed and considered it a pendant. He guessed right for a change, coz I wanted to keep my options open & didn’t tie any ribbon, string or tatted braid.
TIP : I used a Fujito Join slope and roll join for the second round. The Lock Join didn’t seem to come out right for me. So instead, I pulled out a loop with the ball thread & passed the shuttle through. That’s all.
There are a few mistakes in round 2, which I noticed later – a bit of twist in a ring & a chain.
Here's how it looks from the 'back' ...

Mirrored ! 
My second Ice drop is made with 2 mirrors glued back to back. This idea had been on my mind ever since the pattern was shared. I checked the edges & they were smooth. A tad less than 1” across.
Everything went very smoothly. A vintage size 20 thread, which is slightly thinner than the newer one I used above.

TIP : For directional tatting (frontside/backside) :
Round 1 (the back of the bead) – tat rings frontside, RW, and chains frontside as well.
Round 2 (front of bead) – tat rings frontside, RW, chains backside.
Finished off with a beaded loop. Absolutely reversible.

I can vouch for their "addictiveness" ! Wanted to keep making them – they are so quick to tat up and look oh so pretty in real, even though I didn’t have the specific materials. The only downside (always) was stringing beads. Should stick to larger pearls ;-)


many thanks to Diane & Edda Guastalla
for such a delightful addiction !

happy tatting always :-)


Friday, 1 April 2016

Look !

Pin It now!

Look what a lock join unlocked !!! Access to my very first MK pattern. My head was literally spinning with palpable excitement when this popped out of the Tatter Chatter newsletter last week (March)! Thanks to Bev, and her wonderful team at The Tatters’ Guild of Australia (NWS Branch). Their newsletter was the first to officially publish a post of mine - How to Unlock the Lock Join.

And just as I was finalizing this post, Another Huge gift arrived, just in time for ITD. Once again from Australia & probably partially connected to my Joins in Shuttle Tatting series. Judith Connors sent me a copy of her book ”An Illustrated Dictionary of Tatting” *! WooHoo – can you see me doing the happy dance ?!

In Hindu mythology, we consider Time as a wheel (‘samay / kaal ka chakra’) that keeps rolling … The Spinning Wheel glass mat symbolises how tatters across time, space & nations can come together through their continuing love for this beautiful art. We are truly joined, interlaced :-)

So what better way to celebrate International Tatting Day than dedicate it to Mary Konior, the queen of visual tatting.
I also want to dedicate this to the Wonderful online tatting community from where I have learned so much in such a short time & the community continues to inspire me in so many ways every single day, and in particular to Judith, my inspiration & guide.

Spinning Wheel Glass Mat
Mary Konior


The Spinning Wheel glass mat looks great irrespective of which colour(s)/colourway one chooses. But Diane's charcoal mat here threw up such interesting negative space designs tempting me to choose black.

In Anchor Mercer cotton size 40, black, it measures 4” in diameter.
Techniques I used :
2 shuttles CTM fully loaded bobbins .
Directional tatting
Switching Shuttles takes care of the change in chain directions (reverse chains).

It was interesting to note that directional tatting changed en bloc : while going up an arm, the rings were RODS, while returning back, chains were RODS.

If one stops at 6 arms or 7 arms, one gets a nice bowl shape – perfect for little truffles & treats to share on ITD :-)

There was a tip on Craftree to start the mat from an outer ring, so that it becomes easier to join back & tie off in the end. However, for my first mat, I decided to go as per directions.

I intend to tat another, with increased diameter like this, for my snood.  I've been collecting possible patterns but this one is exactly what I wanted !


Happy Tatting and nibbling on chocolates while you distribute tatted goodies :-)


I chose some symbolic tatting for the lead pic, alongside the Spinning Wheel glass mat –
Hold My Hand heart ( for the interlaced rings) ,
Anne Bruvold’s Hearts of Hope , and
Super 17 Butterflies to give away (one has already been given away on Sunday)

* This edition of the book is available at Lacis.com 

Related Posts : ITD 2014 - pattern