Thursday 29 November 2018

4 colour broad Cluny tatting

Pin It now!
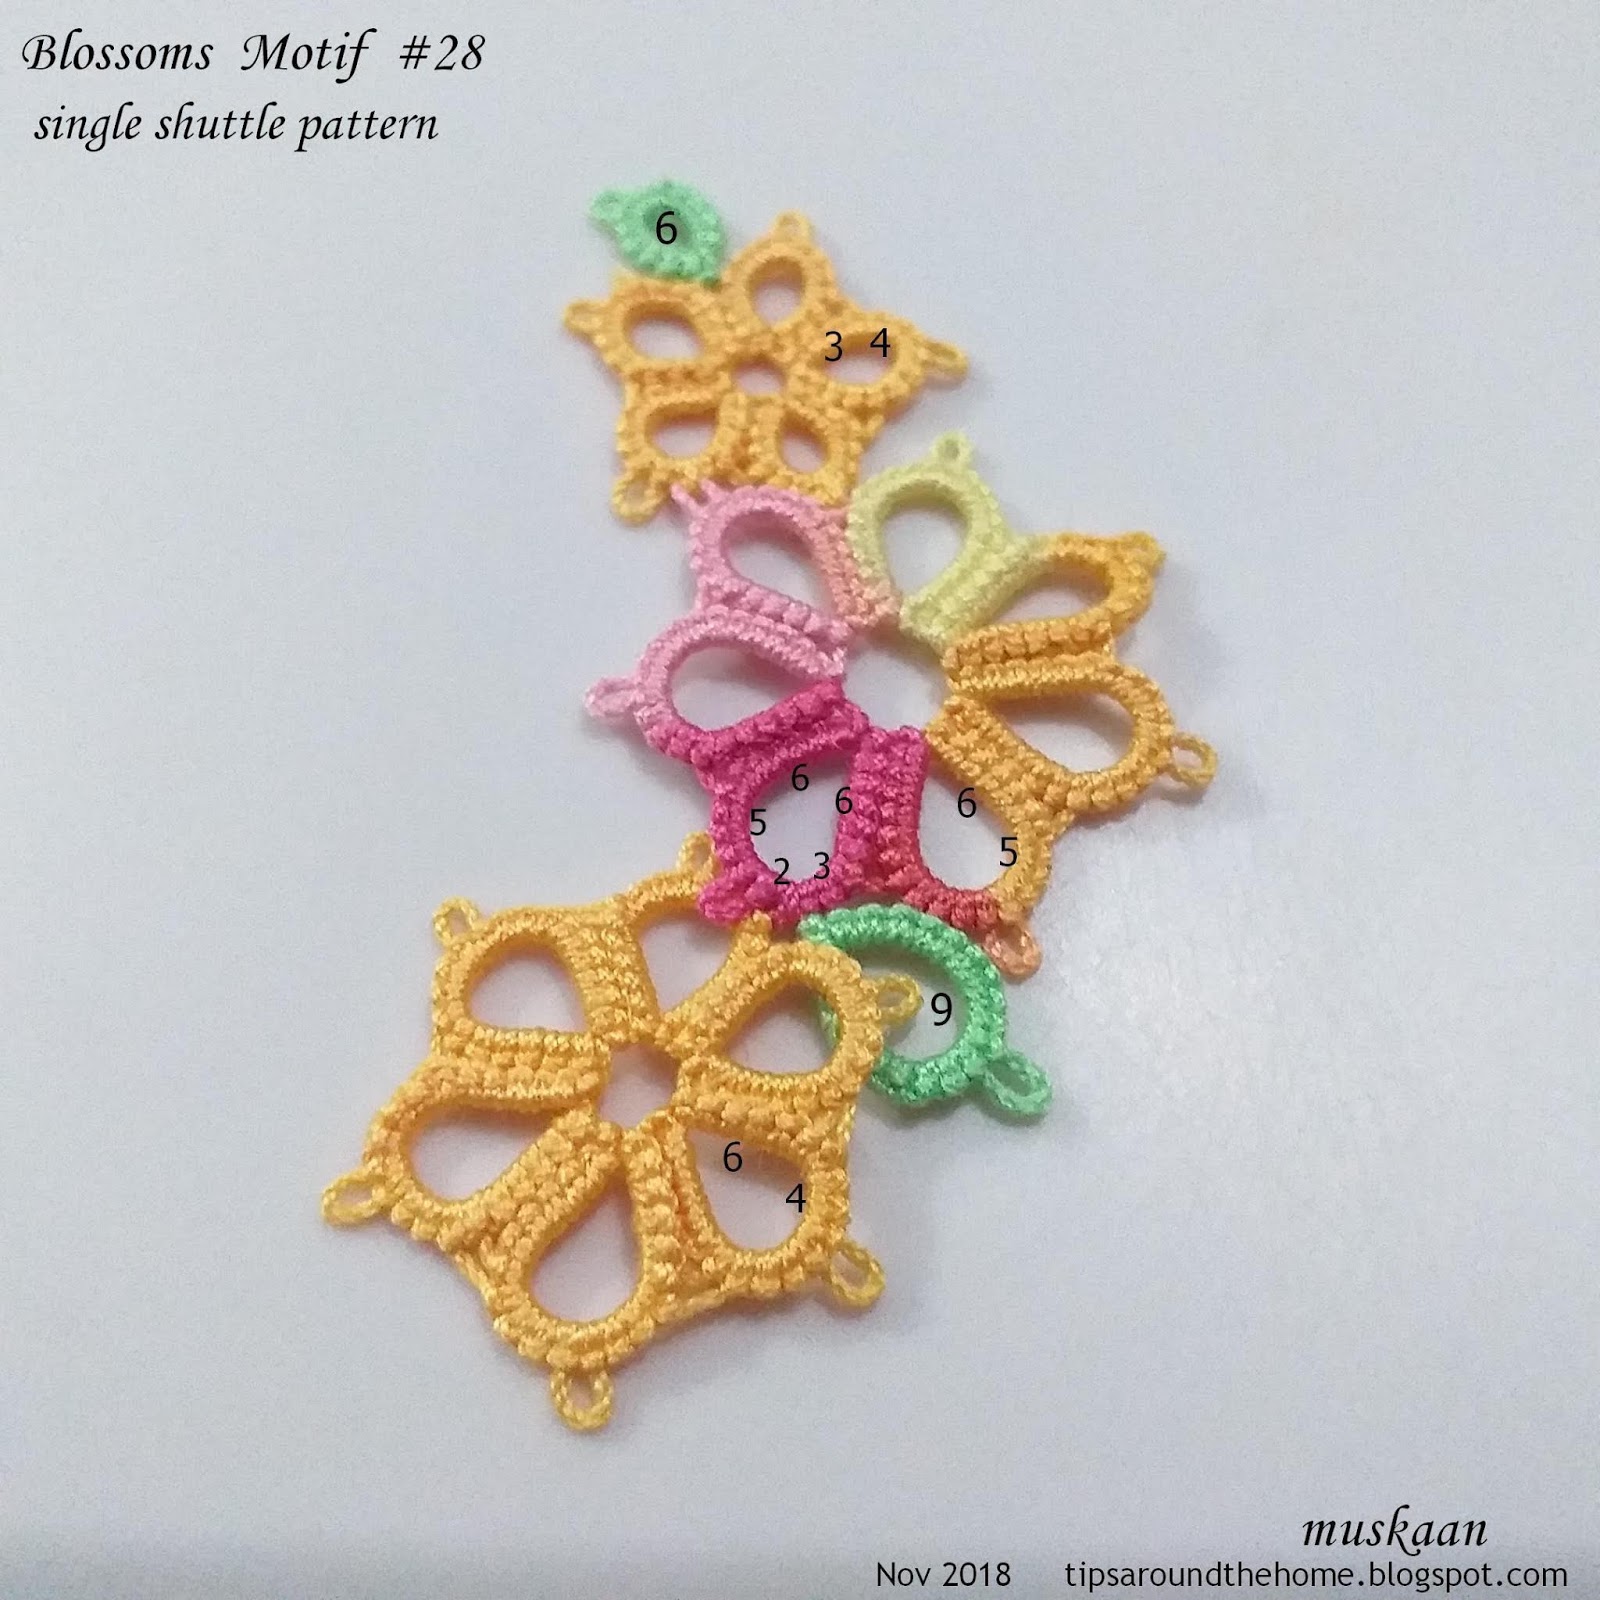
Final installment of colour Cluny tatting pictorials.

This collage shows the progression of Colour/striped Cluny Tatting pictorials I shared this year. While stepwise directions are given for regular tallies (and a broad one below), the same concept can be applied to Hanging Cluny Leaves, as seen in the collage center.

Four-Colour Broad Cluny Leaf
(5 threads and 4 colour stripes)

Using 4 colours for Cluny tatting meant the coloured stripes would show better in a broad tally. Hence I resorted to a 4-Warp loom and also changed the leaf shape a bit.

Notes and Links :
  • My one small step really comes in handy here since multiple loops need to be closed in the end. It is done Twice in a 4-Warp loom because there are 2 top loops to close at the end.
  • Continuing with the braid from the 3 colour tally, I made a split ring, encapsulating the pink and yellow threads on either side. Then I brought in the 5th thread – blue and mustard was again used for the loom.
  • I recommend hitching the loom before actual weaving commences. These year-old pics do not show that step.
  • how to add new thread and hide the tail in the Cluny leaf.
  • how to hide loom colour blip on top.
  • Only major steps are shown below. eg. only one pass of a weave/wrap is shown. But remember to bring the thread back to the side where it starts.

Brief  Pictorial 
1. This is a 4-Warp loom. In order to close tally on the loom itself later, 
One Small Step is done twice – under the AB bar, and again under EF bar.

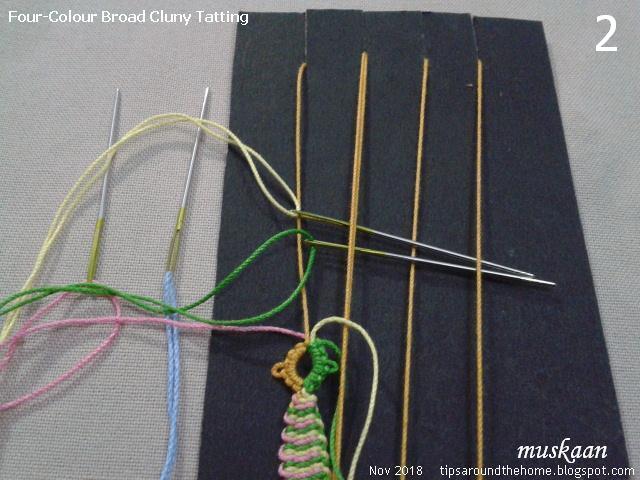
2. Bring 2 colours/threads to the right side, making a pass (under-over-under).
Before this step, I now find  hitching the loom helps center the tally and hide any colour blips. (not shown here, since these pics were taken a year back).

3. All 4 needles/threads are in place, 2 on either side.

4. Start weaving with green keeping yellow below: over-under-over-under to the left. 
Return to the right : under-over-under-over (not shown) to complete 1 weave or wrap.

5. Pick up pink from the left, entrapping blue within and move to right : over-under-over-under. Return to left : under-over-under-over (not shown) to complete 1 weave/wrap.

6. Pick up yellow, entrapping green, and make 1 weave/wrap as in step#4.

7. Pick up blue, entrapping pink, and make 1 weave/wrap as in step#5.
Remember to keep tensioning and packing down the weaves.

Note: In this manner, each needle/thread returns to it’s starting side, 
making a single weave colour strip.

8. Repeat from #4 to #7 to desired shape and size.

Note: colour placement and width of each colour strip depends on pattern and desired effect. 
(In the flame here I used 3 colours with broader stripes at the base)

9. The broad 4-coloured striped tally is complete.

10. Closing the tally and avoiding colour blip
bring pink & blue needles from under the AB loop and close loop by pulling downward at BC.

11. Pass green & yellow needles through the EF loop from above, ….

12. … pull off the EF loop from loom and close by pulling downwards at FG.
Then pull the remaining single loom thread upwards at I to finally close the tally (not shown).

13. One broad 4-colour striped tally made. 
The pic shows the tally first from the front, then from the back.


This collage shows the application of coloured/striped tallies in various projects.
3-colour pendant and diya flame prototypes.

I have a couple of practice patterns on the draft board for 3- and 4-colour Cluny leaves but may not be able to get to them till the new year. But stay tuned, one never knows when inspiration to weave may loom large on the horizon!
There are definitely some non-Cluny patterns in the next few posts! 

Tuesday 20 November 2018

honeytrapped !!!

Pin It now!
Blossoms motifs 21-30

Who said the thieves were fools?! They were old hands at remaining free and unfettered (that's how they amassed that vast treasure stashed in the cave!*)! So, when 20 of their mates went missing – some wound tight, some cornered, roped in, corralled, split down the middle, and what not - they got into a consultative huddle to chart their future course of action. Most importantly how to avoid detection. By now they had realised that moving alone or in small groups made them easy targets. Henceforth they would move en bloc; split into 2 groups of 10 each seemed a safe bet to overcome their unseen enemy, Alibaba.

But our Alibaba was smarter by far and changed his MO (modus operandi), He laid a sweet honey-trap. Who can resist a ‘sweetmeat’ ;-P  He put forward his clever and resourceful slave girl, Marĵanah (Morgĩana in some online versions, pronounced Marjiinaa) who enticed and lured the entire group of 10 thieves to partake of the very many tasty candies till they doubled up in pain arising from decaying teeth! Who can think of anything else with a bad case of toothache, and were easily rounded up.
How cheeky of Alibaba – Was he being unethical and unfair in compromising their long-term oral health? Sadly, all’s fair in love and war.

So parading here are the captured blossoms motifs from 21 to 30, with their stitch count inked in respective images.

Techniques : rosette ; picot join to the right ; luggage tag loop or larks head knot ; lock join.
All worked in Lizbeth size 20 threads with a single shuttle.

Blossoms Motif #21
>2” X 1½”

Blossoms Motif #22
2½” X 1¼”
  
Blossoms Motif #23
2” X 1½”

Blossoms Motif #24
2” X 1½”

Blossoms Motif #25
<2” X 1¼”

Blossoms Motif #26
2¼” × 1¼”
This motif works well as an asymmetrical or freestyle corner motif.

Blossoms Motif #27
2¼” X 1¼”

Blossoms Motif #28
2¼” X 1¼”

Blossoms Motif #29
~2½” X 1¼”

Blossoms Motif #30
2¾” X 1½”

Spiraling out of control, lured by the sweetmeats!!! There's a lesson in this, isn't there! Enjoy festivities but control sweet temptations ;-P
A Blossoms spinning wheel mat ????

How will the last remaining group of 10 save themselves now? Wait for it - they may go underground or go digital ..... 

*Alibaba and the Forty Thieves from One Thousand Nights and One Nights aka Arabian Nights 


Saturday 17 November 2018

quick art attack

Pin It now!
When I started this blog, it was meant to be about a lot of things around the home – both creative and practical. But very soon it lost it’s way becoming almost exclusively a tatting blog. Well, let’s take a break from that T word that seems to dominate my life!

Change of seasons means switching clothes and reorganizing the closets. And this time I found 2 of my art books (yes, even my clothes almirah has a huge shelf filled with books and also that T stuff – see the T invasion there?!!!) and was pleasantly surprised at some of the ‘artwork’ I found within. Totally forgotten and neglected all these years – that is the power of T! Aaargh, see there it is again! Before it manages to squeeze in further, let me quickly upload these scans.

First off, it was tough to get a good impression despite setting the scanner to highest contrast, lowest brightness and a higher resolution. I do have a tendency to sketch and colour lightly, yet it is a tad better than what shows up in these scans. I added the black 'frames' with MS Paint.

Colour pencils, June 2010
This scene is partially from some story published in a newspaper or magazine.

Sketch pens, April 2008 
This was a phase when I was watching Neil Buchanan’s show Art Attack 
and was inspired by his excellent command, creativity and quick artwork!
I made faint pencil outlines which were later erased.
Those squiggles in the base of the bowl add a cute little touch,  methinks. 

Water colours, March 2012
This is the kind of stuff I go for – freestyle. 
I’ve used the technique on greeting cards, sarees, home linen, etc.

The above 3 were done on fairly smooth A4 sheets from this art pad. 
They came loose while scanning.

The next 4 below I found within the pages of this smaller art pad 
(I’ve cut/paste the specifics in the image. click on image to enlarge).
The sheets held together during scanning.

Mixed media, April 2008
There is charcoal, chalk, crayons, & colour pencil. 
Bummer about all these light scans - 
those roiling clouds actually came out pretty good using blue chalk.

Pastels, April 2008
I’d bought a set of 24 pastels and was eager to give them a try.

Pencil, April 2008
Another of my favourite theme for sketching : bare trees (and roots)...
 with a bird (there are 2 in this sketch if you can spot them!) or solitary leaf (O Henry’s story is among my favourite) or some such to add a spot of 'life'. 
I absolutely love the way bare branches and twigs enmesh together, yet each has a distinct identity. Leaves I do like, but they mask the unspoken majesty of bare branches.

Water colours, March 2012
Trying the wash technique.

I realise they all look quite amateurish and need a lot more details/background. 
However, they were all accomplished in single sittings! 

So a nice breather from that domineering T (major oops again!!!) in blogging? 
Do you think I should organise more frequently? ;-P


Wednesday 14 November 2018

Sharon's flakes

Pin It now!
Just too tempting to forego! Sharon shared 2 new snowflake patterns recently and I got to work immediately. Now, they look pristine in white, and snowflakes should be white. But you know me – I want to spice up the challenge and took to colours to see how they’d look. Also, to bring out the flower within.

This is the first snowflake (pattern here) originally worked continuously with one shuttle and ball, climbing out with a split chain. 
My coloured  rendition is done with 3 strands of Anchor embroidery thread 
which is equivalent to a Lizbeth 20. And no split chains.

Black shuttle for central ring & orange 0333 'ball' for rosette chains : <1¼" or <3cms
Mustard 0306, ctm : <2¼" or 5½ cms
Green 0204, ctm : 3" or 7½ cms
T{|{T
This is the 2nd snowflake she posted here.
I used Anchor 40 this time, but worked continuously. 
Measurements after each round : 1”  ;  1½”  ; 2½" or 6 cms. 

Started with maroon, ctm for the central ring and 1st round, then switched the core thread to cream. I kept the maroon shuttle, but snipped off the ball. 
In order to get the desired colour placement and eliminate colour blips, I used 
the Slope & Roll join instead of lock join in the 2 outer rounds; 
SLT to make the split chain in maroon, 
and the Reverse Join to switch positions after the split chain.

I remembered how to do the split chain, but unfortunately the colour is hard on the eyes and somehow that segment twisted while linking. The camera shows it all, sigh !

Future Ideas:  
This snowflake could work beautifully as repeatable motifs linked for a larger lace. 
But as I worked the outer round, it struck me how beautiful it would look as a continuous doily – the ‘formula’ for the last round can be repeated (with additional side rings) ad infinitum without having to change the stitchcount at all! 
Perhaps one of the middle or last round can have the central floral motif all around ?!
T{|{T

Wish I'd taken pics after each round for both snowflakes, 
because each round is beautiful and elegant!!!
In fact the rosette reminded me of a poppy despite the orange shade.  
T{|{T

And playing around, notice how cozily the 2 designs can fit together ....
 
T{|{T

I absolutely love Sharon's diagrams – simple and clear. 

Many many thanks, Sharon!

Monday 12 November 2018

Cornucopia of Blossoming ideas

Pin It now!
Combo ideas with blossoms motifs.

You might remember Alibaba had tied 20 thieves to the ‘board’, isolated from each other by invisible walls, while he went back to hunt down the rest. But it was festive season so in a humane gesture he temporarily set them free – snipped their shackles so that they could enjoy the ‘outdoors’, chat and catch up with each other. And as they mixed around, their huddles threw up a cornucopia of possible ideas shaping future projects …..

Please note that the original Blossoms motifs (or sprays) are not linked at this stage; they are merely arranged into possible shapes (a few of which have been shared earlier). For better definition of shape, one can add a few strategically placed leaves and similarly fill in any gaps.


Rushing out from their confinement, they took on the shape of bouquets!


Blossoms Bouquets #1 to #4 

Some crossed paths and fluttered around like butterflies!


Blossoms Butterflies #1 to #6 

What a couple of squares these dudes turned out! 
 

Blossoms Squares #1 & #2

Then there was a trio of siblings renewing their bonds of love and blood. What better shape than a heart?!

Stitchcount for Blossoms Heart #1 is notated on the tatted model itself, including the total number of petals/rings in each. Each ring has only 2 numbers since the 2nd half of ring is a mirror image. A single numeral means all 4 segments of the ring have same count. Numeral in the box indicates number of rings/petals.

Opposites attracted too, ending in cozy embraces!
 
Blossoms Yin-Yang Pendant/Bracelets #1 & #2

Bosom pals huddled together, but larger huddles were also seen. Pretty wreaths, but were they playing or planning an escape?


 Blossoms Wreaths / Garlands #1 to #6

Some just went nuts, playing choo-choo train! Or was it to scour the perimeter for possible escape routes?
Blossoms Edging #1

These are starting ideas that need a bit more definition in terms of shape.
Put on your thinking caps and let’s get creative!!!


After this temporary sojourn, the 20 thieves were once again rounded up and corralled which is where they will stay till the remaining 20 are found. There might be another cornucopia in future….