Showing posts with label Usha Shah. Show all posts

Thursday, 10 March 2022

girl interrupted

Pin It now!

 Despite the best of intentions, commitments can fall by the wayside. Usha Shah and Ayşe Özgür were among our original volunteers and started tatting immediately after selecting their respective patterns, sending in the first trial pictures.

Then life intervened, interrupting their commitment, and we lost their participation. However, their trial samplers are inspiring and a wee bit different from the original pattern, making it a pleasure to share with everybody. Both ladies are highly accomplished and talented and we expected nothing less, right!

The other commonality lies in the way the tatted they ‘block’ without switching shuttles, seemingly like a continuous chain. Hence despite working with 2/3 colours, their block chains remain the same colour.

Ayşe Özgür worked pattern #7 in 3 colours! Her sampler resembles oya mekik or Turkish lace, partially because of the thread used. If we compare closely, this sampler is a modification of the original pattern not merely in colours but also techniques, direction of chains, etc. A possible variation to keep in mind when tatting.

This is the pattern that went through many hands before landing in mine and the pattern was shared here - https://tipsaroundthehome.blogspot.com/2021/11/the-foster-child.html

Ayşe tats a range of flower motifs, both 2D and 3D. These original designs are very pretty and colourful and impeccably made – a mix of tatting and Turkish oya. However she uses shuttles instead of needle. Besides her Facebook profile, she hosts a FB group (Tatting Ayse), has a YouTube channel, and an etsy shop. Do check out her inspiring work. 


Usha Shah of Shuttle Creations is another talented tatter, designer who needs no introduction. All one needs to say is Dot Picot! She chose pattern #39 and sent in this trial sampler.

Again, if one examines closely, it is a modification or variation of the original, with the block chains worked continuously without switching shuttles or turning work. The vertical segments stand up straight, providing a nice symmetry.

The way her chains stack up, reminds me of peacocks! Do you see birds with open plumes, too?

When Usha could not return to this project, despite wanting to, I was at a stage where it was easier to do it myself than request for volunteers and review their work. (We wanted different names on the modern pdfs than repeating the same). The entire review process is very time- and energy-consuming, without the pleasure of actual tatting ;-D If you remember, I had tremendous fun doing the pattern and adaptations - https://tipsaroundthehome.blogspot.com/2021/11/a-trip-to-beach.html

Usha has shared many lovely original and unique patterns for free in her blog - https://shuttlecreations.blogspot.com/. She, too, is on various social networking platforms including Facebook, Instagram, WhatsApp. If you haven’t yet, do check out her inspiring work.


We are grateful to both ladies for their attempts, even if they could not see their projects through to the end.

muskaan and Ninetta

*********************

Endrucks 1920 Project is a community project, where patterns from Endrucks’ German book of 1920 were converted to modern-style presentations and pdfs. We welcome you to join our Facebook group “Endrucks 1920 Project” (please read the group’s description and rules before joining :  https://www.facebook.com/groups/1235560633606162)  where the fun continues with derivative tatting, new variations, activities, etc. all within the gamut of Endrucks’ patterns.

Using the hashtag #Endrucks1920Project when posting in FB or Instagram, ensures that your pic will show up in a search.

If you enjoy sharing and experimenting, or even test-tatting, the group is waiting for you!  All info and links to patterns (original and modern), including model images, are in the Endrucks 1920 Project Document, here   https://docs.google.com/document/d/17LEVftXweztBIOWh4sL4BB7bX65ssoOsOn4oXIgCepY/view There is still a lot to explore and extract, derive and apply and scrolling through this document will give you an idea of the possibilities and beyond.

*********************

Thursday, 25 June 2020

bonding together

Pin It now!

I haven’t been able to pick up my shuttles for the last several days - a tatting hiatus seems quite inviting! But I have permission (some for quite a while now) to share pics of stuff inspired or learned from this blog. 
So here's a colourful spread to cheer us all -
Tatting binds us.....and liberates us! Soaring together ....

In no particular order ….
Krystyna Mura – tweaked Blossoms heart (from Buddy Hearts) to create quite a wild boho version. Love it!

Sheetal Kakodkar – her bookmark journey took a zigzag path instead of S turns, giving us such a picturesque view! Tweaked from the picoted S-chain tutorial! (https://tipsaroundthehome.blogspot.com/2020/04/picoted-s-chain-cords.html)

Carolyn Miller – her practice piece for various techniques, starting with Interlaced Rings. She has cleverly converted it to hold picot gauges. See, we put every little piece to good use!

Margaret Davies – Such a beautiful adaptation of the Hidden Rose snowflake into an ice drop! She shared the pattern here - http://margaretsdesignercardspatternsandhowt.blogspot.com/2020/05/hidden-rose-ice-drop.html

Usha Shah had tatted and sent me her version of the Magic Square Cross almost within hours of my posting the pattern!

Anita Barry - Master Tatter - has often been inspired, and sent me her off-shoots –
 
Inspired by the Heartland Rainbow Snowflake, she went wild with these hearts ...posing as plumes on a proud peacock and colourful heart balloons (lead pic top) – such happiness and good cheer emanates from these - a true reflection of her peesonality!

 
Remember my invite to design-play? This is how Anita added a new round to the NeoVintage heart.  Looks like an embrace,  doesn't it? !

She has also shared her count.

And finally, such an honour - she used the Rosette Enchained Ice Drop only-chains idea to frame a miniature of her tatting teacher!
This is how the back looks.

I know of 2 tatters who actually learned treble tatting in order to make the Peacock in the Snow flake - one of them worked it a second time using a different colour palette !

These are but a few of what I would like (or remember,  sadly) to accommodate. Any omission is due to a faulty memory, not intentional.
There are quite a few others I have to share, but need to hunt them down for a future post. I invite you to send in your versions to share in my blog!

Many thanks to all these wonderful tatters – 
you inspire me to try harder and do better!

You can find links to respective pattern or tutorial in one of these pages –
All my Snowflake patterns - https://docs.google.com/document/d/1r4OmXX_c5LjFebMN2UbSNiYqXYETLmoridK0X1YIQco/view

Wednesday, 13 November 2019

beads on a roll and twist

Pin It now!

2 years back, when I revisited my 2015 pattern, based on feedback from Georgia’s class, another idea struck me. Could we tie a bead to the floating or free-standing twisted picot? Yes, why not!
In fact measuring and twisting the picot becomes easier for starters.

This shows a self-closing mock ring (SCMR) being made, hence you see a red shuttle for the core thread, and the yellow for the stitches and picots. These were taken in May 2017. 

All we need to do is determine where we want the bead. Then make an overhand knot/tie at the base of the bead. 


Tighten the knot, and keeping the bead at the tip, measure an equal length of thread from bead to core thread. Hold the thread in a pinch at this point and start twisting. Follow it with a double stitch. 

Click here for detailed Twisted Picot tutorial.  The original tutorial was recently taught at Camp Wanna Tat. I hope it went smoothly without too many twists and turns?!

Since bead is knotted or tied on the picot thread, it is easier to do with a 2nd shuttle. It can be done on chains or on mock rings. We will need very accurate placement to tie beads on true rings – not practical, though theoretically possible.

Usha Shah graciously made 2 videos for bead on twisted picot on my request (thank you, Usha)

TIP : For making a twisted picot, or after adding a bead to it, slide your left thumb over the thread/bead to gently hold in position. This makes it easier to handle the twisting. It also keeps the twist confined to the required length of thread. Using this slight touch, one can make fairly long twisted picots.
The fun part is, if the twist is good, one can actually let go of the picot when tatting the first stitch!

Fast forward to Sept 2019, while working another model using Red Rose metallic thread, I wondered about MULTIPLE BEADS on the twisted picot.
Initially, I slipped in 3 beads instead of one, spacing them while twisting the picot. 
After a while I noticed that the beads had clumped together at the tip!!! Perhaps it was the thread (metallic with a pearl cotton core), or may be they automatically gravitate to the tip?
Solution - knot the beads to avoid rolling!

I tied the 2 lower beads (green & yellow), spacing them out, but left the topmost (red) free. Then measured double the length (from red bead down to core thread) and started twisting. The pic below shows the outcome...beads stay in place.
The long picots appear branched due to these multiple beads tied at intervals. Fun to make as well.  

I went a bit berserk with some of the picot lengths! But I also noticed that only lower beads needed to be tied down to keep them in place; the one at the tip is better left untied.
In the lead picture, some of the earlier picots have untied beads. These had to be rolled back manually into position for the photo shoot ;-D 


Monday, 1 April 2019

happy tatting with old and new

Pin It now!
A very happy International Tatting Day!

I’ve had a fruitful day – I’ve tatted a cross from a vintage edging, tried a new technique, gorged on black forest pastry (it has chocolate ;-P), and am now going public with this blog post. 

Georgia Seitz has a puzzle - can we work this vintage edging continuously? Hmm, I couldn’t, but I did convert it into a cross that can be tatted in one pass. And if the puzzle intrigues you, attend class today to see if our talented participants have answers. They always have tons of ideas !

The dark purple one was made first but felt too long, then 'improved' upon in the brown one. But I think the chains in the long arm should be shorter, leaner. That arm looks like it’s grown biceps !!!
In Red Rose pearl cotton (size 8) the brown cross measures 8½ cms x 6½ cms & the first one is longer at 9½ cms.
Techniques I used : 2 shuttles, directional (fs/bs) tatting, central picot, SCMR with mock picot and thrown ring, ring made with 2nd shuttle (like thrown rings), lock join.

I need your help in naming the cross. What should I call it?
It is edging #436 from Coats and Clark #138 Priscilla Edgings. And if you have any design improvement ideas, please do advise.


Now to the lovely new effect, Mimosa Knot, shared by Daniela Mendola to create pointed rings and chains. I tried them on rings only including half-closed rings.
My understanding of the Mimosa Knot on ring, based on movements in video :
  1. It starts off as a self-closing mock ring or SCMR (holding core thread loop at base) ;
  2. Make the 1st half stitch, but before snugging, pass shuttle front to back through open loop and adjust tension – this creates a twist in the thread just like in the treble tat stitch. Except that in treble, there are 3 twists, whereas here there is a single twist.
  3. Next make the 2nd half stitch, and pass shuttle back to front to twist, and snug.
  4. Close loop in 2 stages as we do for any regular SCMR. But my core thread did not slide freely after closing SCMR. I had to do this 5th step to ensure free movement & it worked every time ...
  5. Hold the mimosa knot in pinch and tug/pull the core thread such that the knot transfers and core thread becomes free.
Doesn’t this remind you of Frivolé’s one-stitch SCMR (for pointed chain) combined with Ninetta’s treble tat stitch (2nd half)? The SCMR lifts up the stitch to create a point (see 1 wrap tds here). 
Usha’s dot picot also creates a pointed effect and I remember doing a comparative study on pointed rings (perhaps privately?). Jon Yusoff also created pointed chains. Now I’ll have to add the mimosa knot to the compilation :-D

All links can be found in the tabs above (My Tutorials & Tatting Resources) or type in search box.

Can’t thank global tatters enough for sharing generously ! 

Sunday, 28 October 2018

school photo day

Pin It now!
tatted butterflies, square and oval doily


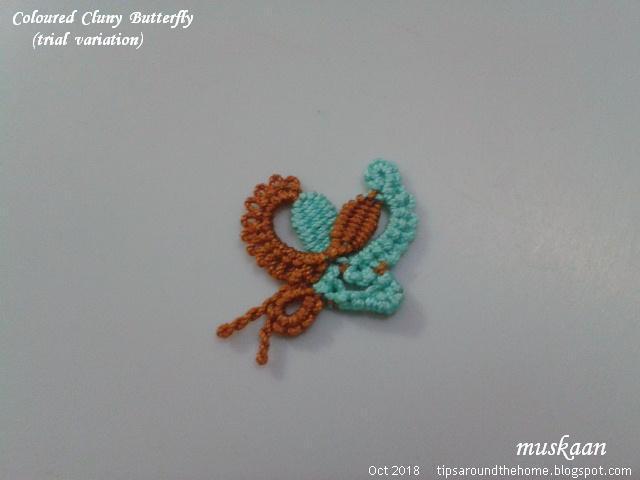
In my previous post I uploaded a school photo day (of all the Coloured Cluny butterflies). But guess what, one of them was too knotty or too shy to face the camera! Found it only when it peeped out from under the looms! 
So here’s a special group photo in celebration, this time with an old teacher standing guard. 
Can you spot which one was missing? (answer at end of post)

A group of butterflies is called a “flutter”, so ...

Question 1 : What should a collective or group of tatters be called ????

This large butterfly is the Butterfly Medallion No. 169 from a 1916 Corticelli booklet. 
I found the pattern here. I followed the rewritten pattern, but some counts are missing.
I’d intended to work it in size 40 white for it’s delicate lacy effect. But with so many cuts and ties, what's the harm in colouring it up to highlight the floral wings?! 

 These are the individual pieces, to be joined later with a pretty trim around each of the ‘florets’. I had to add stitches to floret chains to accomodate the decorative picots.
Re-tatted the body and made twisted (floating) picots this time.

I continued but have already unravelled & re-tatted a number of times. 
With so much back and forth, I am no longer enjoying it. 
So did it get mutilated or transformed? 
To solve that mystery, stop by tomorrow – you may be in for a surprise!

Sparkle Fusion is Usha’s new medallion 
fusing together the dot picot string and variable treble stitches. 
I had the pleasure of test tatting it - her swirl join variation. Worked in Anchor size 20. 
A variable tds creates a nice little peak or scallop on the outer edge of the stitch! 

Scrappy Doily after 5 rounds 
In Anchor Size 20, it is now 4” x 3¼” – I got my oval !!! 
All those suggestions have helped. Too many tatters, unlike too many cooks, did Not spoil ;-P 

Placed on the grid to confirm. 
Click here for earlier musings & notes. 


The truant butterfly !


Question 2 : Should this Coloured Cluny Butterfly be called Ready to Fly butterfly?
One of the names has 2 votes out of 3 (not saying which!), but what’s your choice?

Eager to read your answers ....
flutter by with tatting , always

Tuesday, 25 September 2018

Usha's motifs

Pin It now!
PLEASE NOTE : The sequence of posts has altered when I was updating my posts yesterday, causing my newest post in the Cluny tatting series - hitch the loom - to mover 2 posts down, in case you were wondering or missed it. Blame it on Blooper's (err Blogger's) whimsies.

  
For the last few days I’ve been tatting up a mini-storm of Blossoms Motifs while working on the numerous pictorial presentations. A quick break was in order when Usha’s Split Ring triangle motif turned up.
The near-perfect circular rings attracted me in the first place. And circles that formed an equilateral triangle. It is certainly impressive to successfully convert such a shape into actual tatting.
Large rings - whether normal, split, or scmr - often close into a circle rather than teardrop.


In Lizbeth size 40, the sides measure 1½”.
Having mistakenly made a picot at the corner of the first ring, I repeated it for the other 2 corner rings.
In the pattern all rings are split rings. However, one can start the motif with a normal ring, and add new thread for the 2nd ring and onwards.
I ended with a normal ring, sewing in the tails. But one Can hide tails in the last split ring without sewing.
Future Idea : It would be interesting to see this motif repeated as a magic pathway to form a larger lace fabric! And notice how one can form a diamond by removing 2 and adding 1 ring ?!

Many many months back, I had also attempted Usha's Fringed Petals motif but worked only the first 3 rounds. What I liked about this is how the clever designing of 3rd round lifts the rings of the previous round, ending in a raised and curved textural effect! Notice how they are ‘normal’ in the 2nd round (above pic), but suddenly acquire that 3D look when the next round is worked (pic below)?

However, the working was fiddly and I was not quite happy working through it. I would definitely like to see more of that curving effect, though !! 
My apologies for not completing the motif - I intended to, but never got around to it. I might some day when I find where it's run off to ;-D
This motif also uses long picots with CWJ (lp_cwj), notes for which I shared here and again in the beaded version here.

An enjoyable break, thanks Usha :-))) Now back to some more pictorials - I'm on a roll and want to make the most of it while I can (but can I beat my own record of 15 posts in Sept 2017?!). I hope you will be tolerant through it all :-D

Thursday, 20 September 2018

Clunied !

Pin It now!
2-Tone Cluny Bracelet
aka 
Ganga-Jamuni bracelet

This bracelet is based on the basic Cluny tatting with colour variation pictorial. I chose these 2 colours in order to complement the beads I had – notice the subtle colour striations? And the name was chosen accordingly, though it’s Indian name could be Ganga-Jamuni bracelet – symbolising a fusion of colours and techniques (taking off from a fusion of Hindu & Muslim cultures symbolised by the rivers Ganga & Yamuna).

One can work it in one colour with no need to think of where the shuttles should be. Working with 2 colours brings a degree of interest and apparent complexity since one has to ensure the colours are switched correctly. I’ve employed various little tricks to smoothen the transition between colours, as seen in the process pics. I make the ‘switch’ within the previous element itself. But it is all optional – you can work at will, using SLT if you like.

Materials :

·         2 shuttles (or needles)
·         Anchor size 20 thread in 2 colours 
(I used the light 00366 in shuttle1 & the dark 00896 in shuttle2).
·       Seed beads : 14 beads size 16/0 per repeat. 
For 8 repeats load 112 beads. String 56 beads in each shuttle.
·        2-tone beads : 1 per repeat (+1 for end) size 5/0. 
For 8 repeats, 9 loose beads required.
·         A Cluny loom of your choice.
·         A crochet hook to load the loose beads.
·         Findings for the bracelet.

Techniques :
  • 2-shuttle tatting ;
  • Add findings ;
  • Lock stitch (1 unflipped half stitch; 1 flipped half stitch)
  • Under-Over or Alligator join ;
  • Slope and roll join
  • Cluny tatting ;
  • Working with beads.
Measurements :
3 repeats (including beads) = 5 cms long
Final bracelet (end to end): 1½cms wide and 7 inches (<19cms) long

Abbreviations :
          Sh – shuttle ;  vsp – very small picot ;  b – seed bead

Pattern
Pre-string 56 seed beads on each shuttle and join both shuttle threads.
All tatting is done from the front, progressing from the left to right end.

With Sh1 -
End Ring1 : 10, with finding.
Join Bead.
With Sh2 - Lock stitch to hold bead in place.
Wind loom with Sh1 and weave tally with Sh2 …
Tally: 12 wraps. Emerge from the right side, hiding the colour blip. This ensures that the shuttles automatically switch positions.

With Sh2
Chain: vsp, 2 b 2 b 2 bbb 2 b 2 b 2 rotate , Under-Over join across base of tally ,
2 b 2 b 2 bbb 2 b 2 b 2, join to vsp as shown in pics. This method of joining automatically switches the shuttle positions & hides colour blip.
Join Bead as before.
With Sh1 - Lock stitch to hold bead in place.
Wind loom with Sh2 and weave tally with Sh1 …

Repeat tally and chain motif for desired length, switching colours.

To Finish :
Join Bead as before.
With Sh1 
End Ring2 : 10, with findings.
Tie and cut and hide threads. 

Process
 1. Start first end ring with finding and continue from pic #2.
I tatted 4 repeats before deciding to take process pics. 

 2. Pull up a Sh1 loop through a loose bead, pass Sh2 through this loop …

3. …pull Sh1 such that both threads are now within the bead. Adjust tension.
I first saw this in Usha Shah's Lanyard #4.

 4. Pick shuttle2 and make 1 lock stitch. 
I made unflipped 1st half stitch, and flipped 2nd half stitch.

5. Wind loom with Sh1 and start weaving with Sh2.

6. Ensure that Sh2 is on the right side before closing the tally.
Hide colour blip as described in A6 & A7 .
Pick up Sh2, move seed beads forward on Sh1 to start chain.

7. Make a very small picot at start of chain.
To cross over to other side, rotate work and make an Under and Over join.

8. Complete the chain and make a slope and roll join to vsp as follows :
Pull a SH1 loop through the vsp and pass Sh2 through it…

 9. Tension the threads such that the SH1 loop is NOT pulled back through the picot.
This method ensures that there is no colour blip And the shuttles switch positions.

All odd numbered motifs are worked in above manner.

 10. Repeat Steps #2 to #9, but with the shuttles switched.
All even numbered motifs are worked accordingly, 
starting with shuttle2 in place of shuttle1. 

Continue for desired length, switching colours/shuttles accordingly.

End with another 10 ds ring with finding attached.

TIP : Continue for a longer length to make a necklace. In the middle, after a chain around a tally, add another beaded chain(s) on one or both sides, to act as a pendant.


Clunied !!!
I am so thoroughly Clunied! Earlier this month I bought a set of bathroom mats – not my style, not my colour, and it took us a few days to get used to that large print and relatively bold colour! But guess what – don’t you see Cluny leaves there? Freudian slip or serendipity?! 

happy tatting J