Showing posts with label motif. Show all posts

Friday, 6 June 2025

bridge tatting

Pin It now!

 Like I said in my recent posts, expert and experienced tatters have graciously come to my aid whenever I asked for it. And some have gone a step further by sharing their work and/or discussing techniques and terminology even before I asked.  One such is Judith Connors who has been instrumental in guiding and inspiring me through this past decade. My presentations have been influenced by her despite not being a perfect student.

Early last month, Judith sent me her article on 'Building Bridges' along with a pic of her Fan motif (If you are a member, you can see her model in the Queensland Tatters 2025 group post here - https://craftree.com/forum/threadfs/40423?page=1#258577). We had discussed bridging some years back, too. I was in a state of tatting inertia when this motif instantly spurred me to wind my shuttles and tat since this decorative/functional bridge had been on my trial list since 2019 (https://craftree.com/forum/threads/39159), but never got down to actually applying it. I did do the Rose Motif from Priscilla Tatting Book No.3!   

Bridging Flower Motif - based and adapted from Judith Connors' Fan motif
sharing my process, pattern, and tips/tricks

How many rounds does this motif have? 
Do we cut after the inner 'rosette' round?
Were Celtic shuttles or needle used for the Celtic effect?
Or were 4 shuttles used for the interlaced/overlapping chains? 

Getting back to the present motif, it occurred to me that I could use the element to create overlapping or interlaced chains instead of single lines! So off went my shuttles to confirm. 

Now this post is only about the adapted motif - process, pattern, and tips/tricks. I have pics for a pictorial, along with the background and explanation, terminology and history. Part of it is already explained in the link above (https://tipsaroundthehome.blogspot.com/2022/01/bridging-gaps.html). The rest will be shared in a few days to avoid stepping on Judith's class despite her permission. For the curious, we know the technique as split chain, which is a misnomer and limiting, meant mainly for climbing out.  

My first attempt. I ran out of thread and also realised that if I continued around there would be cupping (I had increased the count in some parts). Moreover the thread had a tendency to unravel, even though it is Anchor mercerised cotton. Cut my losses and started over.

Design Tip starting with a magic circle: Since I wasn't sure how big the central ring should be, I preferred to use the  magic circle (the multiple threads are to make the picot large enough to join to later). Wrap the thread around the magic circle and start the first inner chain. End each chain with a lock join around the circle. 
TIP to keep last half-stitch flipped: The marker on the right - since each bridge is a long chain, by the time it was completed, the last half-stitch often unflipped and locked the core thread below. This temporary marker on the core thread prevents it from happening. 
After a few repeats, I pulled on the magic circle to see whether it was working well. Successful; no cupping or ruffling.

Bridging Flower Motif pattern
  1. Only 2 shuttles are used with continuous thread and the entire motif is worked in one pass. 
  2. 8 repeats and all chains in this prototype. No space for a central ring. In Anchor mercerised crochet cotton size 20 (equivalent to Lizbeth size 10), the motif measures 6.5cms in diameter.
  3. In the image above, I have split the sequencing (A to F) to indicate where there is a change of direction , shuttles, or element. 
  4. The entire motif is worked clockwise from the front.
  5. Chains C & E are bridging chains aka bridge, bar. 
  6. I used a 2cms folded picot gauge to measure the bare thread for bar/bridge before lock joining it to a picot on the previous element.  TIP:  I found that making a lock join by pulling the loop down instead of up through the picot makes a neater start to the bridge.
  7. These bars are covered with Dora Young's Knotless Method or tied stitches worked from left to right. I worked them all from the front, though there are several variations of the method. 
  8. NOTE: The arrows for bridges indicate where the thread from shuttle2 goes, not the direction of working the stitches. 
  9.  While making each subsequent bridge, keep it in FRONT of the previous chain so that the overlapping is synchronised.  
10. For the bridges on the last rosette chain, TWO each had to be made! The above image shows the first pair done and the 2nd pair is being bridged.
After working the first bridge exactly like ch-C, then one more bridge is made joining to the first rosette on the right, at the base of the very first bridge. The stitches are then worked using the Australian method. This, too, is worked from the front, but in the opposite direction (right to left). Repeat this for the 2nd pair of bridges. 
Important: To maintain overlap, pass the shuttle under and over the last bridge both times.

11. After the motif is finished, and both threads are in the center, I threaded them together and inserted the needle through the picots held open with the magic circle, and kept removing the threads from the circle. Final tie, cut, and hide ends.
Option: One can use metallic thread or colour-coordinated thread for the magic circle and leave it be after tightening the slip knot. Then hide all ends - from the motif as well as the circle.

 
Possible Variation: However one can use a central ring of 10 small picots separated by 1ds and make a 10-repeat motif. 
Future Idea: Can we use this bridging technique to work block tatting over or across an element?

I will try to write the pattern in a more lucid form when I share the pictorials and other details. Here I wanted to focus more on the process.

Technique Option: Also, instead of the bridges going from right to left, we can move forward. Thus from chain A we can work the 'bridge'  like a floating chain or single shuttle split chain, leaving a picot open with a paperclip to join to later. 

Bridge tatting or bridging encompasses a lot more, not all of which is outlined here. In this post and motif, the bridges are ornamental - a design element; they can be functional too. Hopefully I will be able to cover it all in the pictorials post. 

I cannot thank Judith enough for her valuable mentorship and guidance since we 'met' at InTatters a decade ago! We may not always agree but the discussions are always lively and passionate!

Wednesday, 4 June 2025

design tatting

Pin It now!

 Its been a while since I updated the entries that came in for my DAL 2025 challenge. I shared the first 7 versions (with patterns!) here - https://tipsaroundthehome.blogspot.com/2025/03/colour-me-happy.html. Now, the next one to start the challenge was Donna McDade who made 8 versions (3 up from last year's DAL)! I will dedicate an entire post to her next time, since there is a lot of good news to share and celebrate. Meanwhile, these are what my other wonderful participants sent in .....

All versions of Muskaan's DAL 2025 Challenge can be found here -https://docs.google.com/document/d/1mQmdXWXQmcbXQ48nRz9FBeTJf_DoJqKz/view


Anita Barry 

See the dense 3rd round? Those are Louise Uteg's stacked rings from her 1970s original doily!  
I think this 4-round version looks like a nice Christmas wreath.

Padma Mandayam
Round 3 was inspired and adapted from Lella Loops' version, with the addition of a 4th original round.
Written pattern is shared in the google doc.

Janet Crow
A colourful spring version with inclusion of butterflies and more rounds. She graciously presented the pattern in a PDF. https://drive.google.com/file/d/16wfGTDxjNovnfWMYmZfqIgn1tmwDzIgY/view
The motif glued to her hand-sewn bag in which she carries her tatting supplies to meetings, etc.!

Lillyan
Janet's 14 year-old talented granddaughter is trying her hand at many crafts, including tatting! Her version is like clubbing where she adapted and applied Karey Solomon's Cat & Mice pattern. Pattern will be shared if they get due permission.

 Margaret Davies
Despite all the curve balls life throws her way, Margaret has valiantly participated again. She shared her WIP here - https://margaretsdesignercards.blogspot.com/2025/03/happy-international-tatting-day-and.html
Her 5th round ruffled and she decided to cut it off. While this modification lays flat, she might tweak the stitch count at a future date. Hence no pattern shared yet.  

Elisabeth Dobbler   worked the initial 2-round motif but was discouraged with the way her picots came out. Shelved for the present. The WIP pic is in the doc.

Join in whenever you can! This is open-ended. Perhaps I will also climb out of my limbo to add another round or two to my own version.

Words fail to express my gratitude and happiness to all participants! 

Related Posts
https://tipsaroundthehome.blogspot.com/2025/02/dal-2025-challenge.html  Start the challenge any time you wish, and send me your version!
https://tipsaroundthehome.blogspot.com/2025/03/colour-me-happy.html  First batch of DAL 2025 versions

Friday, 18 April 2025

hospital tatting

Pin It now!

 Its been over 10 years that I took any tatting along with me. This time I felt like taking my shuttles along to my doctor's appointment. In our minds it was supposed to be a routine visit after 6 months and since everything was stable, we thought the regimen would just continue. We spend anywhere between 3 to 5 hours there, mostly just sitting around. 

A question that has constantly plagued me .... Which came first - patient or patience?!

So anyways, turns out we started a new line of treatment (basically injections at stated intervals) in order to get rid of the oral steroids. I only have a 50/50 chance but any little decrease is better. So off we tromped to the hospital again the next day which required a few hours of hospitalisation for observational purposes, and along came my shuttles again. Following are the motifs I tatted as a patient patient. All in Anchor size 20.


I gave away a couple of butterflies. One lady noticed the hook on my shuttle and asked whether this is how crochet hooks are made nowadays! I explained to her that it was a shuttle used to make tatted lace. She bemoaned the fact that nobody wants to wear or use handmade stuff any longer.


I kept each motif different. Couldn't bring myself to repeat the same counts, LOL.
All tatted with single shuttle or one thread aka single tatting.
These are all very generic patterns hence feel free to copy-tat ;-P

These came home with me. I have decided that it is better to glue them on cards or bookmarks and then gift randomly. Easier than explaining what one can do with the motifs, how to wash and block, etc. So, whenever I'm in the mood, I'll be gluing them to card stock and adding a bit of background. 

And while I had no side-effects from the injected biologicals, I did come home with viral flu which later shifted to my stomach and I lost about 10 days doing hardly anything due to the fever. Back on track now and tatting up samplers, etc., writing an article, creating PDFs, and catching up with blogs.

Friday, 28 February 2025

DAL 2025 challenge

Pin It now!

 Well, I wanted to show some techniques/effects for glossary entries and decided to create a motif to incorporate them. It resulted in a very simple motif, nothing fancy. It may not even be original though I did not refer to or look for any patterns. and it's still a work in progress. 

I kind of like how it looks so far and it could very well be the starting center for a larger motif, if you wish to participate in yet another Design Along (DAL). Tat this two-round motif and then design as many rounds as you wish around it. Sharing your stitch count/pattern is highly appreciated. All will be shared in my blog.

NOTE: I started with a single-shuttle rosette with the intention to cut away later rounds and reuse it for other samples, hence I cut off the thread and hid tails. However, you are free to climb out by making the 6th ring a split ring. Remember to use two shuttles for continuous tatting.

Muskaan's DAL 2025 Challenge


Round 1 - Rosette - one shuttle or two shuttles, continuous thread
ringA: 5-6-6-5. do not reverse work
ringB: 5+6-6-5. do not reverse work
Repeat ringB till you have a total of 6 rings, joining the 6th ring to the first ring.
Cut and hide ends OR climb out with the last ring as a split ring.

Round 2 - Curled Rings  (CR)- one shuttle and ball or continue with two shuttles.
CR: 10-10. Curl around any rosette ring. 
Chain: 2 (-2)×9. Repeat all around. 
NOTE: Picots are 3.5mm high or open picot is 7mm long. [My motif is worked in Anchor size 20, which is similar to Lizbeth size 10).

Hope you like the motif and would be interested in designing and tatting more rounds. Leave a comment or contact/tag me on Facebook or Instagram.

Take it away, friends!

My next round is already decided which is why I have all those picots in the 2nd round. Will share when it is finished. 

Some of my previous DALs can be found here -  https://tipsaroundthehome.blogspot.com/search/label/DAL

And tutorials/videos for all techniques can be found here - https://tipsaroundthehome.blogspot.com/p/tatting-resources.html


UPDATE (12th March 2025) - the first batch of lovelies! -- https://tipsaroundthehome.blogspot.com/2025/03/colour-me-happy.html

Monday, 8 July 2024

E44 motif arrangements

Pin It now!

 Ninetta has been showcasing the E44 cover doilies (links at the end) from our tat-along in January last year and asked me to write something for her final post on the topic where she will share her pattern for continuous tatting. Had to refresh my memory and discovered I hadn't posted the motif arrangements mentioned in my post here -  https://tipsaroundthehome.blogspot.com/2023/02/the-cover-covered.html So, like Ninetta said, better late than never. 

One of the advantages of working in pieces rather than in one pass is that one can play with arrangements and combinations! So without much ado, here are some quick pics I had taken back then. Perhaps it will inspire some one to tat one or more. 

Pattern : Motif G from E44 cover doily TAL Jan2023https://drive.google.com/file/d/1km6Fy-tS-1o5LRW2TMI-KFb3KWlzRiCp/view

Four motifs in a closed circle

Two individual motifs that look like they are flying away! Angels? Birds?

A single motif fits nicely under Round 2 of the doily. 

Holding hands 

Same arrangement but with an overlap

Repeats of the above for a bracelet or belt

Straight border or bookmark?

A ladder or tower arrangement

Close-up of above. Good for a bookmark.

A different tree-like arrangement of four motifs.

A more symmetrical arrangement for a cross.


In my previous posts, too, some ideas from this doily have been shared. Links at the end. 

Hope you enjoyed these. In single colour, with beads, or in different colour combinations, and with a bit of tweaking/adaptation some of these could be brought to life.
So many possibilities but so little time.

Related Posts
https://ninettacaruso.blogspot.com/2024/06/cover-doilies-roundup-1.html
https://ninettacaruso.blogspot.com/2024/07/cover-doilies-roundup-2.html
https://ninettacaruso.blogspot.com/2024/07/cover-doilies-roundup-3.html

https://tipsaroundthehome.blogspot.com/2023/01/tat-along-doily.html
https://tipsaroundthehome.blogspot.com/2023/01/double-juggle.html
https://tipsaroundthehome.blogspot.com/2023/02/the-cover-covered.html

Saturday, 9 March 2024

exciting firsts

Pin It now!

 Editing the book, 'The Six T's of Shuttle Tatting' is creating opportunities to try out exciting techniques and effects, long in my to-try list. And learning a Lot in the process. The author, Net Best, had created one glossary for her book, and another more comprehensive glossary for her group and possibly for later digitization. We decided to combine both to make the glossary as updated as possible, which was her main goal. This also means we have to add missing sampler images. I have reached out to several of my tatting friends to contribute some specific pics (with due credit), and so far everybody has graciously given permission. 

While I won't be sharing all pics, here are a few - I love the way these turned out!  

1. BROOMSTICK PICOT - 

I followed Karen Cabrera's Lesson #104 - https://youtu.be/yp5W6ZrDF9I

And since the long adjoining picots need to be joined to create the effect, I allowed my shuttles to create this little motif - like a flame within a flame. 
Is it interesting enough for the pattern to be shared?
Although I'm sure there are tons of tatters who will simply count the stitches and tat it up, and we all know who will get the credit ... yes, Pinterest, LOL. 
I used really thick thread (probably a size 3) so that the effect shows up in thumbnail pics.


2. DANCING PICOTS -
I followed Karen Cabrera's Lesson #107 - https://www.youtube.com/watch?v=DX7Ig978Xg4
This is a variation of the Daisy Picot and requires 2 shuttles.
I encapsulated the 2nd shuttle thread within the first half-stitch at the start and the last half-stitch at the end. (Judith Connors' tip).
While I tatted over the shuttle 1 tail at the start, I didn't do it for the Sh2 thread, although it can be done.
NOTE: All picots here (bare threads) can be both decorative and functional (for joining).


3. INTERWOVEN  SPLIT  RING  BRAID / CORD -
This 2-shuttle variation is attributed to Wally Sosa, and I referred to Jane McLellan's Choker patternhttps://janemactats.blogspot.com/2012/04/choker-pattern.html  [In the right panel on her blog page, you can find the pdf links for the lovely beaded versions of choker as well as a necklace].
All split rings are 8/8. This time I used Anchor size 20.
It comprises a red foundation cord tatted to desired length. Then the teal cord is worked, weaving the red cord alternately over and under through the open ring before it is closed. 
It is such a lovely piece! However, I have no idea how to use it. It is a bit short for a friendship bracelet coz I ran out of thread and don't wish to add more. 
Any ideas how I could use it?


I hope you enjoyed seeing and reading this, and will try to use these techniques in future tatting. And adding beads for even more variations. I certainly hope to incorporate my new learnings some day. For the present, I am busy tatting more samplers and working on the book, to the exclusion of all else. If I don't concentrate on it it will never get done. Our target is to finish it before year end.

And there are more to share ....

Monday, 15 January 2024

barely in time

Pin It now!

This pattern was long since completed and waiting to be blogged on the 14th of Jan when we celebrate the entry of the sun in Capricorn. generically called Uttarayan (movement towards the northern hemisphere), a harbinger of spring and summer. A pan-Indian festival with numerous regional names and slightly different ways of celebrating. 

unblocked motif

It also indicates the beginning of the harvest season. Diversity apart, sesame or til and jaggery or gur are the two common ingredients throughout, though the resulting sweet is prepared differently in different regions, but distributed around. It is only in Punjab, where a bonfire is lit to celebrate 'lohri', that corn, too, is popped and distributed. This is why I was waiting to share the pattern. This year both 14th and 15th were celebrated, hence I'm really not that late, LOL.

pinned picots

You might remember the range of design possibilities of one motif from Endrucks' pattern #15 shared here - https://tipsaroundthehome.blogspot.com/2023/12/the-power-of-15.html

uncut picots

This time it is another doodle called E15 Ear of Maize, which with minimal changes can become a lavender sprig, any other inflorescence, wheat or other cereal spikelet, or even a feather. Perhaps you can come up with another idea?

snipped and trimmed picots

I have used 3 colours, but only one shuttle throughout. And you don't even need to hide the tails of the husk and stem! By force of habit, I forgot to do it in both models and hid most tails. Just leave ample lengths at the start and finish and trim later.

Hope you like this and enjoy tatting it. 

E15 Ear of Maize pattern pdf  https://drive.google.com/file/d/1GEms2X1Xmk1YHwrDz_3F7FiDLgIVpmz-/view

second motif
The motif actually jumped out when I saw Paola Emilia Rotuletti's E15 Star pattern worked in shades of yellow by other tatters!  

Add findings and we could have a pair of earrings or pendant? Perhaps even add beads to the kernels?

Tuesday, 9 January 2024

what a heart

Pin It now!

Hearts are great motifs to learn and apply new techniques, practice and hone skills, embellish, and create new designs! Look at where this tiny little heart has travelled so far .... without forgetting it's origins!

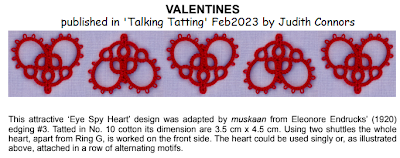
It all started with Endrucks' pattern #3 (1920), an edging which was reworked and presented by Anita Barry (2020), which inspired AlenAlea Rako to turn it into squares (2021), from which I espied a heart (2022) and Sue Bradham saw a butterfly (2022).

A few months later, when we chose this heart pattern for one of our games (Pretty Me Endrucks Aug2022), more adaptations came about! These include a key chain by Marina MadJar tatting, an enlarged heart motif and one-pass bookmark by Margaret Davies, a coaster by Ninetta Caruso, and a butterfly by Stephaine Mc (Tattimic). Pattern links here - https://tipsaroundthehome.blogspot.com/2022/09/aug-roundup-1.html

During our game and later, several arrangements were shared including 3-in-1 Earrings, Collar, Bookmark, and other ideas. https://tipsaroundthehome.blogspot.com/2022/09/playful-hearts.html


This heart continued to inspire and Ninetta, through her coaster, designed the Tat Me Snowflake (2 versions) in Nov - https://drive.google.com/file/d/1ZENvdgxihM0YI3Ar_UxP9lqRwprmFotP/view  

2023 started with the pattern being tatted and published by Judith Connors in their Talking Tatting, Feb2023 newsletter. She kindly permitted us to share her complete article  - https://drive.google.com/file/d/1aJ34xgaE67A0aI8LTj2xYpvx-NQLrBx1/view 

Later in June, Michelle Forclaz made additions to the hearts to make the Inside Out Flowers. https://drive.google.com/file/d/13L0NCvkqJM94Bnbnbf4ogVUzhhYjuaSN/view  The pdf also shows a few other adaptations she tried such as a little teddy bear, fox head, and butterfly.

Meanwhile tatters have often picked up the pattern and shared their versions, many with beads, and applications. And 2 new patterns emerged in December.

E3 Heart Butterfly by Jiamrat Supapol https://drive.google.com/file/d/19DWVrfGhrbb-l80icUsFiq4msQhmJTjl/view

and the E3 Heart Square Motif by Reiko Akamatsu where she adapted the E42 doily center to fit snugly inside the square. https://drive.google.com/file/d/1YxBre5DlW3RcW3ZJFY7-VrDnzvWeuN6m/view


For more heart derivatives, check the Hearts Directory - https://docs.google.com/document/d/1MpYw9XMB8Asz8zusj1ZpHvX8A8Ww424-rEVORtxcL1w/view
For more E3 pattern derivatives, check out the other Directories as well. We now have a composite doc listing all directory links (making it easier to reference, etc.). Endrucks Directories  - https://docs.google.com/document/d/1w1TZBg-HIzseGEUoJ-rko7tNbtSgZY5A18Oy2Y9Hh0Y/view

Please note that in this post, I have included pics of only the 'new' models that haven't been shared here so far. 

Hearty thanks to each and every Endrucksian mentioned here! Hope you continue your exploration and experimentation, sharing the beautiful results.