Showing posts with label tatted fringe picot. Show all posts

Monday, 26 August 2024

starburst fringe

Pin It now!

In my last post I had shared several adaptations of Corina Meyfeldt's Tatted Fringe. Lots of ideas swirled in my head to try out a quick practice pattern, applying all three adaptations viz., tatted fringe, spot/luggage tag fringe, and tatted fringe picot. While I am not fully satisfied with the outcome (it looks especially messy in photographs), there is a lot of scope to play and try something better and different.
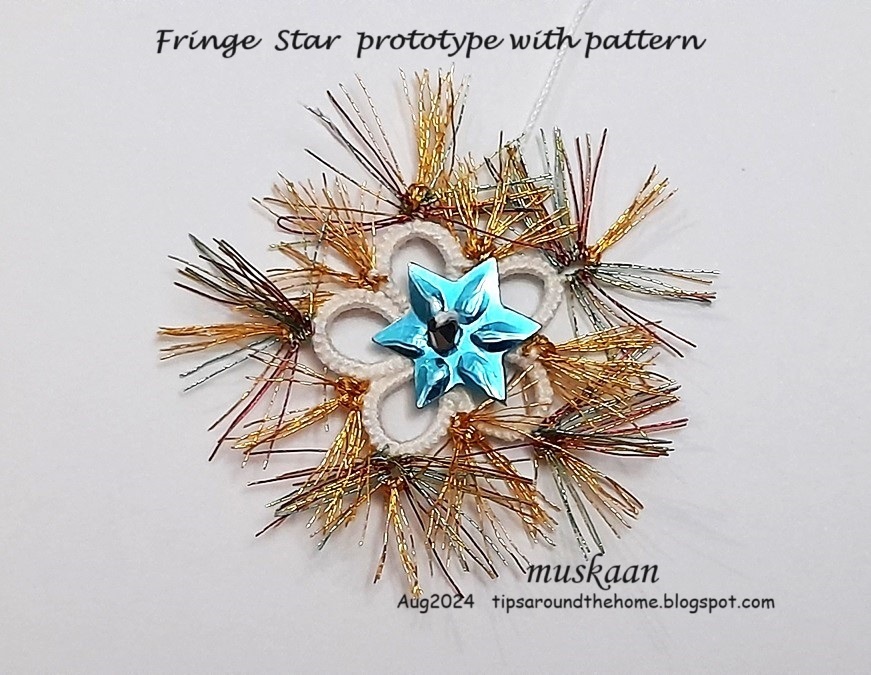
This is the Fringe Star - a kind of practice pattern with a lot of possibilities. 
I got so involved that I forgot to take some process pics.

I started by tying the white (Anchor size 40) shuttle thread with metallic Madeira (Astro 2, No.40) and tatting a chain with measured adjoining picots. This took longer than I bargained for coz the metallic thread is really really fine. However the colourway is beautiful with a range of shades.

Now since the thread was so thin, I feared the picot might turn out to be too small. Hence, after snipping off the tips and dividing them into 5 clusters (eyeballed, not counted!) I divided each further and added a luggage tag in the center of each using Sanbest #34. 
And I wanted a small cluster in the joining picot as well. So, I direct tatted 3 adjoining long picots at the start and between the 5 clusters. 
Future Idea 1 - My original idea was to make layered rings with graduated fringe picots. But somewhere along the way, I decided to simply add the fringe between rings for now.
  
With all the prep work finished, I pushed the clusters further into the shuttle and started tatting. The star body is a simple rosette of 5 rings (6 - 8 - 8 - 6)x5 joining to adjoining ring(s).

However, before starting the ring, bring forth the fringes (Fr) into the loop for the ring.
    For first ring tat 6ds, Fr, 8ds, FrPicot, 8ds, Fr, 6ds. 
    For next 4 rings, tat 6ds +(join to ring: push the Fr towards the top of the picot and join below it), 8ds, FrPicot, 8ds, Fr, 6ds.
    Join last ring to first.

Insert sequin and bead and sew down with the tail and hide the tail end or use it to suspend the star. Trim the fringes.
I wanted a starburst kind of shining aura, hence the long fringe. It is very sparkly when seen in person.
I repeat, it looks especially messy in pics, but there is always room for improvement. 
Future Idea 2 - Use a circle of tatted fringe for the base of a rakhi!!! Or how about fireworks?!

OBSERVATIONS - I'd like to point out that each adaptation has its advantages and this little pattern will help you realize this. 
  • For a fringe picot it is advisable to tat the chain as in Corina's original. 
  • But for spot treatment or to sprinkle a different colour randomly, luggage tags are preferable. 
  • Now if you need fringes on both rings and chains in FS/BS tatting, then you will have to decide and plan beforehand. Decide the number of fringes needed. Then tat the chain in segments of DS and RODS (reverse order DS). 

Future Idea 3 - Tat a motif with spot fringes in rainbow colours! 

Saturday, 24 August 2024

on the fringes

Pin It now!

 Or not so much on the fringes? 

FRINGE(s) is a kind of decorative edge made of lots of hanging threads.  

FRINGE TATTING usually involves very long adjoining picots at the outermost edge of the piece, which are then cut and trimmed to size. These may be frayed if needed. (thanks to Anita Barry, who also shared a pic for the Glossary)


TATTED  FRINGE  AND  ADAPTATIONS -
Then came the Tatted Fringe shared by Corina Meyfeldt in November 2015 here - http://cmhandmade.blogspot.com/2015/11/fringe-sort-of.html . 
Unlike the former, the tatted fringe requires an auxiliary or spare thread.
She first tatted a chain with long adjoining picots on the main core thread; then snipped and trimmed the picots, spread them out and wound the shuttle to start the project. Snipping the picot tips separates the individual stitches.  Corina brought forth each fringe from the core thread as required. 

Tatted Fringe on Picot -
Notice that in the above WIP ring, I placed some of the fringes on the ring loop or left-hand thread while others remain on the shuttle thread. Thus we have the option of placing the fringe on the picot as well as on the core. Just like one would do for beads!

The above tatted fringe (made of metallic thread) is positioned on both the core as well as picot threads.
An extended application of Corina's method.
This can be done on rings as well as chains and gives a thicker fringe.

Spot Adaptation (using luggage tags) -
In December of the same year I shared my spot adaptation, with pictorial, here - https://tipsaroundthehome.blogspot.com/2015/12/fringe-benefits.html
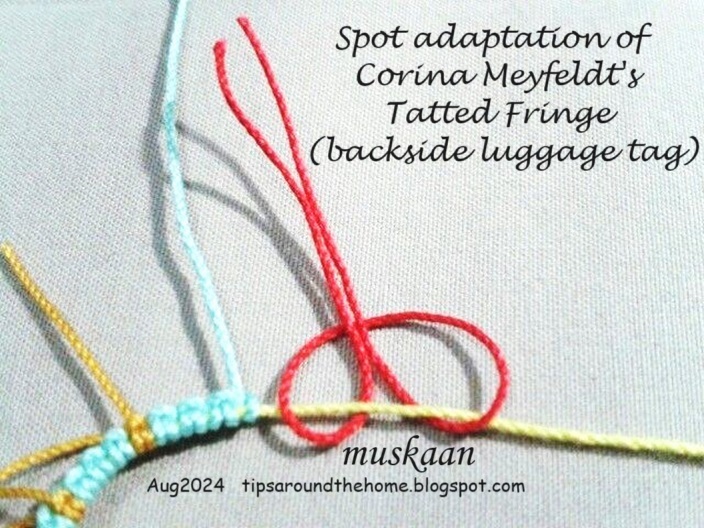
Instead of tatting a chain of long picots, I used luggage tag loops to make a lark's head knot on the core thread wherever and whenever required. These scraps can be tied frontside or backside (see next pic).
Besides, we have the freedom to include as many colours and threads as desired. Again, though not shown, the tag can be tied to the left-hand thread (on picot) or the core thread.

Seen together on a chain. Look closely and you will see that I brought the left-hand thread over and between the luggage tag, thus securing the fringe. 

NOTE: Since the tatted fringe makes a stitch on the core thread, care must be taken with the total stitch count in a pattern not written for a fringe. 

Tatted Fringe Picot! -
Now this is probably something new. Or at least I haven't come across it yet.
Since I had a few fringes left on the shuttle after tatting the first sample, I tatted a second ring but put all the fringes on the loop around the hand. And made a picot! 

UPDATE (Dec2024)
BEADED FRINGE - aka Beaded Stem (Corina Meyfeldt) and Single File Beaded Picot (Nina Libin)


So, that's all for now folks. Editing (and tatting samples for) the book Six T's of Shuttle Tatting, by Net Best, is taking me to the fringes of the tatting world and tatting literature! It is making me delve deep and wide and sometimes inspiration strikes and I go off on a short explorative excursion. Hope you enjoyed this short journey and can find some applications for these fringes. And if you have any new  technique or effect, please let me know so that it can be included in the Glossary.