Showing posts with label tatted star. Show all posts

Monday, 8 December 2025

more E15 leafy stars

Pin It now!

 Stars started shining almost immediately after I had posted about Manju Talekar's E15 Leafy Star here - https://tipsaroundthehome.blogspot.com/2025/10/leaf-to-star-spinoff.html. It is my fault that I couldn't blog about the new entrants sooner. So let's go chronologically (all from Nov 2025) ....

Stephanie Wilson 

It was such a pleasant surprise to find this beauty waiting for me in my email inbox! Here's what she said -
I couldn't resist. This is size 40 Lizbeth thread, yellow ombre to suggest 'twinkling,' although that's probably a very BIG stretch of the imagination. I left out the decorative picots for a smoother look....more like a star, to me, at least.
For a Christmas ornament, it would probably be better to tat in size 20 thread.

Pop Maria Lenuta
And this one twinkled in my blog feed! Read what Maria writes in her blogpost -
https://maryshandmade.blogspot.com/2025/11/fulde-de-zapada-leafy-star-by-manju.html

Jane McLellan

You can imagine my excitement when these emerged in my blog feed! Read what Jane has to say in her blog - https://janemactats.blogspot.com/2025/11/seeing-stars.html

And they only multiplied!!! Here's what Jane posted - https://janemactats.blogspot.com/2025/11/still-tatting.html

And the stars are finally settled in their very own milky way! 
https://janemactats.blogspot.com/2025/11/one-done.html

Katie Verna
Are you wondering whether the star is partially hidden behind some clouds? Here's what Katie writes - 
My little version of the Leafy Star--ran out of the red thread, so thought to add green at the bottom to make it like a flower, but it looks more like a demon or fierce animal with a beard! Fun little piece to tat!

I suggested adding a few whiskers to bring out the animal better :-D 

 Padma Mandayam

Padma was so inspired by Katie's version that she worked her own star, too, in variegated thread. Clearly the pattern lends itself to variegated shades as well.

Elzusia
Elzusia did not exactly tat the star but she showed us her collection of fall leaves one of which is the E15 Leaf Doodle that inspired the star. Check out her blog post here -https://mojeroznerobotki.blogspot.com/2025/11/jesienne-liscie.html
UPDATE (8th Dec2025): Somehow I missed Elzusia's post where she actually tatted this star in metallic thread! I am so glad she left a comment with her link - https://czasnafrywolitke2.blogspot.com/2025/11/srebrzysta-gwiazdka.html

Is it any wonder I am seeing stars (of the brilliant, optimistic, happy kind) everywhere?! 

Thank you all so very much for your wonderful 'gift' of Endrucksian tatting

ps: I want to apologise for not responding to every comment left in my blog over the past several weeks and for not leaving a comment in other blogs. I do read all comments and blog posts, but due to a large amount of time already spent in front of the screen deep in other commitments, I am taking a bit of break where and when possible. It is also the reason why I am not blogging as frequently as I'd like or want to.  Thank you for your patience and support - always treasured 💕💕💕

Friday, 31 October 2025

leaf to star spinoff

Pin It now!

A large majority of our games in the FB group have ended up with more spin-offs and patterns than what we originally went in with. The same happened with the #LeafMeEndrucks Sep2024 game where you got to see the beautiful versions collated in four roundup posts (links at the end). One such is a star (which started out as a starfish) born from the combination of five E15 Leaf Doodles #2.

Following is the E15 LEAFY  STAR  by Manju Talekar (Sep2024)  pattern PDF link -   https://drive.google.com/file/d/15PQwxt3BXZkEv7kPSRK_U091VnSsqTTj/view

Manju sent in her drawing with the stitch counts, notes and tips and we soon converted it into an Inkscape diagram and complete presentation.
The negative space in the center created when 5 leaves are joined, is filled with a simple medallion.
NOTE: The model can be tatted continuously (in one pass) by climbing out of the center motif with a split chain and climbing into the first arm with a split ring. This option is provided in the PDF.

It didn't take long at all for some members to jump in with their versions!

Gelsomina Carbone - (Nov2024) 


Now isn't this interesting how Gelsomina arranged the star as a flower with a large bead in the center!

Jessica Hanson - (Oct2024 and Oct2025)

Notice that she did away with all decorative picots, giving clean outlines and a sharper star shape!

Such lovely backgrounds!
Jessica tatted her white version last year and showed us the two pink models earlier this month. She considers this one of her favourites!
Notice that the lower model has beads - minimalist but strategically placed. Let me repeat what she asked in FB to help her decide, and perhaps you can pitch in with your preference -- 
"To bead or not to bead? Which do you like better?"

Liberata Cacciottolo - (Nov2024)
This version in metallic thread looks quite sparkly with relatively long picots and the shadows seemingly uplifting the model!

Mela Cabo - (Feb2025)

Another lovely shade of metallic thread and a nice background . 

Silvana Buonvino - (Nov2024)
Silvana's silver center and gold arms highlight the pattern in a way different from the monocolour ones.

Now that it is stars and snowflakes time of the year, we expect plenty more models to fall into our lap!


Now this E15 motif is so versatile that I myself adapted it to one or more versions of leaves, tree, candle flames, bell, poinsettia, maize, etc. etc. And a year before this leafy star, Paola Emilia Rotuletti created the E15 Star (Oct2023) which was also used in the Dec2023 game. While Ninetta will share all pics and details, you can find Paola's version in our Snowflakes and Stars from Endrucks Direectory here -https://docs.google.com/document/d/1NKMYK3i4PI9pRmyotGCk5GkV2xcDS_hSgJfh322EQFQ/view

Moreover, if you remember, Manju herself also created the enigmatic E15 Ganesh, E15 Holly Leaves, etc., during the game.

Please use the hashtag #Endrucks1920Project, and cite the name of the designer and pattern when you post your version on any social media platform. And the hashtag for this game is #LeafMeEndrucks.

Thank you everybody, for making this all worthwhile and keeping Ninetta and me happily busy :-) Now if only we could tat all of the wonderful ideas and patterns that keep coming in ;-D

Related Posts
https://tipsaroundthehome.blogspot.com/2025/10/leaf-me-roundup-1.html
https://tipsaroundthehome.blogspot.com/2025/10/leaf-me-roundup-2.html
https://tipsaroundthehome.blogspot.com/2025/10/leaf-me-roundup-3.html
https://tipsaroundthehome.blogspot.com/2025/10/leaf-me-roundup-4.html
https://tipsaroundthehome.blogspot.com/2025/08/festival-tatting.html

Monday, 26 August 2024

starburst fringe

Pin It now!

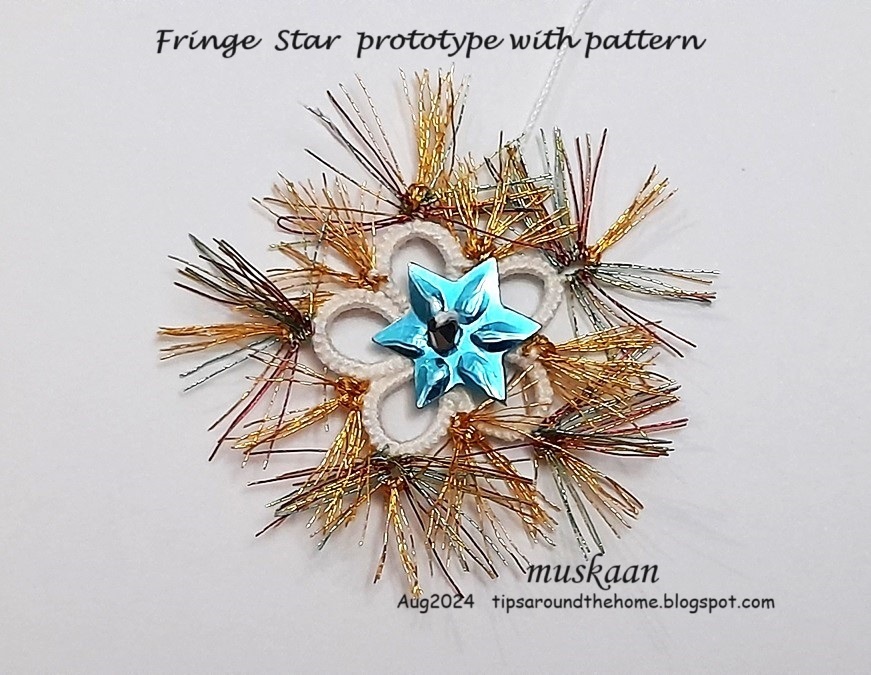
In my last post I had shared several adaptations of Corina Meyfeldt's Tatted Fringe. Lots of ideas swirled in my head to try out a quick practice pattern, applying all three adaptations viz., tatted fringe, spot/luggage tag fringe, and tatted fringe picot. While I am not fully satisfied with the outcome (it looks especially messy in photographs), there is a lot of scope to play and try something better and different.

This is the Fringe Star - a kind of practice pattern with a lot of possibilities. 
I got so involved that I forgot to take some process pics.

I started by tying the white (Anchor size 40) shuttle thread with metallic Madeira (Astro 2, No.40) and tatting a chain with measured adjoining picots. This took longer than I bargained for coz the metallic thread is really really fine. However the colourway is beautiful with a range of shades.

Now since the thread was so thin, I feared the picot might turn out to be too small. Hence, after snipping off the tips and dividing them into 5 clusters (eyeballed, not counted!) I divided each further and added a luggage tag in the center of each using Sanbest #34. 
And I wanted a small cluster in the joining picot as well. So, I direct tatted 3 adjoining long picots at the start and between the 5 clusters. 
Future Idea 1 - My original idea was to make layered rings with graduated fringe picots. But somewhere along the way, I decided to simply add the fringe between rings for now.
  
With all the prep work finished, I pushed the clusters further into the shuttle and started tatting. The star body is a simple rosette of 5 rings (6 - 8 - 8 - 6)x5 joining to adjoining ring(s).

However, before starting the ring, bring forth the fringes (Fr) into the loop for the ring.
    For first ring tat 6ds, Fr, 8ds, FrPicot, 8ds, Fr, 6ds. 
    For next 4 rings, tat 6ds +(join to ring: push the Fr towards the top of the picot and join below it), 8ds, FrPicot, 8ds, Fr, 6ds.
    Join last ring to first.

Insert sequin and bead and sew down with the tail and hide the tail end or use it to suspend the star. Trim the fringes.
I wanted a starburst kind of shining aura, hence the long fringe. It is very sparkly when seen in person.
I repeat, it looks especially messy in pics, but there is always room for improvement. 
Future Idea 2 - Use a circle of tatted fringe for the base of a rakhi!!! Or how about fireworks?!

OBSERVATIONS - I'd like to point out that each adaptation has its advantages and this little pattern will help you realize this. 
  • For a fringe picot it is advisable to tat the chain as in Corina's original. 
  • But for spot treatment or to sprinkle a different colour randomly, luggage tags are preferable. 
  • Now if you need fringes on both rings and chains in FS/BS tatting, then you will have to decide and plan beforehand. Decide the number of fringes needed. Then tat the chain in segments of DS and RODS (reverse order DS). 

Future Idea 3 - Tat a motif with spot fringes in rainbow colours! 

Monday, 19 December 2022

before and after 3

Pin It now!


 Like I said earlier, this month's game had a wide range of stars and snowflakes patterns and possibilities shared by Krystyna Mura. I would've liked to tat plenty more but doubt I'll have it finished by 22nd when the contest ends. This is the 3rd one I enter in the contest where some have reached close to 30! 
This 8-pointed Star from the Filligree collection is supposed to be worked continuously, starting with the outer round and climbing into the inner one.
This is my Poinsettia version, as the colours might attest.

E12 Filigree Eight-pointed Star by Krystyna Mura (2021) -https://drive.google.com/file/d/1o_qb8Z1CkHq_nOQ-90k_QWpnhrRb0V_d/view

Several factors contributed towards my tatting it differently - in 2 separate rounds, starting from the inner one. I started with a Floating Beads string which remains unattached except at the starting point.

One factor was the confusion over the mock rings. Hence I showed how I'd go about it. Ninetta went about it differently and later tried this method too.
All beads were pre-strung on shuttle #2.

After each SCMR, I make an unflipped half-stitch or hitch. It is invisible yet holds the mock ring in place without any possibility of distorting it's shape. It is something I've done for a very long time now.

It is only when I took pics that I noticed the flipped ring on the right side. 2 beads should've been on the outside.
Tatted in Anchor size 20 with a mix of beads and crystals.
It was easy to add the missing yellow bead while working the outer round. I was supposed to break the extra bead on the inside but didn't get around to it.
Now, here's something different I tried which could've been better (it distorted one of the chains/arms) - In order to complement the green on the tips, I wanted beads on the inner trough as well but these needed to be on the core thread! I really hadn't thought it through (which is not my strong point anyways!).
For one, the tension of the core thread should be extremely well-calibrated. 
2nd, the sequence goes as follows if we want the triangulation --- 
pull down the loop for joining in between the 2 yellow beads, 
move the green crystals along the core thread,
THEN close the join. This positions the 3 crystals as a triangle.
All this is a bit wiggly.
Yet the core thread can still slide freely, hence care must be taken while tensioning the next chain.

I'm happy with my idea and that it was something 'new' I attempted, though the execution leaves much to be desired. 
Again no ends to hide coz I used both to suspend the star with....trying to cut corners ;-D

Thursday, 15 December 2022

before and after 2

Pin It now!
Five-pointed star from Little Stars and Snowflakes by krystyna mura

The 2nd motif I started before the December event began was a 5-pointed star designed by Krystyna Mura, which was later embellished in order to enter it in the contest. I shared my 1st Before-After here - https://tipsaroundthehome.blogspot.com/2022/12/before-and-after-1.html

This is the BEFORE model devoid of even the decorative picots that were in the pattern. I just wanted to get a sense of the design when Krystyna first sent the pdf.
It was also my first time tatting with Sanbest - the threads Ninetta had sent me - hence my initial stitches were a bit tentative. This one has 3-strands, closer to size 40 I guess.

It was tough closing the tiny ring (the first 2 arms on the left). After that I made an overhand tie at the base of the ring to hide the defect. You can see the difference, with these 3 rings standing out like beads.

When finished, I chose the easy way out by tying the 2 tails for hanging. 

This is the AFTER model. Using red sewing thread, I sewed in a star sequin topped with a bead, and continued behind working the needle into the 3rd picot counterclockwise. Must've gone around 3 times and lo and behold there was one more star shape! 3 stars in one pattern!
There is a glaring mistake on the right where the thread went around the chain rather than through the picot. 

Krystyna always does a stellar job creating and sharing multiple variations. This time she took one little motif from Endrucks' pattern #12 and soared to Outer Space! She gifted us 3 pdfs filled with star and snowflake patterns as well as further possibilities and variations. Love her artistic and clear presentations though the images can be a bit of an ink-guzzler when printed ;-P

E12 Little Stars and Snowflakes by Krystyna Mura (2021) - https://drive.google.com/file/d/1D9n0yMmq50bO5PAf7883R7qJ_xR-agHT/view

You can join our currently ongoing game/contest on our Endrucks 1920 Project FB group. Direct links on the the top of the right panel in  my blog.

Many thanks to Krystyna for the lovely patterns and Ninetta for organising this event 💕

Monday, 3 January 2022

feeble firsts

Pin It now!

Believe me, I have never done bauble tatting! Oh, every year I think I will embellish at least one bauble, but all for nothing. In December 2021, the admin of the Italian FB group 'Chiacchierino: Filo Amore e Fantasia' held an online event with my MatheMagical Star pattern and several tatters used it to cover their bauble ornaments. All this really inspired me to do one..er 2, er 4.

Due to paucity of time and energy, I settled on using whatever motifs I had on hand - a SOUP (Sewing On/Using Pieces) moment. These 4cm ornaments will soon celebrate their 20th buy-day! At the time we didn't have a lot of options in this city and since the tree was decorated only the 1st 2 years, I am hesitant to buy. Next time I will certainly include more beads and crystals, more flamboyance. Perhaps I Should buy a few good quality and larger sized baubles. This little exercise has got me excited and more confident.

In chronological order - 

Bauble #1 - This edging is draped diagonally and temporarily taped down behind. (don't look behind!). But in Anchor size 20, it is too thick. A daintier edging/insertion would look better. And a tiny motif or 2 on the bare side spaces? 
Interlaced Cumulus pattern - https://tipsaroundthehome.blogspot.com/2020/05/puffy-clouds.html
Bauble #2 - There is no good angle to capture both flakes in a pic. These are in Lizbeth 20 and perhaps the reason I put them together. Spin Away above and ConcentriCity below.
I used a matching blue metallic thread to join the 2 flakes together. It really isn't difficult! Without cutting the thread from the reel, I sewed through the picots, and finally adjusted the tension and positions before snipping, tying, and hiding. Keeping the thread on the reel gave me a lot of leeway with no fear of running short.

Bauble #3 - This is the small version of the MatheMagical Star in size 40 - the only one that ... the others were too large for this bauble. And I kind of liked how the crystals sat like a crown on top.
On the underside is the Folded Fun Star. I hope you can see how I went a bit adventurous and joined the 2 stars.
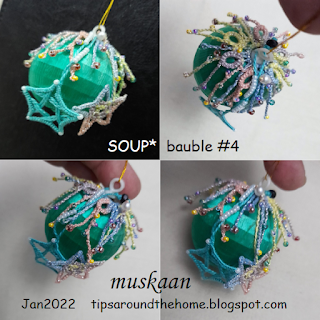
Bauble #4 - Messy but looks better in real. I was going for an organic look by not tying down each twisted picot. But very difficult to photograph.

I simply sprinkled a few of my snowflakes instead of suspending them - yup lazy. Hubby even offered to put up a string of lights but I hope to be better prepared next time.

It happens Every year! I let the sunny days slip by and when I finally get around to decorating the tree, the sun gives me the slip! So the pic comes out insipid. Oh well, this should be a staunch reminder to start early this year!

I really want to thank all the wonderful versions shared by tatters around the globe - in the event (one tatter inserted it inside a transparent star ornament; and others who used beads in exciting arrangement) as well as ornaments in general - that got my juices running, finally. Feeble firsts, but determined to be better later this year!

All the star and snowflake patterns can be found here -https://docs.google.com/document/d/1r4OmXX_c5LjFebMN2UbSNiYqXYETLmoridK0X1YIQco/view

Sunday, 10 January 2021

wrapped in a star

Pin It now!

 Again, I was blown away at how an imaginative tatter can apply my pattern to something I had not imagined. And this motivates me even more to share all I can. 

Daniela Bogacka wrapped the large MatheMagical Star around a tree ornament/bauble. So simple, yet so effective! And she readily agreed to share it with my readers who are not on facebook or instagram..
 
This pattern was first shared here (along with pdf), in various sizes. And the simple equation/ratio is such that one can increase it to any size one wants! Thus a Huge advantage is that you simply choose the star size according to the size of the marble, bauble, etc. that you want to decorate.

UPDATE: Check out how Vera has inverted the star to cover the bauble here -
 https://veragondolatai.blogspot.com/2021/01/frivolitas-gombre.html! This gives me another idea - how about attaching teardrops at each tip to hold down the arms instead of weaving thread. It would also add some sparkle.

I am taking the liberty of sharing a couple of other renditions that I was tagged in recently. Like I said earlier, wish I could share all that I come across...But if you send me a pic of your model or a link to your blog, I would love to post it in my blog. 

This one is by Donatella Rizzo - the colourway reminds me of a romantic night sky! Add a few sparkly beads or glitter and what an astral sight we have!

Several weeks back Anna Tedesco worked the pattern in metallic threads. Beautiful, isn't it? 

You can find these talented tatters on Facebook and Instagram.

The MatheMagical 'franchise' of patterns continues to amaze me - the simple equation/ratio led to so many patterns - stars, tree, bells, and I'm hoping snowflake, ice drop, and 2D/3D angel in the future. I think the 3D bell needs more work before I start with the angel. And beads for decoration?!

Scroll down to 25 Snowflake Project 2019 for links to all patterns. or check out the Google Docs file. I intend to upload more of the remaining patterns through the year. Hopefully ;-D  

Many thanks to All the lovely tatters who have braved my patterns and return for more 😉 Please keep an eye out for a few more bravehearts in the coming weeks!