In my last post I had shared several adaptations of Corina Meyfeldt's Tatted Fringe. Lots of ideas swirled in my head to try out a quick practice pattern, applying all three adaptations viz., tatted fringe, spot/luggage tag fringe, and tatted fringe picot. While I am not fully satisfied with the outcome (it looks especially messy in photographs), there is a lot of scope to play and try something better and different.
I got so involved that I forgot to take some process pics.


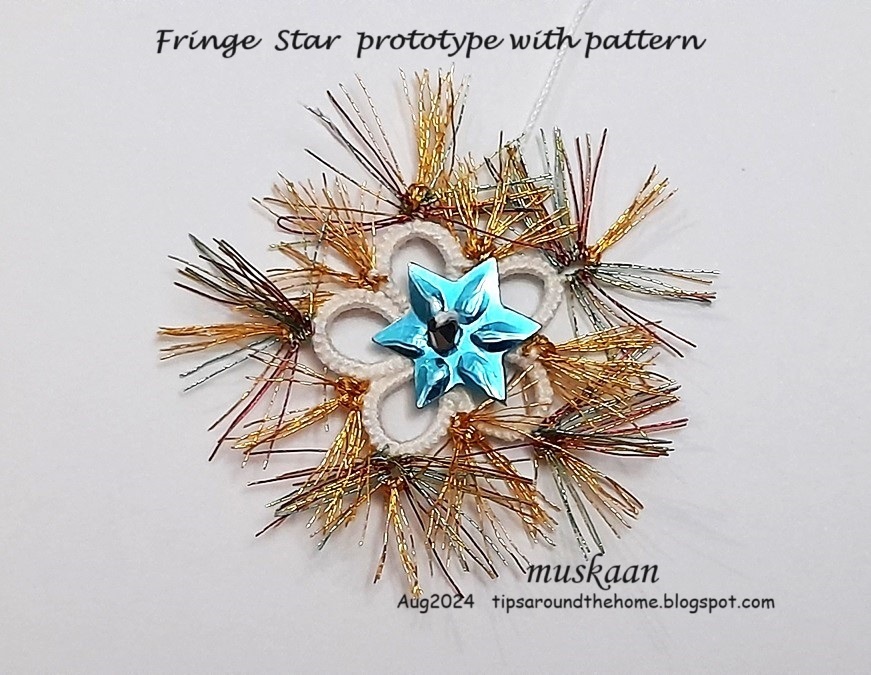
And I wanted a small cluster in the joining picot as well. So, I direct tatted 3 adjoining long picots at the start and between the 5 clusters.
Future Idea 1 - My original idea was to make layered rings with graduated fringe picots. But somewhere along the way, I decided to simply add the fringe between rings for now.

However, before starting the ring, bring forth the fringes (Fr) into the loop for the ring.
For first ring tat 6ds, Fr, 8ds, FrPicot, 8ds, Fr, 6ds.
For next 4 rings, tat 6ds +(join to ring: push the Fr towards the top of the picot and join below it), 8ds, FrPicot, 8ds, Fr, 6ds.
Join last ring to first.

I wanted a starburst kind of shining aura, hence the long fringe. It is very sparkly when seen in person.
I repeat, it looks especially messy in pics, but there is always room for improvement.
Future Idea 2 - Use a circle of tatted fringe for the base of a rakhi!!! Or how about fireworks?!
OBSERVATIONS - I'd like to point out that each adaptation has its advantages and this little pattern will help you realize this.
- For a fringe picot it is advisable to tat the chain as in Corina's original.
- But for spot treatment or to sprinkle a different colour randomly, luggage tags are preferable.
- Now if you need fringes on both rings and chains in FS/BS tatting, then you will have to decide and plan beforehand. Decide the number of fringes needed. Then tat the chain in segments of DS and RODS (reverse order DS).
Future Idea 3 - Tat a motif with spot fringes in rainbow colours!
It does look like fireworks! It seems a palaver, but has potential.
ReplyDeleteThanks, Jane 😍 Had to look up 'palaver' to refresh my memory 😁
DeleteLove all your future ideas!!
ReplyDeleteThanks, Mel 😍
DeleteVery interesting!! :)
ReplyDeleteThanks, Sue 😍
DeleteBardzo ciekawy pomysł :)
ReplyDeleteWygląda, jak gwiazdka świecąca na niebie. :)
Pozdrawiam ciepło.
Thank you, splocik 😍
Delete