Showing posts with label tiny heart. Show all posts

Saturday, 8 January 2022

here we go again

Pin It now!

 I shouldn't, but I am! Yeah, I should've been working on my numerous commitments, but these hearts were calling to me and I am taking life easy and don't want to regret my actions/inactions. Being tiny, they kind of fit into my Life Interrupted, so there! 

1 & 2 were what I shared yesterday - https://tipsaroundthehome.blogspot.com/2022/01/hearty-round-robin.html and they needed improvement. Enter trials 3 & 4 respectively.

I tried 2 things together. One was to make asymmetrical split rings (thanks, AlenAlea Rako), and the other was adding another row of chains below. I also added more joining picots for stability.

Trial #4 is the picoted version of trial #2 - gentle gradation - and I like it. 
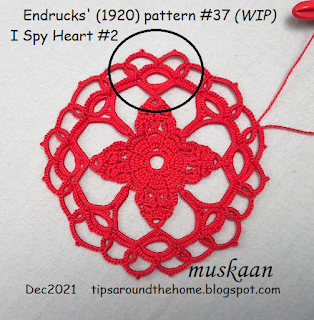
TIP: This version can be made with shuttle and ball by using any of the Lock Join Plus options to change direction. ( https://drive.google.com/file/d/17zsM3JaLO7r0ajg8VOnv5IcJ-kLNqEiU/view )

Forgot to include this yesterday. The encircled portion is the heart I am trying to make. Notice how it is much broader here than in my free-standing ones? I tried to mimic the count for the most part in my first trials. But it is the pull from the rest of the round(s) that creates this stretched shape. Perle cotton versus mercerised cotton could also be playing a small part.

Here are the old and new versions together. Is there any improvement? I'm not so sure. And because I added a stabilizing picot for the long chains, the arch is higher than wider, changing the overall outline.
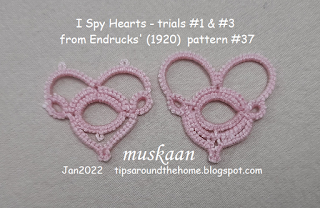
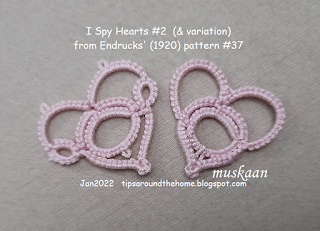
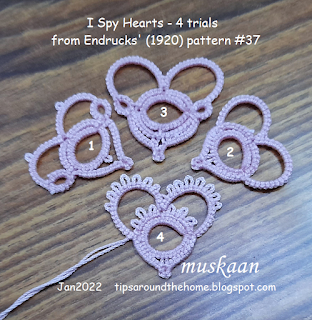
Picots are missing because I wasn't sure of the new count, but I think addition of decorative picots would certainly lift it up. 
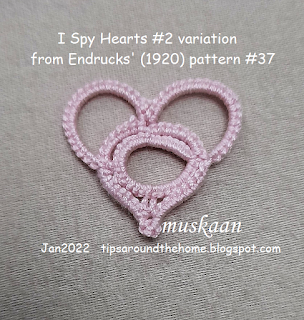
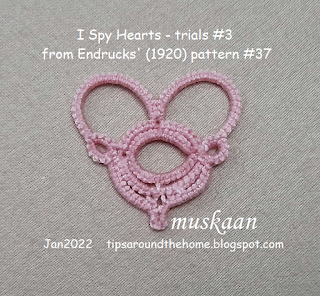
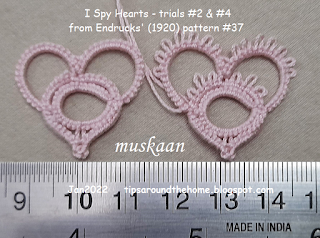
Here the picots definitely perk things up! I even considered a Josephine Ring on the inner chain but Mickey Mouse came to mind.
Future idea - Make those 3 inner picots long and joined later to the curved chains, thus filling the negative space.
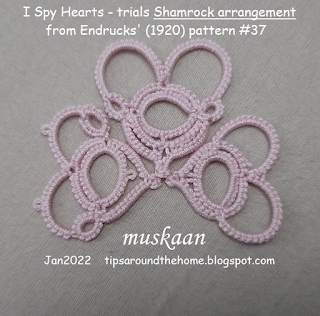
3 hearts in a Shamrock arrangement, just like Diana Howe had done with the Happy Heart from Endrucks' pattern #1 - https://tipsaroundthehome.blogspot.com/2021/03/lucky-hands.html

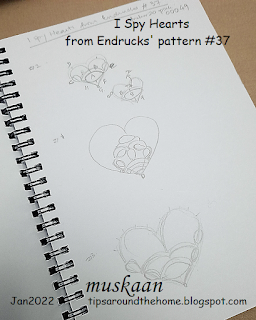
TWoT Notes: Interestingly, of the 4 hearts, 3 follow a different sequence/path! It helps to tat in multiples - each time you get a clearer picture, you focus on subsequent or peripheral aspects, .... and small pieces are just right to tat multiple times, LOL.  

So, dear tatters, what's your opinion and feedback? Which patterns should I share?

Friday, 7 January 2022

hearty round robin

Pin It now!

 ...well, kind of. His Kid was inspired by my design within pattern forays, the latest being 3 possible hearts from Endrucks' doily #37 that I shared here - https://tipsaroundthehome.blogspot.com/2021/12/cupping-hearts.html She quickly belted out 3 trials from Mary Konior's Josephine edging - http://hiskid66.blogspot.com/2022/01/mary-koniors-josephine-edging-inspired.html

In turn, this spurred me to pick up my shuttles and attempt my own trials in whatever time I could muster. Being tiny I managed them both today itself. 

I chose to start with the 2nd encircled pattern from my earlier post since it was the smallest and would be quick to tat. Not bad, but not happy, either with my work.
3 cms wide and 2.75 cms high

Wondering how it would look without the spilt rings, I tried a variation -
Again, this needs better working (it is not blocked, either, just off my shuttles). But I like this version better with clean lines.
2.75 cms wide and 2.5 cms high

What do you think? Which do you prefer? Or would you like patterns for both? Any suggestions for improvement?
Worked in Anchor size 20 (equivalent to Lizbeth size 10). 

Future Idea - I have yet another idea - add a split ring at the side of the variant and repeat the heart and SR to create a round ring of hearts, all in one pass! Will have to work out how many hearts would form a complete circle.
And as I had hinted here - https://tipsaroundthehome.blogspot.com/2021/12/a-future-perhaps.html , I 'inaugurated' my new sketch book with these sketches :-D

Thanks, Sue, for getting me out of my stupor and joining this fun exploration 💖

Saturday, 21 July 2018

anybody interested?

Pin It now!
I need a couple more days to work on the treble tatting pictorials - mainly the presentation. Meanwhile here’s a free pattern in case anybody is interested….

Periodically this post turns up in the top-of-the-week scroll. I really don’t know who is interested and what they make of it. Anyway, you can see that it’s been trending again this week and finally caught my fancy. Despite the ideas I presented then, I didn’t make anything further myself. Thought it was time to rectify that lapse. So here is a circular edging made with a tweaked count of Mónica Manceñido’s Peace and Tolerance Tiny Heart motif. 

Tiny Heart Circular Edging
click here to download pdf


I was going to link adjacent motifs with chains and rings, but that would mean a whole lot of designing and testing work. So I decided to follow a simple path just to see how they lie first and then move on to more design elements or rounds.

In order to determine the exact number of motifs required for it to lie flat, 
I blocked it (rolling pin, of course). Hmm, just one more motif was needed.

design tip : I learned that if the count of the middle rings is smaller then I will get a closer circle, with fewer motifs. With the present count I need 16 motifs around. For a larger circle, one can add a split ring between each motif instead of a mock picot.


The pdf contains only a diagram and dimensions. 
UPDATE : If you have already downloaded the original pdf, please note that the middle rings of adjacent motifs link to each other. This linkage was missing in that diagram.
Or download this new pdf with correct diagram.

For those preferring a written pattern, here it is.

2 shuttles, ctm.
Split rings, mock/false picot,

Worked I Anchor size 40, each motif measures 1½ cm X 1½ cm.
Outer diameter of edging is 8½ cms and inner diameter is 5½ cms.

PATTERN

R1 : 10 – 4 – 4. rw
*Ch : 4 rw
R2 : 4 + 4 – 4 – 4.
R3 : 4 + 6 – 6 – 4.
R4 : 4 + 4 – 4 – 4. rw
Ch : 4 rw
SR : 4 + 4 / 10. mock picot
SR : 4 – 4 / 10. rw*
Repeat from * to * till there are 16 motifs. Join last motif to the first one (join R4 of last to R2 of 1st as well as last ring to first).
Note that the last ring of 16th motif can be worked as a normal ring.
Tie, cut and hide ends.

This is the basic pattern. It can be used as a frame, a coaster edging, on a card, sewn to a quilt block, etc.

For now, I am not doing anything further to this edging, 
but will keep it in mind for future adventures.

see also Tiny Heart Poppy - a 3D flower made from the heart motif. Some day I will get around to diagramming it in Inkscape.

Hope you enjoy tatting the pattern.
The circle of love and tatting is eternal!