Showing posts with label tied stitch. Show all posts

Sunday, 28 May 2023

my DAL tadaaaa

Pin It now!

 And the reveal!!!! My version of the 3rd Round design-along for the DAL Celtic Snowflake. This is where I first posted the game - https://tipsaroundthehome.blogspot.com/2023/05/lets-design-round-3.html. My next two posts showed my own dilemma, course correction and solution trial (thanks to Anna Bonelli!). 


Several techniques, effects, stitches, and their modification have been used to achieve this result. 

I am very happy with the end result. I challenged myself and am quite satisfied.

Tatted in Red Rose size 20 threads (equivalent to Lizbeth size 10), the final size is 14cms.
Motif 1 = 4cms ; Motif 2 = 7cms.

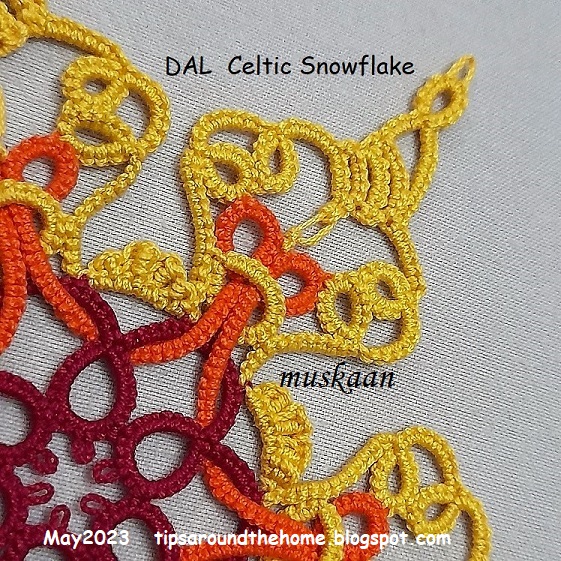
I did away with the Josephine rings. For the tip I used a decorative picot; for the treble arches I used graduated treble tat stitches.

This is how it looks in toto. I would've loved to try Sam's visualization of the flake in blues and greens. Hopefully I will do another one in finer threads using the water effect.

To anchor the are thread in the center, after doing a lock join, I made a tied stitch (as in encapsulation) at the very base and then again at the tip. The bare thread is deliberately left uneven to give an open, free-style look.

This is the same, but from the back. After all Celtic interlacing creates a different overlap on the two sides.

Again from the back.


We now have a total of, I think, 15 models submitted or WIP, with 6 patterns (I have to write out mine to make it 7) and 2 more patterns promised. I have started compiling them in a Google Doc but it takes time to get it all done properly since time needs to be squeezed in, LOL.

Please mention the name of the designer and the pattern whenever you post.

Tuesday, 23 May 2023

solution

Pin It now!

 Remember my problem and the mood to give up on my own 3rd round design? Well turns out there were two possible solutions! Anna Bonelli suggested something in Italian which, though lost (on me) in translation actually threw up the first solution to my mind! After making the join I could leave some bare core thread, work and interlace the large ring, then go back and cover the bare thread with 'tied' stitches using the 2nd shuttle!

Anna then tatted a sampler to show what she meant, and that is the solution I adopted. Notice the ring is now horizontal instead of vertical, and I made it smaller too.
Meanwhile I had this idea to use block tatting at the tip. It caught my imagination and between these two elements I allowed my shuttles to do the work, starting with treble tatting arches.
 
I like how the block appears like a flame. 
In several places I hadn't made any picots. Used a finer crochet hook to clear enough space for a join.
To offset any denseness, I did the bare thread thing in the center. I could use dot picot strings, but wouldn't it be overkill?
Just like the Josephine Ring at the tip of the 'flame' is an overkill, right? Although I cannot decide on the JR above the treble tatting arch.
I was going to include decorative picots, but I like the clean lines here.

So what is your verdict? 
I am open to suggestions since I haven't yet started tatting. Oh and this time I'll be using a muted shade of yellow.

So far the design-along has roped in 12 tatters: 1 diagram only; 5 models only (1 WIP); 5 models with patterns; and 1 late starter. I will collect them all in a Google Doc with shareable link so feel free to join the game whenever you can .... 
My journey so far -
Many many thanks to Anna Bonelli for her wonderful solution that got me going!