Showing posts with label E28. Show all posts

Wednesday, 2 April 2025

shagun tatting

Pin It now!

 'Shagun' is a Hindi word derived from Sanskrit which denotes good omen, auspiciousness, a token, .... Though it it is associated more with Hindu rituals, we also use it in daily life to commemorate an event, an occasion, or any good news with the elders blessing the young with a symbolic token. Or if we cannot perform an entire task, some small part of the ritual/task is started on an auspicious day.  

This is what I try to do every International Tatting Day! This day is also very special for personal reasons and I tend to be busy elsewhere. Yet I make it a point to pick up my shuttle and thread and tat at least a ring or two and not let the day 'pass by' ;-D Despite a very busy first half, I managed to find time from evening onwards and actually completed not one but two motifs! One had only 2 rings and a chain left to tat (I'll share this tomorrow) while the heart motif I started from scratch and completed! 

doesn't it look like a possible angel?!
My new version using graduated and 'erect' vapour stitch which is more like a picot here. I was inspired by a recently shared Turkish Tatting video by Eftelyanin Mekikleri where there are many more than 3 wraps and the bare thread is not pulled down so that the stitch/picot stands erect. Also, the wraps are followed by a complete stitch rather than the 2nd half-stitch. 
I did it all in tatting. But it was not easy and many of my stitches are not as neat as they should/could be. I had started one in perle cotton but the thread unraveled so much that I snipped it off and started afresh with this Anchor size 20 thread. 
TIP: I suggest using 2 shuttles so that the thread can be balanced again by suspending the shuttle frequently. And use tightly twisted thread, polyester, silk, ....

I winged it and don't really have an exact count for the decorated chain. I started and ended with vapour stitch (3 wraps) but graduated up to 7 wraps.
The motif is 4cms wide and 3cms high.

For more Vapour Stitch info and links - https://tipsaroundthehome.blogspot.com/2024/09/variably-padded-lines.html and a few effects - https://tipsaroundthehome.blogspot.com/2025/01/the-years-flow.html

My previous E28 hearts & pattern from prototype to tweaked versions and a beaded jewel version - https://tipsaroundthehome.blogspot.com/2023/06/yet-another-heart.html   and  https://tipsaroundthehome.blogspot.com/2025/04/happy-tatting-day.html    Pattern PDF - https://drive.google.com/file/d/1-rWqmDAd51VwxOqtt9spD-FIX5zYDAUE/view

I had more shagun tatting to share - something tiny and fun, but will continue in a couple of days. Time to juggle ;-D Meanwhile I also have much more to share on the vapour stitch as well when I can take some pics .... 

I hope you did much more than shagun tatting, like I ended up doing ;-D

Monday, 29 January 2024

E Hearts

Pin It now!

 We have quite a collection of hearts derived from Endrucks' patterns and even more patterns where these hearts have been applied such as bookmarks, coasters, butterflies, etc. There are even more I have spied in other patterns that will hopefully come to life in thread some time. Or I might just share the idea for others to work out.

The above is only a fraction of the hearts/applications I tatted. Found these easily in the two nearest boxes I rummaged through. But there is not a single heart from pattern #1 here, nor butterflies, etc.
It was spur of the moment and I hastily put this collage together.
The above hearts are from E3, E5, E28, E32, E37.

The patterns have been derived by many members and you can download all patterns from the Hearts Directory here - https://docs.google.com/document/d/1MpYw9XMB8Asz8zusj1ZpHvX8A8Ww424-rEVORtxcL1w/view
And don't forget to look at the eye candy and other pattern directories listed at the end.

If you complete tatting your first pattern from our Endrucks' Collection and show us a pic, we will be happy to send you a little gift! 

💖 Happy E Tatting ! 💖

Monday, 5 June 2023

yet another heart

Pin It now!


We can never have our fill of heart motifs especially if they provide us a means to empty our shuttles! This one is derived from Endrucks' doily #28 and the pattern pdf can be downloaded by clicking on this link - https://drive.google.com/file/d/1-rWqmDAd51VwxOqtt9spD-FIX5zYDAUE/view

Remember my Crown Jewels? ( https://tipsaroundthehome.blogspot.com/2023/05/crown-jewels.html )
On the left is the prototype and on the right is the bejewelled version. I could see a heart shape if the chains were elongated and just had to give it a whorl resulting in the heart at the center.

This is cute little motif to use for learning and applying techniques and effects (this one has CWJs and dot picot string); to embellish with beads or decorative picots; to use as a charm; to use as jewellery; .... Let loose the imagination to play and decorate!

I sent Ninetta the pdf for a quick scan and she surprised me by quickly tatting it too! In her own words -

"Thread is S-lon 0,5 usually sold for micro-macramè, it is thicker than a size 10. I'll use it as a charm. At the end of the heart I tatted a chain with 40 first half stitches and finished it with a ring with 12 ds."

So what are you waiting for? Use up the scraps.

💖 Many thanks, Nin, my partner in crime in the Endrucks Project 💖

Sunday, 14 May 2023

crown jewels

Pin It now!


No wonder it is called 'Embellishment Tatting'! What a difference adding bling makes to a tatted piece, especially if it is to be used as a piece of jewellery. I shared the red prototype in my previous post (https://tipsaroundthehome.blogspot.com/2023/05/wear-me-endrucks.html) and using the very same counts but with beads and crystals, it got transformed.

It looks like a crown, doesn't it?! Obviously the base needs to be lengthened but still .... Hence I christened it 'Crown Jewels' since it can be used as pendant, brooch, or earrings, or a bride's tikka!

This is closer to how it looks in person - golden and shiny.
Because of the add-ons, this version is tatted with one shuttle and ball, ctm, with small gold beads on both threads.

I owe the idea for the crystals within the top rings to Jill McTats. My own idea had been to add a string of gold beads either as a straight line or as a circle to fill the empty space within. She left a comment suggesting "... sew beads in the two large rings to match the drop you plan ....".

Loved the idea and loved the effect! I tried other colours but this midnight blue seemed to really uplift the piece.

Though not discernible, I combined two metallic threads - Red Heart gold and Sanbest #34 for extra sparkle. Very smooth to work with and no trouble closing the large rings.
Some of the beads and crystals have been sewn in later since it is difficult to estimate the size of the tatting and the gem stock I have. 

Embellishing one's tatted lace is exciting and rewarding, but comes at the cost of time. It took me but a few minutes to tat the plain prototype despite being my first 'trial'; this piece took me every moment I could spare the entire day! At the end I was so 'tired' that the final tails at the base weren't even hidden properly, LOL. 
Hats off to all you wonderful tatters who seem to belt out beaded projects at the drop of a hat!

Future Idea - tweak pattern into a heart, crown, angel.

Many thanks, Jill, for your excellent suggestion!

Wednesday, 10 May 2023

wear me Endrucks

Pin It now!

 Game of the Month in our FB group is to tat one or more pieces of jewellery preferably using beads. After all it is something we can gift our mother this month. 

Game of the Month#WearMeEndrucks May2023 


And for this we released one more directory of patterns, ideas, and models derived from Frau Endrucks' original 44 patterns! Here it is for you to enjoy - 
Jewellery from Endrucks Directoryhttps://docs.google.com/document/d/1ns-C3xQq4CA1tjZwGxFIyKWelLJbqwXJ/view

This is the 9th directory, I already shared links to the first 7 directories in an earlier post and they are also listed at the end of each directory. Meanwhile the 8th collection consists of angular polygonal motifs, including 90 degree corners. -
Motifs- Angular from Endrucks Directory - 


So far I haven't had time to tat anything new for this game. However today I finally picked up my shuttle to tat a prototype of a motif derived from pattern #28. It was so quick to tat! I used a ball and shuttle, ctm, and avoided beads since my main purpose was to see if the stitch count worked. The long ring at the base is supposed to be replaced with a tear drop in my final model.

Clearly a bit of tweaking of the counts will render a heart pattern. However so far I will allow it to remain an earring or pendant. 

What changes would you suggest to improve the design so far?

Further links are in the top right panel of this blog. If you tat something please do let us know either in the comments or send us an email. If it is your first Endrucks' pattern you will receive a gift, too!

With thanks from Ninetta and Muskaan

Friday, 27 May 2022

tatting is therapeutic

Pin It now!

The ‘Talking Tatting’ issue 50, February 2022 (a quarterly newsletter of Queensland Tatters, Australia), brought us a new tatter/member who has enthused the FB group with her work in this short period.

Meet Antonia Lai. She started out with doily #28 which was published in the newsletter. It is worked in Lizbeth size 20. (https://tipsaroundthehome.blogspot.com/2022/01/bridging-gaps.html)

Within a week she was “addicted to the Endrucks 1920 Project”!

Her enthusiasm and tatting beauty took flight with this Happy Hands Heart and Butterfly – both patterns are adaptations of pattern #1 and had been shared in our FB group.

She incorporated a body for the butterfly using a chain folded and joined back on itself, as visible in the close-up!

She recently revealed her love of elephants and this painting/print acts as the perfect backdrop for her impeccably tatted doily #40! In Milford size 40, it measures 11 cms.

Meanwhile, she also volunteered to test tat pattern #22 and sent me her notes and feedback.

She sportingly incorporated a suggestion to see whether bilateral symmetry would make a difference to the slight tilt that was inherent in this lace. The difference is clearly visible between the 2 repeats if you compare the block tatting at the top. The right pair are mirror images, unlike the left pair. She used what we call Block Below Tatting or BBT (https://tipsaroundthehome.blogspot.com/2021/07/a-pernickety-question.html).
More pics and details will be shared when I update the old Eleonore’s Angels pattern #22 pdf.

The May 2022 issue n.51 of ‘Talking Tatting’ carried a bookmark/bracelet adaption of pattern #32 by Judith Connors. This, too was quickly tatted up by Antonia.
 
She made a slight mistake and decided to carry it through as a Butterfly Trim.
And there’s a heart in there, too! If we remove the 2 bottom rings on either side, we get a heart shape, which can be tweaked further.
The butterfly trim looks good on the neckline!

And her direct contribution to date has been in designing a beautiful corner for the #1 Happy Hands edging!

  
The edging can be sewn along the outside or inside of the fabric edge without losing its shape or beauty as seen in the 2 pics above. She also modified the edging slightly, making it easier to repeat motifs yet keeping fidelity of pattern.
She not only sent me her hand-drawn diagram, but also meticulously wrote down the pattern.

Happy Hands edging with Corner (adaptation Endrucks' #1) pattern pdf - https://drive.google.com/file/d/1fsiET9ZJvXSD0kcAMKsuUNZt-rznFkO9/view

Lea Di Palma followed Endrucks’ original style, using the picoted side to sew on the edging as seen in this in-progress pic below. Incidentally, she is working it with a ball and shuttle instead of 2 shuttles! Check out more of her tatting in her FB timeline.


Here is what Antonia Lai says about her tatting hobby and our Project -

I started tatting about 16 years ago. Tatting is therapeutic. Always find time for tatting; it makes me feel content. Endrucks projects is addictive. Since February 2022, I have done patterns # 1, 22, 28, 32, 40. People involved in Endrucks are into sharing and community spirits. I am looking forward to doing more.

Antonia has proved Frau Endrucks right when the designer-author wrote - 

"It is a great fortune to create something beautiful with simple means, I hope that my book will give you the key to this happiness.

Ninetta and I take great pleasure in thanking Antonia and Lea for their work and contribution to the Endrucks 1920 Project. Their experience, especially Antonia’s, shows that there is still a lot to explore and extract, derive and apply… if one has the desire.

NOTE: All patterns mentioned above are free and can be found in the EP doc (scroll down to the respective pattern number and click on pdf link) - https://docs.google.com/document/d/17LEVftXweztBIOWh4sL4BB7bX65ssoOsOn4oXIgCepY/view

With love and gratitude,

muskaan & Ninetta

*********************

Endrucks 1920 Project is a community project, where patterns from Endrucks’ German book of 1920 were converted to modern-style presentations and pdfs. We welcome you to join our Facebook group “Endrucks 1920 Project” (please read the group’s description and rules before joining : https://www.facebook.com/groups/1235560633606162) where the fun continues with derivative tatting, new variations, activities, etc. all within the gamut of Endrucks’ patterns.

Using the hashtag 
#Endrucks1920Project when posting in FB or Instagram, ensures that your pic will show up in a search.

If you enjoy sharing and experimenting, or even test-tatting, the group is waiting for you! All info and links to patterns (original and modern), including model images, are in the Endrucks 1920 Project Document, here

https://docs.google.com/document/d/17LEVftXweztBIOWh4sL4BB7bX65ssoOsOn4oXIgCepY/view There is still a lot to explore and extract, derive and apply and scrolling through this document will give you an idea of the possibilities and beyond.

********************* 

Thursday, 27 January 2022

bridging gaps

Pin It now! I have some great news! Our Endrucks 1920 Project will be featured in the February issue of ‘Talking Tatting’ issue 50! Along with a short bio of Frau Endrucks and the doily #28 pattern (modernised version), all by Judith Connors. This is a quarterly newsletter of Queensland Tatters, Australia.

While this doily has already been tatted by several others, they referred to the diagram rather than the text. Hence it was left to Judith to point out a couple of errors, which are now corrected in an updated pdf.

Impeccable tatting from the inspiring teacher, researcher, and historian who was honoured with the Order of Australia Medal last year! And as you can see, she has managed to retain the octagonal shape of the doily after blocking.

We discovered that my tatting tension is way too tight! Worked in Coats No 40 cotton, Judith’s doily is 9cms in diameter to my 7cms in Anchor No 40 (which is also a Coats subsidiary).

My tension varied from yours in places. I managed the fluting, and when I blocked the mat it turned out to be quite octagonal.” – Judith

Alternate Path: “I worked it completely from the front side, not as you have suggested for Rounds 5 and 6. This means that the small rings of Round 5 were tatted in RODS (with a posting of the shuttle before closure).” – Judith

While enlarging the pic for posting, I noticed another thing about Round 5 in Judith’s doily. It appears the chains on either side of the ring are 8ds each instead of 5ds, creating a graceful arch instead of a flattish line.

Bridging/Mock Chain and Split Chain: Several ways to climb out of rounds for continuous tatting are indicated in this pattern pdf. However, Judith pointed out that what I termed split chain to climb out of round 4 is actually a bridging chain (b-Ch) and I should use this as a “teachable moment”. Got me thinking and this is how I see it:

The technique was invented by Dora Young for rings and then applied to chains – the knotless method (km or KM). Decades later, the term split chain caught on and became more popular. But the stitch and movements are the same in both – mock stitches or tied/manoeuvred stitches.

A Bridging or Mock Chain is functionally and structurally the same as a Split Chain. Each chain spans a space and emerges at a point to the left instead of the far right, and is made over a bridging or foundation thread. 

The difference lies in the Where the threads emerge/exit or where the point of climbing out is. A bridging chain is made completely of mock stitches and threads emerge at the ‘beginning’ of the chain. A split chain, as the name suggests, is split - partially made of double stitches and partially of mock stitches. Thus, the threads in this ‘hybrid’ chain exit somewhere along the length of the chain, not at the start.

Among the several beautiful versions of this doily tatted by enthusiastic lacers, I would like to show Stella Marina’s version in lovely metallic threads because it is yet another example of how we can alter our path. In a moment of distraction, Stella forgot to tat the 2 large twin thrown rings in Round 3. Instead of cutting back, she continued. She then tatted them as normal rings, facing inward, in Round 4! This happened by accident, but could easily have been a deliberate choice to make the rings red instead of silver. Planning ahead gives us so many bridges to cross smoothly!

Now I want to tat the doily again and bridge all my gaps!

Many many thanks to Judith and Stella - keep inspiring!

Related Posts/Resources –
For more tutorials and details scroll down to Techniques & Effects » CHAINS » Split Chain/Dora Young Knotless/Bridging https://tipsaroundthehome.blogspot.com/p/tatting-resources.html
Knotless Method in split SCMR - https://tipsaroundthehome.blogspot.com/2018/10/scrappy-doily-and-scmr.html
https://tipsaroundthehome.blogspot.com/2021/07/continuous-paths.html

Monday, 25 October 2021

bagatelle to bagaball

Pin It now!

Reworked patterns from Frau Eleonore Endrucks-Leichtenstern’s ‘Die Schiffchen-Spitzen’, 1920, for Endrucks 1920 Project.

Am I getting too OC in my tatting? I can’t seem to stop tatting, telling myself ‘just one more repeat’ or ‘one more tweak’ or ‘now let’s place this colour there’ to see what comes up - to upload the best possible for the pdf. But despite the time constraint I cannot stop enjoying the tatting play – way cooler and way more exciting than bagatelle! 

Above are 5 pieces of pattern #28, no two identical. The ruffling settles in later rounds but each piece needed some tweaking of chains.

This time, though, I am very proud of my diagramming skill! In one single diagram I have managed to incorporate 3 versions of the pattern! To see it you will have to click on the pdf url - https://drive.google.com/file/d/1vG2g0JCVsy8cy2DfGKHEhxleq_7Rveba/view

These 5 pieces were tatted in a different sequence, spanning 2 years, to the one presented in the pdf. Here, I’d like to stick to my chronological timeline.

The Valley of Flowers mandala version from June 2019. 
https://tipsaroundthehome.blogspot.com/2019/06/valley-of-flowers.html
In order to incorporate the colour palette, lot of false CTM is used to transition to the next round instead of cutting both threads each time. And the thrown rings in one round were shifted to the next round and worked as regular rings.
This pattern modification is included in the diagram.

This is from June 2021 tatted for the current project using single colour and climbing out using split rings and split chains. I even took round-wise pics for the pdf but did not find it necessary to include them, especially since I later tweaked the count some more.

You can find Georgia Seitz’s written transcript and tips here - https://www.bellaonline.com/articles/art304446.asp

Since the previous piece encountered cupping and ruffling in some rounds, I decided another tweaked piece was essential for the pdf. Much better result as regards laying flat, though a bit of simple blocking along the way helps too.
The count used in this piece is presented in the pdf in written format as well as in the diagram.

Empty 'hands' are a devil’s workshop ;-P I got to thinking that so far none of us has used Endrucks’ method of climbing out and was curious to see how it would look and compare! (I discovered only last week that Marina Mad Jar had already used it in pattern #34 - https://tipsaroundthehome.blogspot.com/2021/10/when-time-flies.html). 
Sep 2021 This is as close to the original count as possible, but using extra chains (shadow chains) to climb out à la Endrucks’.
 https://tipsaroundthehome.blogspot.com/2021/07/continuous-paths.html The octagonal shape is lost a bit because of the extra stitches added in every 3rd chain. This is an unfortunate feature of all my versions unless the tatting tension was loosened.
The original pattern brings up the last 3rd of the diagram.

Sep 2021. This is the final piece where the chain arch above the 3-ring cluster is pulled out unlike the flat-line of the previous.
Can you detect the Shadow chains used for continuous tatting? I deliberately chose ecru in size 40 trying to go for 'vintage'. If one uses 2 colours, some juggling might be called for, but in single colour it is easy-peasy! So, here’s an easy alternate for those who find split chains and split rings difficult to work.
 
All 5 together for size comparison. Details of thread and measurements are included in the pdf.
Pattern #28 (3 versions) pdfhttps://drive.google.com/file/d/1vG2g0JCVsy8cy2DfGKHEhxleq_7Rveba/view


When Anita saw what I was tatting, she immediately pointed out that these would make a great little baggie, and even sent me a pic! How exciting! My limited imagination only had me thinking of using them as coasters. So here’s what came of my attempt …

Lining it with fabric would enhance the durability.
Choice of fabric colour will also help highlight each side. Different sides means the bag is easier to mix and match with your outfit, besides using up spare tatted lace. It can also be an exciting gift purse for a little girl!
As a reflection of Endrucks’ stacked chains (block tatting), I connected the 2 pieces using simple chains. By working alternate chains in direct tatting (reverse or unflipped stitches), it was a matter of one shuttle and ball, working continuously. Longer chains will obviously increase the capacity.
Lined the edges with beaded chain tatting for some bling. A large teardrop with beaded loop closes the opening, ....
....while those solid cylindrical beads finish off the handle. Good to hold a ball or 2 and shuttles for a project on the go!

Although there's many a slip 'twixt the cup and the lip, ‘twixt my conception and execution, and nowhere as elaborate as Anita’s, I am happy with my first such bag-a-ball baggie! 


**********************
Endrucks 1920 Project is a community project, we welcome every one of you to join in! Please let us know where we can find your renditions and derivative tatting!
We created the hashtag #Endrucks1920Project, so please use it for your version to show up in a search.
We all enjoy sharing and the project is awaiting every one of you!
All info and links (original and modern) are in the Endrucks 1920 Project Document, here:
https://docs.google.com/document/d/17LEVftXweztBIOWh4sL4BB7bX65ssoOsOn4oXIgCepY/view
Remember there are many more modernised patterns, derived and extracted patterns/ideas, already listed in the project document, with more still to come! So, do visit and scroll through.

*********************

Monday, 5 July 2021

continuous paths

Pin It now!

There are some lovely doilies in Endrucks' book, all worked in one pass. What I find, though, is that unlike her straight lace patterns, the circular doilies tend to either ruffle or cup, and some tweaking of count is required. I think it is a matter of individual tatting tension?

Another thing I've noticed is that perle cotton (as in the one above) is more forgiving than mercerised cotton which makes sense due to the difference in their twist. The tight twist of mercerised cotton thread tends to keep the lace stiffer and less flexible. 
Despite all the colours in the mandala, false CTM gave me a sense of continuous tatting. However, for the Endrucks 1920 Project, I needed to tat a model that could be more easily shared in modern style which is why I chose this pistachio green in Anchor size 20. It is tatted in one pass using mock picots, split chains, and split rings to climb out. 
Above I have traced the 'modern' path of climbing out of rounds (in blue). For this to work smoothly, I had to work a couple of rounds counterclockwise. The orange path shows how Frau Endrucks moved to the next round - simply add another chain(s) till you reach the point where you can climb out! 
UPDATE: I  have coined the term 'SHADOW CHAIN' for this extra chain(s) used to climb out to the next round, row, or motif, thus enabling continuous tatting.
No need to learn any techniques, and the direction of each round remains unchanged. But as seen above, it does add extra chains along the path....something which 21st century tatters may not like. Although in fine threads, it may pass inspection, and clearly speed up tatting.

UPDATE: Pattern for this doily is uploaded, showing both methods of climbing out - https://drive.google.com/file/d/1vG2g0JCVsy8cy2DfGKHEhxleq_7Rveba/view

 
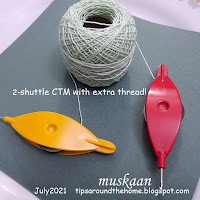
Since the first few rounds can be worked off a shuttle and ball, I used my earlier tip about extending the thread between 2 shuttles. All the extra thread in left pic was wound on to the ball temporarily, till it got used up and the 2nd shuttle was needed.
Of course, one can simply keep shuttle 1 and ball thread continuous and tat till the 2nd shuttle is needed. At that point, pull out the length required, cut from ball, and wind up shuttle2.

There was a lot of ruffling in the green model, despite adding a few stitches to a later round. So I started another in tinted Anchor size 20, with modified stitch count. Worked beautifully and lay flat. The 3rd round does ruffle till the 4th round is added, but this is a structural problem.
Ran out of thread after 5 rounds, hence added a bold violet shade to add a spot of colour. I kinda like it - what do you think?
I am busy with pattern #17, hence this pattern pdf will have to wait a bit. However, for those who'd like to try it right away, you can find the written instructions and tips by Georgia here.

This is Pattern #28 from Schiffchen-Spitzen 1920 by Eleonore Endrucks-Leichtenstern. You can find all the links in the Endrucks 1920 Project doc here along with all other patterns in modern format. We are hoping to have all of Endrucks' patterns in modern format by this November - a year from when we started.