Showing posts with label Rhoda Auld. Show all posts

Saturday, 21 March 2026

Dedicating my 1000th

Pin It now!

For this 1000th post I kept musing on the choice of subject. And I finally decided to dedicate it to some of my favourite people who have shaped and inspired my tatting journey. This is a symbolic gesture to ALL the tatting teachers, designers, innovators, experimenters, explorers who have shared their own learnings and experiences. 

Three Geniuses and a brand new stitch in tatting!

Two years back I stumbled upon two drawings that gave Ninetta Caurso's treble tatting stitch a basis in tatting history! 

A drawing on page 31 in Anne Dyer's 1994 book, To Boldly Go Where No Shuttle Has Gone Before, showing the decorative chain picots. 

A drawing on page 85 in Rhoda Auld's 1974 book, Tatting: the contemporary art of knotting with a shuttle showing her twisting the thread (this twisted picot is something I had pointed out in my pictorial) and passing the shuttle through it. Her tatted model is what we now call the vapour stitch.

Well, our very talented Ninetta engineered the two movements to create her treble tatting stitch (tds) all on her own! At the time she did not posses either of the books and till I pointed it out to her, she had not noticed! Basically, the chain picot became the 1st half of the tds while the vapour stitch became the 2nd half of the tds! 

💧One of the reasons for the delay in posting this was ambiguity about whether I could share the diagram pic from the book with due credit. Anita suggested I ask Tamie Montgomery, who now runs The Online Tatting Class and is very mindful of such issues. She was very receptive and we discussed it. Although she said it was okay to use the accredited pics (like Georgia had done) since it was a 'technique', I still wasn't comfortable, till I hit upon the idea of showing it in thread as above. 

💧💧💧

Auld is gold bead effects!

Last year I found some new beading effects by Rhoda Auld in the same book and took the liberty to give them each a name based on words used by her.

Framed Bead - The diagram on page 107 has been in circulation through Georgia Seitz's classes for several years now. Georgia pitched it as a way to add a bead in the center of a ring and I used it in this butterfly. 


However, Rhoda showed it as a way to add a free bead on a long picot with bare thread framing the bead on both sides when slack is removed. Makes for some good possibilities.

Piggyback Beads - Now this was fun to discover! On pages 99-100 Rhoda shows how to place two free beads one over the other using simple movements. I tweaked it a bit to make it easier to tat.
Instead of loading the bead on the core thread where she has to move the chain stitches, I loaded it on the knotting thread (teal in above sample) and the rest of the process remains the same. On an earlier page, Rhoda makes the teal picot longer and ties up both picots till required for joining. Hence there are many options depending on the pattern.
My sample is a bit wonky, but you get the picture, right?
💧💧💧

Generosity knows no bounds!

💧I can't thank Anita Barry enough for gifting me so many vital books on my list. Without these I wouldn't have been able to review and edit Net Best's, Six T's of Shuttle Tatting, not with any satisfaction or confidence. These have helped me to confirm, correct, or refine terms for her glossary, and even understand and discover so many gems, some of which I took the liberty of adding to the glossary.

💧Judith Connors has been taking an active interest in the glossary, too, either as an answer to my question, as a reaction to my blog post, or reaching out on her own privately. You can imagine what a treasure trove of knowledge she is and how lucky we are to benefit from her skills. 

Judith sent me a copy of her 2000 book, Creative Tatting with beads, shuttle, and needle. It has some of my all-time favourite patterns besides numerous interesting effects and applications. While I read the book, tatting models will be later in the year. 

💧Late last year I received a wonderful digital book by Carin Jansen, Riego ReTatted (2023).  She needed some advice on selling the book through the USA, not being sure of its reception. With permission, I sought Anita's advice and we both gave our respective take urging Carin to put it on the market. Eventually she decided against it for personal reasons, though she has shared her Dutch version within her group. It is such a labour of love and we hope she will change her mind in future. Carin has chosen patterns from each of Mlle Eleonore Riego's books (1850-1886) and shared detailed steps and modernised versions/tips in a pleasant format alongside diagrams and written patterns. 

💧💧💧

I'd like to think that my blog has stayed true to its name to the extent that almost 95% of my posts have a tip of some kind. Unfortunately I couldn't stay true to the url since this blog soon turned into a tatting blog ... not that I'm complaining, LOL. 

Hope you continue to follow my blog and read my posts. 💞

You will find tutorial links to terms in this post here - https://tipsaroundthehome.blogspot.com/p/tatting-resources.html and you can use the search box on the right panel to look for past posts on the tags used here and much more.

💧💧💧

Many many thanks to all the wonderful tatters mentioned here and also to those not mentioned who have influenced, inspired, and improved my tatting journey and maintained my eagerness to blog.

Friday, 30 June 2023

gifts galore 2

Pin It now!

 Besides all the thoughtful and practical gifts Anita Barry sent me, she also sent several excellent books. My tatting book collection just grew a whole lot! I invite you join in my pleasure .... (listed in no particular order)

Taboo Tatting - Anita Barry. 
This little booklet is a perfect example of the creative fun Anita manages to inject into all her projects. It is one A4 size page folded into four 'pages' (printed front and back) and tied with a ribbon. She had shared it with me years back and I had printed it out. But receiving it from her is special. It has tips, tricks, challenges, little projects, ....

Tatting Times - Karey Solomon. 
I'd only heard of Karey Solomon's quarterly subscription-based mini booklets/newsletters and now I hold one in my hands! She had been sending these out for 30 long years till 2022. This post is worth reading - Launching Tatting Times Online

Tea is for Tatting - Martha Ess.
Another treasure! Martha Ess holds a special place in my heart for several reasons, not least for uploading Endrucks' 1920 book, ;-D. Martha's books are eye-openers in themselves, taking a technique or theme and running with it, popularising several techniques/effects through fun patterns. And she has a new book in the offing! 

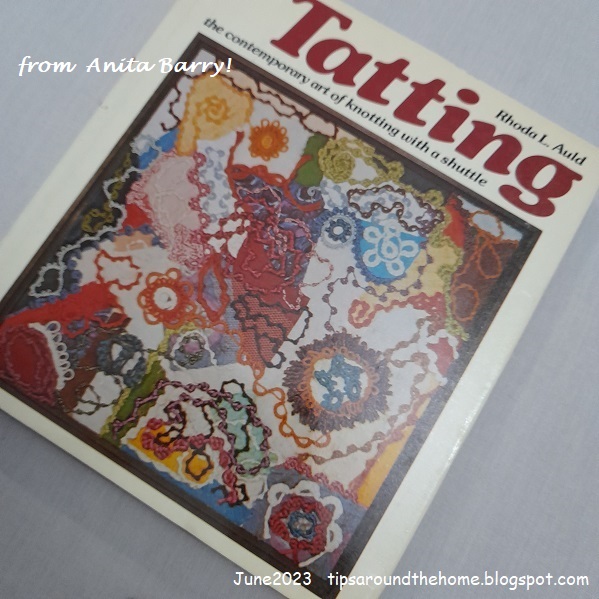
Tatting - Rhoda Auld.
A must-have in any tatting library! I have already read several pages, but haven't played with shuttle in hand yet.

Tatting Techniques - Elgiva Nicholls.
One of my all-time favourites is Nicholls' 1962 Dover publication Tatting Techniques and History, but this was also highly recommended and desired. I'll be spending many happy hours/days reading and imbibing.

Coffee Classics - compiled by Anita Barry.
Anita had told me that she was compiling her favourite coffee recipes to hand down to her loved ones. She made at least four and these are all hand-written and sprinkled with sketches. I had no idea one of the recipients would be me!

A Collection of Tatted Bracelets - Victoria Clarke.
Blogging and the online world has introduced me to so many wonderful and talented artisans. One such is Vicki who often shares her somewhat quirky but always clever designs. And holds short tat-alongs two or three times a year. This is the time for her next two back-to-back TALs - https://victats.blogspot.com/2023/06/coming-soon-very-canadian-tat-long-2023.html 

The IOLI Bulletin Fall 2022.
It often happens that my complimentary copy of the bulletin (when my article is published) does not reach me. Anita sent me her copy and she had been thrilled to see the back cover.....
...these are a few images from my 2nd of 3 articles on Endrucks and the Project!

The Complete Book of Tatting - Rebecca Jones.
Would you believe Anita sent this separately because she forgot to include it in the earlier shipment. So, her bundle of gifts actually reached me in three shipments! Another treasure in my library!

This is something she had received at one of the Palmetto Tat Days. These were all done by Phyllis Schmidt! I believe she does some sort of giveaway every year. https://phyls-handwork.blogspot.com/ 

I placed this last as the perfect way to say Thank You to Anita for all her gifts  especially the books, and not least for her solid friendship through the years!

I have made it a point to periodically read from all the books and make good use of the knowledge and perspective. Even cleared out an entire shelf from the wall cabinet in my bedroom to display all my tatting books in one place and keep them within quick reach! And each one has a lace (mostly tatted lace) bookmark.
There might not be enough time to try out stuff from the books at present, but the literature is equally interesting. And there is that beckoning light to try out patterns and experiments and ideas as time progresses!!!

Tuesday, 29 October 2019

beady-eyed

Pin It now!
Some patterns are meant to enjoy! That is precisely how this vintage butterfly felt when Georgia announced it for this week’s class.
The Deaconess Butterfly 1916, re-written by Carolyn Groves in 2002. When I went hunting for a Deaconess butterfly, I found her old site!
It is a well-written pattern, with clear instructions. But I also kept referring back to the model image(s) frequently, to stay on track. It is worked in one pass. A very clever presentation by Carolyn Groves.
I decided to play with beads. Small projects are ideal to try out ‘new’ stuff. And not everything was planned ahead. I unwound the shuttle to load seed beads, etc.
The ‘stuff’ that went on here –

  1. Black and orange beads pre-strung on yellow thread and the green seed beads on blue thread.
  2. Twisted (floating) picots for antennae. 
  3. Eyes and orange beads are ‘up’ beads- they need to go in the ring loop before starting the ring.
  4. Long beaded picot –On the tail ring I made a very long picot. After completing the butterfly, I put 4 black beads over it with a hook, then snipped the picot in the center and tied a knot to keep beads in place. Snip off excess ends.
  5. Rhoda Auld’s method for bead in center of ring. This was new to me. I Love it for various reasons and am eager to try out a few more ideas with it. I used it for all 4 wing rings.
The collage shows how the bead is hooked over blue thread and the loop is held with a holder pin/paperclip. This pin passes through both the loop And the picot. When it is time, a loop is pulled through both simultaneously to make the join. The bottom left is a back view to show join.

  1. Frontside/backside tatting meant I used down and up picot joins respectively. 
  2. Avoiding colour blip in Lock join – I did try my own method, but the thread is just too thick to hide it completely. And I was colour-blinded ;-P I thought the yellow blips could camouflage as tiny beads! 
  3. Ninetta’s blipfree join was used in a couple of picot joins, and as usual I counted the join as 1ds. 
  4. Elaine Gan’s Reverse join came in handy thrice, to switch threads/colours. 
  5. Green seed beads in place of all the picots on wings.
  6. In Anchor size 20,  the  butterfly is 2½” wide and 1¾” tall. A good size for brooch, pendant, or hair ornament
Phew, that’s it. I'm happy, though - getting more confident with beads! If you like this butterfly, fine, otherwise think of me being beady-eyed at the time ;-P

Oh, and I added a center to the Wreath snowflake prototype. It looks more like a flower now! This stitch count won’t work for an ice drop version. I added a faceted glass bead and wound the threads to make a suspension loop for ornament.


Many thanks to all for bringing joy fluttering into our TatLand!


Sunday, 27 October 2019

Auld is gold

Pin It now!
Snowflake #15 in Land of Laces’ 25 Snowflake Project

Wreath Snowflake
(& possible ice drop)
This is a prototype using Rhoda Auld’s bobble technique, based on Ninetta Caruso’s pictorial and can be worked in one pass.
The colours, texture, and central hollow create a wreath-like effect that can be inserted over a bauble or a candle. It can be suspended as a tree ornament or add bling for earrings or pendant. We can also continue on the back with a ring/chain round to encase a gem for an ice drop.

Model tatted with Anchor Pearl Cotton size 8 measures a tad over 1¾”. The glass gem has a diameter of just over ¾”

A rings-only pattern using 2 shuttles to stack them facing opposite directions (ring as fish). If it is your first time using Auld’s bobble, I recommend first trying Ninetta’s pictorial and then making one motif (repeat) of this pattern with scrap threads before attempting the actual flake.

Abbreviations and Notes :
Sh = shuttle. R = ring . SS = switch shuttle. JR = Josephine ring (half stitches)

Sh1 – green ; Sh2 – red
I tatted over tails at the start, hiding under respective rings.

Θ -  Rhoda Auld's method to join stacked rings, as shown by Ninetta. It basically captures the other shuttle thread within the open ring, between 2 stitches.
For odd rings (green here), follow Ninetta’s method. Pass Sh2 through ring from behind, and over the shuttle (core) thread.
For even rings (red here), do the opposite : pass Sh1 over Sh2 core from above and down through ring loop.

Always keep previous work to the left.

RW = reverse work. I started off without any reverse work as in the tutorial, but found that the thread emerged on the ‘wrong’ side of ring. For some reason, RW made it easier to manage the bare thread space! Hence, it is better to RW after each ring in this pattern. 

bts – Sh2 (red) bare thread space about 1ds wide on the outer edge of both sides of the odd rings, ie. a total of 2 or 2½ ds wide bts
Do not leave any bts before starting green odd rings.


Pattern : 
Sh1 : R1: 3 Θ 3. rw, SS
Sh2 : R2: bts, 6 Θ 6. rw, SS rotate
Sh1 : R3: 9 Θ 9. rw, SS rotate
Sh2 : R4: bts, 12 Θ 12. rotate
         JR: 10. rw, SS  Capture with overhand tie to center the floating ring.
Sh1 : R5: 9 Θ 9. rw, SS
Sh2 : R6: bts, 6 Θ 6. rw, SS
This completes the first motif. Repeat 5 more times, joining back in a circle.

Do not cut thread. Continue around the inner margin with a lock chain. (I had already cut off threads when the idea occurred, hence you see a green lock chain).

Lock Chain : [5 +(space after R1)]x6.

Cut and tie and hide ends.
OR continue with the lock chain to make a loop for tree ornament.
OR continue at the back with rings and chains to encase a cabochon for ice drop.

I am not happy with my Josephine rings. Pearl cotton is not a good thread for tiny rings or JRs. Perhaps next time I will use beads instead.

My initial idea was to use stacked rings only as a central round, adding more round(s) on the outside. But I like the shape and didn’t feel like disturbing it. The idea for outlining the Inside, came to me suddenly a couple of hours back, and I made the lock chain.
Another idea alongside, was to make David’s Star in the negative space using interwoven lock chains.

What do you think? Your opinion and suggestions are valuable, so please speak freely.

TõTõT

Have I told you yet? Since mid-2017, I haven’t uploaded any pics to my pattern page – it is already so crowded!!! Then I had this idea and started a few months back - listing all my patterns in Google Doc files, category-wise. It is easy to update and see at a glance. The Snowflake patterns are all up to date with a photo and links. Even if a pattern has a pdf file, I request you to go to the respective blog post since that is where I may post more tips, and updates. And comments often offer a lot of ideas J


 ËÌËÌË happy deepavali  ËÌËÌË

Thursday, 24 October 2019

a friendly neighbourhood

Pin It now!
I count my blessings to have such talented and generous friends in my global/digital neighbourhood. Here are a few ‘gifts’ I gratefully received recently….
In the order they were worked....

Elizabeth’s doily Round Robin 15.
Jenni Clark (Liyarra) posted her beautiful pink version on facebook & I liked it for a snood. She shared the pattern with me. It is from an old blog ‘tattingroundrobin’. Does anybody have a link?

More rounds to go.
Not happy with my chains - some overlap. Not a problem as it will not show up when worn.  I used 2 colours to showcase the flower shape, the green showing up as foliage.
Does the center look familiar?  Yes, it's what started the whole False CTM exploration. And to think I started this as a slow side project to disengage my mind and focus on downsizing my UFOs ;-P

Spool Pin Doily 
Who else but Anita Barry can come up with a butterfly to place under the spool pin?! How cute to have a butterfly sitting pretty on the sewing machine, keeping an eye on our sewing (or current lack of it, in my case)?! She is making these to sell at fairs, etc. yet shared the pattern with me!
Again playing with colour placement and had to include some lavender! It is worked continuously using 2 shuttles.
Now this is an example where we can continue into next rounds using the same core thread (in this case the mustard) but adding new colours for each round since they are chains with thrown rings : false ctm! If only I had remembered ;-P
This time I simply twisted the long antennae picots when it was wet. One picot is missing on one of the purple chains - can you identify it?

Walla-Walla Sweet Onion Motif 
Kathleen J. Minniti is not only talented but also explains so well! I understood Aurora’s onion ring technique when Kathleen used it for my dancing peacocks doily! But she uses only a half stitch instead of a full ds to capture the inner ring. I do like this method!
She PM-ed this pattern a couple of months back, with 3 versions for the center leaf. The left motif has a dot picot tip, and right one has a bullion knot (which got pulled out when I closed the ring).
A clever feature of this motif is the captured picots! Multiple alligator joins across the same picot. The left one has smaller picots than the right one. I like it, but need more practice.

Both these patterns (butterfly & onions) can be worked in one pass using 2 shuttles.
We mostly get pink/red onions here, but I've eaten similar onions in Australia.

Bobble stacked rings
And finally below is my trial of Rhoda Auld’s bobble technique posted by Ninetta Caruso which she shared with everybody ;-D  
Here again, one captures the previous thread in the current ring. It reminded me of how Ninetta curled her small rings.
I wanted to see if a circle could be formed with the stacked rings and then to see how it works with different ring sizes. I want to use this in one of my snowflake centers. Many textured effects are possible with this technique! 

Captured together...the butterfly & onion motifs are worked with Anchor Pearl cotton size 8, and the bobble trial is in Anchor size 20. Elizabeth's doily measures 4½" so far in Anchor size 40.

You generous ladies have captured my awe and gratitude J