Showing posts with label Vicki Clarke. Show all posts

Saturday, 25 April 2026

3D solid tatting

Pin It now!

 Who knew these cute little birds would be the cause to anger some people who then went on to make them an extinct species in their ecosystem! This pertains to only one specific FB group from which many of us have been booted out while others have left voluntarily. We now have a new group started by Vicki Clarke, called 3-D Tatting. All birds wiped out from that one group are now flocking together in this group, LOL, and others as well.

Bluebird in solid tatting
Continuing from my last post about flat solid tatting, see how wonderfully it can be applied to tatted amigurumi models!!! All pics in this post belong to Carolyn Craig who is the experimenter, designer, and tatter. I will quote some of what she shared with me privately with permission to use whatever was needed.

What is Amigurumi - Amigurumi is the Japanese art of crocheting or knitting small, stuffed yarn creatures or objects. The word combines "ami" (meaning knitted or crocheted) and "nuigurumi" (meaning stuffed doll). Amigurumi are typically worked in spiral rounds using basic crochet stitches like single crochet and invisible decrease. They can now add tatting to the list for amigurumi. CRAIG

Solid Tatting by CAROLYN CRAIG - is the same as amigurumi. It is continuous rounds instead of joined rounds in a spiral, but it can also do flat solid tatting which is continuous. 
3-D Lips
After her 2D solid tatting in 2020, Carolyn tried these lips, working them in continuous rounds and stuffing them before sewing them closed
The Lips became the body of the birds. I am a retired art teacher. I have used basic shapes in clay, paper, and other materials to make different objects for class projects. I see how some can be made with the solid tatting, I just have not mastered all the ways it can be used. CRAIG
3-D Mouse Family
"The mouse family in solid tatting with jute... continuous spirally circle of tatting"

3-D Robin
This Robin is worked in yarn. 
You can see how she is experimenting with different threads/yarns as well as sizes to get the desired result.
The collage shows how the body is being worked as a single entity, a continuous round which includes the head in a different colour. Before the body is closed completely, it is stuffed. The tail, wings, beak, eyes are added later.

Below we see the assembly parts of a solid tatted Sparrow. 

3-D Sparrow
"This sparrow was done in 4 ply acrylic yarn with a Moonlit shuttle. The sparrow is continuous solid tatting in a spiral to form body and head. The spine and tail are solid flat tatting in one piece. The wings are regular tatting."

The second image is the parts of sparrow solid tatting in a continuous spiral - body and head, Flat solid tatting which is continuous - spine and tail, and regular tatting - wings with moonlit shuttle in background. 

If you look close at the flat spine and tail, one of the two stitches used to create SOLID TATTING can be seen in the top and bottom row……. CRAIG

TIP: Carolyn uses two types of lock join to achieve her compact 3D solid tatting. For the most part the lock join made through the wasitband of a double stitch which she calls LFW (LJ through front waistband). It is the horizontal bar of a DS when the DS is facing us; the LJ is made within the stitch, between two half-stitches. The 2nd is when the LJ is made through the back waistband - LBW. This is simply like joining between two DS. Since 3D model is tatted all from the front, the LFW is used much more. LBW is used for increases/decreases to shape the model. 

3-D Bluebird
"The blue bird is with size 3 tatting thread (but tail and wings are still in size 3 thread instead of size 10)"
 
A closer look at these beauties!

These are but 3 solid birds designs. Her aviary consists of 7 or 8 different birds and you can see them in her FB timeline or the 3-D Tatting group (besides a few other groups). There are many active preservationists who stepped in to prevent extinction! Carolyn will be sharing her process and experiments in detail in future.
🐦🐦🐦🐦🐦

3D in Tatting - There are numerous ways to tat 3D models with or without stuffing. Some are worked continuously (as in the listing below) while others can include joining motifs, bowl shapes, covering a balloon or ornament, etc.  These could include in no particular order ....

Please note that the above list is by no means exhaustive! Feel free to remind me of any I might've missed.
🐦🐦🐦🐦🐦

I wasn't going to, but this is adorably cheeky to not share! Here's what some veteran masters of tatting are doing in the above FB group .... Anita posted this yesterday and then left the group and told me I could share after several other tatters expressed their desire to copy/paste. 
Please note that this is the vintage edging (recreated by Anita) that inspired my threader holder motif here - https://tipsaroundthehome.blogspot.com/2026/04/literally-out-of-box.html

And now I am told Martha Ess has also posted something similar listing all our greats who inspired her 3D design using block tatting and it reads like a true historical timeline. 

Cheeky but civilised and disciplined and following all rules! 
🐦🐦🐦🐦🐦

Many thanks to Carolyn for allowing me to share her lovely work and details and to ALL others mentioned who allow us to use their ideas and techniques so that we do not have to reinvent the wheel.

Monday, 14 August 2023

almost 3 years

Pin It now!

 That's how long it has taken me to complete the pdf presentation of pattern #37 from Eleonore Endrucks' 1920 book! I started tatting it in Nov 2020 (when we first invited volunteers) but encountered cupping issues. However as the list of posts at the end shows, it was never quite forgotten. I do so love the square/diamond motif in the center.

Anyways, so there were only two patterns of the original 44 left to be reworked and uploaded to the Endrucks 1920 Project. One was this and the other was by Krystyna. We gave ourselves an ultimatum to finish by July-end and also a bit of a competition to see who finishes 'first', LOL. Well, I finished last. I will share her work in the near future - it will require two or more posts!

Pattern #37 from Eleonore Endrucks' German book ‘Die Schiffchen-Spitzen’,1920, in modern and modified reworking (click to download)https://drive.google.com/file/d/180COMwnzgXXm_PphjUCD_qmq7xLMg4Pz/view

What I found truly fascinating was how we could play with the sequence of tatting and thence the direction of rings and the colour of elements in the central motif! These are all shown here in an earlier pdf      Square Diamond Motif from E37 pattern and options (click to download)-  - https://drive.google.com/file/d/1wqAPnOUZwLJ9tEUk55wDZhAMw2qCNFSj/view

Cupping: To solve the cupping issue, I did not want to stray too far from the original. Change one element and you might encounter a cascading effect! Hence little tweaks like one less round in the rosette, longer and false picots (which increase the span or width of that round) and longer chains, a couple of larger rings, seemed to suffice in keeping the essence of the original design intact yet laying flat. And catering to modern sensibilities, the climbing out pathway includes split chains and split rings. Although Endrucks' original stitch count and continuous path involving shadow chains is also indicated in a separate diagram. 

Cupping is a common problem we faced with Endrucks' doily patterns. Ninetta wrote a nice post on the issue - https://ninettacaruso.blogspot.com/2020/11/renewed-on-third-try.html

Anchor 20 (¬Lizbeth 10) June2022- 14 cms diameter

Pattern presentation and especially diagramming was quite a challenge. I kept having to retrace my steps. For one, it is never a good idea to have huge time gaps when working on a pattern or on it's presentation. Finally it evolved into something I felt comfortable with, using a different colour  for each round; bright pink for the climb-out path/element; etc. 

Anchor perle 8 (¬Lizbeth 20) Dec2021- 10 cms diameter

Test-Tatting: In mid-May 2022, when Sue Fuller was updating the Endrucks' Project page -  https://www.theonlinetattingclass.com/endrucks-class-project in their new site, I saw Vicki Clarke's beautiful model that she had worked somewhere around 2015-16. While her notes and presentation haven't been found, she graciously accepted to test tat the count I provided. More on her enthusiastic and systematic journey, with pics, in another post soon.  

Anchor 40 (¬Lizbeth 40) May2022- 9.5 cms diameter
Two-Part Tatting: This was yet another tweak I tried on Round 4, but not very happy with the result. Hence I haven't shared it. However, in this, I kept to the original in the number of rounds in the rosette. 
Both the red above, and this blue one are worked in two parts - cutting off after the diamond motif. It is good for trial purposes when only the in-progress round can be snipped off if it does not work (as seen in the trial pic) or if you wish to avoid the long split chain segment.

Just a few derivatives
Derivatives: As with most of Frau Endrucks' patterns, this one turned out to be quite rich in derivatives! Besides what could be done with the Square Diamond Motifs - applique, charms, earrings/brooch/pendant ; arranged or tessellated into bookmark, bracelet, cross, mat ; or joined into a 3D tree ornament, gift bag, and box; there were Heart motifs that arose, too! The hearts could be lined into a bookmark or edging, or used individually as motifs or jewellery or applique. Margaret Davies enlarged one of the hearts and even created an angel and bell from it. She recently used the hearts to make earrings for our game (https://tipsaroundthehome.blogspot.com/2023/07/wear-me-roundup-2.html). The angel was used in a previous game (#TagMeEndrucks Nov2022 ; TagMe roundup 1 ; TagMe roundup 2 ; TagMe roundup 3)
More future derivatives, variations, and applications will be found in the respective Directories!

E37 Patterns: Here are all the pattern pdfs we have from #37 so far - 
Doily - https://drive.google.com/file/d/180COMwnzgXXm_PphjUCD_qmq7xLMg4Pz/view
Square Diamond Motif (and Mat pattern) - https://drive.google.com/file/d/1wqAPnOUZwLJ9tEUk55wDZhAMw2qCNFSj/view
Eye Spy Heart #1 https://drive.google.com/file/d/1Auf-CIZYLUQdkA6jalQR4hkS7Ah-Deld/view
Eye Spy Heart #2 https://tipsaroundthehome.blogspot.com/2022/07/heart-pattern.html
Enlarged Heart https://drive.google.com/file/d/1G2AboS4amzg5HgLGKoZ6X-bGNrLZBLCt/view
Angel/Bell https://drive.google.com/file/d/1aq202-ESOzP_DLlA1bQ1mz3unyTTrpwr/view
SOUPy Vine bookmark https://tipsaroundthehome.blogspot.com/2023/07/soupy-vine.html

EP Doc: And as you well know by now, you can find all 44 patterns here in the Endrucks 1920 Project document here - https://docs.google.com/document/d/17LEVftXweztBIOWh4sL4BB7bX65ssoOsOn4oXIgCepY/view 

My sincere thanks to all my friendly and helpful tatters mentioned in this post.
It underlines the community effort - the hallmark of Endrucks 1920 Project!

Related Posts (chronologically) -

Friday, 30 June 2023

gifts galore 2

Pin It now!

 Besides all the thoughtful and practical gifts Anita Barry sent me, she also sent several excellent books. My tatting book collection just grew a whole lot! I invite you join in my pleasure .... (listed in no particular order)

Taboo Tatting - Anita Barry. 
This little booklet is a perfect example of the creative fun Anita manages to inject into all her projects. It is one A4 size page folded into four 'pages' (printed front and back) and tied with a ribbon. She had shared it with me years back and I had printed it out. But receiving it from her is special. It has tips, tricks, challenges, little projects, ....

Tatting Times - Karey Solomon
I'd only heard of Karey Solomon's quarterly subscription-based mini booklets/newsletters and now I hold one in my hands! She had been sending these out for 30 long years till 2022. This post is worth reading - Launching Tatting Times Online

Tea is for Tatting - Martha Ess.
Another treasure! Martha Ess holds a special place in my heart for several reasons, not least for uploading Endrucks' 1920 book, ;-D. Martha's books are eye-openers in themselves, taking a technique or theme and running with it, popularising several techniques/effects through fun patterns. And she has a new book in the offing

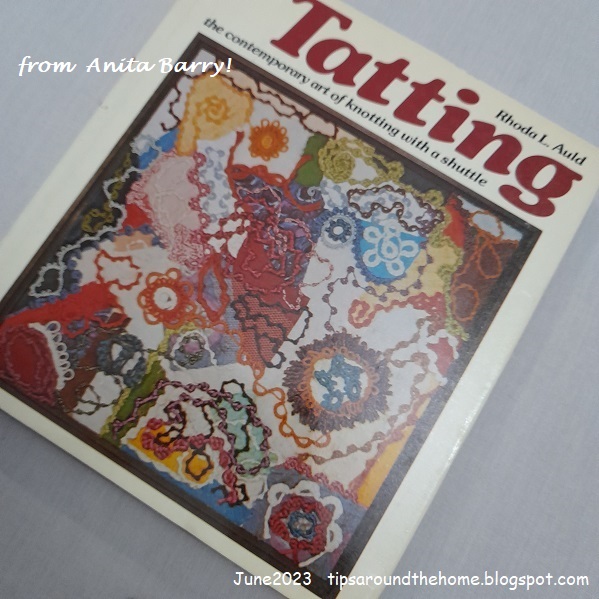
Tatting - Rhoda Auld.
A must-have in any tatting library! I have already read several pages, but haven't played with shuttle in hand yet.

Tatting Techniques - Elgiva Nicholls.
One of my all-time favourites is Nicholls' 1962 Dover publication Tatting Techniques and History, but this was also highly recommended and desired. I'll be spending many happy hours/days reading and imbibing.

Coffee Classics - compiled by Anita Barry.
Anita had told me that she was compiling her favourite coffee recipes to hand down to her loved ones. She made at least four and these are all hand-written and sprinkled with sketches. I had no idea one of the recipients would be me!

A Collection of Tatted Bracelets - Victoria Clarke.
Blogging and the online world has introduced me to so many wonderful and talented artisans. One such is Vicki who often shares her somewhat quirky but always clever designs. And holds short tat-alongs two or three times a year. This is the time for her next two back-to-back TALs - https://victats.blogspot.com/2023/06/coming-soon-very-canadian-tat-long-2023.html 

The IOLI Bulletin Fall 2022.
It often happens that my complimentary copy of the bulletin (when my article is published) does not reach me. Anita sent me her copy and she had been thrilled to see the back cover.....
...these are a few images from my 2nd of 3 articles on Endrucks and the Project!

The Complete Book of Tatting - Rebecca Jones.
Would you believe Anita sent this separately because she forgot to include it in the earlier shipment. So, her bundle of gifts actually reached me in three shipments! Another treasure in my library!

This is something she had received at one of the Palmetto Tat Days. These were all done by Phyllis Schmidt! I believe she does some sort of giveaway every year. https://phyls-handwork.blogspot.com/ 

I placed this last as the perfect way to say Thank You to Anita for all her gifts  especially the books, and not least for her solid friendship through the years!

I have made it a point to periodically read from all the books and make good use of the knowledge and perspective. Even cleared out an entire shelf from the wall cabinet in my bedroom to display all my tatting books in one place and keep them within quick reach! And each one has a lace (mostly tatted lace) bookmark.
There might not be enough time to try out stuff from the books at present, but the literature is equally interesting. And there is that beckoning light to try out patterns and experiments and ideas as time progresses!!!

Thursday, 26 March 2020

whats in a size

Pin It now!
A spring bonanza! A generous lady from South India I ‘met’ on facebook sent me these gorgeous balls of Lizbeth threads in size 80! Although I tried to dissuade her, and also offered remittance, she would have none of it and asked only for a piece of my tatting (which will unfortunately only get mailed once this pandemic chaos is over). Luckily the threads arrived just before lockdown was declared, phew! 
Can’t thank her enough, despite hubby rolling his eyes at more stash ;-D (whispering - He's the one who bought the 36-piece Ferrero-Rocher boxes to store my threads ... though at the time I didn't realise only size 80 fit in them)

One of the balls had a single ring (the pink petal) with thread still attached. I immediately used up the thread to tat 4 more rings for a complete rosette. Not bad, eh?! I thought it would be difficult to work in size 80. I did tat a bit looser, having heard that the thread breaks when closing. Notice the difference between the pink petal and the rest. 
Hiding the tails could’ve been neater, though.

Heeding Vicki’s call for a fundraiser project, I started the rosettes in size 20. I am taking this as an opportunity to compare the different brands and intra-brand sizes in my stash. Details are tagged on to each.
I suggested this idea to the organisers, but they haven’t worked on it so far. It would’ve been such a great opportunity to create a sort of comparison chart and build on our tatting resources. There are charts, but none that have Anchor listed in them. (UPDATE : I did not include decorative picots in the measurements )

The 2 variegated rosettes on the left are Lizbeth (size 20, and size 80). The rest are from Anchor Mercerised Crochet Cotton and Red Heart so far.

Meanwhile I'm working on extracting a Huguenot Cross from the cross center here. Progress on the written instructions for the MS Cross is slow, though many have requested and received the diagram pdf.


Thursday, 11 July 2019

bunch of pattern updates

Pin It now!

There are quite a few updates I need to share. I will be updating the respective posts, too. This is the reason I suggest going through the related blog post even if there is a pdf, since it is easy to add updates :-D.

Recently I realized that the pattern link was corrupted and irretrievable. This gave me a chance to add the Patchwork bookmark pic.
Here’s the new link : Snowflake (6-pointed motif) pattern

This doily has long measured picots which are Functional. I worked the doily in Anchor size 40, but what if one wants to use a different thread size?
I worked a short chain with same thread and found that a 7mm picot is equal to the width of 7 double stitches! And so on. Easy to remember and convert.
Just substitute 1mm tall picot with 1ds width.

You may remember that this is the round robin doily which Coretta had started. She graciously accepted to share the pattern link. It is a Google Docs link and the pattern presentation is a mix of 4 different styles, but will take time to clean up. 
Coretta also invites you to a new round of designing – continuing from the 5th round onwards. If interested, please leave a comment here or on her blog here (or on facebook or Craftree)
Here’s the pattern link : Hexaflower Doily pattern 

In the beaded version of this snowflake, there is another way to work with ball and shuttle, if you do not wish to use direct tatting (unflipped stitches). Simply make a SLT & reverse work to tat that chain segment. However, you may have to pre-string the large bead on to the shuttle thread, instead of unwinding. Many paths, but be vigilant.
I added the tip the next day, but blame the oversight squarely on my lack of focus due to fever.

And what's a post without some visual masala?! So here's some unfinished work.

Intertwining Bracelet - Anastasiya (Hobby Point)
Inspired by Aliona Racu’s bracelet in facebook several weeks back, I started this Ankars/Celtic  bracelet in June. 
For the pink pieces, I loaded one bobbin, then kept pulling out a length of thread to work the chains. Thus I got ctm with a single shuttle and fewer ends to hide. 
I’ve had all these pieces ready but need to continue watching the video to assemble them. And I just haven’t been in the mood – what with being consumed designing snowflakes et al ;-P

Boxy Maple Leaf – Vicki Clarke
Like last year, Vicki again did a very Canadian tat-along which I started immediately - twice in fact (the one on left is in size 40, the one on right is pearl cotton size 8). But somewhere along the way, I lost the will to continue. I didn’t like my colours, I didn’t like my tatting, and I couldn’t focus. I still haven’t cut off the threads, so I might get around to completing it someday. My apologies to Vicki for my bad outcome.

She then shared a 4th of July tat-along pattern – Rockets Red, in 3 stages, which turned into a lovely flower! Saving it for a future date.

On a happier note, though, I have done my trial for the next snowflake - well it turned into a star - and just need to work out the center. So stay tuned :-D

Saturday, 22 September 2018

twist n twirl, spiral n swirl

Pin It now!
doily tat-along and pictorial
Completed the tat-along a week back but too many presentations swirling around in my compy vying for attention! Without much ado, let me 'jive' in ….


Swirling Butterflies Tat-along 

I made a few tiny tweaks and here are my notes –

1. Treble as a twisted picot : The 2nd part of a treble is actually just a twisted picot!!! Well, well, well. I tried it on some of the tds. Pictorial at the end.

2. The double leaves : It is a very clever design where the leaves are asymmetrical but with graduated segments – from 3ds through to 6ds - creating a swirl of their own!
But my conjoined double leaves just wouldn’t stay flat. Finally I settled with a ring of (3+3) and 2nd ring (4+6), leaving them unattached to each other.

3. Bare thread under the butterfly. My little indolence served 2 purposes :
visually, I felt that the entire body on the twig made it seem more like a caterpillar ; tatting the butterfly was normal - only the double stitches of 1st & last trebles were encapsulated (2 core threads).
And instead of 3 shuttles,  I used a ball and shuttle,  ctm, for green, and 2nd shuttle for pink.

4. An idea – one can make the butterflies separately (single shuttle only – see here) and join to twig normally. Which means, we work the twig with shuttle and ball only! But the butterfly will need 2 picots on core thread held by paperclip.

5. Long picots made and snipped for the antennae.
6. Mutilated Wing – I made only 4tds on the wing instead of 5tds. I did not count the TJ (treble join) as a tds, hence the goof-up. Some of the butterflies look like elephants to me! If I hadn’t blogged, it would’ve gone unnoticed even now ;-P

7. Directional or fs/bs tatting: My way of doing the treble backside is simple – only work the ds part of it backside, keeping the rolled part as usual. Ninetta shared her method here. Always good to have choices!

8. Measurement : Worked in Anchor size 20 threads, the doily works to 4” with butterfly ; and 3” if one leaves out the butterflies.

9. Techniques used : fs/bs tatting, tds (treble tat stitch), spiral rings, floating/thrown rings, encapsulation (direct tatting with unflipped stitches), 3-shuttle tatting (I used 2 shuttles and a ball).

10. Spiral Rings : I believe the best effect of tds is in these spiral rings!


This new stitch is really catching on J 
The fun part is that it can do Everything that a normal double stitch does - 
including half tds, padded tds, and picots of all kinds !


For those who consider the treble a bit of a mystery, perhaps it’s similarity to a twisted picot will help? Most of us know of or have done the twisted picot. So, here’s how we can use the same movements to make the 2nd part of a treble tat stitch !!


Treble Tat Stitch worked as a Twisted Picot
or
Twisted Picot In the Treble Stitch !
Click on any image for enlarged view.
This is a alternate method of working the 2nd part of a treble stitch. 
It can be used as an eye-opener to show the 'common threads' running through 
seemingly different tatting techniques.  

4 tds can be seen on a chain, of which the first 2 were made normally 
and the next 2 were made using the twisted picot method/movement.
See Twisted Picot video here.

 1. Start next tds with a double stitch

 2. Pull loop through picot (not shown), tighten and pull another loop through it.
BUT do Not pass shuttle through this loop.

3. Twirl shuttle and Twist loop ! 
Now here’s where the twisting starts and the direction is very important. 
Hook/hold the loop on the shuttle and
rotate the shuttle clockwise like a ferris wheel – 
moving towards us from the lower side and away from us on the upper side. 
The loop gets twisted once.

If we rotate in counterclockwise direction, this is how the tds turns out -

 4. Repeat this movement again and now there are 2 twists in the loop.

 5. Repeat this movement a 3rd time so that we have 3 twists in the loop.
Keep the loop hooked at all times to avoid untwisting.

 6. Now pass the shuttle through the loop. 
This is the tricky part since the loop should open up sufficiently to allow shuttle to pass through.
If needed, tug the loop to lengthen it.

 7. Start pulling the ball thread to close the twisted loop. 
Then pull the shuttle/core thread to tension the stitch.

 8. Treble stitch all snugged and complete using the twisted picot method!

 9. 3 more trebles made in similar manner.

This method works well with this size 10 knitting cotton as well as Anchor size 20 threads. Does it work equally well for finer threads? Try it and let us know J


UPDATE : Check out My Tutorials page for more Treble tatting pictorials, variations and analyses 

That’s it for now, but I am super excited to show you my perfect Cluny leaf – finally happy with it – and absolutely no colour blips on either end. Will share the trick soon.