Showing posts with label Phyllis Schmidt. Show all posts

Friday, 30 June 2023

gifts galore 2

Pin It now!

 Besides all the thoughtful and practical gifts Anita Barry sent me, she also sent several excellent books. My tatting book collection just grew a whole lot! I invite you join in my pleasure .... (listed in no particular order)

Taboo Tatting - Anita Barry. 
This little booklet is a perfect example of the creative fun Anita manages to inject into all her projects. It is one A4 size page folded into four 'pages' (printed front and back) and tied with a ribbon. She had shared it with me years back and I had printed it out. But receiving it from her is special. It has tips, tricks, challenges, little projects, ....

Tatting Times - Karey Solomon. 
I'd only heard of Karey Solomon's quarterly subscription-based mini booklets/newsletters and now I hold one in my hands! She had been sending these out for 30 long years till 2022. This post is worth reading - Launching Tatting Times Online

Tea is for Tatting - Martha Ess.
Another treasure! Martha Ess holds a special place in my heart for several reasons, not least for uploading Endrucks' 1920 book, ;-D. Martha's books are eye-openers in themselves, taking a technique or theme and running with it, popularising several techniques/effects through fun patterns. And she has a new book in the offing! 
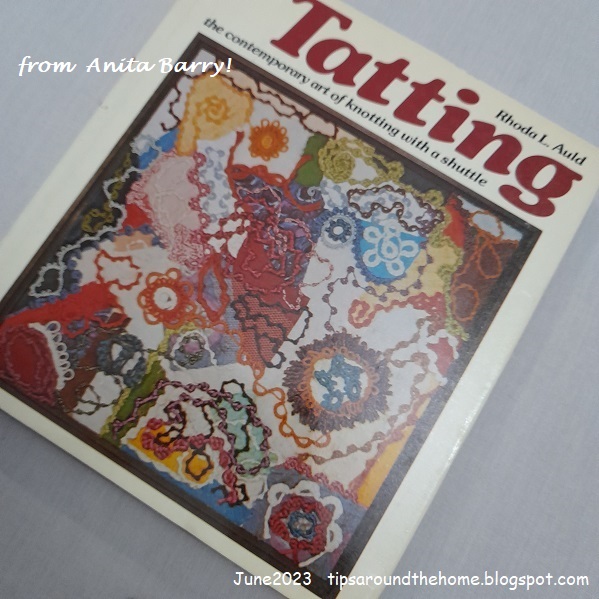
Tatting - Rhoda Auld.
A must-have in any tatting library! I have already read several pages, but haven't played with shuttle in hand yet.

Tatting Techniques - Elgiva Nicholls.
One of my all-time favourites is Nicholls' 1962 Dover publication Tatting Techniques and History, but this was also highly recommended and desired. I'll be spending many happy hours/days reading and imbibing.

Coffee Classics - compiled by Anita Barry.
Anita had told me that she was compiling her favourite coffee recipes to hand down to her loved ones. She made at least four and these are all hand-written and sprinkled with sketches. I had no idea one of the recipients would be me!

A Collection of Tatted Bracelets - Victoria Clarke.
Blogging and the online world has introduced me to so many wonderful and talented artisans. One such is Vicki who often shares her somewhat quirky but always clever designs. And holds short tat-alongs two or three times a year. This is the time for her next two back-to-back TALs - https://victats.blogspot.com/2023/06/coming-soon-very-canadian-tat-long-2023.html 

The IOLI Bulletin Fall 2022.
It often happens that my complimentary copy of the bulletin (when my article is published) does not reach me. Anita sent me her copy and she had been thrilled to see the back cover.....
...these are a few images from my 2nd of 3 articles on Endrucks and the Project!

The Complete Book of Tatting - Rebecca Jones.
Would you believe Anita sent this separately because she forgot to include it in the earlier shipment. So, her bundle of gifts actually reached me in three shipments! Another treasure in my library!

This is something she had received at one of the Palmetto Tat Days. These were all done by Phyllis Schmidt! I believe she does some sort of giveaway every year. https://phyls-handwork.blogspot.com/ 

I placed this last as the perfect way to say Thank You to Anita for all her gifts  especially the books, and not least for her solid friendship through the years!

I have made it a point to periodically read from all the books and make good use of the knowledge and perspective. Even cleared out an entire shelf from the wall cabinet in my bedroom to display all my tatting books in one place and keep them within quick reach! And each one has a lace (mostly tatted lace) bookmark.
There might not be enough time to try out stuff from the books at present, but the literature is equally interesting. And there is that beckoning light to try out patterns and experiments and ideas as time progresses!!!

Monday, 29 May 2017

rising a month late

Pin It now!
tatting on a paperclip - free pattern

Radiant Sun Paperclip
   
This little project was worked in 2 days flat – from ideation to execution to presentation – so that we could have a surprise paperclip pattern before end of April.

You know that I am not proficient with beads or their terminology, etc. So there were many senior moments here. Only later after pdf was made and sent (in record time for me! And this included a quick test tat and valuable feedback from Phyllis), I emailed Nina Libin for info and she graciously explained the correct terms along with links (which helped immensely during class). Georgia also shared links I didn’t know about, in class. I have used those terms & links in this post.

It all started when I saw a jewellery ad in the newspaper and wondered if I could get beads to stay positioned as free-floating rays using a shuttle.
I had an idea and quickly searched for similar projects & tutorials but as often happens, nothing came up close.
Pattern is a simple chain with beads radiating freely around .
To execute my idea I needed the end/stopper bead to be large.
Slip bugle bead and pearl bead on to a picot loop ;
Before tensioning the picot, loop it over the pearl snuggly like a noose (like we do for the SSSR or LTROR);
Pull back the extra length of loop, ensuring that the wrapped thread stays tightly noosed around the bead.
Continue with chain.
Pretty simple, easy, and no extra tools required.
Now to put it to the test, I started to tug at the pearls – 2 stayed in place, but one fell off.
One can use this method only if the piece is going to lie flat – glued or appliqued, and not worn/used.
Back to the drawing board. This time I used a beading needle to thread back through the bugle bead only. Of course it worked. But it has been around for ages – called the beaded fringe*


 pattern is so small, that it can quickly be finger-tatted . Or needle-tatted

A 'luggage tag loop' is used to start. It creates a complete double stitch. 
Care must be taken to keep the shuttle to the right.

I chose a blue clip for sky with the yellow sun emerging. 
For the right shade, I used 3 strands of Anchor embroidery thread.

If I leave tails on both ends, doesn’t it look like a headdress ?!

Many more ideas radiated from this, but the sun is setting for now :-)

* other terms : beaded stem (Corina Meyfeldt prestrings the beads and pulls into place when required) ; single file beaded picots (Nina Libin, Book #18)

this is not my first pattern with bugle beads on a paperclip - I made several trials of another pattern in February (remember, Ninetta? :-P), but have let the final tatting & presentation lapse. Should get back to it ....


Grateful thanks to Georgia, Nina, & Phyllis

hope you enjoy tatting this quick little pattern :-)


Saturday, 20 May 2017

DROPping into space !

Pin It now!
I had the pleasure of test tatting a snowflake which had square rings.
Jumped at the opportunity to practice square rings. The only time I tried a couple of these was 3 years back & at the time I was still groping my way through the plethora of techniques. Nothing to write home about.

Diamond Snowflake
Phyllis Schmidt

The highlight of this flake is obviously the square ring oriented like a diamond. 
A square ring is simply a combination of padded tatting and regular tatting

I experimented a lot with the square rings, starting with Christiane Eichler’s method. It is very effective. But you have to work with 2 taped shuttles throughout the entire pattern, which slows down the speed of tatting (unless you have those double bobbin shuttles).

Hence I really liked Phyllis’ practical tweak where she uses only bits of spare thread limited to the square ring. Rest of pattern is worked normally. 
Even with spare thread, I tried a lot of variations and all seem to work just as effectively – same size, smaller size, embroidery floss, different colour, etc. – once we get a hang of the technique, and close the ring tight.

But I will still recommend 3 strands of embroidery thread for size 20 whether in same or different colour – the colour does not show up; being less tightly twisted, it grips the stitches within; it is finer than size 20; and it is easy to find the right shade.
Don't be afraid to pull the spare threads tightly and finally close the ring tightly at the very end, after you are satisfied with the angular shape.


My thoughts on square / angular rings :
I tried to make squares - rings or mock rings - using single bead on core thread, 1ds SCMR, dot picot, padded stitches, to name a few.
End result - padding is absolutely necessary to get really straight lines, whatever way we use to make angle (unless one tats loosely and blocks & stiffens profusely)
The padding can be along core thread as in the 2 methods above, or padding can be on the stitch.


See Phyllis' own working here, including a beaded version.
Pattern is shared here and will be discussed in OTC this Monday 
(along with my twisted picots in the Snowflake Sparkle, I think).

The top left is my first test tat ; the lilac is the final version. One of the spare threads in the latter is yellow coloured, but not visible even from up close.

TIP : And no, the spare thread does Not unravel. 
Yet to ease my paranoia, after closing the ring, I made 1 unflipped second half stitch, encapsulating the spare thread tails, then continued with chain normally. And further, I snipped them close, only after blocking, thus ensuring that the fibres caught on and held their place.

Techniques : 2 shuttle tatting, lock join, square ring, thrown rings, mock picot.
It is worked all from the front, in clockwise direction.
I did not do the unflipped half stitch before starting the square ring.
Blocking (for shape only) and stiffening is recommended.


Besides practicing square rings, I learned a lot from this test tat. Phyllis is so organized and precise in her response and resolution to all feedback. I have already applied this learning to some extent with good results, while testing/corresponding with Usha. Midways, I also became comfortable with Google Docs with it’s comment boxes, et al. Saves so much time !

Off to Space it goes

I magnified & mirrored my ice drops,
am now sending it into outer space.

That colourful bead box is one of my new acquisitions & I love the turning slotted lid !!! It opens only the desired bead segment, and keeps the rest in their place.

Warning : Continue reading at own peril - this is graphic material for precision tatters. ;-P

Yes, I snipped off the picot between rings in the green flake!!! But first I put a spot of fabric glue on each picot, let it dry, then clipped.
Sewed in the blue seed beads with single strand embroidery floss, going through both flakes.
Inserted the clear marble towards the end. A slightly larger marble would be ideal, but I had only these or much larger marbles in my stash.

Stiffened on the back with very slightly diluted liquid fabric starch/stiffener. It dried invisible.


Many many thanks to Phyllis for this splendid opportunity and lovely pattern

whether a flake, a double flake, an ice drop or a spaceship, 
hope you enjoy tatting this as much as I did.

happy tatting in whatever space you find yourself :-)


Tuesday, 7 February 2017

hooked !

Pin It now!

on TIASes, tatting on paperclips, and block heart !

Fish Paperclip
Phyllis Schmidt
Georgia has a great new surprise project every month on the Online Tatting Class. Phyllis’ tatting on a paper clip – a new pattern every month through this year ! The first one for January is this cute fish.
I had thread left over from a recent project – a size 3 or 5. So the fish is a bit large, but my first on a clip and I like it ;-P And it was such a quick tat, too, except that I forgot where to add the bead and ended up having to undo the half-tatted ring. Bead has to be on the shuttle, Not around the hand, silly me ! See, I can even make it stand upright  :-D  
Hmmm, I just noticed. See, instead of printing the pattern, I had quickly sketched the diagram and jotted a few things. Only now, as I compare her tatted model with mine on the large screen, do I notice the difference in tails (compare the caps).

Please note : To be sure, RODS is reverse order of a normal Flipped double stitch, not the unflipped second side of split ring, which is called a Reverse Stitch & it subsumes a reverse order but of unflipped half stitches.

Tat It And See 2017 – Day 10
Jane Eborall

Sniggering BC3 
thinks we're 'over the bend'
Clueless still
my Day 10 I send 

All my guesses
didn't pass the test
Setting it aside 
I'll, errrr, take a rest

I'm still going with a lady in a gown and this is her hair/hat/hood ; the rest of her ensemble shawl or cape will appear next, crossing over the neck with an alligator 'pin' (join) and tying off at that tiny little picot on the right !


Large Block Heart ....

I have so much lined up to share, but don't want to make this too lengthy ... so we'll all just have to wait a while longer ;-P But here's a peek into a single Block Heart - a larger one that can be used as brooch, pendant or lapel pin, or perhaps something else. This was the project with size 3 or 5 thread with which I made the fish above. It's still a work in progress, though, and I used a different join.


Many thanks to Jane and Phyllis for sharing their delightful patterns and I look forward to tatting more of them !

happy tatting, till then