Showing posts with label bead in center of ring. Show all posts

Tuesday, 18 January 2022

a hearty meal of tinies

Pin It now!

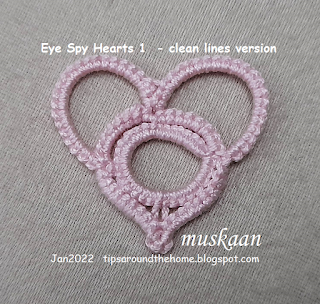
 There was so much interest when I asked which of the 4 trial hearts tatters preferred, that I can't help but serve up a hearty buffet for whatever each person's preference might be. However since #4 received the most votes (only written comments, no reactions counted) - 33, and #2 - 19, these are the ones I am sharing first. 8 tatters liked all 4. 
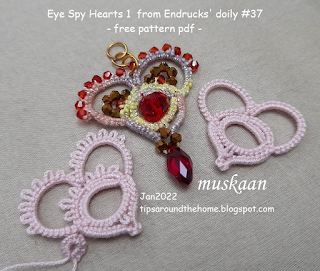
This is the first batch of Eye Spy Hearts 1 from Endrucks' doily #37 - 3 versions in the pdf - click to download : https://drive.google.com/file/d/1Auf-CIZYLUQdkA6jalQR4hkS7Ah-Deld/view

Linda Reiff saw an eye in the middle and suggested I call it 'Eye Spy' instead of 'I Spy' .... guess what, this is exactly what Anita Barry calls her extracted hearts (I had forgotten).

The hearts measure just around 3cms in Anchor size 20 which is equivalent to Lizbeth size 10.

This is by far the most favoured heart, hence the one I started diagramming first. Ninetta says this pattern can be used as a teaching model. Quite true; there are so many possibilities to play with sequence, techniques, effects, etc. It's size makes it an ideal practice pattern.

If you remember, this was the precursor to the picoted version. For first trials I keep picots to a minimum, especially decorative ones. Several tatters pointed out their personal preference for clean lines. 
It is easy to needle tat the motif. I am not focused enough to give instructions. But any needle tatter who wishes to test and share notes, please go ahead. I will include it in the pdf.
2 resources that show how shuttle patterns can be converted to needle -

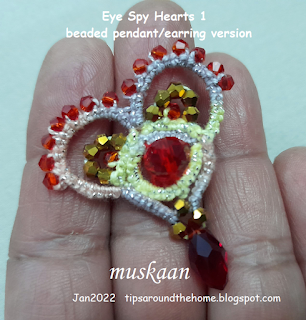
Amarilys Cwb wondered how a double picot would look. So I used that idea to string gold bicone beads over it! All the other crystals & teardrop are strung on shuttle 2 thread, with a single gold bead on shuttle 1. The large red crystal in the center can be sewn in later, or you can use this clever method by Ninetta - bead inside ring - https://www.flickr.com/photos/ninettacaruso/13713249233/.
Recently Alicja Kwartnik uploaded a video showing the same method - https://www.youtube.com/watch?v=7DbYw2A1G7Q.
I don't know why I chose this metallic thread and not the solid gold or silver! The effect would've been much better.

So, I hope you enjoy these hearts that can be made with leftover threads in a jiffy!
Here's the link again (please use it when sharing your version and also click on it to check if there are any updates, before you print or start tatting) - https://drive.google.com/file/d/1Auf-CIZYLUQdkA6jalQR4hkS7Ah-Deld/view

           I'd like to thank All respondents for taking the time to choose and answer, and also for your entertaining comments and suggestions 💖💖💖

Friday, 12 February 2021

beaded SR braid part 1

Pin It now! Before delving back into the Endrucks Project, I had this strong urge to learn a few techniques/effects that are floating around for pretty beaded split ring bracelets. Keep learning, keep trying. 
Turns out I got only one method done before succumbing to that heart motif idea I shared in previous post and other behind-the-scene commitments. 
No progress on the heart and none on this study, either. Turns out there are too many methods and no time to go into each nuance at present. But hopefully a step here, a step there ...
    
Disclaimer: This is not a serious study of origins, primacy, etc. of technique and effect. It is my whimsical & random exploration and experimentation. I will keep adding to this personal learning journey as and when I can. 

I try to avoid stringing beads whenever possible ;-D - a logistical problem with the smallish Pony shuttles. Now Jon had once incorporated a separate string of beads into her tatting. So many lovely applications, but not on a split ring braid (SR braid). Called for some adaptation.

Beaded SR Braids
In order to clearly differentiate what comes from where -
  1. shuttle 1 has pink thread strung with yellow seed beads;
  2. shuttle 2 has green thread with purple seed beads; and,
  3. where needed, a blue thread with pearl beads.
1. beads on third thread. 
Adaptation of Jon Yusoff's Beads on a String .
I thought this would be easy. Turns out the 3rd thread needs to be anchored before starting next SR! Here is what I tried -
1. Weaving: The beaded thread weaves up and down between alternate rings. 
Well, it leaves a colour blip when brought to the front, (notice the blue between SR1 & SR2) unless using fine, invisible, or same colour thread. Further, the string would be too loose.

2. Encapsulation : To avoid any colour blip I prefer the first of 2 ways to encapsulate the beaded string.
NOTE:  KEEP beaded string at back of work throughout. 

2A. Encapsulating Within SR (in last half-stitch): Make SR but do not close yet. Move bead to center, make final half stitch and pass beaded string through the open loop (parallel to core thread) of half-stitch before tensioning and closing ring. Thus string is held tight through the last hs and start next SR.
TIP: do it through the 2nd half-stitch, then move string to the back again. It does not leave any imprint!

2B. Encapsulating Outside SR (in unflipped half-stitch): Close SR, move bead to center, then make an unflipped or wrapped stitch with SH1 encapsulating both remaining threads, and start next SR. (I did this before the 4th and also the 5th SRs above). 
This will leave a tiny space between 2 SRs, but it can become a design element.

In both encapsulation methods, the beaded string is not locked and can be pulled to adjust. I went to town pulling away (see above), but the braid can be smoothed back into shape easily.

Despite being invisible from the front, encapsulation simply moves the blip to the back as seen in above pic. Obviously, we need to choose a string that will not be seen as pointed out earlier. I used 3 contrasting colours for purpose of learning. 

3. Knotting: In order to lock the beaded string in place, knotting is required. 
3A. Knotting with 2 threads: We can make an overhand tie or SLT between 2 threads, one of which is the beaded string. In above pic, after closing last SR with bead in center, choose any one shuttle thread and the beaded thread to make the knot, then continue with next SR.
3B. Knotting with 3 threads: Or we can make a knot using all 3 threads (as seen at end). This makes a larger, more visible knot and increases distance between SRs, but can act as a design element.

This is it so far - all my own 'ideas'. 
But before posting, I did a bit more research and found the following !!! 
However, none of these resources make any reference to anchoring the 3rd thread (I didn't check any class logs for possible discussion).  

....to be explored further

Tuesday, 29 October 2019

beady-eyed

Pin It now!
Some patterns are meant to enjoy! That is precisely how this vintage butterfly felt when Georgia announced it for this week’s class.
The Deaconess Butterfly 1916, re-written by Carolyn Groves in 2002. When I went hunting for a Deaconess butterfly, I found her old site!
It is a well-written pattern, with clear instructions. But I also kept referring back to the model image(s) frequently, to stay on track. It is worked in one pass. A very clever presentation by Carolyn Groves.
I decided to play with beads. Small projects are ideal to try out ‘new’ stuff. And not everything was planned ahead. I unwound the shuttle to load seed beads, etc.
The ‘stuff’ that went on here –

  1. Black and orange beads pre-strung on yellow thread and the green seed beads on blue thread.
  2. Twisted (floating) picots for antennae. 
  3. Eyes and orange beads are ‘up’ beads- they need to go in the ring loop before starting the ring.
  4. Long beaded picot –On the tail ring I made a very long picot. After completing the butterfly, I put 4 black beads over it with a hook, then snipped the picot in the center and tied a knot to keep beads in place. Snip off excess ends.
  5. Rhoda Auld’s method for bead in center of ring. This was new to me. I Love it for various reasons and am eager to try out a few more ideas with it. I used it for all 4 wing rings.
The collage shows how the bead is hooked over blue thread and the loop is held with a holder pin/paperclip. This pin passes through both the loop And the picot. When it is time, a loop is pulled through both simultaneously to make the join. The bottom left is a back view to show join.

  1. Frontside/backside tatting meant I used down and up picot joins respectively. 
  2. Avoiding colour blip in Lock join – I did try my own method, but the thread is just too thick to hide it completely. And I was colour-blinded ;-P I thought the yellow blips could camouflage as tiny beads! 
  3. Ninetta’s blipfree join was used in a couple of picot joins, and as usual I counted the join as 1ds. 
  4. Elaine Gan’s Reverse join came in handy thrice, to switch threads/colours. 
  5. Green seed beads in place of all the picots on wings.
  6. In Anchor size 20,  the  butterfly is 2½” wide and 1¾” tall. A good size for brooch, pendant, or hair ornament
Phew, that’s it. I'm happy, though - getting more confident with beads! If you like this butterfly, fine, otherwise think of me being beady-eyed at the time ;-P

Oh, and I added a center to the Wreath snowflake prototype. It looks more like a flower now! This stitch count won’t work for an ice drop version. I added a faceted glass bead and wound the threads to make a suspension loop for ornament.


Many thanks to all for bringing joy fluttering into our TatLand!


Tuesday, 1 October 2019

a plump crown

Pin It now!

Anita invited me for a duo tat-along. Life and time zones got in the way of simultaneous tatting, but it was still fun. Someone had sent her the image. I traced it back to the original. Not difficult really – look for some watermark or notation, such as MC…H in this case. 

It struck a memory, and I typed “MC…H tatting” in Google. The search took me to pinterest, and after going round in circles for a bit (blame it on my Opera browser), I found her Instagram account.  And am I glad for taking that time/effort. She’s the one who tatted the World Map! Check it out, if you haven’t – she has pics of the map taking shape. What an impressive project.
It has consumed such large pearls and become plump!
Did it think it was Cleopatra?

A one-pass motif using a split ring to climb out, hence 2 shuttles required.

The boring stuff –
Anchor Pearl Cotton size 8 (shade 00297).
4 Crystal bicone beads size 8/0. 4 Pearls 10mm (this should be smaller!).
12 gold seed beads in shuttle1. 5 gold beads in shuttle2.
Final measurement : 2” wide x 1½” high.
   

My notes -

  1. The middle row has 4 large Mock Rings – chain is lock joined at both ends to the same picot. It was Anita who noticed it (thank you). 

  1. I had a vague idea of where I wanted some beads. Hence I had to unwind my shuttles before the last row to string the gold beads. The others were loaded on a long loop using #13 crochet hook.

  1. The pearls are too large, causing the crown to become flatter and broader, besides stretching out the rings. My apologies to the designer.

  1. An opportunity to practice beaded centers - 2 methods. I went through a lot of tuts/demos and liked a method I first saw in Carollyn’s blog for the crystal bicones. It had been done before by Maranta . Karen Cabrera has included it in her lesson 162 - Two ways of adding beads to center of a ring.  
  1. Some elements got stretched or misshapen - very unhappy, but if I make it again, I can do better. Choose beads of right size, and make the row2 picots longer (the ones seen in the collage pic).  

  1. I wanted to add a single gold bead at the intersection between row2 rings. Problem solved as follows – lock join chain as normal ; move bead from core thread ; make Another lock join in same picot, but on other (right) side of bead.
    Raised Beads (alternate method)
    Voilà, the bead lifts up! The bead in center of cross is added in same way, although I should've added in after the 2nd segment. The view from back shows those beads are invisible.
I then remembered coming across Raised Beads in Jon Yusoff’s blog. Went hunting later and found that she already has the bead within the joining picot. 
In case we forget to add bead(s) to the picot beforehand, or decide later, the alternate method can be used. 
So, there are Numerous solutions to any beading dilemma, as evidenced by my Floating Beads method !

  1. Made the cross on top with chains facing inwards. Couldn’t be sure of how Hatsu did it. Anita made the chains facing outwards, hence must’ve used held the picot open on core thread. 

Excellent diagram, clearly showing which element has the picot and which element is linked to it… thus establishing the sequence. Moreover, regular picot join is indicated by a line, while a lock join is shown with a dot followed by line.
There are so many things I should incorporate in my own diagrams. Must remember.

A pic of her wearing the crown as earring! And some more of her free patterns. I especially like her star.


Many many thanks, Hatsu. Your tatted world map is Incredible!
And thank you, Anita, for including & inspiring me.