Showing posts with label pentagonal motif. Show all posts

Saturday, 17 September 2022

playful hearts

Pin It now!

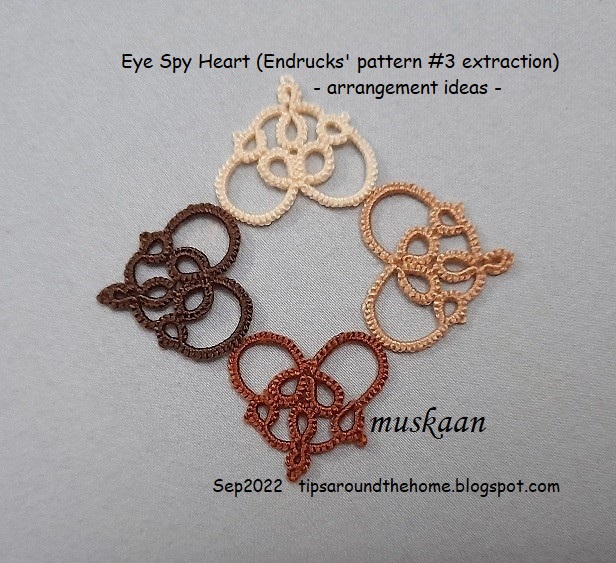
Hearts want to play, organise themselves into groups and shapes. Well it's not new in our tatting world (see links at the end of post), yet each arrangement takes on the characteristics of its component hearts. So, let's see what the Eye Spy (extracted from pattern #3) or #prettymeEndrucks hearts are playing at ....   direct link to the pattern pdf - https://drive.google.com/file/d/1t3DhpAeXUBi4oZegOty-q5Ux-zfntdYf/view

And do scroll down to the bottom of the post for some new spy work!!!!
Also, we have another participant who sent her pretty me heart. I have updated the round up post here - https://tipsaroundthehome.blogspot.com/2022/09/aug-roundup-3.html
Anchor Pearl Cotton size 8 is similar to Lizbeth size 20;
and Anchor crochet cotton size 20 is similar to Lizbeth size 10.
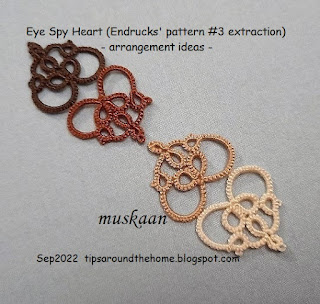
I Love this arrangement for an elegant bracelet or bookmark.
The hearts can be tatted continuously in pairs of 2 (like the 2 in the center) with split ring tips.

Another arabesque arrangement for a quilt block or a frame.

4 friends together form a square.

The 4 hearts at the bottom can be arranged alternately for an insertion or bookmark.
These, as well as the earrings are worked in Anchor Perle Cotton size 8. Each earring heart measures about 2.5cms x 2.5cms, and the skewed arrangement gives an earring measuring about 4cms wide and 7.5 cms long (without the teardrop).

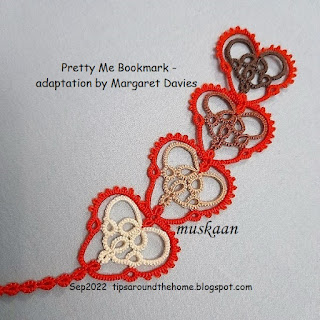
The body of this bookmark (Margaret Davies' adaptation), also worked in Anchor Pearl size 8 measures 3.5cms x 12.5 cms.
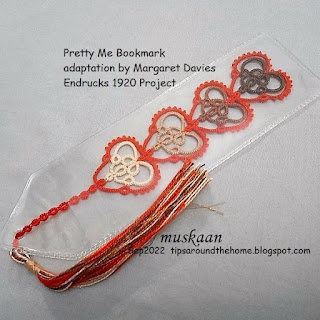
After adding the braid and tassel, it almost touches 30cms.

A couple of my Indian tatters directed me to where I could purchase the bookmark sleeves online! And I did! Thanks, ladies.While for personal use, I still prefer bare lace (hence the tassel is attached to the bookmark, not the sleeve), the sleeves will keep them protected and flat when not in use or when gifting.
I pulled the tassel through the hole at the tip, thus anchoring it.

The maroon prototype was worked in Anchor size 20 and is 3.5cms wide and 3 cms high.
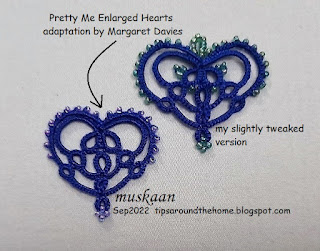
The other 2 are the enlarged hearts .....

On the left is Margaret Davies' enlarged version, with 16/0 beads. In Anchor Pearl size 8, it works out to 3.5cms x 3.5cms.
The right one is my slight variation with longer top chains and a beaded loop to insert a chain or findings. It now measures >4cms x 3.5cms.

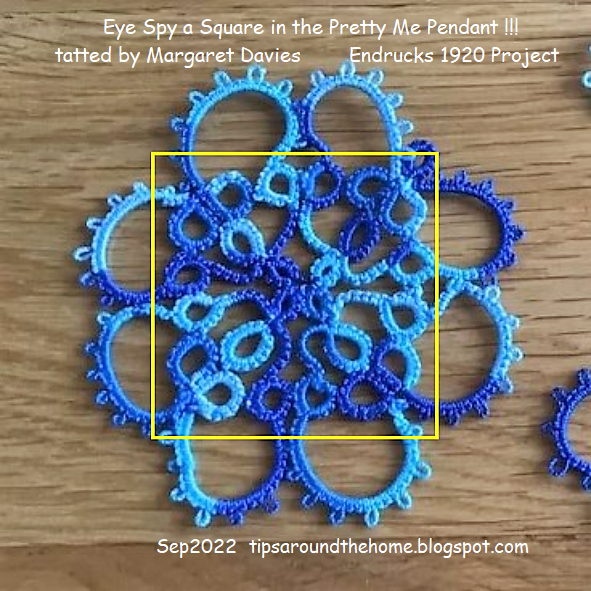
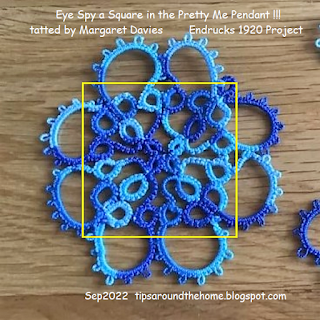
Now for the exciting part ----- Look closely at the center .....
Eye Spy a Pentagon in this coaster ....
[In Anchor size 20 the diameter is 7cms]
.... and Eye Spy a Square in this pendant!
Both pentagon and square can be worked in one pass. Can you figure out the pathway?

It was Carol Liu's colour placement which first brought out the pentagon clearly.


UPDATE (Nov 2022): Check our Paola B's arrangement of the heart motifs to create a beautiful collar! - https://tipsaroundthehome.blogspot.com/2022/11/aug-roundup-4.html


All pattern pdf links are listed in https://tipsaroundthehome.blogspot.com/2022/09/aug-roundup-1.html
And of course, you can go to the EP doc for the entire collection of modernised and adapted patterns and ideas - https://docs.google.com/document/d/17LEVftXweztBIOWh4sL4BB7bX65ssoOsOn4oXIgCepY/view

Tuesday, 24 November 2020

spinoff fun

Pin It now!

In Jan this this I tatted 2 more spinoffs from Folded Fun square and star. 2 six-pointed versions. I'll try to add a pattern when I get around to it, but don't hold your breath! Because as I peeked into my diary where the 25 Snowflake projects were documented, I cannot find the new ones, sigh!

This is the snowflake version, not much different from the 5-pointed star. The main difference is additional stitches in the inner rings so that we now have 6 instead of 5.

This is the Stupa version - the folded rings on the outside reminded me of the 3rd century BCE Sanchi Stupa - a world famous UNESCO world heritage site - part of Buddhist holy pilgrimage.

Here they are all together (one of the stars is a prototype), positioned as a cross. I loved tatting the two 6-point versions, even during my slump phase and the colours cheered me up.

Worked in Anchor Pearl Cotton, size 8.

I have a lot of rummaging to do! Be it patterns or actual lace. I barely complete a project than jump on to another and keep forgetting along the way. Which is why I will be uploading pics of several of my designed lace, even if sharing the pattern may come much later.

Tuesday, 23 April 2019

Patty's square pattern and peeks

Pin It now!

It’s been a long time coming, but finally here. It is a single page pdf (although a 2nd blank page has adamantly inserted itself!). Patty kindly permitted me to share the pattern and her pic.


Besides her original square in red, she later PM-ed her 5-arm version using the very same stitch count! The central picot is longer, holding 5 seed beads, and each ring is linked between 2 beads.

As already shown, these are my 3 motifs, using 3 different thread sizes …

… and connected into a bookmark using Curled Ring Connectors (CRC).

I’ve been having more fun with these CRCs
These motifs made at the turn of the century, are linked together with 3-way CRCs, and a bead(s) added in center.

And here I’ve worked the CRC in metallic thread (1 strand of embroidery thread), using them to link sequins.
TIP : As I worked this, I realised a better way to make the CRC. Instead of curling each ring around the element and lock joining, it is better to tat the rings involved in the CRC (2, 3, or 4) and then curl each of them by turn. This creates a more compact and solid connector.

Both bracelets are finished but will be revealed at a later date.


Grazie mille, Patty, per condividere con entusiasmo il modello

Sunday, 3 February 2019

3 little bears but where is Goldilocks

Pin It now!
It all started because I really wanted to tat Ninetta’s latest heart earrings. But I started out with her 3 little treble stitch motifs, the first of which I had done in July 2018. That's Mama Bear!
Papa Bear looked like a dahlia (yes, you can laugh at the incongruity!) and I worked it accordingly – flower surrounded by a bit of foliage. My intention was to tat only 3 rings in the green part to resemble leaves. While tatting, I kept admiring how well Nin had tatted those tiny rings. Little did I realize they were 12ds each and I made them only 6ds! But it worked out fine and I really like the overall effect!!!
The flower part ruffled a bit but flattened after a rolling pin block.

In Anchor size 40 (yellow 00302 & green 00269) it works out to just under 6cms.

Baby Bear was surprisingly quick to work. This has SCMRs with tds segments and thrown rings. As usual, I made an unflipped half stitch after closing the mock ring. She shared some process pics here.
In Anchor perle size 8 (01215), it measures around 3cmsx3¼cms.

Have you noticed the missing J & K in Ninetta’s diagram? She tells me that standard Italian alphabet does not have j, k, w, & y J

When it came time to measure and select beads for the earrings, I found Goldilocks had already gone to bed! Before she woke up, Sharon shared a challenging heart pattern, which I started instead - always sleepy when it comes to beads ;-P No problems, Goldilocks will soon have her earrings!

Friday, 14 September 2018

Cluny basic colour variation

Pin It now!
Colour Cluny Tatting contd.

In the previous post the tally was worked in a single colour. But what if we wish to use 2 colours in a pattern? There are a few examples out there, but I find that the tallies are of the same colour in all. In a couple of examples, SLT was used to switch colours for the next element. What if we could switch the colours easily within the tally, with no need for a SLT? It’s what I tried in this braid and motif.

Confession: My Cluny leaves are far from perfect. Please do not let my limitations dissuade you from trying it out yourself. I’m sure you will do a much better job than I.

What we have here is a kind of transition between the basic single colour tally (where both loom & weaving threads are of same colour) and the multicoloured tallies where 2 or more colours can be seen in the leaf itself. As in the basic Cluny, we are still using only 2 threads, albeit in different colours. And this entails an additional step to hide colour blip.

UPDATE : practice pattern for basic colour variation : 2-Tone Cluny Bracelet.


Cluny Tatting –Basic Colour Variation
Basic (2 threads) Cluny tatting in 2 colours
(where Warp/loom thread is of different colour)
Resultant tally is single coloured

The following will be covered here :
  • Weaving a different coloured tally (2 ways – A & B)
  • Exiting in a way that the desired colours/shuttles are in position for next element (A4 & B2).
  • Hiding a colour blip (A6 &B3)
 
A1. As seen, the loom/Warp threads are mustard, while the weaving thread is green.
A2. We start weaving by bringing the shuttle to the right – Under Warp2 & Over Warp3

 
A3. First pass made to the left – Under, Over, Under. To complete the 1 wrap/weave, bring shuttle back to right – Over, Under, Over. (not shown here)
A4. The tally is woven and shaped. Shuttle is back to the starting position - on the right.

 A5. Start closing loom by pulling the top loop off the loom.

A6. If we close normally, the Warp colour will show at the tip. 
In order to minimize it, I introduced an extra step
Pass shuttle back-to-front through the top loop
NOTE : In certain cases, it may become necessary to pass shuttle front-to-back.

 
A7. … the shuttle is through and we can start closing the top loop
A8. Top loop is closed. Now close the bottom loop.
 
A9. All loops closed and tally is complete. 
Notice I haven’t pulled the lower loop tight enough, leaving a colour blip at the bottom (I still need lots of practice). This would be unnoticeable in a single colour basic tally, but when working with more than one colour, it can pose a problem.
If we follow this weaving pattern, there is a tendency for the weaving thread to emerge on the right, and the loom shuttle on the left.

A10. If we want to change colour placement in the next element, we would normally resort to the SLT/overhand tie as I did in this case. But, the following pictures show how we can avoid the SLT.

I took this opportunity to also show the other way to weave (Ninetta pointed it out in her comment). No right or wrong, it’s just how one prefers to work, as long as one is consistent. 
B1. After the SLT, the shuttles got switched and loom is made with green, 
and weaving is done with mustard.
Here, the weaving commences from left to right by going Over Warp2, Under Warp3.
 Move to left is Over, Under, Over (not shown) Continue weaving.

 B2. Tally is woven and shaped. The shuttle is on the left, and it is time to close.

 B3. To avoid colour blip, pass shuttle, back-to-front, through top loop….

 B4. … shuttle is through. Now close all loops.

 B5. This closure brings the weaving shuttle to the left and loom shuttle to the right.

So basically, 
the last pass determines whether the weaving shuttle will emerge on the right or the left.
If the last pass is to the right (as in A4), weaving shuttle will emerge on the right 
and loom shuttle on the left.
If last pass is to the left (as in B2), weaving shuttle will emerge on the left 
and loom shuttle on the right.

Where you park your shuttle, is where you will pick it up from – the left curb or the right curb. And in case you want it on the other side, then take a U-turn, i.e., weave one extra pass and you land on the curb of your choice!
Couldn’t resist a bit of frivolity ;-P 

It is what I followed in the Cluny Flower Motif pattern by Jennifer Williams. No SLTs. I chose to make the short chain between tallies in maroon, but could just as easily have made them in pink by choosing where to leave the weaving on the last pass.
In Anchor size 20 : Rnd1 - 1¼” ; Rnd2 - >2"
One can see my tallies get a wee bit better as I go along. One of the pink tallies is actually shorter than the others. I keep losing track of the count when weaving ;-(
Further, I didn’t RW to join to the center ring, opting for a lock join instead. This meant I could tat the entire Cluny round clockwise from the front.


We’ve taken the first steps towards colour Cluny tatting. From the next post on, we start with the tallies that have more than one colour in their weave! I found that a bit more exciting (my tallies came out better, too), though one does need to manage the extra threads. Hope you stay tuned...


I’d like to thank Jane McLellan with all my heart.
Appreciate her indulgence and help as we tried to figure out a suitable name 
for this transitional basic to multi-colour Cluny tatting.

…to be continued

Friday, 17 November 2017

a star is born

Pin It now!
Another new pattern for the, ummm, Medallion Series …

Penta Fleur medallion


This was made over a week back. Nothing much to write here. I wanted to throw off the central ring from a chain and this pattern was the result of that quest. It is tatted in one pass.

I do like the way the long/double picot completes a ‘petal’ and a 5-petalled flower emerges from the confines of a pentagonal star. Based on this I decided on the name and when I Googled it, found that Pentas or penta fleur really is a flower ! Also called Egyptian Star. How opportune is that! Except that I'd already completed it in green otherwise perhaps a red or pink would be more appropriate.

I used Anchor size 20 but we know that it is thicker than Lizbeth 20.
Measures approx 6.5 cms at the broadest points.
Tats up real quick but a picot gauge is required for the long picot. I used a 3/8” gauge held vertically ie. perpendicular to the core thread.

The first trial in tinted blue. Not all chains of same length; other minor tweaks also went on.

Incidentally, while making this, if I had joined the chains differently I get another pattern. I’m really eager to see if the idea works!

This is a diagram-only presentation. In case of any difficulty, you know where I’ll be ;-D

happy tatting always !


Monday, 17 July 2017

off to The Pentagon !

Pin It now!

I totally forgot to post the pentagon trials in my previous post! These were accomplished before I started on the triangles.
I realize you may be getting bored seeing the same stuff in the same colours. 
No, I do Not like pink! Which is why I chose it for trials – trying to finish off the ball ;-P
However, I think it goes fairly well with the ecru.

I’ve made 5 of these with slight tweaks in stitch count. Arranged in a semi-circle they make a lovely collar. Or continue around to complete the circle fore a lacy edging.
The best part – it can be tatted in one pass !!!! Easy to trace the path, if you enjoy a bit of a puzzle :-)

I'll have to consult my sketchy notes to determine the details here & that is all boring stuff. (In fact I stopped writing notes early into the project, shhhh!)
The size 20 one is ready, so that's what matters.

I've found that size of picots makes a difference in these shapes lying flat. 
The placement of joining picots in inner rings also makes a difference.
And where the ring is split causes the shape to widen/spread out or remain closely packed. 
Fun to experiment with these factors, especially since all rings are 24ds each. And working it in 2 colours adds to the fun factor.


With Wimbledon over, I’ll be able to get back into this pattern-writing and diagramming stuff more seriously & diligently now.
I’m thinking of sharing all 4 shapes in one pdf.
Next I’ll do the bookmark in a separate pdf.
After that I hope to tat these one-pass magic shapes and share as I go. And I promise to use different colours, but in size 40 - it's the size I enjoy working with.

I’ve added ‘quatrefoil’ to the Labels’ list on the right panel. Click or use the search engine to scroll through my previous posts.

 happy tatting always - whatever the shape/size of the building :-)))