Showing posts with label BTS. Show all posts

Wednesday, 15 April 2026

literally out of the box

Pin It now!

and functioning as a threader holder! Why didn't I think of this solution ages ago?! Here's the full story ...

Going back a few weeks, Anita showed me a vintage edging she had picked up at a thrift store. A single shuttle trefoil/clover edging with a curious way of joining the rings. It looked so good, too. Thought I'd work a sample but somehow I let my shuttle take over and ended up with this medallion.

Now I wasn't in the mood to use a picot gauge despite having a few handmade folded picot gauges, which is why the bare thread spaces are not perfect.

Nevertheless the highlight of this medallion is the little twist at the base of each ring. 

All I am doing is attempting to make a 1st half-stitch (ie. bringing the thread from Under the previous thread) without actually transferring or flipping it. This leads to all that twisting. One has to be careful with it. As you can see, the stitch is not tensioned and snugged completely since I wanted a loose twist. 
There is ample scope to play around with the effect, adding more half-stitches, etc.

It then reminded me of something that Ninetta had done. Turns out she used a lock join to simulate a twist in this vintage motif here - https://ninettacaruso.blogspot.com/2020/08/locked-in-old-corner.html - from Emmy Liebert's 1916 book.

So coming back to the problem that was awaiting a solution. I whip stitch tail ends using tapestry needles and a threader to thread the needle. The latter is kept in a different box within the larger project box. I wanted a way to have both the needle container and the threader to be together - pick them up in one go. Didn't want to use tape; couldn't use a magnet; couldn't glue it down for obvious reasons. 

This medallion which happened to lie over the circular box struck me as the perfect solution. I glued it down with a spot of glue at 3 points, that's it! 

Being so open and airy, the threader easily slips through any space yet stays put! And no fear of the wire being bent or getting caught anywhere. A safe haven!
Anita called this the Threader Keeper!!! Now she's one to think out of the box and guess it is rubbing off on me, LOL.

Oh, and I am submitting this BTS medallion (my 5th submission) for Natalie Rogers' Picot Bingo 2026 Level 2, crossing out one box -  
  • Use Bare Thread Space. 

Sunday, 5 January 2025

last and first

Pin It now!

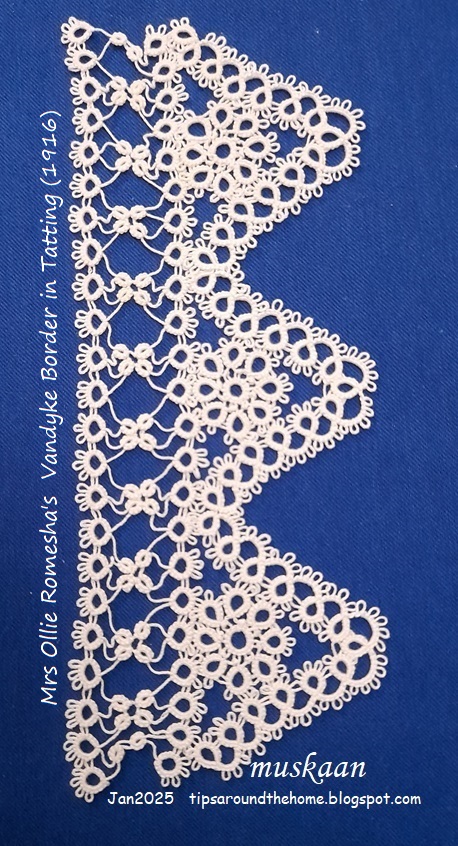
 So this is the last thing I tatted and the first I picked up at the turn of the year. And I have my tatting buddy Anita to thank for it. She was on a determined mission to finish off her ongoing works before the new year came around. Impressed and motivated, I chose this sampler I had shared here and finished it on the night of 31st Dec 2024 with an hour to spare! 

And in 2025, I picked it up again to hide the tails, block and photograph it. Notice the thread going across at the top? I won the thread chicken race!!!

Pattern is Vandyke Border in Tatting by Mrs Ollie Romesha  published in Needlecraft Vol. VII, No. 8, April 1916 and the PDF can be downloaded here - https://www.antiquepatternlibrary.org/html/warm/tatting.htm

One headside motif showing wheel surrounded by a scroll.
NOTE - The pattern calls the circular medallion a 'wheel'. However the correct term for this classic formation is 'daisy'. https://tipsaroundthehome.blogspot.com/2024/03/counts.html

My Notes - 
1. Pattern calls for starting the scroll at the ring indicated by white arrow. I started with the one indicated by orange arrow.
2. 4ds is missing in the pattern for ring indicated by blue arrow. All 5 rings are identical.
3. Pattern calls for tatting the scroll first and later tat the wheel (daisy) joining it to the scroll on the go. I preferred tatting the wheels separately and joining the scroll to each. 

A single motif turned around looks like the letter A! In Anchor size 40, it is 4cms high and just under 4cms wide.

Three repeats without the footside or sewing edge is more pliable and can be used for a collar, necklace, etc.

4. This lace is worked in four parts as per original pattern - wheels, pointed edge, two rows of a straight edge on the upper side. Worked with one shuttle (and ball only in scroll) throughout. 

5. Continuous Tatting in Wheel using Slip Stitch - Determined to keep it vintage, I did not use any continuous tatting method to climb out of the rows in the lace. However, the wheel is an exception where Mrs Ollie works it in one pass using only one shuttle. She works the central ring then instructs us to close the ring and 'fasten thread to 1st picot and tat ring ....'. Basically leave a very short bare thread space, make lock join in 1st picot, and start outward facing ring. I recently learned this is called a SLIP STITCH - leaving bare thread to span the distance in order to climb out at a different point. We've all used this in some form, some situation or other. Now we have a term (Judith Connors' An Illustrated Dictionary of Tatting, 2007 ed.) and Judith patiently clarified it for me. In a future post I will elaborate on these situations, one such being this Rosette Enchained snowflake .

6. In Anchor mercerised cotton size 40, measurements for 3 repeats: 7cms high x 17cms long. Without the footside rows, the triangle is 4cms high. 
Not happy with the bare thread lengths in the footside rows. I used a 5mm gauge. 4mm would've been better. My fear, despite the trial, came true, sigh.

From this upturned side, the peaks remind me of temples in India.

I hope to use this short length on a greeting card or card topper once I visualise what else should go into the composition. Your suggestions are welcome.

Related posts

Tuesday, 10 December 2024

incomplete

Pin It now!

Suddenly the month is slipping away fast and I have ton of tatting to do. I hadn't been able to tat for almost a month due to life interruptions which put me back a whole lot. Prioritizing is the need of the hour or what's remaining of this month. 

This is the Vandkye Border in Tatting by Mrs. Ollie Romesha which I had hoped to complete before showing. I've decided to postpone it's completion hence sharing the WIP pic. It was published in Needlecraft Vol. VII, No. 8, April 1916 and the PDF can be downloaded here -https://www.antiquepatternlibrary.org/html/warm/tatting.htm   

Vandyke formations are inspired by portraits painted by 17th century Flemish artist Anthony van Dyck and refer to the distinct peaks or points like in the V-shaped chevron strips. I decided to go with this edging despite the bare thread space that kind of terrifies me. Then there was the headache-inducing task of transcribing the old text into short notations or diagrams. I took the plunge! 

However I tatted the flower medallions first unlike what the instructions stated. Decided it would be more comfortable when joining. 

There is one minor omission in the written pattern (part of the pattern is missing). The image of the tatted model was of great help.

The sewing side consists of single shuttle work with lots of bare thread. I started at the right to gauge the length of bare thread. It turned out to be a wee bit tight when the final row is tatted above. Started afresh at the left end, but have left it for the present. Once my other time-bound commitments for this month are done, I'll get back to this and share more details. 
Worked in Anchor size 40.


I am submitting this for Natalie Rogers' PICOT Bingo game, striking off the block - Tat an Edging. Now this game is another project I probably won't be able to complete despite starting in January itself. At least not in the way I wanted to. But never say die, LOL. 

Sunday, 31 March 2024

happy ITD 2024

Pin It now!

 A day early, but we love our tatting year round, don't we?! So, keep your tatting tools and materials ready, choose your pattern, friends, and location, and have a blast with chocolate, tea, and chatting!!!

This is such a quick and fun medallion from Rebecca Jones' 'The Complete Book of Tatting', Fig. 123.
Tatted in Lizbeth size 20, with half-closed rings (HCR) instead of chains or bare thread to bridge the distance. A single-shuttle pattern obviously.

TIP: Notice how the top and top right cords appear more pointed than the rest? It shows how you can change the curve by changing how far you close the ring! The middle ring in both is closed more than halfway as seen in the shorter bare thread space. I'm tempted to tat another with a sharper pentagon shape, LOL.

I did use a folded picot gauge for the HCRs , but messed up with some of the rings. Of course the sure shot method would've been to use beads.

🌹🌹🌹🌹🌹

After a hiatus of three months, we begin our new game of the month for this year tomorrow, in the Endrucks FB group! Let me know if  you wish to join even if you aren't on FB. This is our pre-announcement:

A game of decoration where you will get a chance to
  • Refresh your skills
  • Learn something new
  • Apply your new learning
  • Do a bit of designing
  • And all while beautifying a little model!
It all depends on how far you wish to take it! But let us warn you that this can be quite addictive!

🌹🌹🌹🌹🌹

🌹🌹🌹🌹🌹 Once again, a very happy International Tatting Day to all 🌹🌹🌹🌹🌹

Wednesday, 16 September 2020

3 and 1 and 2

Pin It now!
No, no, this time I have the sequence right!
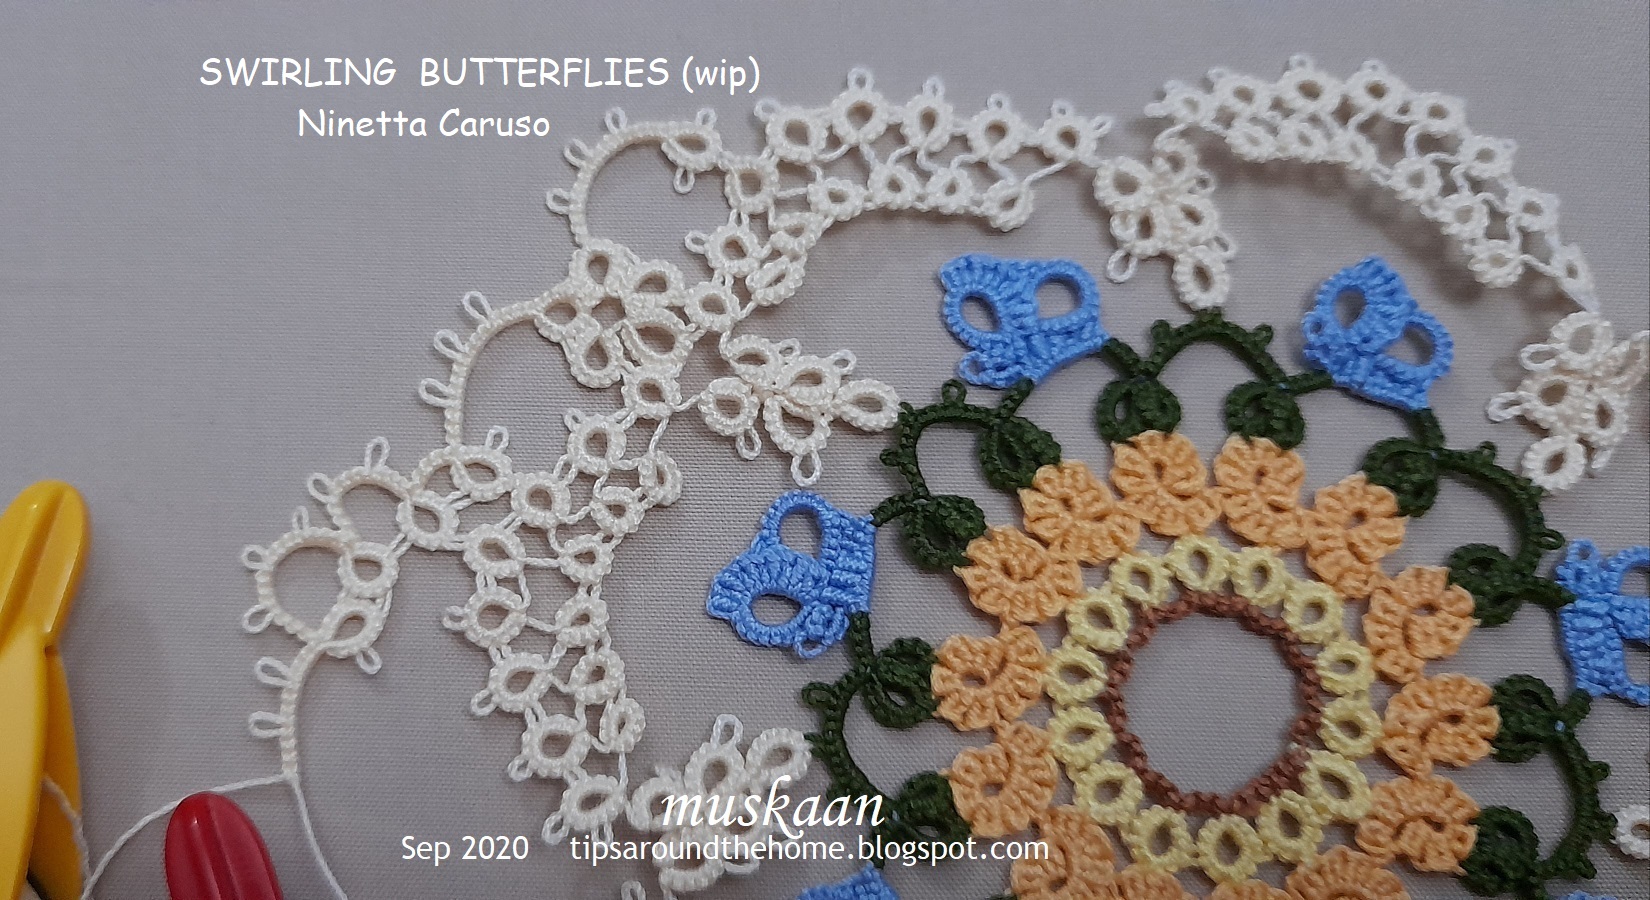
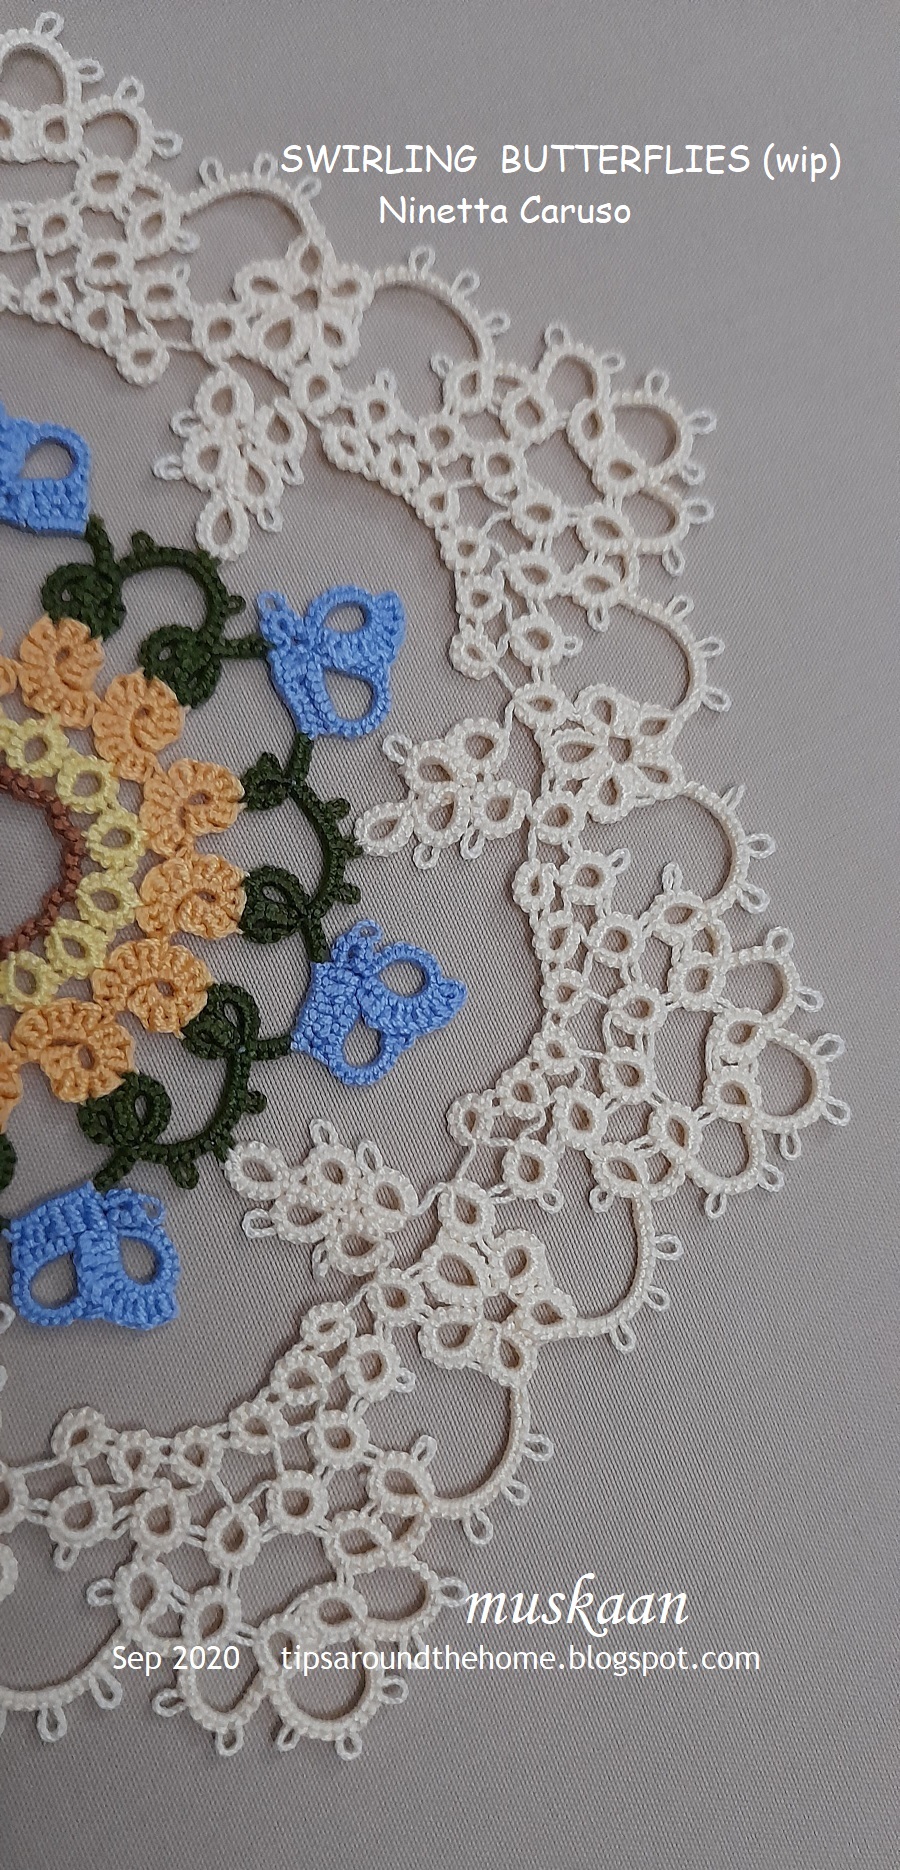
These are the number of shuttles or threads used in rounds 3 to 5 of Ninetta Caruso's Swirling Butterflies Doily.
And it also showcases a mixed timeline in evolution of tatting techniques...
Rnd3 - treble tatting in butterflies - a very modern stitch, along with encapsulation/padded tatting ; 
Rnd4 - bare thread tatting with rings only - from the very beginning of the artform ; 
Rnd5 - chains and split rings - evolved between the 2 time zones above.


Round 4 : 11cms in Anchor size 40, worked clockwise with one shuttle
Techniques - one shuttle rings only, bare thread, lock join bridging, directional tatting

Remember my incorrectly tatted round that I snipped last time? It is the one on the left. On the right is the correct version.
 
One ring strategically placed, makes all the difference in the height and shape of the arch! 
The incorrect one measured 10cms across.
The bare thread is 2ds long, but I did not use any picot gauge.

The main feature of interest in this round is the bunch of 5 rings that look like leaflets.

The leaflets are again a look back in time to 1850! The leaflets are worked in the same way as Mlle Riego's Bunch of Grapes , using bare thread and lock join to emerge at a distance to start the next ring. 

TIP : Since the leaflet is worked from the backside, if we use a loop pulled down to make the lock joins, the bare thread remains at the back of doily. 
TIP : Also, it is better to err on the side of a slightly longer bare thread. If it is too short, it distorts the ring, as happened a few times.

TWoT Notes - Directional Tatting in Round 4
Following the pattern, if one starts with the outer large ring frontside, the inner small rings and leaflet will be worked backside and the leaflet will swirl as in the left image below.
 
However, if one works the small rings and leaflet frontside, then the latter will tilt in the opposite direction (pic on right).

UPDATE: As I worked more rounds, I realised that the bare threads at the base of the leaflet motif can be avoided all together! In my working, the bare thread makes the leaflets 'loose' and floppy, and they shift while blocking instead of lying flat.

TIP : In order to climb out to Round5, I left a long tail and began with the 3rd inner ring. This tail was used to work the split ring to climb out. 


Round 5 : 13.5 cms, worked counterclockwise with 2 shuttles, starting with false CTM.
Techniques : split rings, directional tatting
The long tail acts as the 2nd shuttle thread. One can add a fully loaded 2nd shuttle at an element of one's choice later. I climbed out at the outer ring as seen in pic above instead of where the pattern instructed. Personal choice, nothing more.

 
The side of the septagon measures 6cms in size 40.

Such a lovely large flower shape! In order to highlight this floral effect, I chose cream. This forms the complete colour palette for this doily.
Against a black background (my tablet cover).

I am thoroughly enjoying this doily, though it is progressing a bit slower than I would've liked. And these 2 rounds gave me lessons in design and designing from a master of the craft!

Sunday, 13 September 2020

7 plus 6 is 13

Pin It now!
7 outer rings and 6 inner rings make 13 rings. This is followed by ring#15 of the leaflet. So how did I miss Ring#14?! Ah, yes, I definitely need to go back to kindergarten to learn counting! Last time it was for simple addition.

the crane is hungry!

On top right is my trial tatting in order to establish the length of bare thread in size 40 thread. I was happy and did the entire round 4, climbing out with a split ring. It was only on the last element of Round 5, that the bulb in my eyes and head went off!

Peered into the diagram and found that there are 8 outer rings and 6 inner rings in the arch above each butterfly, equaling 14. Followed by ring 15 which starts the leaf/frond. Sigh.

The hungry crane went to work, snipping it all off.

Off to restart the round. Will show how it all looks next time. Luckily, the round tats up pretty quickly and is so lacy!

Enjoy, while I return to my dunce corner, shuttle and abacus in hand :-)))

Tuesday, 21 August 2018

The picot stands tall

Pin It now!
Many of us ‘eye-ball’ the picot. When precision is needed as in case of graduated, double/triple, interlocking/interwoven, central and tuft picots or in tatted hairpin lace, a gauge is required. Some ink/tattoo dots on their finger! I merely measure and cut some cardstock to use as a homemade gauge. To me, vertical meant looping the picot thread around the gauge, while horizontal meant laying the picot thread flat along the measuring side. 

But Robin pointed out that there are different interpretations (see comments) and it led to a lot of research ending in this article : Measuring the Picot.
I will use 2 images sent by her to illustrate how some tutorials/resources differ in their approach & terminology. One set speaks of how to hold the rectangular gauge, while the other talks about how the picot thread lies (in relation to core thread or the gauge) when measuring. 

 
            In A, the picot gauge is held horizontally, but the picot thread is vertical.
In B, the gauge is held vertically, but picot thread is horizontal.
But notice that the core thread remains the same throughout – horizontal!
Core thread is the only constant during measurement.
It lies flat (horizontal or on the X-axis)
irrespective of the picot thread or the picot gauge.
In A, we measure the height of the picot (5mm in this case) and the finished picot is of the same measure viz 5mm.
In B, we measure the length of the picot (10mm in this case) but when finished, the picot will measure 5mm.
Length of thread in any picot is twice the height of that picot.
Conversely, height of picot is half its length. 
In A, multiple picots can me made before slipping them off the gauge.
In B, only 1 picot at a time is possible.

Thus the seeming dichotomy is resolved. But this is not all. There are ways to use the gauge unconventionally; and ways to measure a picot without using any separate tool (see collage below) !!! These are all covered in the article, along with pictures – some stepwise. 

Part of the article was published in Bellaonline on July 12, 2018. More sections were added later, and refined further, to make it quite a comprehensive document.

Click to download the pdf of the complete article -

This article is a compilation of the many ways – old & new - to measure a picot. Each method has it’s advantages and it is entirely up to the tatter to choose the method(s) they prefer. The article makes no claim of superiority of one method or of one gauge over the other.

The contents of the article :
I.  Orientation of Picot Gauge – horizontal and vertical
II. Orientation of Picot Thread in Relation to the Core Thread – height (vertical) and length (horizontal)
III. Non-conventional  Applications/Uses
A.                  Direct Tatting (unflipped stitches)
B.                  Decorative Effects
C.                  Graduated Picots 
D.                  Multiplier Effect of Gauge 
E.                  BEADS as Picot Gauge
IV. Stitches as Picot Gauge – length and height
Recap / conclusion
References
¯¯¯¯¯

During the course of my research, many good friends helped with their own insights, though not everything was included in the final article. This post is to share this new information rather than repeat what’s in the article.

Historically, a pin was used to measure the picot loops. “Tatting. Edgings and Insertions”, Mlle Riego de la Branchardiere, 1861.
‘A Pearl Loop – After the number of double stitches are worked as directed, the thread which forms the loop round the hand is passed over the pin, invented for the purpose, facilitates the work.’
Since a pin has a circular cross-section, there is no vertical/horizontal dilemma here. The number of times one wraps the picot thread around it can alter the size of a finished picot.
This same technique is used by Jon Yusoff on modern gauges for extra long picotsThe collage above shows how to measure a 10cm picot using a 2cm gauge.

¯¯¯¯¯

Bonnie Swank (through Anita Barry) sent me her description derived from “The Art of Tatting”, Lady Hoare, 1910, page 20
“Pinching the ring and shuttle threads together then tatting the double stitch and sliding the new double stitch next to the previous double stitch.
This is a horizontal method of making the picot without a gauge.”
Lady Hoare suggests ‘leaving about the eighth of an inch of thread on both loop and shuttle threads….’ This is what we refer to as eyeballing.
¯¯¯¯¯

An elementary and universal method is to employ
the stitches themselves as a picot gauge.
If a gauge is not available, the stitches themselves can act as a gauge. Even beads can be used for measurement if size is known. The advantage of using one’s own tatted stitches as a gauge is that it accommodates all types & sizes of threads as well as individual difference in tension.
I used the height of a picot-in-the-making to estimate the size of central picot and arrived at the following thumb rule. Jane McLellan stepped in with trials, experiments and feedback to confirm the rule.
A thumb rule for measuring the central picot
around which rings will be linked :
1ds width for each ring.
(± half stitch to account for individual differences)
¯¯¯¯¯

While technically not a picot, it is a different way of using a picot gauge. Jeanie Schekel, in her unpublished book, calls it a folded picot gauge ideal for bare thread tatting and mignonette. She shared her images and also these video links –  Double picot gauge by needledreams and this video by mytattingplace which also shows how to get uniform half-closed rings.
¯¯¯¯¯

Coretta Loughmiller sent me many pics of the BTS and Picot Tool being used. Now this stepped tool, at first glance, defies the vertical/horizontal position. However the detailed markings of length and directional arrows helps us understand how to hold and use the gauge to measure either the height or the length of the picot thread and also bare thread. Gloria Nelson, the designer & manufacturer of this compact efficient tool, has been most gracious in our communication, even offering to send in more pics.
Such markings are a good way to avoid any confusion and communicate clearly - whichever gauge a designer uses.
¯¯¯¯¯

Martha Ess’ sliding gauge is ideal for graduated picots. She graciously gave me permission to use any of the photos and instructions!
¯¯¯¯¯

I’d like to sincerely thank each and everyone mentioned 
for prompt and enthusiastic help – over and above my expectations !  
And I cannot thank Robin & Georgia enough! 
Robin Perfetti has helped proof the multiple drafts carefully and offered valuable feedback/suggestions. Some of the words, thoughts & of course images, are hers. 
Georgia Seitz has provided us with a wonderful platform and opportunity to reach a wide audience through Bellaonline and her Online Tatting Class.

Thursday, 24 May 2018

add new thread to bare thread pattern

Pin It now!
While using the SCMR to add new thread Within a ring, I wondered whether we could also use it in a bare thread or single shuttle pattern. Turns out we can, though it involves a bit of a twist in the tail.

Adding new thread to bare thread pattern 
with self-closing mock ring (SCMR)


I have already described one method of adding new thread, finishing off with a SSSR (link below). This new method is yet another option – very secure; no doubling of bare threads; easy to add new colours frequently; knotless. And it can be sew-free with MTT.

1. Let’s say I’m running low on thread after these 3 rings (each is 5-5-5-5). But I still have enough to make the stitches but not enough for the core thread.

2. Load another shuttle and add fold in the new thread (I used coloured thread for clarity), bringing the tail through as shown.

3. Then leave a loop of new core thread and start working stitches with old thread like a chain. This is the start of the SCMR. Tat over new tail for a few stitches.
(see Variation below)
TIP : In case the old thread is too short to wrap around pinky, tie a scrap/helper thread at the very tip with a weaver’s knot.

4. The ‘ring’ is complete.

5. Pass shuttle through the loop to close the SCMR.

6. Now pull the new TAIL up to close the ring. Notice the pink tail has become longer.

7. Both tails are visible – new thread and old thread.

8. Insert new tail through a tapestry needle and whip stitch back towards the base of the ring. This will ensure the stability and durability of the lace.
I guess one can use the Magic Thread Trick for sew-free hiding but I like to whip stitch the tails.

9.  Next sew in the old tail, moving up the ring on the right side.

10. Pull both tails to remove any slack. Then snip off the excess length in each. 
New thread added with bare thread between the rings!
Pull and tug but the tails/rings will not unravel.


Variation

A. A variation is to tie a knot with old thread encapsulated within it, leaving bare thread space before tightening the knot.
B. Leave a loop of the new core thread and start working the SCMR. Tat over the new tail, hiding it within the first few stitches.
Close the SCMR as usual buy assing shuttle through loop and pulling the core thread taut. With the new tail already hidden, we only need to whip stitch/hide the old tail on the right side of ring.
Heather (see link below) tats over both tails thus avoiding any sewing. I prefer hiding tails in different elements/stitches to avoid bulk.

I’m not sure how much this method will help because there are already so many to choose from. However, I did not find this SCMR method/variation and having already taken pictures, I decided to go ahead and share.


For quick reference, here are links to some of the other methods to add new thread to single shuttle/bare thread/rings-only patterns (random listing):


 happy tatting always J