Showing posts with label Elisabetta De Napoli. Show all posts

Thursday, 8 September 2022

game of extraction

Pin It now!
No fears of any tooth extraction!!! We are talking about extracting motifs from a specific pattern.

Last month's game of the month brought us so many prettified hearts and even a few patterns! I will showcase them soon in this blog. This month we have a slightly different game with lots of creative imagination in play.

You can play along, too, and join our FB group (Endrucks 1920 Project) or send pictures of your work to either Ninetta Caruso or to me.

Game Of The Month – EXTRACT ME SEP 2022

The pattern we are using this time is Endrucks' #25. Pattern #25 is an extension of #24 which was presented by Ninetta Caruso and now we have a composite of both diagrams in the #25 pdf.
[Pattern #24 pdf link - https://drive.google.com/file/d/1ZpHou6AOWM3LZJVbEMNB_gurWqtjazRx/view ]

What you see is what you extract!


Take a look at this lovely model of Endrucks’ pattern #25 tatted by Elisabetta De Napoli alongside Endrucks' original diagram. Can you spot different shapes and objects? 

If we break it down into motifs and view it from different angles, we can easily see a flower, a sun, a leaf or pod, a rainbow, perhaps waves or a fence, perhaps a sunflower, a tortoise, a tree, ….For instance the motifs extracted and tatted by Ninetta Caruso.

Our task is to extract one or more of these motifs, tat them, and then glue them on a card in any arrangement or composition.

  •  You are free to choose colours, thread sizes, embellishments, etc.
  •  You are also free to tweak the motifs to suit your composition and imagination.
  •   You can choose to tat a single motif multiple times or several different motifs.

We are fast approaching autumn and festival season in many countries. The card you make might come in handy for gifting!

In case you face any issue, or have any questions, ask freely.

==================

As in the previous event,

* Please write your name on the pic.

* Use the hashtag #extractmeEndrucks and #Endrucks1920Project in the description and any other detail you want to share, whenever you upload to any platform.

Looking forward to your creative tatting and cards
Muskaan & Ninetta 


Remember you can find so many many more patterns - original and adapted - in our EP doc - https://docs.google.com/document/d/17LEVftXweztBIOWh4sL4BB7bX65ssoOsOn4oXIgCepY/view

Sunday, 13 June 2021

timeless dancers

Pin It now!

The tribal dancers are finally here in their full glory! These gypsies took their own sweet time, didn't they?! Modern style presentation of pattern #18 from the German book ‘Die Schiffchen-Spitzen’,1920, by Frau Eleonore Endrucks-Leichtenstern is now in pdf form for the Endrucks 1920 Project. 

Direct link to #18 pattern reworked by Paola Bevilacqua and muskaan - https://drive.google.com/file/d/1vib_1C2e0SuRzUsMitUCbp67Nc5iT7xQ/view 

There are 4 rows, tatted in one-pass. No modernisation here - Endrucks' herself tatted it continuously! Simple techniques - 2-shuttle tatting, block tatting, thrown rings, lock join - and voila, a complicated-looking design is born!
The single motif  is a bilaterally symmetrical version, which is also indicated in the pdf. 

Paola Bevilacqua first tatted a single motif in Dec 2020 using a ball and shuttle. Her pics are shared here, and her process pics are also in the pdf.

Row I - This is also a stand-alone pattern listed as #18/a and reworked by Paola Bevilacqua. This is uploaded as a separate pdf in the Project files.
It can be curved a wee bit by making the upper yellow rings smaller or substituting with beads. Embellish with beads and we have ourselves a beautiful necklace!
I deliberately used 2 contrasting colours in order to clearly distinguish which shuttle is in play for which element. 
Row II - The model is tatted using frontside/backside tatting and it was amazing to see that All red elements are worked backside while all yellow elements are frontside - throughout the entire 4 rows!
In this row, Endrucks uses an extra chain on one side of the block to reach the other yellow ring. It is barely discernible.

Row III - This is a chains-only row. We climb out of the previous row with a long chain. In the original, this chain is shorter because she ends row II after the 1st block despite having 2 blocks at the starting end. I chose to make them symmetrical and preferred the broader arch.

Row IV - A quick chains-only row! 
Do you see Gandhiji's 3 monkeys here? Possibility of yet another adaptation? 
TIP: Throughout the pattern I counted my joins as a half stitch. On the front side, I used a down loop for lock join (and vice versa) since it leaves a smaller footprint.

Rows II to IV also form a standalone pattern #18/b. It was tatted and diagrammed by Elisabetta De Napoli and the pdf is in the Project files. You can see all her other contributions to this project in Ninetta's post here.
I have strung beads on metallic threads and wound up my shuttles to make this 18/b into a crown!

Merely curious to see how this broad lace would look upended. What do you think?

TIP: My block tatting in this project is a midway path.... Endrucks' uses (1ds,picot) to climb out to the next chain in a block. Instead of the 1ds, I simply made the picot long enough to span the height of the current chain, and a bit extra to ease joining of next chain. I think it works well doesn't it? 

On close inspection, you can see that some rings in the red/yellow model face opposite to each other, when cut vertically or horizontally. Compare this with the 4-coloured model on the right where symmetry is 'perfect'. 
With a tiny bit of jugglery and thrown rings in place of normal rings, this lace can become symmetrical. Only one chain requires a downward picot for the adjoining ring to be linked later. These modifications are also explained/inked in the pdf. 
I used 4-colours to distinguish each row if we want to tat it in this manner. But despite 4 colours, it is still worked in one pass, and I used false ctm to add in new colour. 

Anchor Pearl cotton size 8 is used for both models. A few minor changes from the original had to be made.
I had attempted to increase the skirt by another 2 rows in a 3rd model but ran out of thread and time. Perhaps some time in future. And what about a 3D skirt that goes all around? Easy enough to tat using the same stitch count! Could be adapted for a skirt/gown or bell, etc.

It is now up to you creative tatters to adapt this pattern to your vision and share with us. If one Facebook, tag Ninetta or myself, and use the hashtag #Endrucks1920Project. You will find all details and links to original and modern in the Project files here. 

My heartfelt thanks to all the lovely ladies mentioned here - 
dancing is fun only when friends are around 💖💝💖

Related Posts

Wednesday, 15 July 2020

splitting the mesh

Pin It now!
My Italian Connection is at play again, splitting chores! Couple of days back Elisabetta De Napoli shared a picture of her filet tatting in an Italian facebook group. On request, she readily created a series of pics and explanation to share through my blog. Ninetta, ever gracious, did the translation and added her notes. Yours humbly had the privilege to assemble, 'polish', and present. So without more ado, here’s her split chain method of filet tatting.
At the end is her Italian version, verbatim.

Filet Tatting (split chain method)
by  Elisabetta De Napoli
Two shuttles, continuous thread (CTM).

Fig1) Foundation Row: Start a dead end chain, holding a picot space. work for desired length, finishing with 4ds. The above model has 6 picots separated by 4ds.
       Ch: picot, 4ds, [1 picot, 4ds]x5 

Fig2) Turn the Corner: Reverse Work and switch shuttles or do a shoe lace trick (SLT), then continue with a chain to move to the next level or row.
Row 1: consists of 6 split chains, joined to the foundation row picots.
       SCh: 4ds, 1 picot, 4ds / 4ds.
To make a Split Chain (SCh) leave bare thread just enough for 4ds, lock join to nearest picot of previous chain, tat 4ds. 
(see tutorials - https://tipsaroundthehome.blogspot.com/p/tatting-resources.html )

Fig3) Make split chains for the entire length/till the end.
       [SCh: 4ds / 4ds]x5

Fig4) Repeat steps 2 and 3 for as many rows as desired.
This creates an Open Filet or mesh.

To Fill a Square: Plan ahead in the previous row to include small picots for joining. As can be seen in the image, the 2nd and 5th chain segments in Row2 have very small picots. This is how it is done here …
Picoted Chain segment (pCh): To fill a square in the next row, in the previous row a plain 4ds chain includes tiny picots as follows -  
       pCh: 1ds and 1fhs, 1vsp, 1reverse order ds (1shs and 1fhs), 1vsp, 1shs and 1ds.
(basically, 4 ds is divided into 1.5ds at the ends and 1rods in the center flanked by 2 small picots. The picots are made within a ds rather than at the end of a ds - as in backside chains)

Fig5) Row 3: Of the 6 squares, the 2nd and 5th squares will be filled here, which means there are 2 extra split chains within the square.
       Make 1st open square:  4ds, 1picot, 4ds, SCh: 4ds.
       Filled square: [SCh: 1ds / 4ds]x3
       2 open squares: [SCh: pCh / 4ds]x2
       1 filled square: SCh: 1ds / 4ds.
       Last open square: SCh: 4ds / 4ds.
       Move up to Row 4.

Fig6) Row 4. We planned ahead in Row3 which squares we want to fill in this row. Hence picots were included and accordingly in Row 4, squares 1&2 are open, 3&4 are filled, and 5&6 are open.

For Filled Square Over Filled Square:
If next row has an empty square over this filled one, tat normal ds between split chains (total 4ds). If next row has a filled square over this filled one, tat the same sequence as in the picoted chain segment in this way: 
       the chain is 1ds and 1fhs, 1split chain (4ds), 1reverse order ds (1shs and 1fhs), 1split chain (4ds), 1shs and 1ds, all in place of 4ds.

∞∞∞
This is what Elisabetta says, for our Italian friends –
Ciao Ninetta, ti invio le foto che ho fatto e le spiegazioni:
2 navette e filo continuo
1° lavorare un arco di 1 pip  4 nodi fino a raggiungere il numero di spazi vuoti
 che occorrono;
2° girare e lavorare 4 nodi 1 pip 4 nodi e agganciarsi al primo pip  lasciando lo spazio per uno split chain di 4 nodi e ripetere, 4 nodi e split chain di 4 nodi, fino all'ultimo piop;
3° girare il lavoro e ripetere come il primo giro agganciandosi al piccolo pip che si crea tra i gruppi di 4 nodi;
4° per avere degli spazi pieni occorre prevedere, nel giro precedente dei piccoli pip nei gruppi di 4 nodi. (*)
Spero sia sufficiente, in caso contrario io sono qui.
Ti abbraccio e ti ringrazio anticipatamente **
∞∞∞

Filet Tatting - some other methods (with updates):
I have little experience with actual filet tatting. But here are links to a few other methods –

  • 'Reversing Chain' method in John’s and Jeff’s blog. Read the comments, too, for answers.
  • Mary Konior's rings/floating rings and chains method in Margaret's blog (image only).
  • and a similar 'Filet-Ochhi' rings and chains method by Christel Wutzmer and Agnes Focke from "Doppelknoten" Nr. 7 (2005) in Jeff's blog (image only).
  • Shoe Lace Trick method by Mandatory (my notes on this method here- https://tipsaroundthehome.blogspot.com/2016/06/something-new-something-old.html ) She has done quite some experimenting with filling effects (pics in her Craftree album)
  • Sue Hanson's tiny split chain basket (taught at Spokane, 2008 and pattern shared in many facebook groups) is a bit similar to the above method and uses 2 colours. 

I have been working on a tutorial series about lock join and chains, and this fits right in, especially if you take up a 2-colour challenge – I had forgotten about filet tatting! Life has intervened major-ly hence the delay in polishing it up. But soon – Anita has been proofing it …


Many many thanks to Elisabetta and Ninetta – share the joy!

Thursday, 13 February 2020

dress my heart

Pin It now!
design along (DAL)


What bug have I caught?! And why am I trying to spread it around? But then we are already 'suffering' from ATS - Addictive Tatting Syndrome, so what’s one more play-along?!

Recently I revisited this NeoVintage Heart. I gave the prototype pattern in 2015 – a 2-round continuous pattern. This time I ran out of thread after the 1st round and it struck me that there are So Many possible designs that can go around those chains! Since I cannot do them all, here’s a design-along (DAL) for you. You can choose to create your own outer round, although I have given my 2nd round pattern in the pdf

SCROLL DOWN FOR PDF LINK.

In Anchor Pearl cotton size 8,  it measures around 4cms×4 cms

I’d just like to state one rule : Keep Round 1 essentially the same (although you can add beads, etc.). Design Round 2 or more as you wish. It will be interesting to see the variations.
Kind of reminds me of this make me pretty please butterfly and the wonderful diversity that flew in!
Please do share your work either here (comment) or tag me on facebook , on Instagram, or email a pic that I will then upload here.

click to download the one-page pdf - NeoVintage Heart DAL 2020

TIP : Dora Young Join (Knot) is exactly the same as what we now know as Catherine Wheel Join,  except that it is made with the same shuttle and no thread is encapsulated. .


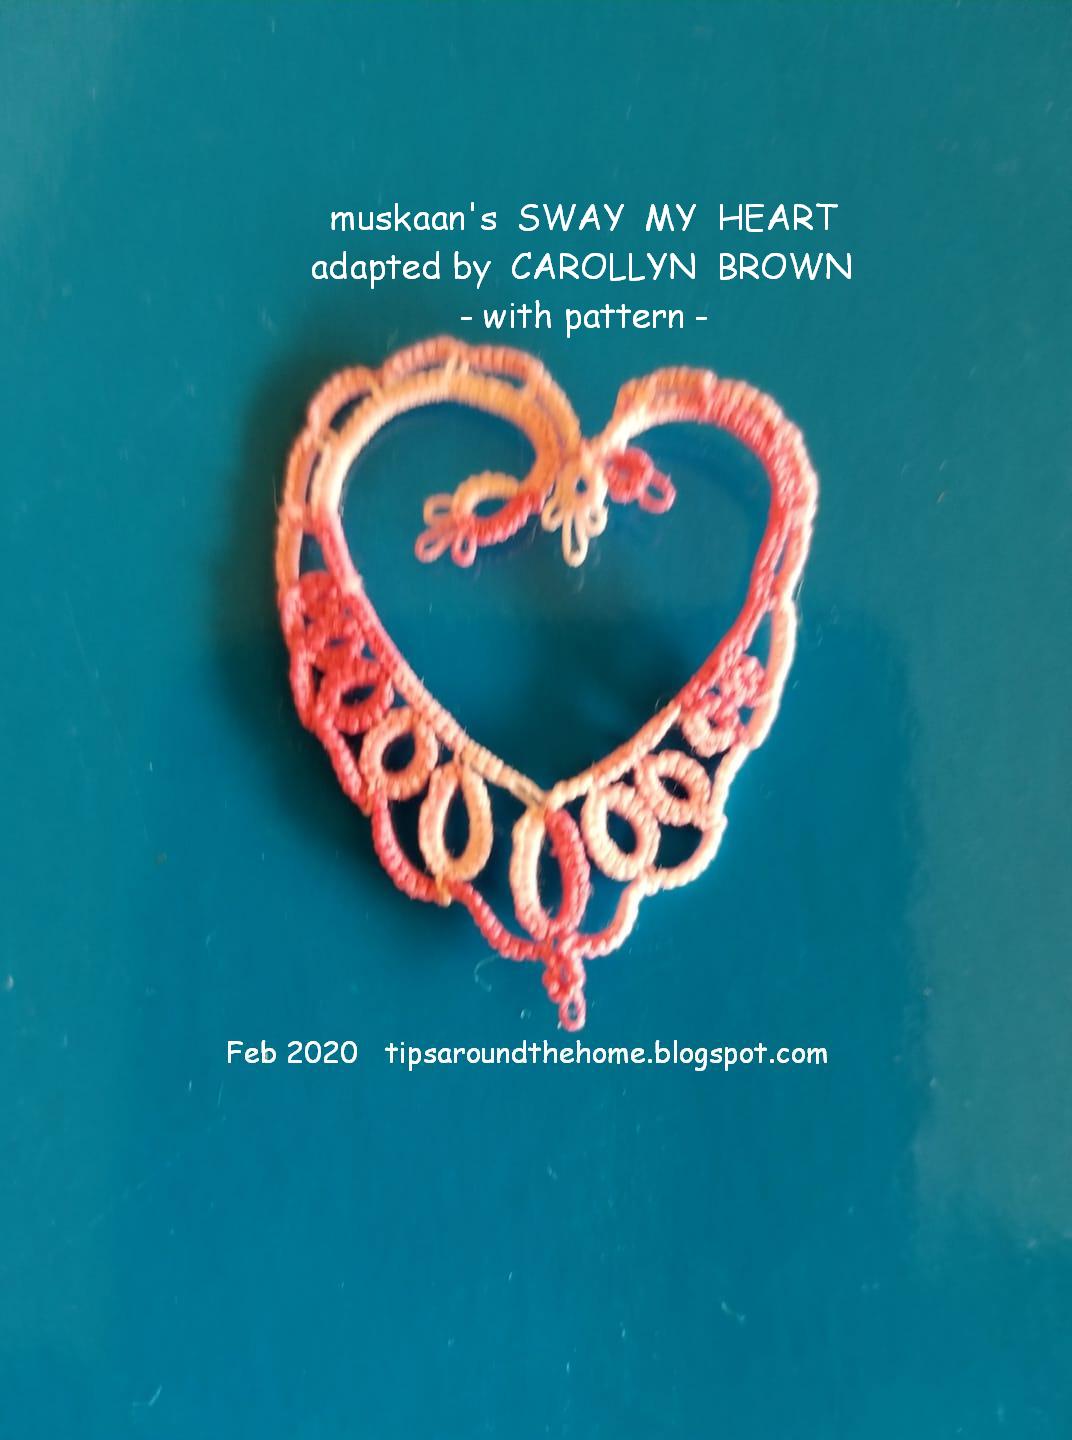
And before I leave you to play, here is Elisabetta De Napoli’s beautiful version of Sway My Heart. All set to be a pendant on a necklace !!!


Sue (His Kid) also added a 2nd round using treble tatting – check it out!


Friday, 7 February 2020

such sways and swaggers

Pin It now!

Oo, là là ! Such sways and swaggers! Such are the hearts here – all a-sway with built-in swagger!

So the green one is my 'official' version – much closer to my original sketch. It still needs stiffening if it is to be dangled. But now that I have the shape I want, I will experiment with some techniques and looks to keep the shape without the use of wire or stiffening.

Look what popped up as I worked around the center ! A possible paisley.

After round 1 - This time I thought of not adding an extra ring around the inner one. But on comparing after it was completed, and confirmed by hubby, I added that outer ring using scrap thread. This is why you see some pics with only 1 ring. Although hubby did say that it can be given as an option.
I like the look without any out round! 
Please note, that this round will need to be dampened and shaped before finalising it and proceeding to next round.

The green one, in Anchor size 20 (≡ Lizbeth size 10) measures 3”x2”.

All picots are very small. 
I think the ring on the left of the 14-14 ring should be 12-12 rather than 11-11 for a more natural gradient.
The rolls/wraps in the outer roll-tatted chains can be adjusted to suit your tatting tension.

With only the lone inner ring. As mentioned, the outer one was added later as additional decoration.
This motif can be worked continuously by climbing out with a 3ds split chain.
For detailed process, tips, and pattern notes - Round 1 ; Round 2 

Many thanks to those who played along! 
You can join the fun and tag me (facebook/instagram) , leave a comment, 
or send me pics of your versions!

Elisabetta de Napoli started a beautiful center in metallic [UPDATE- see complete heart here], 
and Sue worked in size 40. [UPDATE: treble tatting in 2nd round]
Margaret Davies used spiral/Josephine chains instead of roll tatting. 
And then there are Victorian sets that also provide visual texture.
Carollyn Brown tweaked the pattern as you can see, and shared her count and notes. She seems to have straightened out the errant swagger ;-P In her own words ….
"Well I started at top and placed picots every six ds after the initial 2 rings and chain of 3 ds. This way I could go around twice. I had size 80 which was on shuttles and should have used larger thread but it was fun to make thanks can give more counts if needs be
Here are quick numbers I still used 4ds inbetween and I feel this could be tweak some more maybe less stitch count on out side outline.
 This last picture is the count for outer part no cutting threat till end."

Ninetta Caruso sent in her version – oh my it is already part paisley! And true to form, she has used s small curled ring (sCR) with bead, as well as treble tatting. She also linked adjacent thrown rings . The pattern in her words ....
"With one round only, mine should be sewn up somewhere to keep its shape. Otherwise it needed wire in the core, that would be something worth a try.
The inclination to left or right is just personal taste, in my version for example I would tat it again because at the end I like the other face up, but the sCR defines the front side.
I forget to tell you that I started from the bottom mock ring, then this and next rings are connected, that is the first is mock ring: 4-8-8-4, next is ring: 4-7-7-4, etc. decreasing the joint, till the last that is ring: 2-1-3.
I finished in the little heart at the bottom. "

UPDATE : 2 more decorated hearts !

As they say, 'it takes a village …' I love adaptations/derivations and also get to learn and improve my own work. So, unfortunately, this heart is still not ‘completely’ complete. There’s a lot of play left, right?! ;-D
Only after I am finally done with the ideas, I will release a proper pattern. But this should be enough for you to play along and to experiment.

happy tatting

Saturday, 7 December 2019

hidden treasures

Pin It now!
I can’t explain the feeling. I have tatted patterns shared online, making coloured versions or with other tweaks/techniques. Some morphed into adaptations. Something similar is now happening with my patterns! It is so gratifying to see tatters enjoying a pattern, a design so much and exploring new avenues through it.

When creating a pattern, one keeps thinking of ‘what if…’, but there are limitations to how much I do myself. Then I get to see those or newer ideas being implemented on the original and I am thrilled!

Of the patterns I've shared so far in 25 snowflake project, Hidden Rose snowflake is one of the more popular ones. Some have attested to becoming ‘addicted’ to it – making more than 4, 5, 6,….! Playing with it! 
With due permission, I am posting only a few pics to showcase some of their ideas - some pics were sent privately, others were on facebook. In chronological order - 


Anita Barry immediately converted it into a heart!


Elisabetta de Napoli tatted the entire flake with metallic thread.


Jeanie Schekel quickly belted out SIX 2-coloured beauties and even ‘taught’ it to her group. They had some difficulty with the direction, which I can totally understand. When this project is over, I intend to tat the flake again so that it moves in clockwise direction instead of counterclockwise, and post those instructions.


Jean Gordon is on her FOURTH flake, determined to make it perfect and send out as gifts.

And the piece de resistance …

Krystyna Mura made several (and has a half page of notes for tweaks/ideas!). Of those, this one holds a very special place in my heart. She wove in gold thread in the center to reflect the gold-plated rose I showed you!
She went further to make these single rose buds as jewellery for her daughter.
Aren’t they the cutest! I couldn’t have done such a great job.

There are many more tatters who uploaded their beautiful work on facebook (or in respective blogs) – many of them can be found in my timeline or in one of the fb tatting groups, or by typing Hidden Rose Snowflake.
If you have made any of my patterns and wish to have it posted in my blog, please do not hesitate to tell me. 


Silver Linings snowflakes
Before I forget yet again, I condensed the 4 pages of Silver Linings snowflakes into 1 single page, and added a legend and some more info. I had already updated the post. But here’s the new link to the single page.

Keep them coming, tatters, and thanks for your interest ! 
And time for the 21st snowflake …stay tuned !