Click to download pdf
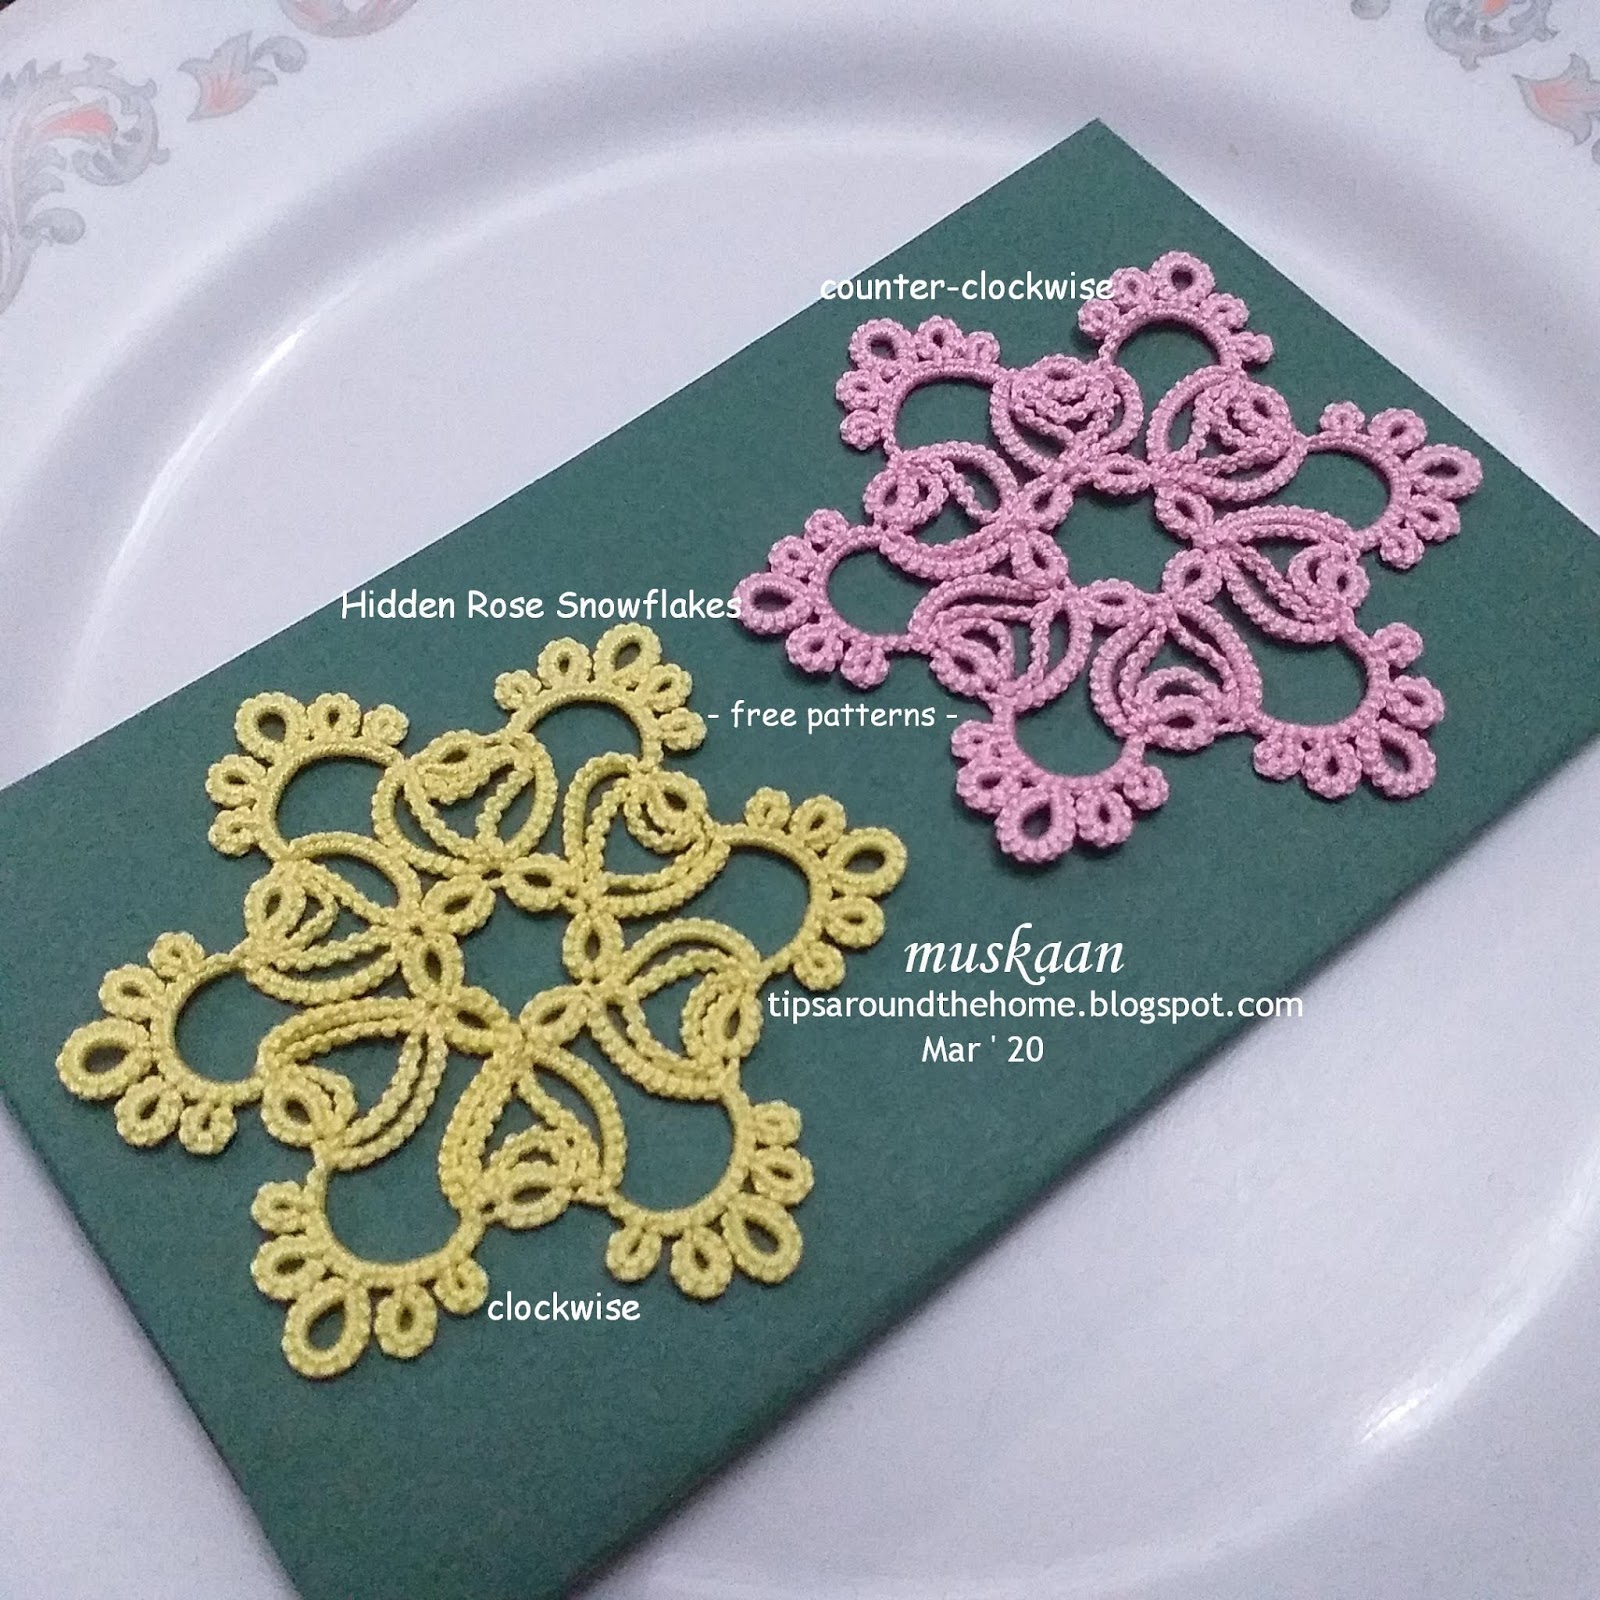
Months back I received feedback that a group had difficulty working the snowflake because the sequence of tatting went counter-clockwise. At the time, I was working against a deadline of sorts, but finally in January, I tatted another snowflake in clockwise direction. It has taken me several more weeks to present the pattern. If there is any error, please let me know. Otherwise, simply choose the shuttle that seems to be in the right position, to tat the next element, especially if both shuttles have the same thread colour.


TWoT
Notes : Notice how the
inner and outer ‘horizontal’ rings go round clockwise in the yellow flake, and
counter-clockwise in the pink flake, reflecting the sequence of work.
The above pic gives an idea of how they would look as
tessellated motifs.

I am still receiving pictures or news of the original Hidden Rose snowflake being tatted and Margaret has adapted it into a lovely ice drop here!
Related
Posts
https://tipsaroundthehome.blogspot.com/2019/12/open-treasures.html
- rose &
heart adaptations
https://tipsaroundthehome.blogspot.com/2020/08/hidden-option.html - 2-round one pass
https://tipsaroundthehome.blogspot.com/2021/01/hidden-pathway.html - without paper clips
I love you work and diligence always fun to look through and see what you do and experiences work through patterns and then sharing them with us. 💐🦋💐
ReplyDeleteAh Carollyn, you missed my previous post which was full of little projects that may or may not move forward ;-P
DeleteIt’s fascinating that there are different ways of achieving the same result. Should be a lesson for life I think!
ReplyDeleteAh, yes, Jane, this wisdom comes with age, doesn't it. From a black/white perspective to greys and multiple choices... :-)))
DeleteGood thinking on Margaret's part. Spectacular eye candy! You created a choice image with this snowflake!
ReplyDeleteLove how Margaret adapted it into an ice drop, Anita. All you tatters inspire me so much :-))
DeleteAwesome!!! :)
ReplyDeleteI LOVE the layered ones!!! :)
I've been trying to find a way to tat the layered one in one go, Sue. Nothing ;-(
DeleteIt's so cuter when layered! I love it.
ReplyDeleteerba
My favourite too, Erba :-)))
DeleteThat's a beautiful pattern, love it 🌹 thank you!
ReplyDeleteThanks, Nin :-)))
DeleteI like having options! I do like the layered look!
ReplyDeleteNeed to figure out how to work in the bridging outer chains for continuous tatting, Diana. May be somebody can take up the challenge.
DeleteAll this time I thought it was just me and how I looked at diagrams or written patterns! Now I read there are clockwise and counterclockwise patterns! I didn't know. I just reversed order and kept on tatting wondering why it was backwards...lol ;))
ReplyDelete😀 Cassandra, there are several reasons for incompatibility, one of which is the tatter's own style of working which becomes second-nature. Because of similar experience, I began the TWoT or This Way or Tat? series of diagrams, which might interest you.
DeletePiękne! :)
ReplyDeleteDziękuję za instrukcję, pewnie skorzystam z niej.
Wykonałam Twoją Rosette Enchained i napiszę o tym.
Pozdrawiam ciepło.
I am so excited to see your model, splocik!! Hope you enjoy this pattern as well 🌹💗🌹
DeleteVery interesting project. Thank for your visit on mu blog. Have a nice weekend.
ReplyDeleteI enjoyed scrolling through your projects, magbod 💗 happy crafting 💕
DeleteI love the layered look too, still working on the pattern but I am getting there
ReplyDeleteThanks, Margaret :-) I've figured out a way to keep the beautiful outline of the layered motif, working in one pass. Now to find the energy to work it out ;-D
DeleteGracias por compartir esta hermosa rosa, es maravillosa.
ReplyDeleteMost welcome, Claudia 💗🌹💗 Hope you enjoy and share 😍
Delete