
SQDR = split quadruple directional ring. It is basically a split ring but has only 1ds on the first side and the rest is worked on the 2nd side, using reverse (unflipped or larks head knot) stitches. Working moves counterclockwise. Rings thrown off the center are worked with same shuttle without any switch.
If shuttles have different colours, there will be 1ds (on 1st side) that will of one colour and the rest in 2nd colour.
SCMR = self closing mock ring. This is a chain that closes into the shape of a ring. Working moves clockwise, and rings can be thrown off by switching shuttles.
It makes no difference if shuttles have 2 different colours - the entire SCMR with thrown rings will show the same colour stitvches.
The post is long because I am showing 3 alternate methods of working the Dandelion motif, all using the SCMR instead of SQDR. A lot of tips are also thrown in, giving the tatter an opportunity to pick and choose steps as desired. Feel free to skip the working you do not intend to make.
And for even more options on ways to tat a central ring with several thrown rings, read the article, and download the tabulated pdf.


Note that since thrown rings in SCMR are worked from left to right (a to e, in above left image), the start and end stitches of the SCMR are as notated. It may also be a good idea to make the motifs first, then make the chain link surround (the black rings in above bookmark), joining on the go.
Please follow the original pattern for stitch count and instructions, making necessary adjustments. The following is merely a depiction of alternate methods of working and/or using 2 colours. And knotless starts.
A. Single colour, 2 shuttles, wound ctm (continuous thread), SCMR with thrown rings.
Red - shuttle #1 ; Yellow - shuttle #2


A-2 : ... to hold open a loop of Sh1 and start SCMR with 5ds.


A-4 : Closing the 1st thrown ring off SCMR


A-6 : Follow pattern to complete the motif. Notice there are 2 tails that can be hidden in the chain link later.
TIP : For a standalone motif, and to avoid sewing in tails, hide one tail in the last stem ring, and tat the final segment (10ds) of the stem as a floating chain as I did here for the rose.
Tutorial - https://tipsaroundthehome.blogspot.com/2015/03/dead-end-start-to-split-chains.html

Red - shuttle #1 with teal thread ; Yellow - shuttle #2 with pink thread


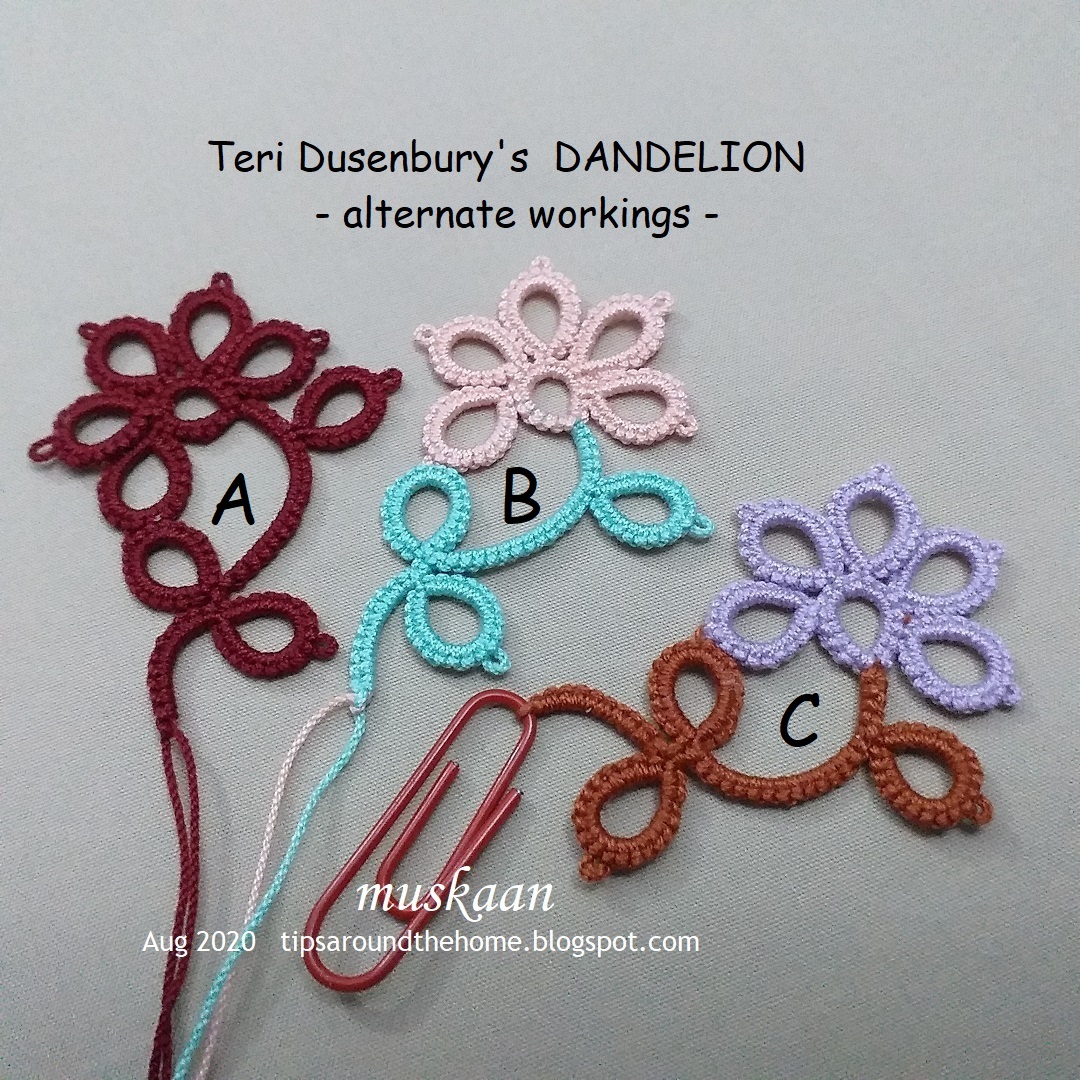
The tails in above motifs are not hidden in order to keep my options open for future.
B. 2 colours, 2 shuttles, SCMR with thrown rings
Red - shuttle #1 with teal thread ; Yellow - shuttle #2 with pink thread


You can start by knotting the threads. I prefer a knotless start, tatting over tails in separate elements.
B-1: (left image) I usually cross the threads as seen in left image. Each tail is hidden in a separate element.
(right image) This time I simply placed the tails one above the other and continued as below.


B-3 : Work 5ds of the SCMR, tatting over tail.


B-5 : and continue to make the rest of the thrown rings and 3ds to complete the central ring.
TIP: Notice how I inserted the pink tail inside the open loop, and also passed Sh1 through the same loop.

 B-6 : Now close the loop/SCMR. But for Version 2 of pattern, we need switch threads for green stem stitches.


B-7 : The most common solution is SLT (showlace trick). I prefer to avoid it. Instead I did TwW (twist work) as in this bookmark. With Sh1, make an unflipped half stitch, but while tensioning, ensure that the shuttle moves to the top, thus repositioning threads and shuttles into desired positions.


B-9 : Continue and complete the motif. The tails can be hidden in the chain link later.
C. 2 colours, 2 shuttles, SCMR with thrown rings, starting from bottom, ctm
Red - shuttle #1 with brown thread (and later with lavender) ;
Yellow - shuttle #2 with brown thread

In my standalone model, a picot space is held open with a paper clip (dead end start). Thus, if the motif is worked first, this paperclip picot can be used for joining to the chain link frame.
Work the stem and leaves.
 C-2 : Snip off the Sh1 thread, leaving a tail (the shuttle at the bottom of pic) which can be hidden under any element. Sh2 becomes the core thread shuttle for SCMR.

Wind lavender on a shuttle, tat over tail to hide end and work the SCMR with thrown rings as per pattern. (add thread on chain)

C-3 : Close SCMR and hide ends.

It's been over a week since I heard from Solai, and have no idea whether she has started the bookmark and has any issues. But this seemed like a good opportunity to try out the substitution idea and share with you.
So, pick up your shuttles and get started :-) What colours will you use?
One more question - do you like the size of the images? Any changes you would like to see in the presentation?


