Showing posts with label LHK. Show all posts

Saturday, 1 February 2025

direct method tatting

Pin It now!

I had a very interesting experience earlier this week. In her book 'The Complete Book of Tatting' (1985), Rebecca Jones highlights six methods of tatting, one of which is what she calls the Direct Method Tatting. This should not be confused with Direct Tatting which entails using reverse stitches to tat chains, etc.

The stitch really doesn't care how it is made, as Patty Dowden famously said!

Since I hadn't intended to do a pictorial, I merely took a few pics for my own reference. Hopefully these will be enough to give you an idea and a way for me to recall easily. 

DIRECT  METHOD  TATTING

Rebecca Jones (1985)

1. We start by looping the ring thread around the shuttle as seen in the pic - a luggage tag loop, such that when the shuttle is passed through the loops, and tensioned, it forms a lark's head knot (LHK). 
Notice the starting tail of the shuttle thread. 
This step can be a tad tricky, so try to focus on the entry and exit points of the thread. Fortunately it is only needed once for the very first stitch.

2. After the shuttle is pulled through and the stitch snugged, this is how it looks. It appears upside down when compared to a normal shuttle-tatted ring. However, as we move along they right themselves.


3. After the starting or foundation LHK, tatting continues by making each half-stitch. 
For 1st half-stitch, loop the thread counterclockwise and pass shuttle through. Snug.
TIP: Make kind of a one and a half turn before passing shuttle through otherwise the stitch is not formed.

4. Making the 2nd half-stitch ... turn the ring loop clockwise, pass shuttle through and snug.

5. Notice the second direct method stitch is made. Repeat steps 3 and 4 for required number of stitches. 
Picots can be made by leaving some space as we do normally.
6. When the ring is closed, the stitches face outwards and the ring looks exactly like a shuttle-tatted ring.
The same steps can be applied to chains as well using loops made with the ball or left-hand thread.

*****
UPDATE (4th March 2025): A lady bought the book after reading this post and also tried to work the method. However, she had trouble with how to continue with the half-stitches. Here is my quick video to help her out. Hope it is clear enough to be of use in case you wish to try it too. 
And here is the direct link to the video: 
I have tatted 3 double stitches in a ring in this demo. Hope it helps. Please excuse my clumsiness and background ... videography is not my go-to format ;-D

What I later realised is that this in one of two ways to make a lark's head picot join (LHPJ) or lark
*****
WHY?
You may justifiably ask why this method. I think it is a nice way to transition from needle tatting to shuttle tatting. Even if a tatter cannot manage the flip/transfer, s/he can use a shuttle just as easily! As a knitter, I have used my thumb to make the loops to cast on stitches and I used the same movements for needle tatting. Hence I found this pretty easy-going.
Besides, Rebecca also points out that this method might be easier on arthritic hands and a tatter can continue to enjoy making lace. 

I haven't had time to explore this further. Hopefully some of you will be interested and share your observations and experiments ... 

Thursday, 20 July 2023

luggage tag loop

Pin It now!

 Since Georgia Seitz's site is still in transition to the new site (https://www.theonlinetattingclass.com/) and not everything has been transferred, I needed a link to the luggage tag loop or lark's head knot. So I took a few pics from my Jan 3, 2023 post (https://tipsaroundthehome.blogspot.com/2023/01/measured-picot-on-core-thread.html), making it easy to share.

This loop or knot looks like a double stitch and in the same colour it can be an 'invisible' join/addition. Following are some of the ways and situations in which it can be used - 
  1. To add new thread. I have used it add green thread in the Blossoms Project. https://tipsaroundthehome.blogspot.com/search/label/blossoms%20project
  2. To add new thread in a ring. When running out of thread, new thread can be added before closing the last ring using a LHK. Credited to Judi Banashek (thanks, Gillian Buchanan). See Marilee Rockeley's video here - https://www.youtube.com/watch?v=w9pmL1kyirc
  3. Marilee uses the method to add the third (core) thread in pearl tatting in the above demo.
  4. To start on a paper clip - https://tipsaroundthehome.blogspot.com/2017/05/rising-month-late.html
  5. To hold space on the core thread for an inward picot or a starter picot on chain instead of using a pin or clip. https://tipsaroundthehome.blogspot.com/2023/06/bigger-flower.html
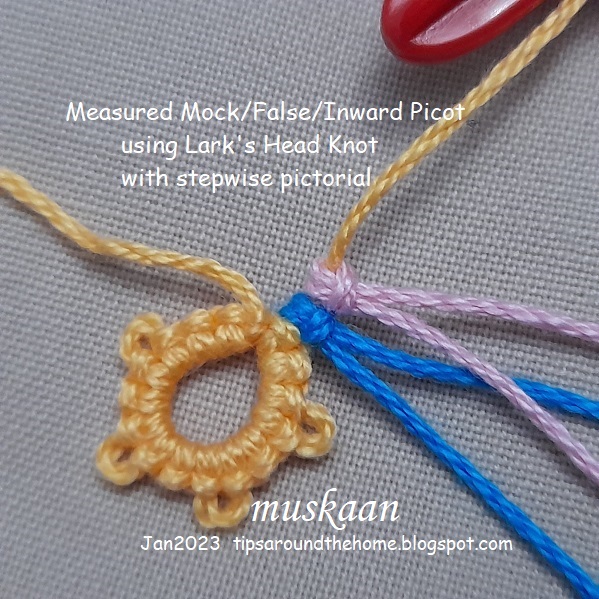
  6. To make measured mock picots and inward picots - https://tipsaroundthehome.blogspot.com/2023/01/measured-picot-on-core-thread.html
  7. To attach a tassel - https://tipsaroundthehome.blogspot.com/2015/01/tatting-away-x.html
  8. (UPDATE) To add a fringe - a spot adaptation of Corina Meyfeldt's method - https://tipsaroundthehome.blogspot.com/2015/12/fringe-benefits.html)
  9. (UPDATE) To tat short floating chains or to add a 3rd colour for a specific element - eg., the E3 Inside Out flower by Michelle F - https://tipsaroundthehome.blogspot.com/2024/01/what-heart.html and PDF link 

These are a few that I can recollect at the moment, but I am sure I'm missing something ;-P Perhaps the knot in my head will clear at a later date and I will update this post.

Tuesday, 3 January 2023

measured picot on core thread

Pin It now!

 It is difficult to get an accurate measure of an inward picot on the core thread which is held by a paperclip or coil-less pin, etc., till the time of joining. 

Then we have a mock picot where the norm is to make an overhand tie and then work the stitches. This is something I have never been comfortable with. 

And it is these that led me to use scrap thread to hold the space, by making a lark's head knot (LHK), which is exactly the size and form of a double stitch. Now this gives me an accurate measure of a picot even when it is on the core thread.

Measured Mock/Inward Picot with LHK pdf  (click to download) - https://drive.google.com/file/d/1GciBBglABtYVt3Jew5zn6chqhMjLQuqG/view 


1 Lark's Head Knot = 1 Double Stitch

The best part is that we can alter the size as desired! 
For a very small picot, make 1LHK with a smaller size scrap thread;
for a regular picot, use the same tatting thread and make 1LHK;
for a longer picot, use thicker thread for 1LHK, or several scraps for 2 or more LHK. 
The possibilities are endless. The mock or inward picot needn't even be regular. You can easily have an irregular picot with a longer core thread side and barely any space on the ball thread side, if a future join is to be made only on the lower end. 
The marker/scrap thread can be removed once the element is joined and the core thread is locked either with a lock join or with a ring.
Notice how all the picots above are of the same size and all the stitches are the same with not a single thread or bar out of place.

I put together some pics in a one-page pdf to show the steps involved.  Measured Mock/Inward Picot with LHK pdf  (click to download) - https://drive.google.com/file/d/1GciBBglABtYVt3Jew5zn6chqhMjLQuqG/view 

If you remember, I've used the LHK to join at the beginning - it was called luggage tag loop (Georgia Seitz). eg. Radiant Sun paper clip tatting, Blossoms motifs, etc. (click for search results and patterns). The LHK is also used to add new thread since it gives the appearance of a double stitch. 

Related articles/resources -
Measuring the Picot - https://drive.google.com/file/d/1Kk6rtyIUvo5JFA5u3vE3ruU2Z7zQ9fuq/view

Monday, 24 August 2020

hybrid tatting

Pin It now!

my musings.....

This is somewhat of a personal deliberation, contemplation - musings if you may. I haven't done a thorough exploration. So jump in with your comments, input, counter, reference, etc.

We know that any tool we use for tatting lace has it's advantages and limitations. Ingenious tatters have found ways to use the strengths of each tool Together!

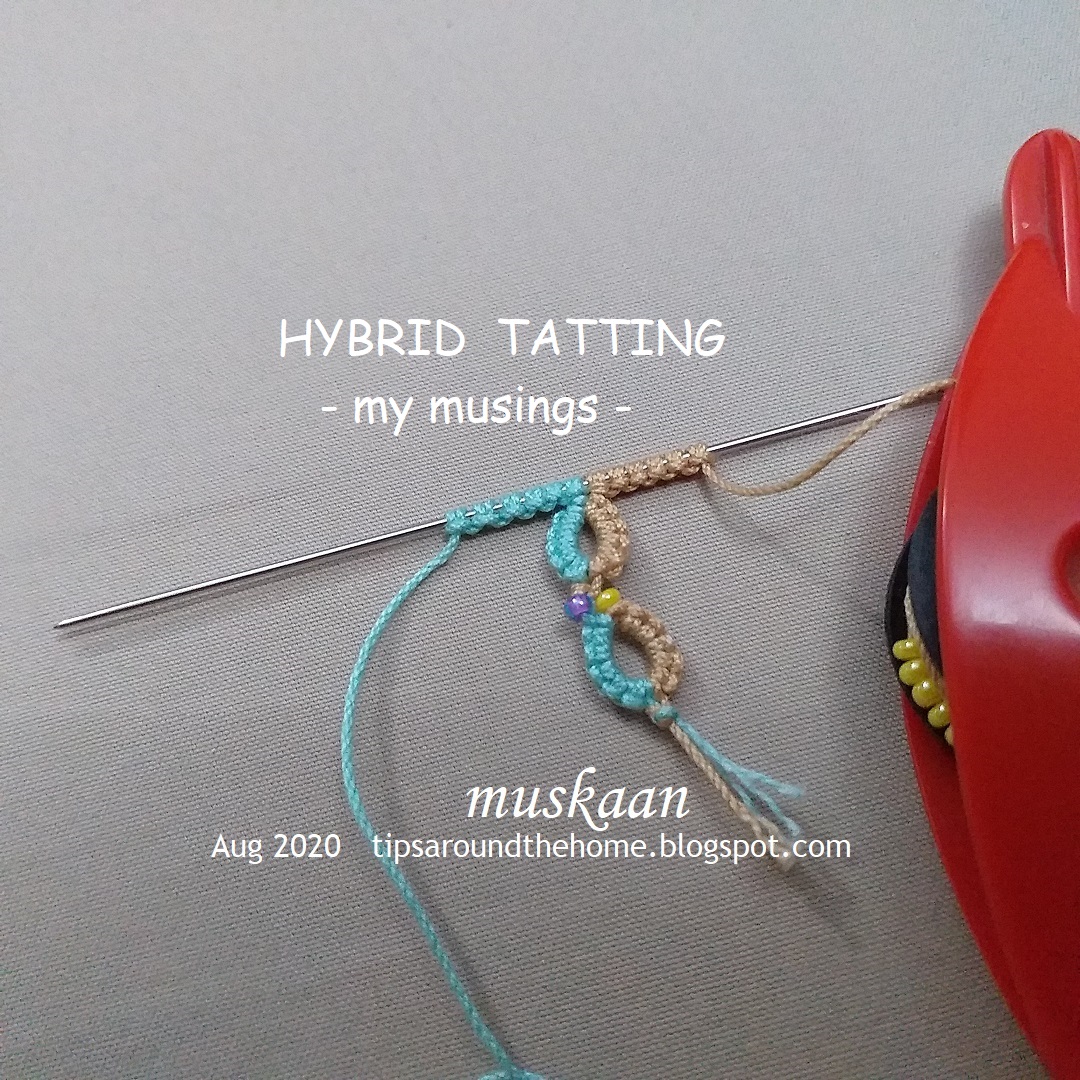
Hybrid Tatting is a tatting method that uses both needle and shuttle to work an element. It started with using them together in a split ring as seen in the image above. The term was coined by Wally Esther Sosa, for this method by Rosario Ruiz Moreno. They taught it at Palmetto Tat Days in 2017. Wally narrated the genesis -

I first came across this term and clever adaptation last year when Sharon Fawns blogged about it here. 

Recently, someone shared a video on facebook, that clearly showed how to do the split ring in hybrid tatting. It was dated 2015! It is by ChariFriv and can be accessed through this link - https://www.facebook.com/charifriv/videos/1602794246605932. Another example of how tatters independently came up with the same technique, method, or effect!

UPDATE (Nov 2022) - Wally tells me that ChariFriv is Rosario Ruiz Moreno! 

Anyway, this got me thinking. 

Should the term hybrid tatting be limited to the use of 2 tools for the same element or can it include the use in separate elements or rows within the same lace? 

A pattern that comes to mind is Frivolé's Rose and Crown motif. It has interlocking rings as the central round and several shuttle tatters use a needle to tat only this round.

And what about the SSSR (single shuttle split ring) where we use shuttle to tat 1st side and finger to tat the other?! 2 tools in same element.

Going further back in time, when the chain as we know it, had not been invented in tatting. Tatters left bare thread between rings or ring clusters. 

 
This bare thread was later covered in several different ways. Elgiva Nicholls calls this the 'False Chain' where the bare thread was covered in numerous ways using a tapestry, netting, or sewing needle (Tatting Technique and History, 1962). I am selecting only 2 where the stitch clearly imitates the half stitch(s) as we see in today's tatted lace.

Larks Head Knot (LHK) - 
  
The bare thread being covered by mock ds or LHK. The unflipped over-under movement for half-stitch is underway (left pic). The unflipped under-over half-stitch being made (right pic).


3 mock chains completed with picots.

Buttonhole Stitch - 


Those with a preference for embroidery might have used the buttonhole stitch to cover the bare thread.
Turn work (or work back to the start) and cover the bare thread with buttonhole stitches. These resemble a repetition of half-stitches as in a Josephine chain.

These are merely a small window into the use of 2 tools specifically for tatting the same element, separate elements or rows in the very same tatted lace. I deliberately omitted several other ways we use a crochet hook, a needle, or a cro-tatting tool, focusing only on how a false/mock stitch can be made with 2 tools such that once the lace is completed, the difference in tools is not apparent or discernible.

So, what are your thoughts? Where, and how would you use 2 tools to ease your tatting; and which 2 or more tools?