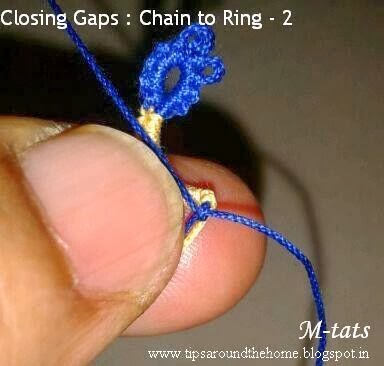
NOTE : this same fold, pinch, and tat is equally effective with trefoils and clovers when a normal chain follows it after RW (reverse work).
Thursday, 25 May 2017
squirreling away gapsosis
NOTE : this same fold, pinch, and tat is equally effective with trefoils and clovers when a normal chain follows it after RW (reverse work).
Monday, 15 February 2016
Gapsosis can be good !
Tuesday, 10 January 2017
states of matter - 2
Or go 3D - smaller, with closer concentric chains, only 4 or 5 repeats, the right colours - voila a tuberose or some such!
- If only different colours are used or beads are added ?
- If techniques are changed but not the stitchcount ?
- If both are altered ?
- If something ‘different’ in appearance is created ?
- Any other ____
Monday, 6 June 2016
in silent mode
Other techniques : All normal picots. Directional tatting. Picot Joins (up & down)
Related Posts : Gapsosis can be good
Day 1 , Day 2 , Day 3 , Days 4 & 5 , Day 6
Sunday, 29 August 2021
thrown, floating and 8 rings
Please note that the post and pdf have been updated on 30th August 2021. In case you already downloaded the pdf, kindly click on the link to refresh the document.
Tatting with an international community throws up interesting facts and ideas. All patterns in Endrucks' (1920) book use 2 shuttles and has plenty of rings made by switching the shuttle in hand - you guessed it - thrown rings! However, as Ninetta pointed out, a lot of Italian tatters have mastered the art of tatting with a single shuttle and ball, and adapting any pattern to suit this. It got me thinking about all the various ways in which we throw off a ring and here is the result of that exploration/stream of thought.
Thrown Ring Methods - a Ready Reckoner. click this link to download the complete document - https://drive.google.com/file/d/1PhXhtq9K-WiUbys0dwwZuOIat10hGlB0/view which contains pictorials for each method as well as patterns to practice. Included at the end is a list of Needle tatting resources.
For several of the patterns, despite having a pdf, I had to give the link to the blog post because the pdf link just wouldn't work the moment I converted this doc into a pdf. Probably some formatting glitch.
2.B. Since I didn't like the way it sat, I tweaked it by stabilising and centering the TR with on overhand tie and keeping the ball in front of the work.
5.B. Shoe Lace Trick - we all know this, but I avoid it and prefer other repositioning methods, including twist work. Jon Yusoff has explained this method very nicely here (wish I could get my SLT to behave so well!) - https://tatsaway.blogspot.com/2010/05/sometimes-you-dont-need-two-shuttles.html
Tuesday, 13 May 2025
stop tatting
Not literally, of course! But do read on for the full story ...
I didn't want to bore you with the continuing saga of my Just So Coaster, but it is one of the few pieces of tatting I can show at present; one of the very few that doesn't need too much effort to present.
After round 5 the only thing I was sure about was to bring back the cream shade from round 3. After rejecting several design ideas, when I finally zeroed in on what felt good, I started second-guessing my choice of the shade. Asked hubby (all cream or cream rings with pink chains) and he said go ahead with all cream cautioning me that I would need to add another round with the dark pink shade outlining the piece. No problem, it was intended!
This is another scroll round with a slight difference. That is Not gapsosis you see between the triad rings. It is a deliberate design element and a version of stacked rings. Last year Anita Barry reworked a doily from the 1970s (by L. Uteg) which had 7 or more such contiguous rings with bare thread deliberately left at the base to maintain the curvature of the round and also act as a picot for joining future elements/rounds.Start with the 1st ring and move counterclockwise.Each ring has 14 stitches and is joined in the middle to a picot on Round 5.Chain counts are inked in the model above, with a lock join to Round 5.
In size 10 Anchor Knitting Cotton, and after 6 rounds, the coaster now measures 15.5cms in diameter.
Sadly the pics don't do justice to how beautiful it really looks on my glass dining table. Anyways, when I showed hubby the coaster, he said stop tatting! It looks complete and beautiful just as it is, Just So!
Related Posts
https://tipsaroundthehome.blogspot.com/2025/04/just-so-tatting.html
https://tipsaroundthehome.blogspot.com/2025/05/comfort-tatting.html
https://tipsaroundthehome.blogspot.com/2025/05/identity-tatting.html
Sunday, 2 February 2014
Tatting Tutorial : Closing the Gaps -I-
Closing the Gaps in Shuttle Tatting :
"OTM" : Overlap, Tug & Manoeuvre Technique
I have been tatting solo ever since I learned how to tat - about 3 decades ago! Consequently, I had to develop my own ways & means to improve & keep pace with the pattern. Over the years, I successfully conquered this nagging gap issue by my "OTM" method (I've coined the term especially for this post!).
I never thought much of it, until I came across a query on InTatters about inadvertent space left between elements when tatting with a shuttle. Experienced tatters have chipped in with tips, advice, & tutorials. I thought I'd add my 2-bits as well, captured in photographs. Verbal explanation is not always enough! I'd have preferred to upload a video, but working alone, I could manage only snapshots. Hope it will be of some help at least to beginners.
Now, for my well-entrenched & personally successful technique - I think I'll call it
"The Overlap, Tug & Manoeuvre " or "OTM" !
1. when making a chain after a ring
2. when making a ring after a chain
3. when making a ring after a ring.
(please excuse the quality of pics & the horribly intrusive thumbnail!):
I . From Ring to Chain :
| I-A. Starting a Chain after Ring |
Images I-B & C : Make the first half of ds (FHS), extremely close to base of ring, almost overlapping the thread to the ring. ( Unable to show in still photograph, but the chain thread of FHS can be held in an overlap position in a pinch & the threads pulled - tugged & manoeuvred till the FHS is in place )
Then carefully, & slowly, pull the thread tight to close the FHS. If required, fidget with the shuttle (blue) thread to bring the half ds Flush against the ring - as close as possible!
When you are satisfied, pinch this half stitch & ring base tightly between your thumb & finger before you continue, so that the position is stabilized & maintained.
Images I - D & E :
Now make the second half of the ds (SHS) & bring it close to the first half without messing with the position. ie. keep a tight pinch till the second half is extremely close to the first half, the 'close' & tighten it. Remember, tighten Only After you feel it is in the right position & the earlier half has not moved at all.
This explanation may seem more complex than the actual working; and with a little practice, it becomes second nature !
![]() |
| I-D. Complete the ds |
| I-E. Chain after ring with no gap! |
| II-A. Overlap Ring thread to Chain End |
Once the chain is made & tightened, one can start the loop of the ring from the very tip, overlapping the
chain slightly. Then start with the first half of the ds over this 'overlapping' loop.
Make it loosely, position it Flush against the chain (keep tugging & manoeuvring till you feel that the ds has reached the end of chain & has no more place to move). Only then, tighten the FHS; keep a firm grip over this
half ds between thumb & finger, & make the SHS, thus completing 1 ds of ring. Remember, tighten Only when in position.
| II-B. Start ring with overlapping the chain |
| II-C. Flush FHS against chain & hold tight |
| II-D. Make SHS, position & tighten. |
TIP : Whenever one tats, it is extremely important to keep the yarn from twisting. If yarn twists, it becomes difficult to close a ring properly or to make the stitches correctly/neatly. The simplest way to untwist the yarn is to suspend the shuttle by the thread till it stops twirling around.
III. From Ring to Ring
(Tatting Tutorial : Closing the Gaps -II - ) .... I will add the link later.
[Please note that there may be many more tips on other sites, but these are what I've come across so far. Feel free to add more links & tips in Comments] :
- One superb tutorial is from Jon who coined the adorable & very apt term 'gapsosis'. I have been using this technique very successfully, for clovers, & larger rings or between continuous rings. It is truly ideal for clovers, etc. (However, when working with a smaller & single ring & switching to a chain, I find this a bit difficult to apply. eg in my Waves edging. Instead, I fall back on my own method detailed below)
- Through pinterest, I stumbled upon another great pictorial comparison of frontside/backside tatting . If one is just beginning, this, too, will prove a valuable experience.
- Making an 'extra' half ds before continuing with the pattern. (I like this tip & will definitely try it out next time)
- Closing the ring very tight can cause a gap to appear in the next element. Hence avoid a tight close. ( I am sometimes guilty of this tight close. Must watch out !)