Showing posts with label SR braid. Show all posts

Wednesday, 30 November 2022

starting with a SR pictorials

Pin It now!

 We are well aware that split rings are not meant only to climb out/into the the next round. They form a design element in their own right and when 2 colours are used, there can be interesting 'splits' in the overall design. Then there are split ring braids that make beautiful bracelets and lanyards. Speaking of which, what if we wanted to start a split ring braid in 2 colours https://tipsaroundthehome.blogspot.com/search?q=sr+braid? 

I rarely if ever use a knot to start any lace (except occasionally for a tut). Same holds true for starting with a split ring. I use this simple knotless method (which also holds good for true rings, mock rings, etc.) - cross the tails from each shuttle in the manner depicted, and voila, we're ready to go!

These pics were taken in 2018 and I dug them out when someone asked a question. The pdf has a bit more notations.

How to Start a Split Ring Knotless - click for pictorial pdf - https://drive.google.com/file/d/1lKYLoLFEhMycP4YFsemIEyk4TUjn69Q-/view

At the same time (2018) I had also taken pics for a related situation - what if the split ring braid had to be joined back in a circle? For instance in my Thorny Wreath Ornament - https://tipsaroundthehome.blogspot.com/2015/12/thorny-wreath-pattern.html where the foundation round is a series of 2-coloured split rings joined back to the start.

Obviously we need to have a picot in the very first SR. Initially I had made the picot on side 1 of the SR. However, it is not always easy to start any ring with a picot. Moreover that small picot has a tendency to close up when the core thread is pulled to close the ring. This is the reason I am not sharing pics I took at the time. Instead, I shot new pics where we start the split ring, knotless, with a picot on the 2nd side of the SR.

How to Start a Split Ring with a Picot, Knotless - click for pictorial pdf - https://drive.google.com/file/d/1OS_9VdZSoWVSsOtQYT8UVb4nV6exmf2p/view

Both are one-page pdfs with minimal text.

Both links will be included in this huge collection of tutorials for how to start and finish covering all situations - https://tipsaroundthehome.blogspot.com/2016/11/beginning-or-ending.html

Do you remember my whimsical experiment to Hide tail ends in the last split ring without sewing? - https://tipsaroundthehome.blogspot.com/2017/08/hiding-on-whim.html This, too, was in response to a query.

And I used this same technique to hide the ends in a floating chain, with no sewing - https://tipsaroundthehome.blogspot.com/2019/12/open-treasures.html 

Hope some of these help when the situation arises.

My next post will be on the 3rd of Dec when I reach 2 milestones simultaneously. So do stick around ....

Saturday, 13 August 2022

har ghar tiranga

Pin It now!

 Celebrating 75 years of Independence (August 15th) with a tatted version of my flag.

Har Ghar Tiranga campaign is about flying a flag in each home. I chose to tat a flag around a 1947 coin.
It's so good to look out the balcony or window and see flags flying merrily in the monsoon breeze. 

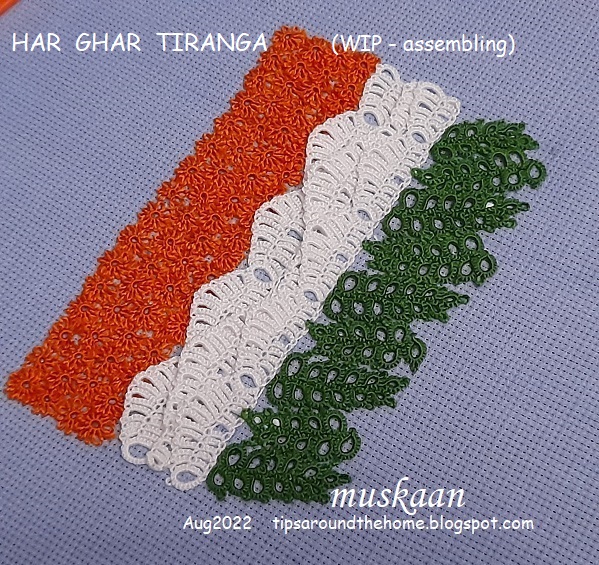
I've been sharing my tatting progress this entire August. Now it was time to assemble. 
 
Saffron - I used marigolds to symbolise sacrifice and auspiciousness. My original intention was to have the 'petals' raised up. Couldn't accomplish it since these flowers are so tiny.

White - waves in water symbolise peacefulness, serenity, peaceful coexistence.
Glued in overlapping layers.

Green - I used leaves to symbolise prosperity though it denotes faith and chivalry.

As expected there are gaps in the green rectangle, which were later filled with single or double leaves, as required.
For the pole, I tatted an onion ring using metallic silver thread, size 20. Then I couched over doubled up strands. The pole could've been thicker, but oh well ....

Ashok Chakra - the emblem represents the eternal wheel of law. I used the 1947 coin from hubby's old collection. It was the discovery of this coin that flagged off my idea early this year.

Flag tatted in Anchor Pearl Crochet Cotton, size 8, measures 13.5cms x 9cms.
saffron - 00316 ; white ; green - 00245 ; blue - 00133

This is how the edge of the coin looked after the split ring braid was wrapped around it. I had wanted to outline the coin, but without adding bulk. Since I didn't know how to go about it, I had left it as is.

Then inspiration struck! Wound my shuttle and threaded a long tail through a needle. This tail acted as the core thread and I worked chains between rings using reverse stitch (direct tatting). The needle came in handy to slip under each ring.

And this is how it looks with a chain passing through the SRs.

A close-up of the simply encircled coin.
There should be 24 spokes on the wheel which could easily be sewed in with finer thread, but I left it open so that the coin face and date is clearly visible.

I was pleasantly surprised that gluing everything together was accomplished in a single day! Today I merely filled in the gaps with extra leaves and flowers, and worked the pole.
And I sewed down the coin instead of gluing it, to keep my options open.

The Aida cloth is mounted on an embroidery hoop (25.5 cms diameter along the inner edge).
So this is it. My artistic Indian flag in tatting. 
Hope you enjoyed my 10 day journey as I join my country in celebrating Azadi ka Amrit Mahotsav!


Related Posts -