Snowflake
#21 in Land of Laces’ 25
Snowflake Project
List
of Tatting Tutorials with links.

This
time I decided to go simple. Trouble with ‘simple’ is the constant fear that
it’s already been done! Which is perhaps one of the reasons I did a 2nd
round. A quick search did not throw up anything like this, and if there is, I
haven’t seen or copied it.
I’ve
used Kathleen Minniti’s captured adaptation of Aurora Lozada’s Onion Rings method. I find it ‘simpler’ and easier to remember, with great results.
Kathleen captures the 1st/innermost ring in the first half stitch
(within the loop after flipping the stitch) and proceeds with the 2nd
half stitch. The rings stay snug.
In
the 2nd round, where I worked the 2nd ring backside (RODS), I
captured the inner ring in the 2nd half stitch (see pictorial below).
Both
rounds are worked from front, clockwise....
ConcentriCITY
snowflake
Small
/ Round 1 pattern
Worked in both Anchor Pearl (size 8, white) and Lizbeth (size 20), it is <4½ cms. As a hexagon, the side is 2cms.

Ball
and shuttle, continuous thread. Start with the innermost ring (A) of onion ring.
Choose your favourite method to make the onion rings.
I
used Georgia Seitz’s Onion Ring or ball thread join.
Then
work the chain. Note that the chain picots are NOT linked to each other. They
remain free, and are slightly longer.
ConcentriCITY
snowflake
Medium
/ Round 2 pattern
Worked
in Anchor Pearl (size 8, white), it is 8 cms. As a hexagon, the side is 4cms.

2
shuttles, continuous thread.
Join
to the 2 free picots on adjacent chains. I used a normal lock join, pulling up
a loop simultaneously through both.
Check
out this explorative study by Eliz Davis of how different ways of joining 2 picots together can be visually different. She tried Consecutive
vs Simultaneous Joins.
Start
with the chain, going clockwise.
Lock
join to the center picot. Make the 2 inner onion rings. Outer one is a chain,
with a thrown ring. Join chain to middle ring, leave some picot space and make thrown
ring. Leave equal space after closing ring, and continue chain. Lock join to
same picot and continue chain, again making a join to the double picots
simultaneously.
Repeat
all around.
NOTE: I often have to tweak the stitches - adding half or full stitch in onion rings. Hence, depending on your tension, make the necessary adjustments.
PICTORIAL
(with FRONTSIDE/BACKSIDE TATTING)
The
following pictorial shows how I worked one repeat, in directional or
frontside/backside tatting. Red is shuttle1 & yellow is shuttle2.


8.
Snowflake complete.
I
tried a 3rd round. These are the 3 repeats with tweaks in each (from
1 to 3). I couldn’t decide whether to go through with it or not, but feedback on facebook seems to be in favour of making a 3rd round.
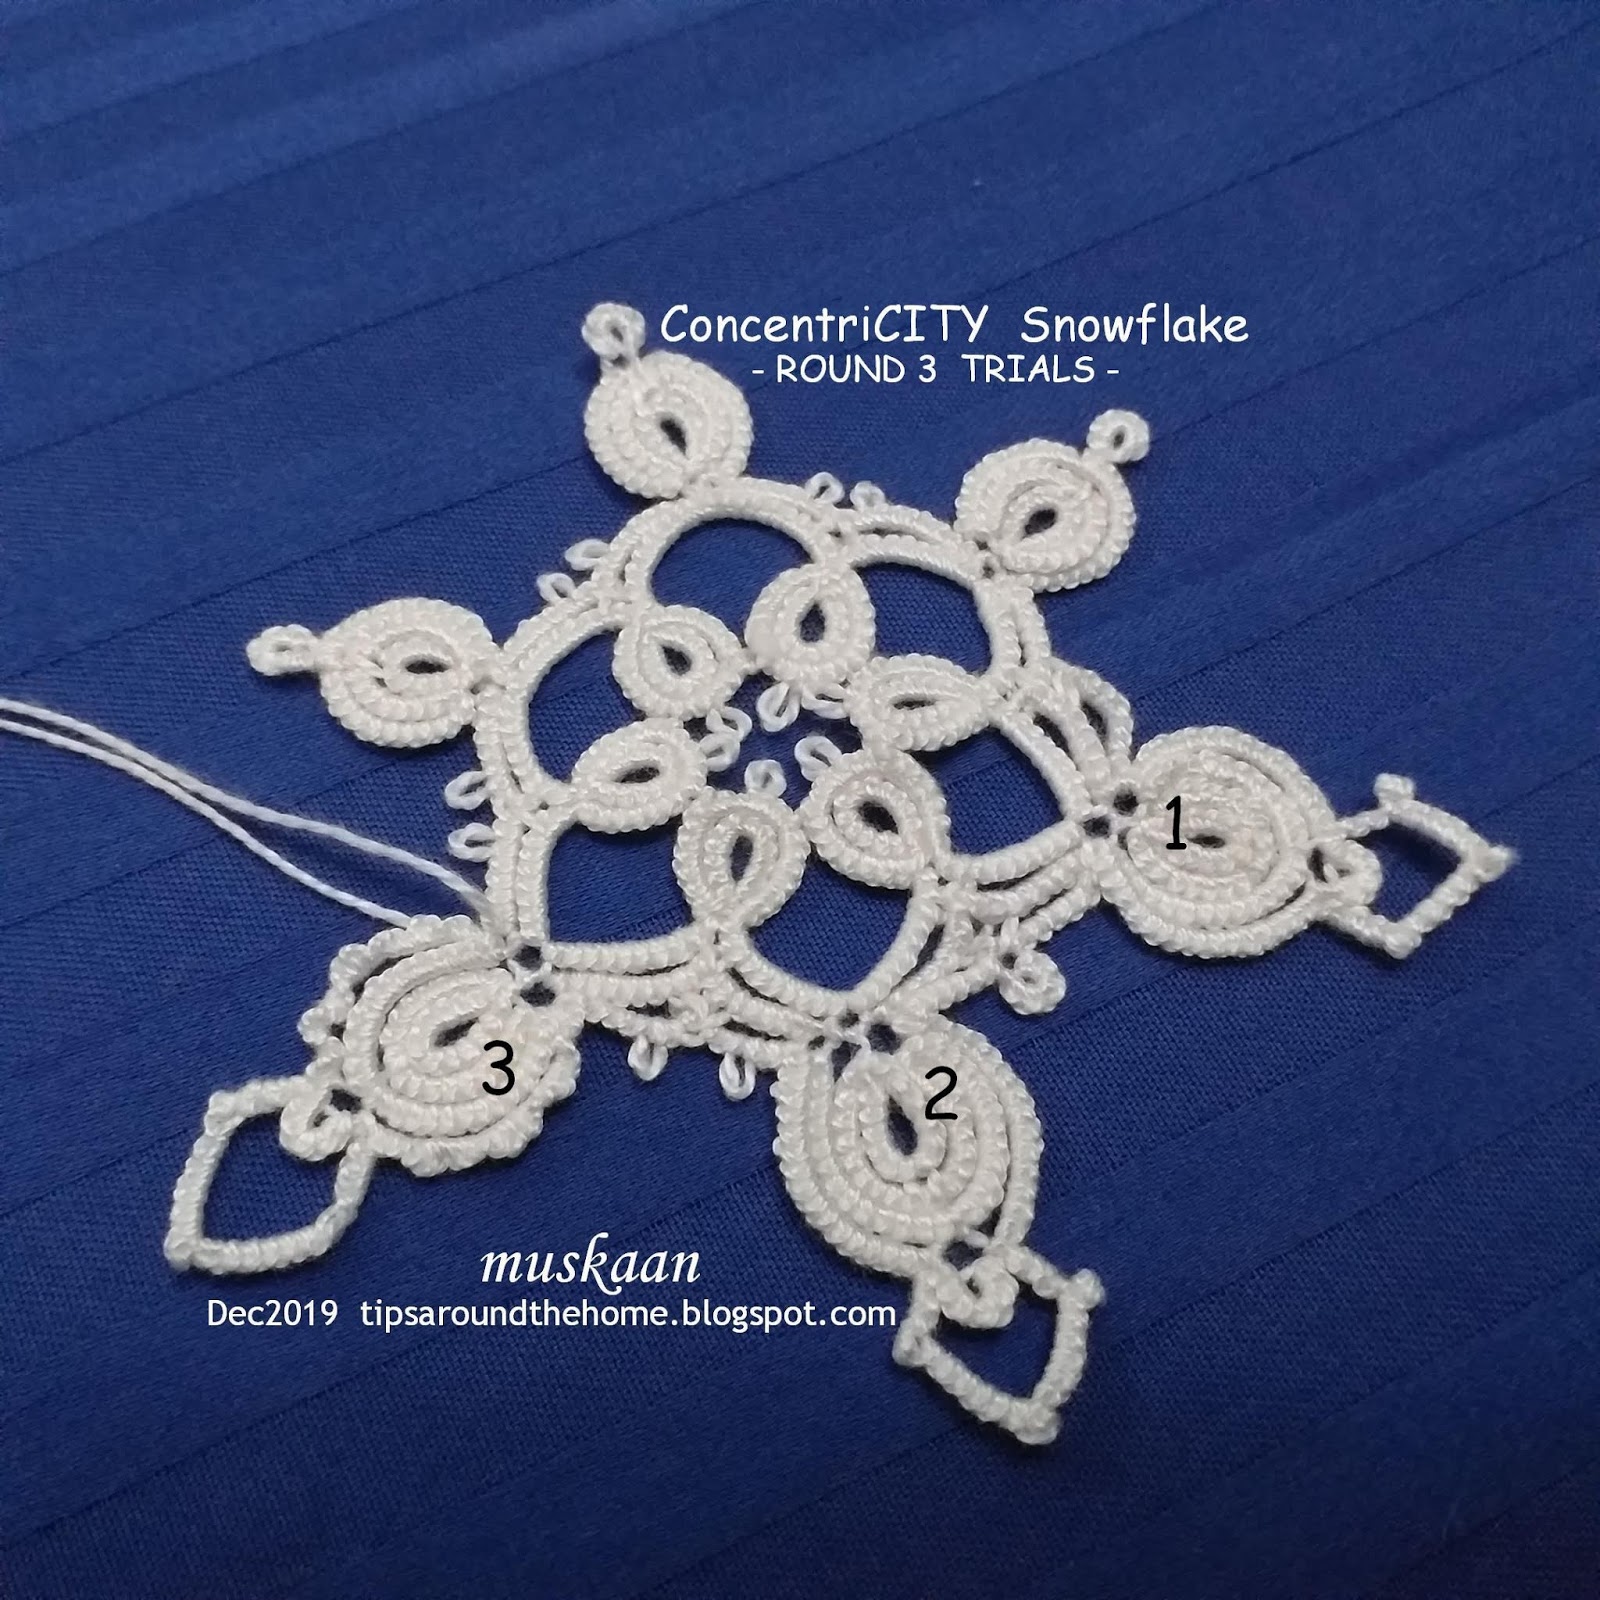
I
have a couple of questions, though –
- Should there be a
small ring (as in 1 & 2) or 2 picots (as in 2 & 3) between chains?
- Should the
outermost onion ring round be normal (1 & 2) or Victorian Set (as in
3)?
- Anything else?
This
will require making the entire snowflake afresh to make the picots the right
size and avoid stretching. Hence it will be counted as a new snowflake for the project – I have 4
more to design/tat before the 25th, so I’m taking this lifeline ;-P
UPDATE: Pattern for Round 3 - https://tipsaroundthehome.blogspot.com/2019/12/gotham-towers.html
Wow! That is a gorgeous snowflake! I will have to wait until the new year to try this one out, but I definitely want to try it. I think I prefer the small ring to the two picots, and I prefer the outermost onion ring to be normal. However, there's no reason why both can't be shown as alternatives for those tatting multiple snowflakes. After all, no two snowflakes are exactly alike!
ReplyDeleteThank you so much for your feedback, Diane :-))) Duly noted :-)
DeleteI like the ring between the chains rather than the picot and I also like the onion rings normal...there is lots of 'play' options for the chain on the tip tho - I may have to explore!!!
ReplyDeleteThat's a consensual vote, then! Thanks, LuvLee :-)))
DeleteI had actually made the chains all curved inwards, with sharp points (keep forgetting to take a pic) but this arrangement is a bit uncommon.
I like the idea of the small ring between the spokes (like 1 & 2) and the victorian sets for the outer ring. One can always opt for simpler or adding beads or something else. Your pattern can be done so many different ways! ooooooo
ReplyDeleteThanks, Mel :-)) Beads would be your choice, wouldn't it ;-P
DeleteSo that's 3 in favour of the ring.
Fabulous snowflake!!! :)
ReplyDeleteToo many different options and all could produce awesome snowflake variations. I will just wait and see how awesome it comes out!!! ;)
Thanks, Sue :-))) Will see what my shuttle throws up - may be not too different for the moment!
DeleteI'd say normal tatting, with small rings in between. But of course any of the options will work!
ReplyDeleteThanks, Jane 😍 There is unanimity, so "...who am I to disagree" (singing Sweet Dreams by Eurythmics 😄😉)
Delete