cabochon tatting and another floating beads trial
Here's what I did last night , taking courage in both
hands ...
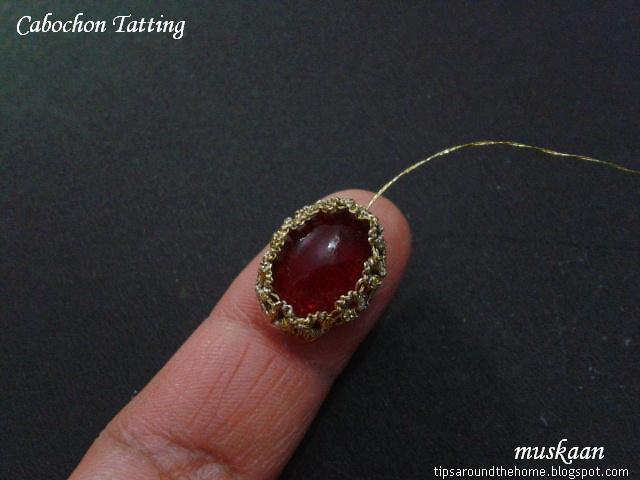
Encapsulating a tiny gem - 1 cm x 1.5 cms. It is a lone ‘rescued’
gem from long back, without any holes to string. I’ve admired the fine
jewellery work that Marie & Ninetta do, but couldn’t muster the courage (except here).
When I told Georgia
Seeing her entire post now & this one, too, I realize my freestyle pattern is
slightly different.
I think I have a great memory, but memory doesn’t agree with me ;-P Should've taken the time to look for it earlier! Hmmm, but perhaps it would’ve been too wide for this tiny gem.
I think I have a great memory, but memory doesn’t agree with me ;-P Should've taken the time to look for it earlier! Hmmm, but perhaps it would’ve been too wide for this tiny gem.

Using 2 shuttles, wound CTM with 2 strands of unmarked
gold thread (is it metallic – at least partly?) I worked 2 rings facing either
side, and then a chain along the edge before making next pair. The flat side has 2 rings less for curvature.
To ensure the gem stays snug and secure, I wove one tail
through picots of the underside rings.
I've encapsulated a shell, but it was much larger
and worked in size 20. Here, I had to wear the magnifier continuously to avoid
shuttle straying through the 2 strands.
ËÌËÌËÌËÌË
A few hours back, yet another floating beads idea struck ...
Floating
Beads under a chain !

The smaller pearl uses a slightly different first step while larger crystal bead follows the original method.

I like how the chain maintains it’s curvature despite the
dangling bead. Of course we can dangle the bead lower by increasing the length
of the shank.
Now I really must get back to completing the pictorials …
enchained in tatting is a happy experience :-)
Sweet! Will you incorporate the ruby in something bigger? Yes, it's clever how the beads don't affect the curve of the chain.
ReplyDeleteDefinitely, Jane ;-D But there's a bit of secrecy involved at present.
DeleteLove the ruby and i have tryed and done this but my biggest problem is the gold thread dosent slide well and too bad we live so far away it would be fun to experiment with different types of gold thread I know from blogging some areas have different brands of thread. Sorry got of subject a bit. love the other demo to 🌹
ReplyDeleteCarollyn, as soon as I closed the very first ring, the threads snapped ! After that I was extremely careful and all went well except for the tendency of shuttle to veer course through the 2 strands ;-p
DeleteI have no idea what brand or type this thread is or when/why (probably for machine embroidery?) I bought it. It has to be from that craft store from many years back. But I know exactly what you mean - living close, one can compare and exchange and gift :-)
Wonderful tiny jewel!
ReplyDeleteGreat encapsulated tiny gem!!! :)
ReplyDeleteYour experiments are inspirational!! :)
Very beautiful start of Tatsmithing. What are you going to do for the outer edge?
ReplyDeleteI really like this post, I have some opals that have been around for a while and this Ruby method may just make them into earrings for me. They are small but that shouldn't make a difference should it? I also love your "floating beads" what a great idea and should solve a few beading problems that tatters have.
ReplyDeleteI had totally forgotten that it was called Tatsmithing, Marie ! Yay, I just tatsmithed my first gem, without even realising it :-D I've completed the outer edge, but keeping it a secret for a couple of weeks. Stayed tuned, though :-)
ReplyDeleteBernice, earrings, studs would look gorgeous ! Looking forward to seeing your exploration. I know that my personal bead monkey is off my back Finally, with this FB idea ;-D And the bead is finally 'free' too ;-P
Thanks Ninetta & Sue :-)