Wednesday, 11 November 2020

stiffen the flakes

Pin It now!

As the season approaches snowflakes are being tatted by the dozens for decoration and gifting. And that leads to a commonly asked question – how do I stiffen my tatting, my snowflakes? 

There are already several methods (and studies) tatters use and share, some of which are listed here - scroll down to 2. Starting and Finishing > Blocking & Stiffening

Recently I came across this simple but effective explanation, accompanied by a couple of pics, shared by Barbara Pickens Tozzano in a facebook group (Tatting Ayse). It is not 'new', but so well presented. I have her gracious permission to share it with you!

How to Stiffen Tatted Snowflakes/Lace 

by Barbara Pickens Tozzano

In her own words –

" Just want to share my method of stiffening snowflakes for ornaments. This is tried and true. I have used this method for 30 years with no problems. No yellowing or anything.

  1. I like to iron and lightly starch ornaments first.
  2. Use 1 part white school glue and 1 part water mixed in a squeeze bottle. The glue bottle works well.
  3. Disposable plastic bowl or plate for larger items. A small, CHEAP plastic paint brush.
  4. Paper toweling for blotting excess glue.
  5. Waxed paper for drying ornaments on.


Place snowflake in bowl or plate, squeeze just enough glue\water mixture onto tatting to saturate using the small paintbrush to spread the glue. Next place snowflake on paper toweling and blot with a second piece. Then place ornament on the waxed paper to dry being sure it is shaped properly. Leave to dry overnight and then attach hanger. Enjoy! I give many of these in Christmas cards as gifts. I hope you will find this information helpful. "


I certainly find this very helpful! Now if I can get off my lazy back and actually do it - after all all these materials are on hand in almost every home. 

What is Your go-to method for stiffening?

Many thanks, Barbara, for sharing your time-tested method with my readers.

Friday, 6 November 2020

hidden addiction

Pin It now!

She's done it again! First earrings, now ice drops - all adaptations of the Hidden Rose snowflake.  I'm sure you, too, will find Krystyna Mura's ice drop variations absolutely stunning. Margaret Davies has done an ice drop adaptation earlier and shared her pattern here

In the first ice drop adaptation, she modified the pattern a bit to add the cabochon in the center and beads around it. Hence the front (top pic) and back (next pic) are slightly different.

In her own words - "I am crazy about this pattern and I can't stop tatting it"

Her 2nd adaptation uses 3 shuttles with a rose cabochon in the middle and if she hadn't mentioned it, I wouldn't have noticed - there are Seven repeats!

What a cute rose cabochon! Krystyna tells me this flake was gifted and her friend loved it.

I come across several models on facebook, and would've liked to share them all. At least half a dozen tatters have made this particular snowflake multiple times (read 6 or more)! It gladdens my heart so.... But wait there's more ....

If you remember Anita was going to teach her heart adaptation from this snowflake at Palmetto Tat Days this year. On her return, she graciously sent me a copy of the pattern to share with you! So now, you can easily download this single page pdf instead of tracking my blogpost.

 Hidden Rose Snowflake Heart pattern pdf by Anita Barry. In fact, she tied a tassel and it is a cute little bookmark. 


All related posts, covering references made in this post -
UPDATE: a 4th method without paperclip is shared by Melanie Cervi. See all updates in the doc below -


Wednesday, 4 November 2020

the enticing hole

Pin It now!

.... in an array of denser block tatting patterns in Endrucks' 1920 book ! ('Die Schiffchen-Spitzen' by Frau Eleonore Endrucks Leichtenstern )

If you remember, over 5 years back Georgia Seitz had asked me to work pattern #22 and share in modern format. From that one broad lace, so many different patterns emerged, including little angels and I fell in love with this book and worked in private trying to cover the entire book (including some derivations), calling it my Endrucks Project. All of it is in various stages of incomplete ;-P

At first glance, the images are not enticing. But once I start tatting up a pattern in colour and translate modern notation, ideas blow around and it becomes addictive. Ninetta is feeling that same enchantment & addiction as you can see from her lovely versions over the past several weeks! She has systematically tackled 4 patterns already and has roped in several volunteers in the Chiacchierino facebook group!!! Some have started posting their first trials. We welcome you to join in, or watch the progress in this document - Endrucks 1920 Project which contains all information, links, and updates.


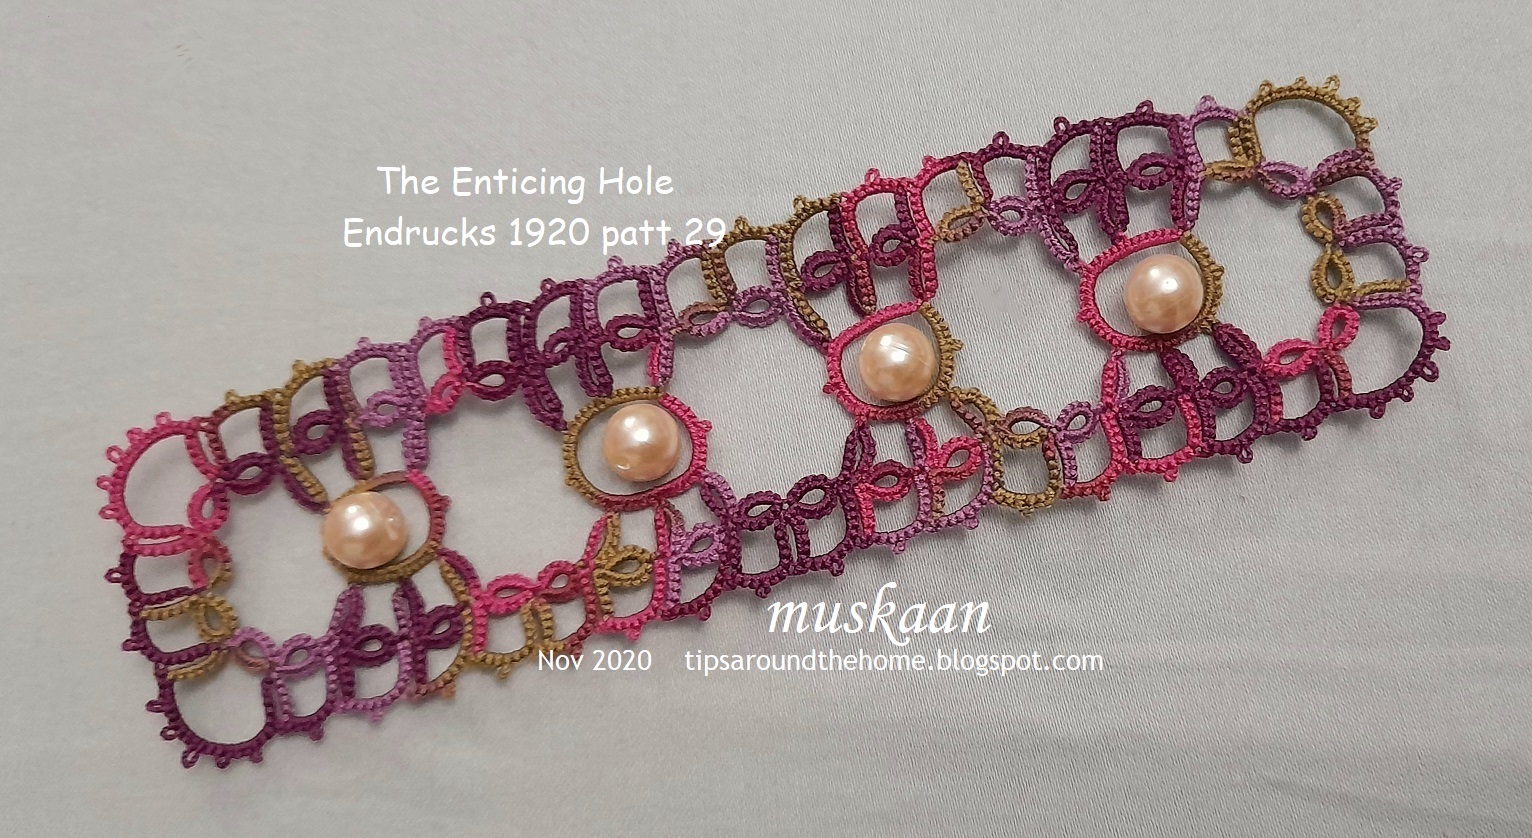
This is my adaptation of pattern #29 into a close-ended, one-pass bookmark/bracelet which I am calling The Enticing Hole  Endrucks pattern #29 vintage to modern

This is the first motif. The joining picots should be very small, unlike those seen in this first trial. Doesn't this look like the top frill of a gown? Or perhaps an angel, even a 3D version. is waiting to emerge?

A few more repeats in Anchor 20. The 2 colours show how easy it is to work with 2 shuttles, covering a large area in one pass. And all segments are basically 6ds!

In the original, the insertion is open-ended. We prefer continuous tatting, and I used one of the small motifs to span the side.

The center ring is fairly large with 48 stitches! I tried SCMR for the 2nd pink ring, but it distorted as is clearly visible. So true rings, using my usual adaptation of Patty Dowden's working large ring tutorial.
It is also Very important to leave a mock picot at the base of the large ring otherwise the later chains tend to pull it out of shape (as is visible in a couple of my rings).

This is in Lizbeth 20 #131. It is fall after all! 4 repeats, including both sides makes this bookmark 15.5cms long and 4.5 cms wide.

Since I hadn't thought of a tail design yet, I tried satin ribbons to reduce all the negative space.

Of course, it hides alternate motifs. I also thought of using this as a surround for a wrist watch, provided the dial fits within the ring diameter.

And it is better to have an odd number of repeats. Oh, I forgot to insert the ribbon Inside the ring, sigh!
One more colour. Of course, one can simply tie the ribbon as a tail at one end. I really don't mind the negative space....in fact the hole in the center is quite enticing ;-D
But Ninetta's 'eyes wanted to see something there'. How about glass gems as in ice drops? These are the smallest I had and they do add a bit of sparkle and lift. One will need to modify the center for these insertions.
Pearls! Gives it a vintage feel doesn't it?

How about leaving the ring alone and covering up the in-between space? 2 large faceted bicone crystals between each.
Bugle beads at a slant! What, are we playing Knots and Crosses now?! 

And finally, faceted tear drops. I still have to add findings, etc. for this bracelet.

Download the pattern here - 

We invite you to join in before all patterns are taken. Let Ninetta or me know which pattern you wish to tat and share in modern style.