No, no, this time I have the sequence right!
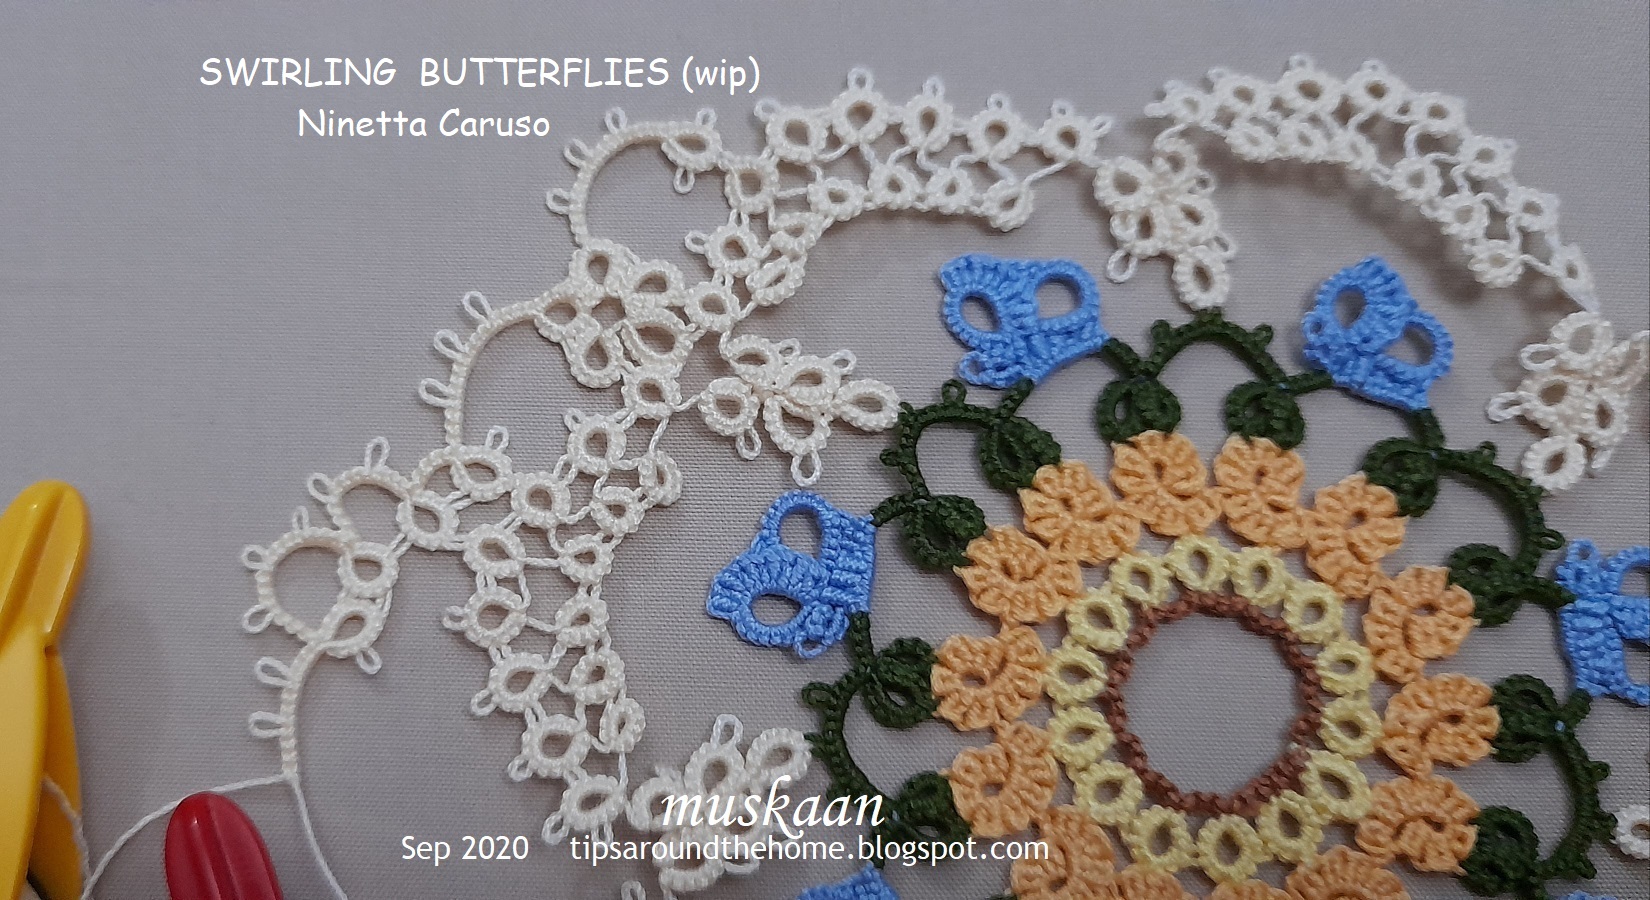
These are the number of shuttles or threads used in rounds 3 to 5 of Ninetta Caruso's Swirling Butterflies Doily.
And it also showcases a mixed timeline in evolution of tatting techniques...
Rnd3 - treble tatting in butterflies - a very modern stitch, along with encapsulation/padded tatting ;
Rnd4 - bare thread tatting with rings only - from the very beginning of the artform ;
Rnd5 - chains and split rings - evolved between the 2 time zones above.
Round 4 : 11cms in Anchor size 40, worked clockwise with one shuttle
Techniques - one shuttle rings only, bare thread, lock join bridging, directional tatting
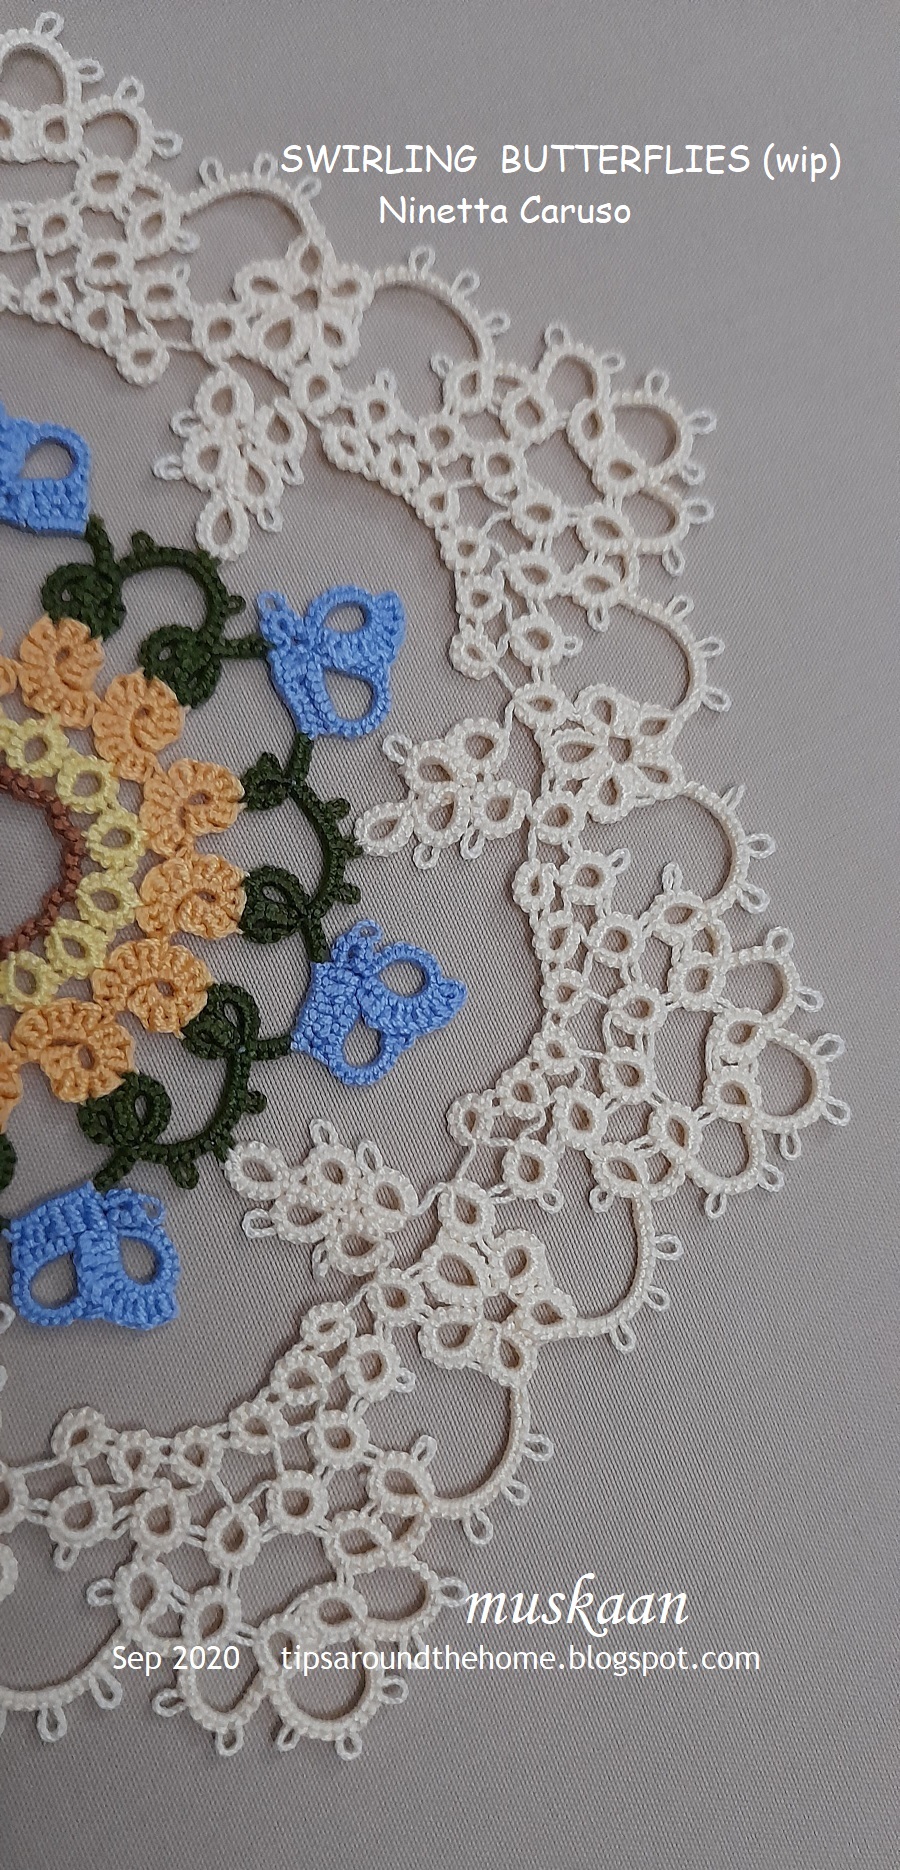
Remember my incorrectly tatted round that I snipped last time? It is the one on the left. On the right is the correct version.


One ring strategically placed, makes all the difference in the height and shape of the arch!
The incorrect one measured 10cms across.
The bare thread is 2ds long, but I did not use any picot gauge.

The main feature of interest in this round is the bunch of 5 rings that look like leaflets.
The leaflets are again a look back in time to 1850! The leaflets are worked in the same way as Mlle Riego's Bunch of Grapes , using bare thread and lock join to emerge at a distance to start the next ring.
TIP : Since the leaflet is worked from the backside, if we use a loop pulled down to make the lock joins, the bare thread remains at the back of doily.
TIP : Also, it is better to err on the side of a slightly longer bare thread. If it is too short, it distorts the ring, as happened a few times.
TWoT Notes - Directional Tatting in Round 4
Following the pattern, if one starts with the outer large ring frontside, the inner small rings and leaflet will be worked backside and the leaflet will swirl as in the left image below.


However, if one works the small rings and leaflet frontside, then the latter will tilt in the opposite direction (pic on right).
UPDATE: As I worked more rounds, I realised that the bare threads at the base of the leaflet motif can be avoided all together! In my working, the bare thread makes the leaflets 'loose' and floppy, and they shift while blocking instead of lying flat.

TIP : In order to climb out to Round5, I left a long tail and began with the 3rd inner ring. This tail was used to work the split ring to climb out.
Round 5 : 13.5 cms, worked counterclockwise with 2 shuttles, starting with false CTM.
Techniques : split rings, directional tatting
The long tail acts as the 2nd shuttle thread. One can add a fully loaded 2nd shuttle at an element of one's choice later. I climbed out at the outer ring as seen in pic above instead of where the pattern instructed. Personal choice, nothing more.

The side of the septagon measures 6cms in size 40.

Such a lovely large flower shape! In order to highlight this floral effect, I chose cream. This forms the complete colour palette for this doily.

Against a black background (my tablet cover).
I am thoroughly enjoying this doily, though it is progressing a bit slower than I would've liked. And these 2 rounds gave me lessons in design and designing from a master of the craft!
All tutorials can be found here - https://tipsaroundthehome.blogspot.com/p/tatting-resources.html
All my Swirling Butterflies posts - https://tipsaroundthehome.blogspot.com/search?q=swirling+butterflies
I'm enjoying your journey with this doily and I'm also learning from you! Great observations. Personally I like this pattern mainly for the butterflies (🥰🦋) and it can be stopped at 3rd round as a motif but also at this 5th round for a little doily. Agree about the techniques, I deliberately chose the rings only elements.
ReplyDeleteThanks, Ninetta :-))) Yes, I agree that one can stop at those rounds and still get beautiful lace! Smart choice on the rings-only round :-D
DeleteSo delicate, the outer rounds. The doily certainly uses a lot of techniques, ancient and modern!
ReplyDeleteIt is certainly quite a contrast, Jane - the dense/heavy inner rounds offset by these delicate, airy, light rounds! :-)))))
DeleteIt looks awesome!!!! :)
ReplyDeleteThanks, Sue 💙💛💚
DeleteBeautiful pattern and so many new elements put together
ReplyDeleteI agree, Margaret 💙💛💚 It is what makes this interesting to tat.
Delete