Continuing with the next round … I am still tatting on this first
trial piece hence there are a few limitations.
 It is a simple round when tatting from a pattern. But it took me
well over an hour to get it to look ‘good’ – there was a lot of retro-tatting!
And I also changed the right side chains – all facing inwards didn’t look good
at all, unlike the sketch.
It is a simple round when tatting from a pattern. But it took me
well over an hour to get it to look ‘good’ – there was a lot of retro-tatting!
And I also changed the right side chains – all facing inwards didn’t look good
at all, unlike the sketch.

As before, I invite you to work as you please, tweak and adjust as
you will, sway my heart! The notes are for reference only.
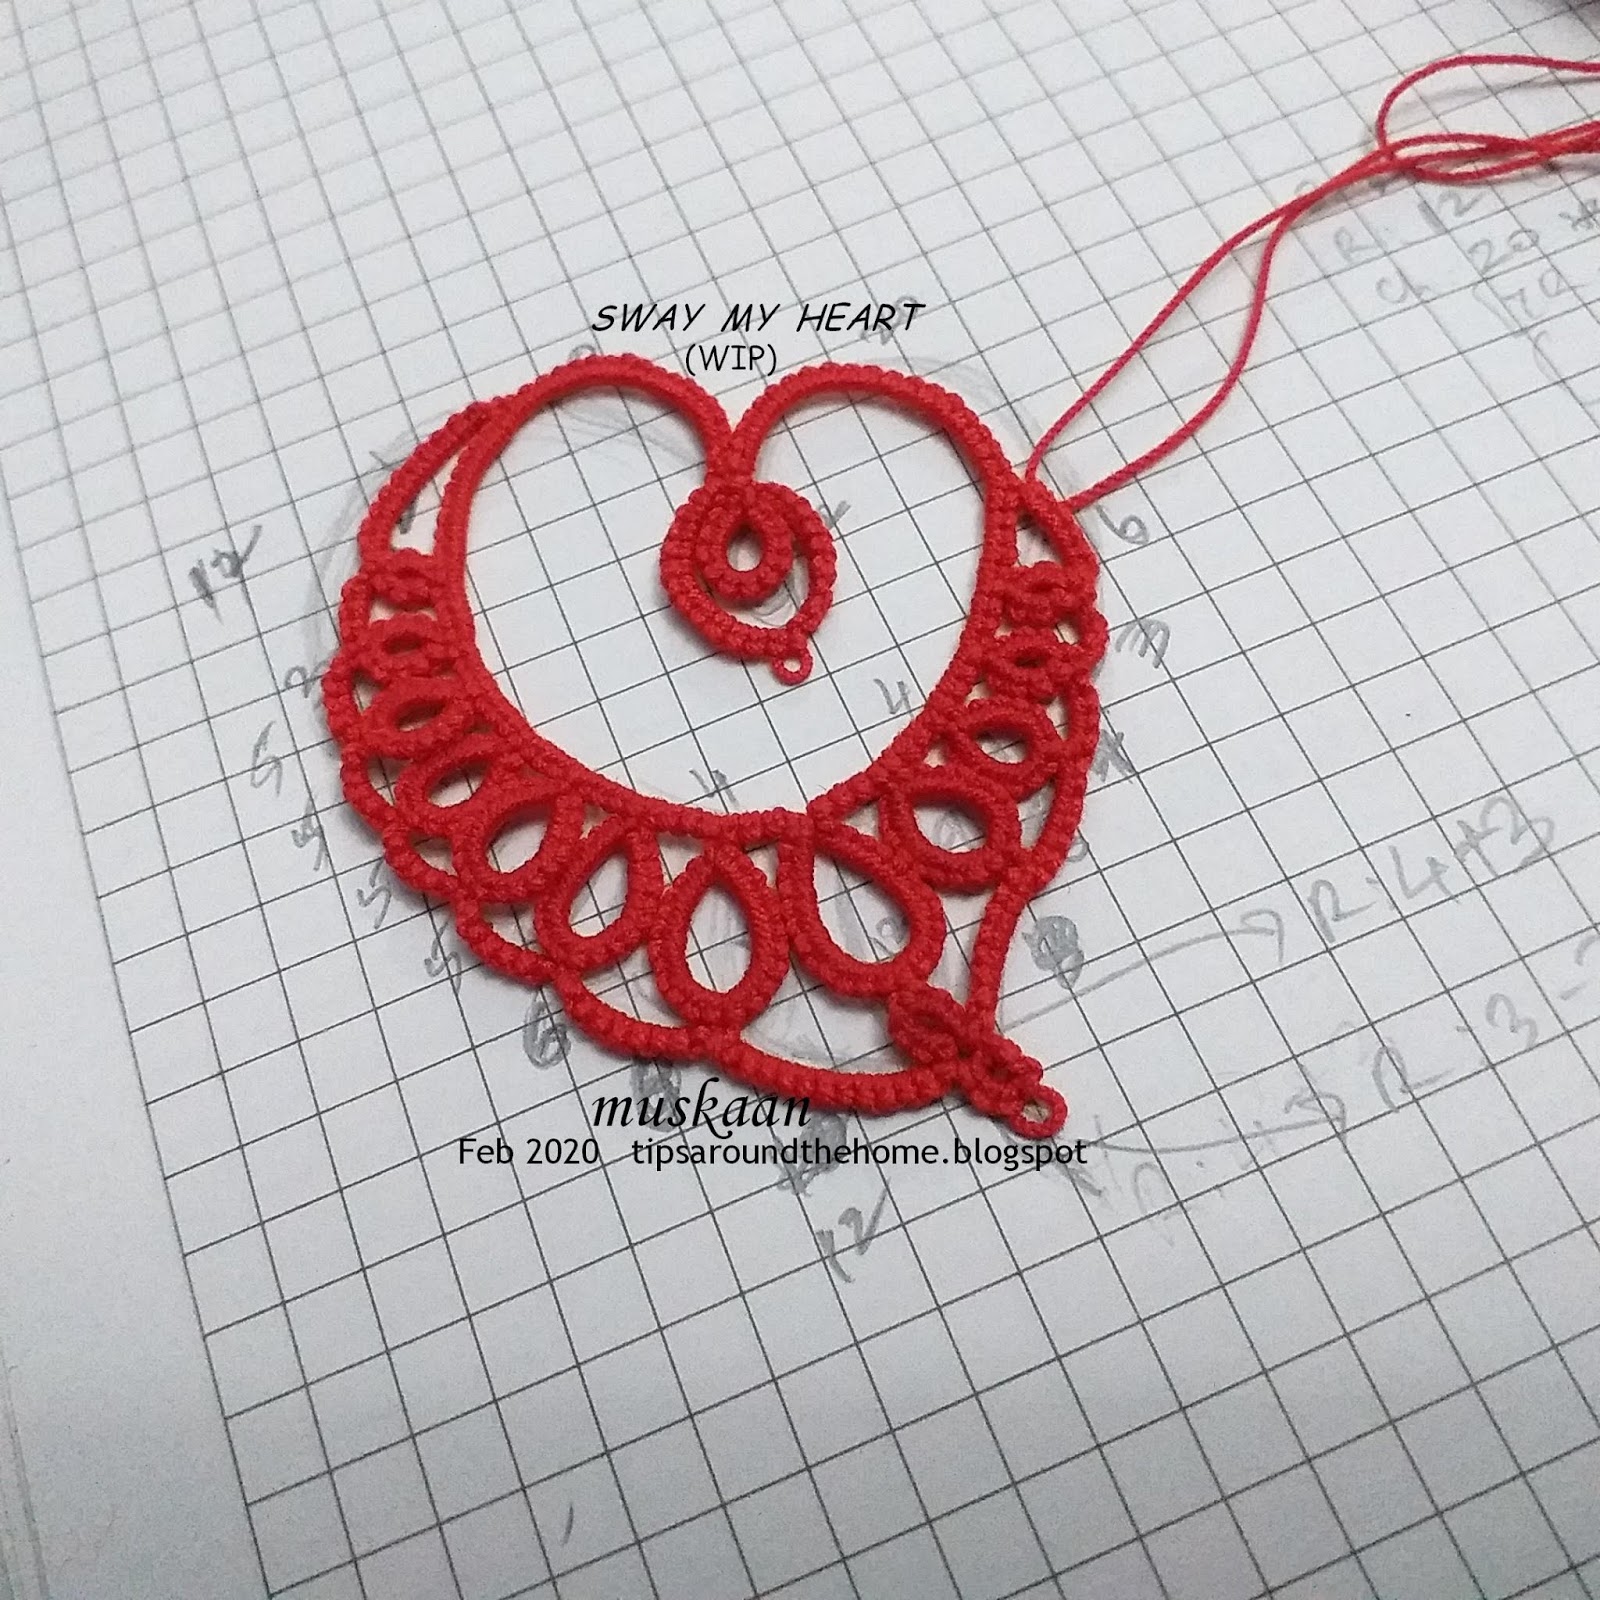
SWAY MY HEART
prototype round 2
Pattern, Notes
& Ideas
- This is mainly a
chain round with 2 tiny rings at the bottom.

- I pulled out about
3/4th yard for core thread, continuous thread.
- It can be made
with shuttle and ball, ctm, if the ring at tip is worked as a mock ring.
- Since I would be constantly placing the motif on the drawing, I started on the top left
side, using direct tatting (reverse or unflipped stitches) - no reversing work!

- Stitch count is
given in pic above. I would reduce the 12 chain on top left to 10 ds.
- The first chain segment on the bottom right after the 2 rings, faces INWARDS - hence the count is in brackets. All the rest face outwards.
- For the join
between segments, I did not use a lock join. Instead I pulled the core
thread through picot and passed shuttle through it (remember I was direct
tatting). This creates a bit of texture, but more importantly it gives a
clean dip, enhancing the curves. I did not count the join as part of the chain.
- When placed over
the sketch, it coincides fairly well overall. But I still want to increase the asymmetry a bit more.

- Now I had this
idea to continue around the chains for stability, hence left the threads
uncut. But I was also apprehensive that the concentric chains would become
too thick. My solution – roll tatting! I do wish there were picots to join
to - I will include it in the final pattern. You, on the other hand, can
pre-plan your strategy and options. TIP: I didn’t remember to jot down the rolls/wraps, but just like in Josephine chains, I wrapped 5, then adjusted/smoothened and snugged. It kept the long roll-tatted chain looking good.

- My other ideas for
this round – a. work it in finer thread to keep emphasis on main heart
(round 1) ; b. add picots (frayed!) to left side chains and also to the left side of
the central ‘ring’ to imitate a gentle sway, a soft breeze :-D


Remember
#3 – alternate ideas to stabilise the long chains in round 1?
I remembered one more way to make the round 1 chains stiff. Add up
and down beads after every stitch, as in this necklace.
Please share your thoughts and your work ... So far I've seen 2 beautiful hearts of which Carollyn has already tweaked and has offered to share her counts.
Beautiful heart!
ReplyDelete💗💖💗, Anetta
DeleteI love this heart better than mind ❤💐❤ I must have missed that pretty necklace where do you find the directions for this one or how do I find the directions?
ReplyDeleteYou are too kind, Carollyn 💗💖💗 This is my Golden Arches necklace - a competition to include the vintage motif in any form. Details here
Deletehttps://tipsaroundthehome.blogspot.com/2019/05/golden-arches.html
but I still have to upload the pattern. You missed a lot of posts last year - didn't see you as often 😀
Starting to tat mine later today watch this space as they say
ReplyDeleteWatching eagerly, and excitedly, Margaret 😍 Thank you 💖💗
DeleteI have the center part, but it didn't turn out right, guess I might need to use a larger size thread(I used 40 of course!). ;) I will post it on my blog.
ReplyDeleteChecked your blog, Sue, and it looks nice! If I am not mistaken, Ninetta must've used a size 80 or something - must ask her ;-P
DeleteBut yes, one does need to shape it with one's fingers after dampening it. Many thanks :-)))
Will try and post a much better, improved round 1 tomorrow along with other versions I received!
I need to tat your Sway! It looks like so much fun!!! I'm hustling here to get a few projects complete. Hope to tat your Sway before St. Valentine's Day. Thanks for the pattern. You're such a giving person.
ReplyDeleteMerely trying to carry on the generous tradition of the tatting community, Anita. Hope you enjoy the sway and share you experiments 💕💕💕
Delete