Turkish tatting and filled-in rings
BD Angel 2017
Wally Sosa
Wally has been sharing a birthday
motif annually for the last 17 years ! This time she chose an angel with Turkish
Tatting or Oya Makuk (lace shuttle). She has shared
an excellent stepwise pictorial, as well as Karen’s video for this technique. Both made it easy to
follow along.
I used various shapes of sequins
to create a wing-like effect, along with a beaded star in the center.
So that I remember in future :
thread the left wing sequin, red star, round sequin and bead on the shuttle (core
thread). Then bring the thread back through the 3 sequins, thus securing the
bead over the 3 layers. Snug into place. Then load the right wing. This can be
done over a picot, if desired.
I also increased the stitches in
the head ring so that it showed up nicely over the ‘wings’.
I had to decrease the skirt length
because it was becoming too wide (I need to practice controlling my hand loom).
Instead of 15 weaves, I only did 10 or 11. The increased width also called for
a longer chain below.
The above pic shows the angel from behind. I like this woven edge too - feels 'sunken'.
It was tremendous fun learning a new technique on such a cute, quick pattern. One suggestion in the OTC was to add beads on the long picots ! Wouldn't that be awesome.
Many thanks to Wally for sharing her immense creativity.
ËÌËÌËÌËÌË
My Experiments with Solid or Filled-In Rings
It was my first attempt at Oya
Makuk above, but many months back I did experiment with filling in rings. You might
remember that
tiny 3D spiderwort doodle.
The images below are all prototypes. I haven't been able to work on them since.
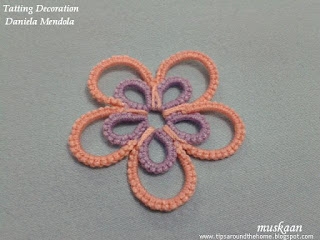
In this first experiment, graduated picots are made on a normal/true ring. Then on the way back, keep joining to each picot. Close ring. The effect closely resembles oya, but can be done within a true ring.
Requires tremendous practice to get it looking nice ; size of ring is a limiting factor ; joining is a bit fiddly.
On the plus side, no need for any other thread or shuttle ; no extra thread ends to hide ; can make spot decisions.
Could I fill the entire ring ?
The graduated picots were made along the edge as before, but at the tip I added a twisted picot for spiked effect, and went back from above, joining to each picot and adding a few extra stitches to get the larger arch. One can use a folded ring for this. When Inverted tatting fails us, this faux inverted tatting can come to the rescue !
I found this leaf ring much easier to close than the petals, and could make it larger, too.
Again, requires a lot of practice. And one must be careful while closing the ring.
Now this is something I have never come across !
It is a ring made and filled up Entirely with chains !!!
Start the chain (I used 2 colours to differentiate between core and chain/stitch thread). At regular intervals, insert a paperclip to hold an inward picot space. I have 3 such picots as evident from the clips.
Continue with a long chain ; fold at desired point, turning back and joining to inner picot, fold and move to right, and so on. It is one continuous chain, being joined back to picots along it's inner lengths.
Pretty fiddly, of course, with all those dangling clips. But fun to experiment ! And do-able too. And no limit to size of ring !!!
In balance, of course, one has to admit that Oya makuk is the way to go. Turkish tatting is a much simpler, quicker, neater way to fill in a ring of any size or shape ! And so much easier to add beads in the filling picots !!!
Hope you enjoyed my little whimsical meanderings ....
happy tatting always :-)
ËÌËÌËÌËÌË


