Dreamcatcher
Usha Shah

This layered pattern has been shared here.

Tatted throughout with 3 strands of Anchor embroidery threads. Probably a size 30.
TIP : How to separate embroidery floss. This video link and handy tip shared by Martha Ess in the comments here, really really helped ! This time the
hubster watched amused, from afar ;-P Life is easy :-D

Techniques : 2 shuttle tatting, split ring, mock picot, dot picots, dots, thrown rings, decorative join, lock join, long or decorative picot join, rosette, bare thread space, fs/bs tatting.
Workings of a dreamy tatter ...
I wanted a floral look, with emphasis on the black, hence the choice and placement of colours.
Rounds 1 & 2, worked continuously, form the
foundation of this medallion.

After
climbing out with split rings (remember to leave BTS on both sides of the SR
while climbing out, and a very small mock picot before SR of rnd 2), I switched shuttles. Thus I could
work the chains and dot picots and thrown dots frontside, using SH1. 8m thread
in SH1 was completed depleted , and barely 2m in SH2. That worked out well – no
short scraps left!
Both
rounds were worked clockwise because of switching shuttles.

I blocked only at the
very end, hence the tatting is not as flat as should be.
Round 3 is the highlight of this pattern,
worked Over the previous round, creating a layered effect. The decorative lock
joins form a lovely ‘V’ at either end of the ring.
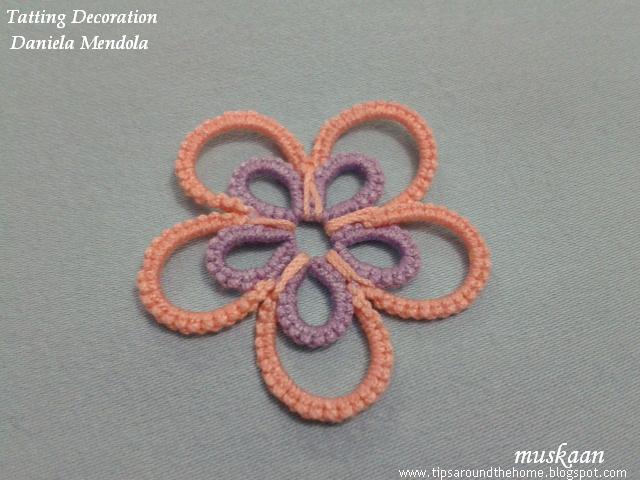
It is
made in the same way as in these cute flowers here.

This is how I did it : Make sure the chain stitches are snugged properly. Place the
core thread over/across* a
ring, and pull out a loop through the ring and above it. Pass shuttle through
loop as in any lock/shuttle join. Tension just enough that it does not distort
the ring.

Now this is lock join
that is easy to undo !!!
* I didn’t like the end look of the
join when loop was pulled up instead of down.
Rounds 4 & 5, worked separately, are rosettes
or flower medallions, attached ‘above’ !

Worked
with single shuttle, the rings are separated by bare thread, and joined
cleverly to the rounds before, through the ring ! These are simple picot joins,
but with visible lengths of the loop that go round the ring base. These are
worked in the same was as the long or decorative picot joins shown in these flowers.

All 5 rounds were worked in clockwise direction. Although if shuttles are not switched after round 1, then round 2 will be worked counterclockwise.

There’s a lot going on in this cleverly constructed and
enchanting pattern, yet it is all pretty simple to work. I got to play with
some of my favorite effects of layering and intertwining.
And this dreamcatcher is woven around the talents of so many
designers and their techniques – a tatting dream J
Many many thanks to all the designers who clear the path for
future creativity
and
a special thanks to Usha for sharing her pattern
always dream tatting !