Showing posts with label Edwige Renaudin. Show all posts

Saturday, 7 October 2023

rosettes

Pin It now!

 In tatting, we often come across different names for the same technique/effect and the same name for different techniques! (jot it down to various reasons - historical, linguistic, ignorance, non-standardization, ....).  One example of the latter is Rosette. This historical term refers to at least three different styles as evident in the collage below!

Our newest game in the Endrucks 1920 Project FB group involves the third motif and it seemed a good opportunity to address this situation and refresh my knowledge.


They are arranged along evolutionary lines -

1. Single ring with picots aka central ring. Tatted with a single thread. This was a common starting medallion in numerous antique patterns, and the thread was tied and cut after each! Now, we climb out with a mock picot or if possible, we work it as a thrown ring for continuous tatting.

2. Outward facing rings, often called a daisy or flower. Again, tatted with a single thread and the rings are joined to each other to create beautiful medallions. It helps that joining on the go was discovered. The number of rings can determine the shape and size.

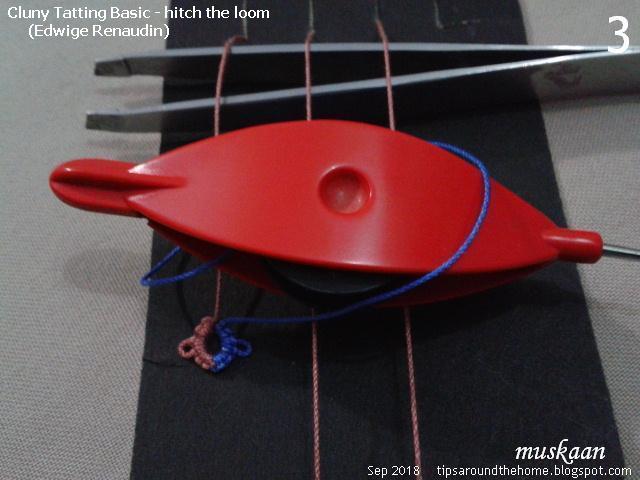
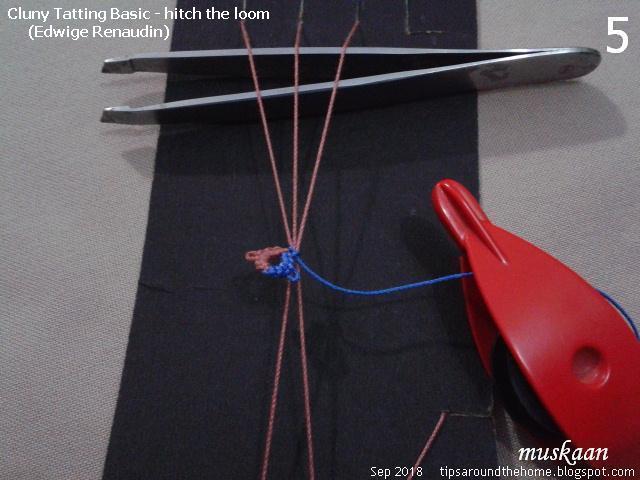
Rosace is a term used by several non-English speaking tatters, to address this formation. eg. Maria Papia's earrings (https://www.youtube.com/watch?v=wbqLn8xTaGU) and Lilas Lace's pictorial of Edwige Renaudin's Double Rosace (https://lilas-lace.fr/blog/2014/02/28/diy-a-double-rosace-diy-une-rosade-a-double-rangee-danneaux/)

3. Concentric chains around a central ring. Each chain segment is joined to the picot below from the previous round. The entire medallion is worked continuously, but requires two threads. Obviously this came into existence after the discovery of tatted chains.

In the sample above, the consecutive chain rounds are niched closely into a compact circle - like a dartboard. However, if the chains are made slightly longer, with more of an arch on each chain, it gives the appearance of a flower - a Rose or wild rose as Sharon Briggs calls it (https://sharonstattedlace.blogspot.com/2008/05/tatting-wild-rose.html).


This is all I have. Have you encountered the term for another formation? Please do share.

My main references for the above, besides online resources already listed (including Craftree), are - Elgiva Nicholls' 'Tatting: Technique & History' 1984, and Judith Connors' 'An Illustrated Dictionary of Tatting'. And all three tatted samples above are from derivatives of Endrucks' (1920) patterns 42, 20, and 37.

UPDATE: (9th Oct 2023) - Perhaps I should've spoken about the origin of the word rosette, etc. But here's a comment by Stéphanie Mc (Tattimic) on my FB post and quoted here ---

I'm pretty sure it comes from French.
In French, the word "rosette" can take about 10 different meanings. It usually refers to something circular with a circle in the middle, but not necessarily.
Also, when the suffix "-ette" is added to a noun - let's say "rose", haha-, it refers to a smaller version of that noun. So a "rosette" is supposed to mean "a small rose", at least in some interpretation of the word, of course.

 Well, she is absolutely right! 

My sincerest thanks to all mentioned!

Saturday, 6 October 2018

3 colour Cluny tatting

Pin It now!
In the 2-Colour Cluny we worked with 3 threads – one on the loom and 2 for weaving. I showed how to add & hide the 3rd thread, how to alternate the 2-colour weave, and how to avoid colour blips when closing. We now move to 4 threads where 3 will be used for weaving. Since they are all different colours, we get 3-coloured stripes or bands on the Cluny leaf.

These pics were also taken last December. I discarded an entire set of pics for the 3-colour Cluny (3-CC), and re-photographed with more comprehensive steps, but have included 2 from that batch here. That first 3-CC is the one just before the split ring in some of the pics.

If I were to tat a 3-CC now, I would definitely follow Edwige’s first step which I called ‘hitch the loom’ to remove the blip at the bottom of my tallies. 

Three-Colour Cluny Leaf
(4 threads and 3-coloured striped Cluny leaf)


Try different number of passes or wraps for a banded or graduated effect. eg. in the collage above, the pendant is a hanging Cluny where I started with 2 wraps of each colour twice, then narrowed the stripes to 1 wrap each. A crystal bead had been strung on the loom earlier, between Warp1 & Warp3 (ie. the top loop).

Choose any order of weaving, place 2 colours on the left and 1 on right, and so on. Lots of possibilities!

I have used a card loom. But choose a loom of your choice - the principle & concept remains the same. 

Loom/Warp thread : mustard 
Weaving threads   : Colour 1 on the right – green;
                  Colour 2 on the left – pink ;
                  Colour 3 on the right – yellow.
Sequence of weaving : green, pink, yellow.
1 wrap/weave = 2 passes (across Warps and back to starting side)

 1. Wind the loom as usual, with 3 Warps, using mustard thread.
One 3-CC has already been made, followed by a split ring. 
Pink is hidden within the left side & yellow on the right side of the split ring.
I have threaded the weaving threads. Tapestry needle works well, but shuttles are fine, too.
TIP : Place the needle(s) on a flat surface when not in use, to avoid tangling.

 
2. Move green and yellow to the right – Under, Over.
NOTE : In order to avoid any colour blip, hitch the loom with the colour of your choice. 
(not done here, unfortunately)

3. All positioned, we are now ready to weave.

 
4. Move green to the left for 1st pass (Under, Over, Under) …

 
To add new thread: This is the stage where new thread can be added. In case of my first tally, I had to add yellow colour. The collage shows how I trapped the new thread within the first green pass. The tail can then be lined along/parallel to Warp2 or Warp3 to hide, and snipped after a bit of weaving. See adding new thread options here -

5. and back to the right for 2nd pass (Over, Under, Over).
1 wrap/weave complete.

 
6. With pink thread -
1st pass to the right (Under, Over, Under) …

 7. and back to the left (Over, Under, Over).
1 pink wrap made.

Keep packing down the weaves.

 
8. With yellow thread, keeping it above the green –
1st pass to the left (Under, Over, Under) …

 
9. and back to the right (Over, Under, Over).
1 yellow wrap made.

3 wraps made so far, one in each colour.

 
10. Start with green again, keeping it ABOVE the yellow.

TIP : Leave some slack along the edge, enough to span the 2 coloured wraps before it comes into play again. Pulling it too close will distort the tally edge.

 
11. Repeat steps 4 to 9 to desired size, shaping the Cluny leaf along the way.

 
12. To hide colour blip :
Insert all 3 needles through the top loop from below….

 
13. … threads are emerging out through the top loop now

 
14. To close tally
Remove top loop and start pulling Warp2 downwards till the loop disappears completely.
Notice how all 3 colours are emerging from the top, covering/hiding the mustard loom thread. 
For the next element, we can easily pick the colour we want to show.

 
If we skip step #12, this is what happens (tally on right in pic) – In my first 3-colour tally I forgot to pass the green thread through top loop before closing. That thread emerges from the right side, making it untidy and leaving some mustard blip.

 
15. Slip the bottom loop off the loom and pull Warp2 upwards to close it.

 
16. One 3-Colour Cluny leaf complete!

See the tiny mustard blip on the right side of tally base? 
This is the blip that hitching the loom prevents! 


My pictorials show only the basic Cluny leaf being worked in colours. But as I pointed out at the start, this colouring of a Cluny leaf works just as well for a hanging Cluny leaf, a Split Cluny or a broad Cluny (which will be the next in this 2018 Cluny tatting series). 

As a reminder, here’s a throwback pic of my trials shared here. Most of these are hanging Cluny leaves. I was trying to get the 'hang' of coloured Cluny tatting!


Monday, 24 September 2018

hitch the loom

Pin It now!
I’ve been a real dolt – a blind one! Last year Georgia had sent me a 2-page pdf of Edwige Renaudin’s diagrams (with instructions in French) as a possible layout for my colour Cluny presentation. Edwige is a master cluny tatter and author…”
I will start diagramming if many of you are interested – 
please let me know through comment or email.

But anyway, the point is that she starts her tally weaving in a way that finally led to my perfect Cluny leaf! You have all been very supportive, overlooking the imperfections in my tallies, and I appreciate it so very much. Now, however, I am finally happy myself! Look for yourself (the Before and the After) - 


I have prepared a short pictorial to show the step and the difference it makes.

Cluny Tatting Basic : Hitch The Loom
(Hitch is the term used for an unflipped half stitch).

Winding the loom and weaving remains the same. Before weaving actually starts, there is one additional step where we capture all the loom threads within an unflipped half stitch (a hitch). 
This step can be used in any Cluny tatting ranging from basic single colour to 2 or more colours.

 1. Wind the loom as usual and bring weaving shuttle to the right.

2. Move shuttle to the left Under the Warps. *

3. Move shuttle to the right Over the Warps and through the loop.

4. Pull shuttle to tension and ...

5. Slide the unflipped half stitch (hitch) to the base, 
as close to the previous element as possible.
With the Warps tied snuggly together, weaving and shaping becomes easier!

6. Start weaving normally : 2 passes = 1 weave/wrap.

1 tally or Cluny leaf made !

Edwige takes the shuttle Over the 3 threads in step2, then Under and through the loop in step3, before tensioning.
Both ways work equally well, though I find moving the shuttle Under, then Over more convenient.

No colour blip at the base AND the leaf is centered.
The top braid shows the colour blip at the base.
I made some weaving errors in the 2nd tally of the lower braid, 
but the other 3 tallies are pretty close to 'perfection'.

Remember I said the half stitch (both flipped and unflipped didn’t work for me earlier – it would sometimes lock the tally when I started to close it. This happened because I was making that half stitch on only 1 Warp thread, instead of all 3. I may have misunderstood the instructions at the time, but even now they are not clear enough.

When I shared my excitement with Anita, she kindly sent me a video link of Edwige tatting a Cluny leaf on a box loom. I watched it many times but she seems to be starting her weaving directly (without the unflipped stitch). Nevertheless, it is worth watching – she makes it look so quick, easy and perfect! Notice how she removes the top loop and places it on the knob while closing? So the top loop remains on the loom, making it easy to close! Like I showed with the card loom, using the ‘one small step’.


I have found resources that were not listed before or links that no longer work. I will update my Resources page to include them all soon. 

Don’t you love how so many tatters weave their strengths and ideas,
sharing to create perfection around !