Saturday, 1 February 2020

are you playing?

Pin It now!
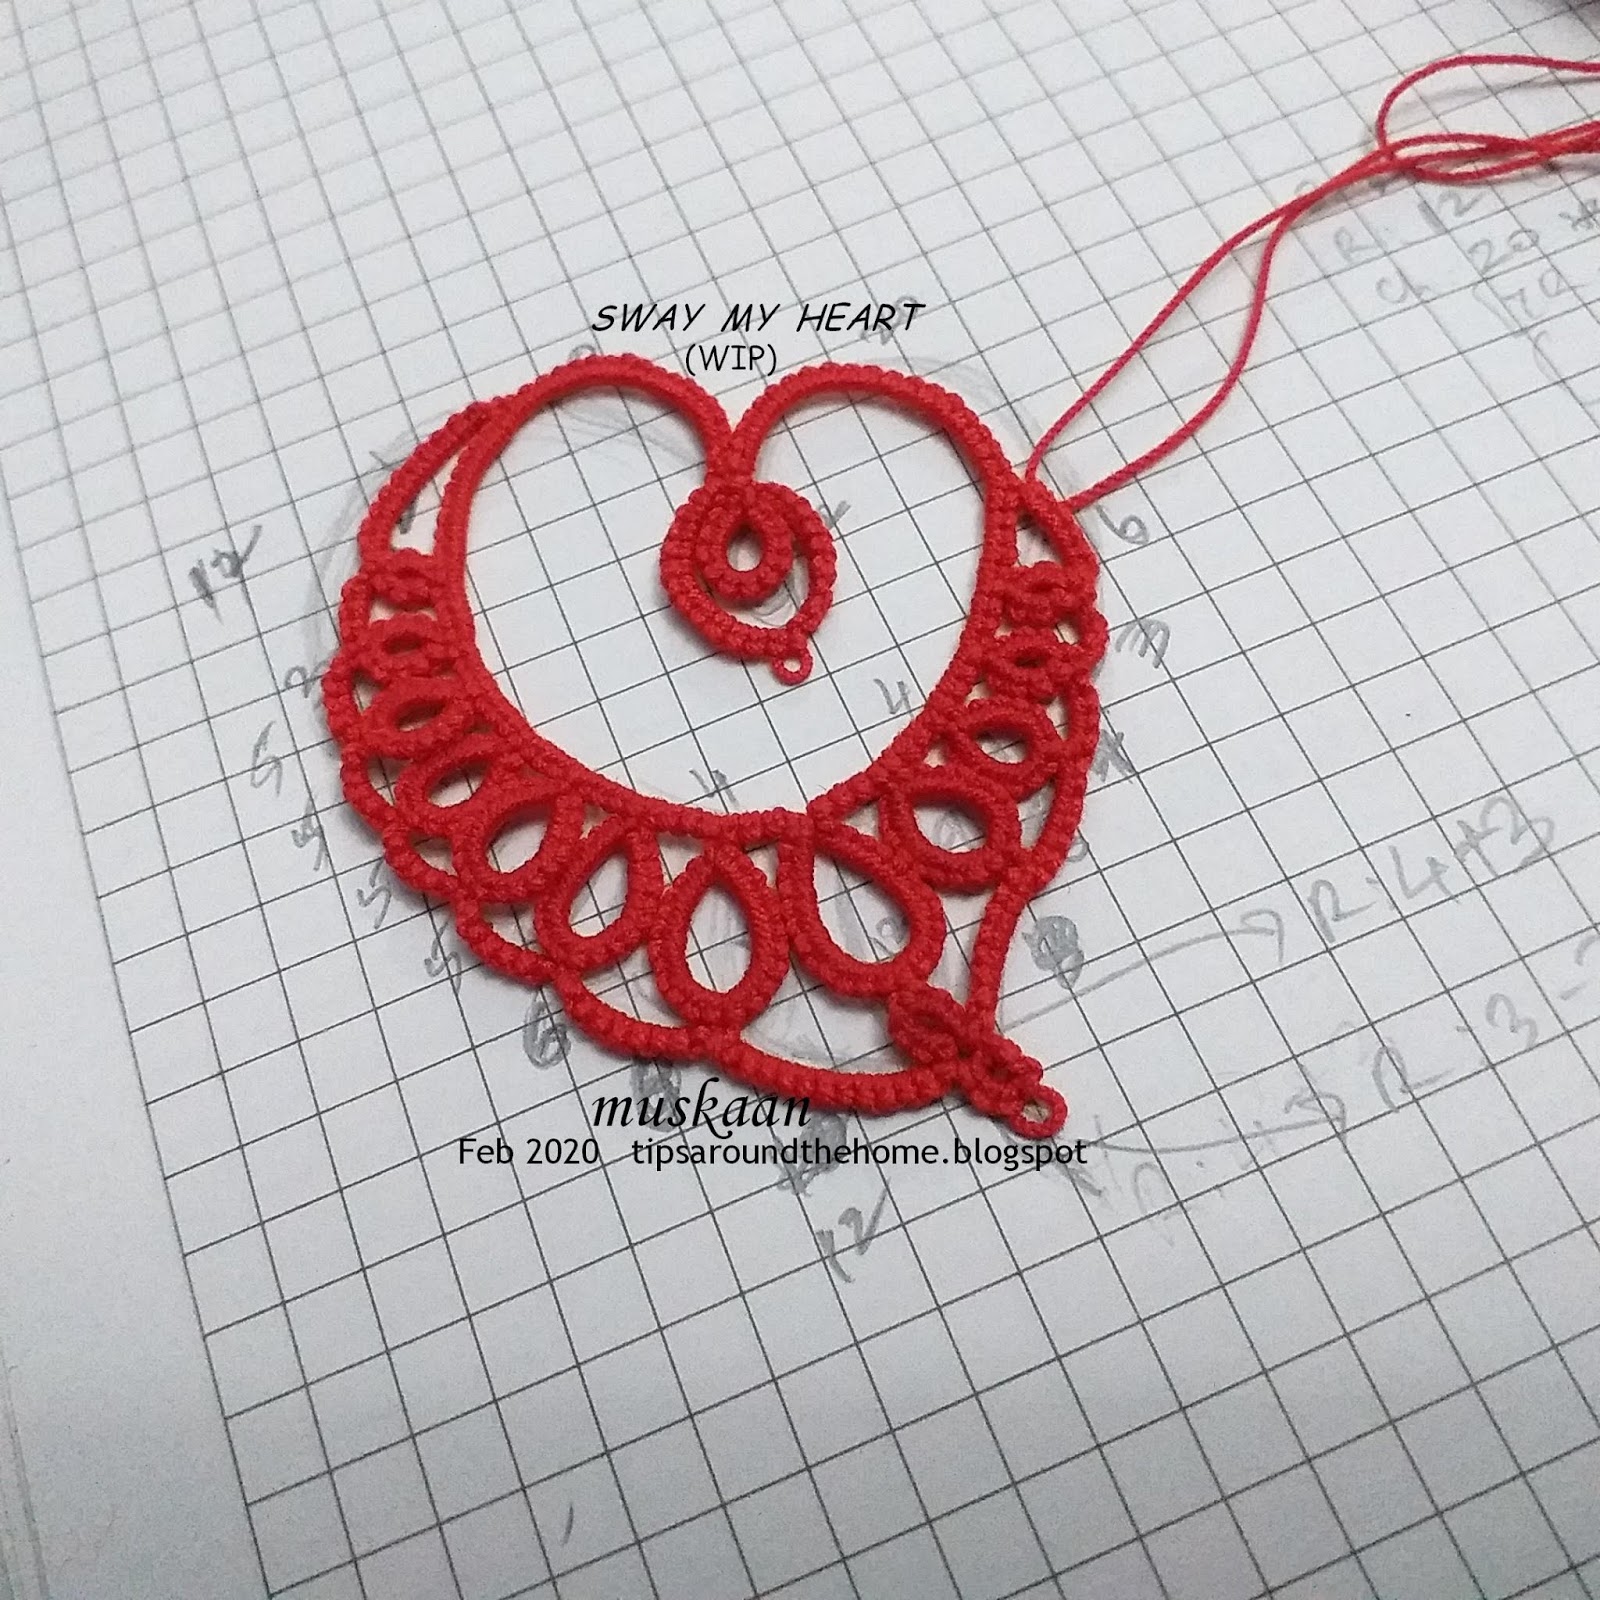
Continuing with the next round … I am still tatting on this first trial piece hence there are a few limitations.
It is a simple round when tatting from a pattern. But it took me well over an hour to get it to look ‘good’ – there was a lot of retro-tatting! And I also changed the right side chains – all facing inwards didn’t look good at all, unlike the sketch.
As before, I invite you to work as you please, tweak and adjust as you will, sway my heart! The notes are for reference only.

SWAY MY HEART
prototype round 2
Pattern, Notes  &  Ideas

  1. This is mainly a chain round with 2 tiny rings at the bottom.
  2. I pulled out about 3/4th yard for core thread, continuous thread.
  3. It can be made with shuttle and ball, ctm, if the ring at tip is worked as a mock ring.
  4. Since I would be constantly placing the motif on the drawing, I started on the top left side, using direct tatting (reverse or unflipped stitches) - no reversing work!
  5. Stitch count is given in pic above. I would reduce the 12 chain on top left to 10 ds.
  6. The first chain segment on the bottom right after the 2 rings, faces INWARDS - hence the count is in brackets. All the rest face outwards.
  7. For the join between segments, I did not use a lock join. Instead I pulled the core thread through picot and passed shuttle through it (remember I was direct tatting). This creates a bit of texture, but more importantly it gives a clean dip, enhancing the curves. I did not count the join as part of the chain.
  8. When placed over the sketch, it coincides fairly well overall. But I still want to increase the asymmetry a bit more.
  9. Now I had this idea to continue around the chains for stability, hence left the threads uncut. But I was also apprehensive that the concentric chains would become too thick. My solution – roll tatting! I do wish there were picots to join to - I will include it in the final pattern. You, on the other hand, can pre-plan your strategy and options.
    TIP: I didn’t remember to jot down the rolls/wraps, but just like in Josephine chains, I wrapped 5, then adjusted/smoothened and snugged. It kept the long roll-tatted chain looking good. 
  10. My other ideas for this round – a. work it in finer thread to keep emphasis on main heart (round 1) ; b. add picots (frayed!) to left side chains and also to the left side of the central ‘ring’ to imitate a gentle sway, a soft breeze :-D


Remember #3 – alternate ideas to stabilise the long chains in round 1?
I remembered one more way to make the round 1 chains stiff. Add up and down beads after every stitch, as in this necklace. 


Please share your thoughts and your work ... So far I've seen 2 beautiful hearts of which Carollyn has already tweaked and has offered to share her counts.


Thursday, 30 January 2020

come and play

Pin It now!
I have been engaged in tatting-related activities though my shuttles have been gathering dust for the most part. Didn’t stop me from generating ideas or doodling.

When I opened my tatting diary couple of days back, I found this heart doodle from Jan 20-2020 and felt compelled to tat it! Here is the first or foundational round. I shared a collage on facebook to a heartening response and have decided to share the count along with my notes/ideas. This is still a prototype.

I invite you to make any tweak or alteration you wish to; play with it ! But do share your work either here (comment) or tag me on facebook , on Instagram,  or email a pic. I’m sure you will do a much better job at it, going by past experience.
I will include your variations, with due credit, when I write out the pattern. You can all be my test-tatters and experimenters And Playmates !

Y

SWAY  MY  HEART
prototype round 1 
Pattern , Notes  &  Ideas

  1. The asymmetry is deliberate. But it is easy to make a symmetrical heart using either of the sides and tatting a mirror image - 3 hearts in 1!
  2. Worked in Anchor size 20 (≡Lizbeth 10), 2 shuttles, continuous thread. 
  3. For stability, thick thread is advisable, or stiffening it on completion. Alternate Ideas: padded tatting (multiple or thicker core threads); padding the stitch (BDS), treble tatting stitch (especially on the left side to create a shadowy 3D effect!); metallic thread. Stitch count may need to be adjusted accordingly. 
  4. I drew an enlarged version for easy reference during trials.
  5. The entire motif is worked from frontside in clockwise direction.
  6. Initially there was only going to be that one small ring in the dip. But later it felt too tiny, and hence I continued the chain by making an under-over/alligator join across the base of the ring. If you want this, you can make it an onion ring at the very beginning.
  7. Perhaps we can eliminate one of the left side rings OR increase the linking chain from 4 to 5ds, since there is a bit of overlapping.
  8. I would like to increase the left chain a bit more – about 5-6ds maybe. At present the motif is 2¼” high and 2” wide.  
  9. Also, add a small picot in the right chain to which the left can be linked towards the end. This is another way to keep it flat and stable.
  10. Do not snug the chain stitches too tightly. Try to keep the gentle curve of the heart. Keep shaping with your fingers.
  11. All outer rings are thrown rings, except for the largest one at the tip. That one is a mock ring (I worked it as a SCMR), and after closing, I made an unflipped 2nd half stitch to accentuate the dipping point.
  12. Notice the tiny picot in each ring? It is for the next round – to attach chains as seen in the sketch.
  13. I tugged at a couple of the larger rings to give them a longer shape.
  14. Adding beads to those rings, and earring or pendant findings would make it look so cute and wearable, don’t you think?


Go ahead and Wow me, dear tatters. Sway my heart.
Feel free to change what you will, and design the next round(s) differently as well. I’d love to be inspired by you.

Y

Tuesday, 7 January 2020

all hearts in one

Pin It now!
Barely has snowflake season ended than heart season has commenced! I see hearts ruling tatters' needles and shuttles already. This spurred me to finish compiling all my heart and heart-related patterns in a single Google Docs file with pictures and links.


So here's the link to the document if you wish to scroll through. Hopefully some image will inspire your shuttle or needle. 

Tat ....

  • motifs to glue on cards, 
  • add findings to make jewellery - earrings,  pendant, bracelets,...  
  • make hearty bookmarks as gifts for the book lover, 
  • or convert the 3D flower into a brooch or corsage/nosegay (don't forget to spray some rose attar!)
  • be playful, adventurous,  creative ;-P

A couple of the images are too large but I can't find a way to resize them properly on my tablet. I will get to it later.
Enjoy :-))))

And a few of my past posts with Roses to accompany hearts.