Showing posts with label freestyle. Show all posts

Monday, 23 December 2024

a no glass ceiling

Pin It now!


This is something I pulled out from my art archives, LOL. Made around the turn of the century and lying unused in a box in my now almost defunct yet stuffed art closet. 

I needed something for the Small Decorations game organised by splocik and for the last 11 months I've submitted various specimens of tatted lace. For this final month, too, I had a few small pieces and a to-tat list of a few more, which I was going to put together as tree decorations to hang as simple ornaments, to cover baubles, etc. However, this value addition didn't happen when I suddenly remembered I'd never blogged about this project. Had to look through several of my containers to finally locate them, but the search did throw up so many forgotten memories!

 
These are mostly leftover glass paints on transparency sheets cut into rectangles for bookmarks. All are freehand, free-style, painting outlines directly over the bookmark and then filling with colour.

 
The black outline is not fine and even in many of them because the nozzle wasn't cooperating ...perhaps because the squeeze bottle was running low on the colour. Yet I enjoyed giving myself a free hand, LOL.

 
These bookmarks remain unused because at times the paint tends to stick to the page especially in the hot summers we have here. Would a coat of varnish help? While I didn't try varnish, I did try to cover up the painted side with cling wrap. Nah, unless laminated, the wrap just spoils the look.
A failed idea and experiment.

The box contained another painting on an A4 transparency sheet - lot more detailed and fine, but the paint has peeled off in several places. Another one has remained fine, though. My largest glass painting (a Medusa), this one on glass was framed and adorned the study for several years. Now it is wrapped up and closeted.

Would the newer generations remember what a transparency sheet is? Are they still being used for presentations or put to some other use? 
I could've punched a hole at the top and tied a satin ribbon for a tail. But I was just plain lazy to collect the materials and put in those few extra minutes and effort. Part of the reason is that these are not going to be used as bookmarks and are too long to stand in for tree decorations. Hmmm, I could cut around the outline of a few of them, though! Now that's something for next year.

So these bookmarks are my submission for December. You can scroll through the beautiful range of  November submissions here - https://splocik2.blogspot.com/2024/12/male-dekoracje-2024-galeria-listopadowa.html

As requested by splocik, above is a collage of all my submissions for the entire year (there were two submissions in October).

I had tremendous fun thinking of what to present each month! And I didn't always have to make something special, though the game was instrumental in several. Glad I could complete the game!

UPDATE: December gallery - https://splocik2.blogspot.com/2024/12/male-dekoracje-2024-galeria-grudniowa.html ; collage of year-round projects by each participant - https://splocik2.blogspot.com/2025/01/male-dekoracje-2024-podsumowanie-i-3.html

Many many thanks, splocik, for organising such a fun event in a supportive and creative way. So much talent was on display through all the submissions!

Happy holidays to one and all!

Friday, 26 March 2021

colour temptation

Pin It now!
 
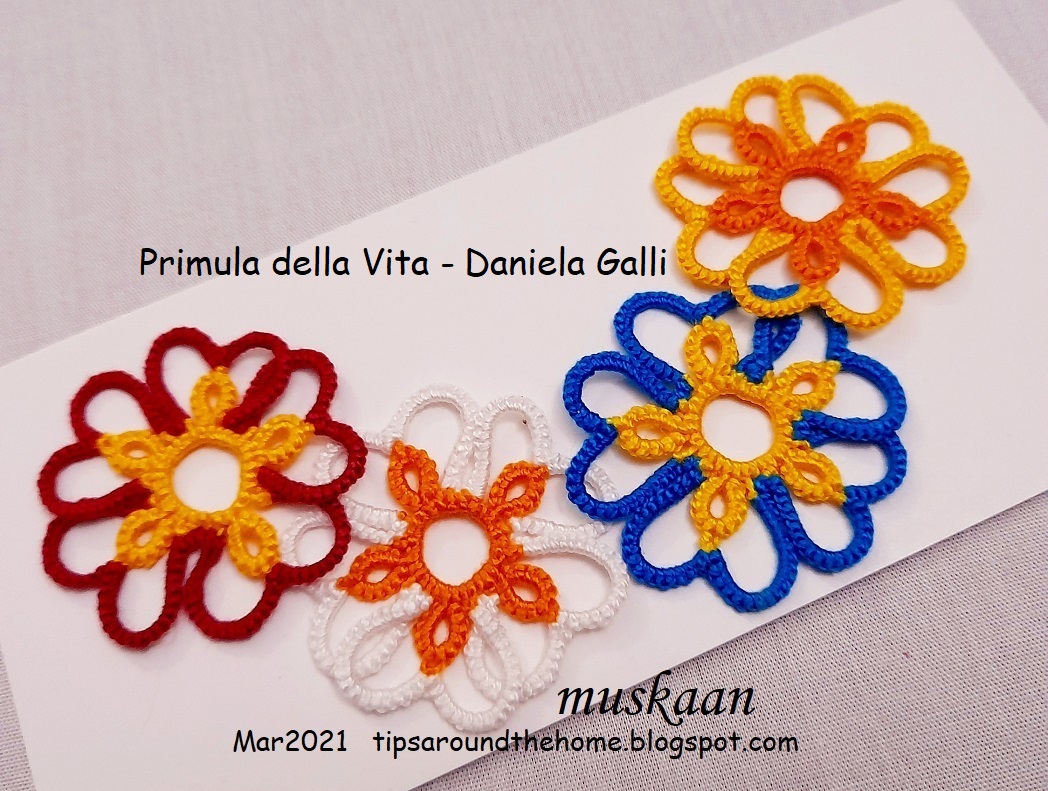
Nefertiti seems content with this necklace adaptation of Daniela Galli's Primula della Vita motifs😊
We are enjoying a long spring heading into the festival of colours (Holi) after which summer will set in (lunar calendars are way more accurate when it comes to seasons). No wonder I wanted to capture some of those colours in thread through this addictive floral motif shared by the very talented Daniela Galli for an event on facebook in early February.
Primula della Vita! And once started, I couldn't stop! Such a pleasing shape.
Each motif is 3.5cms in Anchor Pearl cotton size 8.
Would you believe that 3 years back I had saved an image hoping to convert the lovely primula flowers into tatting. That Primula mercerium image led me to this cluster which became my template for colour choices. This was my Mom's go-to flower to sketch! 
These are still unblocked and I like the slight overlap of petals! What to do now? A spring necklace! How to join? With leaves! 
On the top is the first leaf I tried, but cut off. Tried a few more ideas, including beads, and rejected all.
Finally settled on simple single-shuttle rings in different sizes. Strategically distributed to join adjacent motifs. 

Following 6 pics are close-ups where the 2nd of each pair has a Swarovski crystal in the center. Which do you prefer?
The core thread remains same through both rounds. After completing the central medallion, only the knotting thread was snipped off and hidden; a new colour was joined as knotting thread for the outer petals - false CTM method.
   
Tatting moves clockwise, all from the front. SCMR with thrown rings, climbing out with mock picot, and lock join are the only techniques for motif. 
TIP: Notice how I always use 2 metal jump rings? It is my way of assuring that even if thread slips off one ring, the other will hold it, till we can fix and close the gap.

My favourite kind of tatted lace - a bit of freeform, overlap, flowers - bringing in Nature in some small way!
These are all the materials used. Anchor Pearl cotton size 8 threads and beads, crystals. The details are notated on the pic.
Crystals sparkle in real life and give weight, body, and a finish to the necklace. 

Many many thanks, Daniela, for this wonderful pattern! I thoroughly enjoyed this project and hope to that the motifs in future as well.
Currrently there's an Easter 3D egg and cute chick pattern that Daniela has shared with the Chiacchierino: Filo, Amore e Fantasia group, if you wish to join in. It's on my to-tat list for later, but these amuse-bouches are so tempting for a relaxing distraction!

Sunday, 13 December 2020

hiding fabric burn spots

Pin It now!
Several years back we gave a brand new bedsheet set to the laundry for a simple wash, instead of doing it at home. And it came back with a few burn spots! 

 My solution was to embroider around the spot burns in white buttonhole stitch (single strand) to prevent any possible fraying. I'm sure you can spot them in the image above, now that you know.

Then I tried to replicate a sense - a simple impression - of the printed part of the bedsheet, using freestyle brush strokes in a subdued colour.

Painted white circles to copy the 'burnt berries' on the twigs.
And done! Oh, I did a similar one on the plain panel on the other side of the printed one. I didn't take a pic of it, since it was a bit out of reach and I was lazy ;-P

Quick fix solution! This sheet has been on my bed for a couple of weeks now, before I thought to take pics and share. Hence the creases, if you will excuse them.