Showing posts with label Wiosna 2015. Show all posts

Friday, 10 March 2017

revisiting options

Pin It now!

When learning, we move from easy to complex to consolidation. Further learning and explaining requires an ability to break the complex into easy. I’ve come full circle with this tutorial. In my defense, I am continually learning J

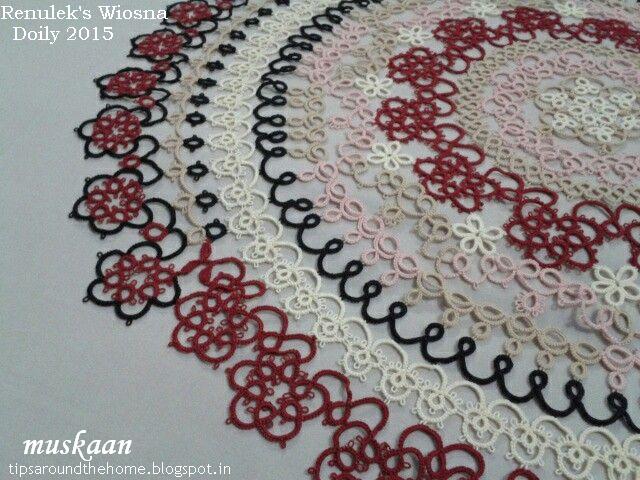
A Craftrean is working on Renulek’s Wiosna 2015 and referring to my notes. This prompted me to read through my Round 9 notes. Errrghh ! Unnecessary complication!
In light of more experience, here’s a simpler, more direct method of working that round, with shuttles always in position (no SLT or ungainly cross-threads). And how changing the base join can change colour placement. 
click on image for larger view

Wiosna 2015 Round 9 REVISITED

Start with 2 shuttles, CTM (if using one colour).
I have used 2 colours to differentiate the 2 threads at a glance and also to illustrate colour placement options.
When working from the backside, you can use the reverse order of half stitches (RODS - optional, but indicated).

Start with shuttle 1 ring, working from backside. (RODS)
Reverse Work
Tat chain from front.
Lock/shuttle join to ring picot. Continue around the ring as per pattern. 
Last chain is to be attached in space between ring and chain as indicated by the pin in #5.
Lock join to base. (see join options below).
Turn Work
Switch shuttle and work the chain from backside. (this chain is attached to Round 8 in doily)
Switch shuttle and work ring backside. Notice that it is worked like a thrown/thrown off ring.
After closing ring, Reverse Work.
Work chain frontside and join to previous motif as per pattern. Continue around.
2nd motif complete. Continue in similar fashion for entire round.

Colour Placement Options
When working with a single colour, the above method is sufficient. But when we work with 2 colours, choices need to be made between colour of ring, colour of chains around ring, and colour of chain between adjacent rings.

Shoelace/Overhand Tie
We already know that colours can be switched using the SLT or shoelace/overhand tie. I am not a great fan of this method, but it does the job.

Onion Ring Join
Instead of a Lock Join at base of ring, an onion ring join can be used.
Pull a loop of chain thread & pass core thread through it. Tension and continue as before.
Compare the change in colour placement with first two motifs.
If we use onion ring join, the switch in colour will happen naturally after every 2 repeats.

Reverse Join
Pull a loop of core thread as if making a lock join. But encapsulate the chain thread within, and then make the lock join.
This tends to switch shuttles/colours automatically. What we would do with LJ+SLT, is accomplished with one RJ.
Compare colour placement with earlier motifs.

In conclusion, for the same pathway and working, we can choose our colour placement by choosing the type of join.
And, of course, there are many options available to work Round 9, as discussed in the earlier post and here.
Also, this same path can be used for onion rings ! I've been using it since Robin's Frauberger Bookmark which I learnt later (so I'm excused, right ?!)


If anybody wants larger pictures or a pdf, please let me know through comment or email and I will mail the original pics to you or upload the pdf.

till then, happy tatting always J


Sunday, 19 July 2015

Renulek’s Wiosna Doily - II

Pin It now!
Designer : Renulek
(click for the original ) 
The Reveal !!!

I’m not calling it the Grand Finalé : questions remain – is it grand / obscure ; is it really final / to be redone later ?!  Well, whatever it is it’s done for now. And I can certainly say it is unorthodox & experimental, perhaps even quirky.  Will I ever come back to rework the last round(s) – I’d like to, but doubt it. Rather make a different one .

The discussion is 'broken' into some categories that may be worth considering – some of the factors that went into my reasoning (!). Although categorized, the format is a kind of stream of consciousness, based on relevant comments, my feelings, & mental calisthenics that led to decisions (along with final thoughts on the same). I think the categories might act as designing tattisms for beginners, as well as when making all the choices for a new tatting project. Details of Rounds 1-9 in previous post here.
All comments can be read here, & here. I would strongly recommend a quick perusal – it is a treasure trove of experienced sharing. In order to avoid confusion, the name of the commentator has not been changed. I wish I could’ve added each person’s name for their valuable inputs.
Relevant rounds are indicated in image, for reference 

1.  Spacing 
Round 10 : To Do Or Not To Do
While I focused on the colour arrangement, I learned something important about designing from Anonymous (StephanieW). Spacing within & between rounds to balance lightness/laciness with heavier/denser pattern. That was the reason a simple round like this was required to space out 2 denser rounds !
Another angle to Spacing can be in the ‘distancing oneself’ sense, either temporally & physically (as suggested by Martha) . It generally brings perspective & restores motivation.


2.  Filling v/s Featuring 
Round 10 : Black & Beige Or All-Beige

This can be part of the Spacing aspect, but I think it deserves a Special mention, because it has functional implications for designing as well as for choosing colours. mb duke introduced this perspective (new to me) . Consider whether a round is a “filler” round or a “feature” round. In these times of colour tatting, the tatter can choose which rounds s/he wants to bring forth/highlight, & which can be kept in the background. The terms are self-explanatory. Filler round(s) serve mainly to highlight the Feature round(s), hence will be more in the background, with subdued/muted colours & patterns. Feature rounds can’t be clubbed close together, otherwise their identity & usp will get lost; hence fillers are essential. Both play a crucial role.

My Feature rounds in this doily, from the start, were the individual cream flowers in Rnd 5, the undulating Rnd 6, & Rnd 9. Unfortunately, Rnd 6 became muted when I chose maroon for Rnd 4 & therefore couldn’t repeat it so soon. It became a feature round unintentionally.
As for Round 10 : Went with the majority vote & chose to do it in 2 colours. Since the Feature Rnd 9 was a light shade of cream, a darker colour was required to highlight it. Black did that highlighter job , while the beige chains & rings on the outer edge served as a subdued filler for the last dark coloured round. Can the same round can act partly as a feature, partly as filler ?

3.  Echoing 
Round 11 as Round 4 : Match or Mix ?
Rounds 4 & 11 are identical in pattern. So if an earlier round has been done in a particular colour(s), should the latter also follow through ? Jane McLellan , Lace-lovin' Librarian ~ Diane & my DH thought there Should be echoing .
I agree, but then I should’ve spaced it with the filler Rnd 10 (which most recommended); a mistake that could only be rectified by snipping what I had already tatted.
Also, I did want a black outline to bring it all together – I didn’t quite like to stop at that particular pattern, because after all, it was the same as an earlier round. So it didn’t seem like a Final round to me. My intention was to add a black chains-only outlining round, Echoing the Contours of the previous round .
I did neither ;-(
4.  “Muddying the Waters”
Round 11 : Maroon & Black
I delayed, I procrastinated, I over-thought, I overanalyzed, I stalled, I shelved, …. the waters had been thoroughly muddied :-(  Following GraceT’s advice, I started a maroon rings & black chains last round over the Round 10. But I still couldn’t decide ! At times it seemed okay, at others it seemed too dark & heavy. My brain went into freeze mode. Stoically, in order to complete what no longer excited me, I continued with the remaining half, differently from the previous half. Thus paying a price for my ambivalence & overthinking . Follow Fox’s advice to avoid “overthinking & muddying the waters”. It Will have a ripple effect !

5.  “Tablescaping” 
Round 11 : This Half Or That Half ?!

With my mind in a tizzy whether to continue or cut, each stitch seemed a burden (and meanwhile I had tasted the pleasures of tatting a doily in size 40 thread !) . Practicality took over . Madtatter80 used this lovely term ‘tablescape’ – what & where will the item be used on/for ? This can inform our decisions regarding choice of pattern, size, colour, shape, & so on.

I rationalized, that since this doily was going to be draped over my sewing machine, which is against a wall & window, only One side/half will be visible at any given time ! Problem solved ! I had already ‘broken the round’ in Rnds 6 & 7; I could do it again ! So that’s the story … Both halves stayed. Any changes in decision are relegated yet again to another day in the faraway future.


6.  Spanning
Round 10/11 : Closing The Gaps
Practical decisions can still leave some lacunae. One half of doily had Round 10 missing & I was in no mood to add the black chains-only final round to the maroon half as initially intended. That meant a gaping hole on both sides, where the twain shall met.
Closing the gap with rings & chains in keeping with the pattern, was the obvious choice. But I had just got into learning Cluny tatting. Tallies, especially hanging tallies/clunies could so easily span the gap !!! How very tempting, considering my huge preference for freeform, free style tatting !
An Olive Branch, it was that brought Peace to my tortured mind ! 3 leaves each on a twig.
These are still at the beginner stage, so the weave is not too tight & even. Plus I was working in a small confined space, with Lots of threads hanging about (I didn’t want to cut & hide, in case this didn’t work & something else needed to be done). My inexperience also meant a lot of undoing & redoing. But my excitement remained unabated.
I had picked out the linen cloth over which the doily will be draped (a deep blue type colour, over which I had taken a few previous pics), but couldn’t find it again for these pics. When I do find it I will take a couple more pics – that background does true justice to all the colours.

All in all a very eventful, exciting. & enlightening journey, though it stretched out a bit towards the end because of my ambivalence.

Crystal Ball Gazing 
After the Horse has Fled the Stables !
If I get into the zone to cut off & retat the last rounds of this doily, I would go with black & beige for Rnd 10 & all maroon for Rnd 11.
Hmm, or, all beige for Rnd 10 & maroon & black for Rnd 11.
Errr, black & beige for Rnd 10 & all maroon for Rnd 11 & a Rnd 12 black chained outline ….

Crrraaaaaashhhh ! Broke the rounds, now broke the globe/crystal ball !


Huge Thanks to Renulek for a Lovely Pattern & a thoroughly enlightening journey
I sincerely apologise if my experiments & version send shivers down your spine

Very Special thanks to All who contributed their valuable suggestions – 
 each one has been very helpful & insightful, & it's given me a great deal of perspective ! 

I hope you do leave a comment telling me what you truly feel about the final result - what you dislike/what you like .... 


I start my 3rd round of the 25 Motif Challenge. Check out this resourceful site full of wonderful tatting.
And now I can finally add the Wiosna to the 25 Motif count , 
and celebrate my 100th post :-D

Motif #1/III for 25 Motif Challenge

Thursday, 16 July 2015

Renulek's Wiosna Doily - I

Pin It now!
Wiosna 2015 Tat-Along*
Designer : Renulek 
Rounds 1-9
*(click for her version) 

Those who have been diligently following my journey through this gorgeous pattern, are aware of how much I learned & applied tatting wisdom compiled by generations , my experiments with coloursAnd tatting technique options ; know the dilemmas I faced, especially the last 2 rounds. I sought advice on the decisions to take at this crossroad, & you willingly & wisely suggested 2 main paths. 

I shelved the doily for many weeks, grazing in newer tatting pastures.
I was finally jolted out of my lethargy of stalled progress by 3 in-work project images (1 on Craftree & 2 blog posts), All within 24 hours !!! Was it a sign ?! I took it as one :-)


Since I haven’t yet shared pics after each round, on my blog, here’s each leg of the journey (with close ups of the later rounds) .... Click on any pic for larger images.


Renulek’s  Wiosna  Doily  2015


Round*

Colour (AMC 20)
Bobbin loads in brackets **

Techniques used

Finished size ;
Width of individual round

Comments
  * All bold coloured words are direct links 
 ** 1 bobbin load holds approx. 6.6 m or 7.2 yards of size 20 thread
    Joining picots in most rounds were small as per instructions.
 SH1 cream ( 1 )
 SH2 beige ( ½ )
 FS/BS tatting
 Decorative picot
 Thrown Ring, LJ
 >3” / 8cm
 Makes a lovely  coaster/medalliion
 SH1 pink (1½ )
 SH2 pink (1)
 FS/BS tatting
 Lock Join
 5” / 13cm ;
 ~ 1½” wide
 SH1 beige (1½ )
 SH2 beige (1)
 FS/BS tatting
 <6½” / 16cm ;
 ½” wide

 Rnd 4
 SH1 maroon (4½)
 SH2 maroon (2½)
 Rnd 5
 SH  cream (3)
 FS/BS tatting
 SSSR ; anchoring vsp  for petals & Rnd 4 long  chains .
 Decorative picots
 >10” / 26cm ;
 2” wide
 With Rnd 5:
 11½” / 29cm ;
 Each flower 1”
 Flower motifs of Rnd 5  were made First &  joined while tatting  Rnd 4.
 SH1 pink (3)
 SH2 beige (3)
 FS/BS tatting
 decorative picot
 Thrown Ring
 An “SLT join”
 12½” / 32cm ;
 1¼” wide
 Colours switched for  segments, not for  elements .
 6 segments each
 SH1 pink
 SH2 beige
 FS/BS tatting
 decorative picot
 Floating Ring
 An “SLT join”
 Lock Join
 14½” / 37cm ;
 ¾” wide
 Elaine’s Reverse Join  would’ve been ideal to  switch colours  between segments.
 Details of Rnd 6-7
 SH1 black (1)
 SH2 black (1)
 FS/BS tatting
 anchoring vsp for long  chains.
 16¼” / 41cm ;
 ¾” wide
 SH1 cream (5)
 SH2 cream (5)
 FS/BS tatting
 Directional tatting
 Decorative picots
 Slip & Roll join
 Lock Join
 18” / 46cm ;
 1” wide
 15 repeats in 2 full  bobbin loads.

Various ways of tatting Rnd 9 detailed here
 SH1 black (1)
 SH2 beige (2)
 FS/BS tatting
 Floating rings
 Decorative picots
 20” / 50cm ;
 2” wide
 maroon (8)
 CTM 3½ repeats.
 maroon (6)
 black (4)
 FS/BS tatting
 Decorative picots,
 SLT,
 Cluny Tatting

 22” or 24” ;
 2” wide
 Picots eliminated –  only 1 per chain
            muskaan (2015)  


I will continue the last leg of this journey in the next post.
Thanks & hugs to all for being so patient & supportive


 @@@@@@@*********@


I have uploaded the pattern & diagram for the Tails & Charms used in Robin’s Frauberger Bookmark (on request by GS). Although I have updated the post (and also added another picture showing the bookmark with a Single tail), the title here is also a direct link to the pdf. 

Related Posts : Tails of Bookmarks
@@@@@@@*********@


happy tatting :-)