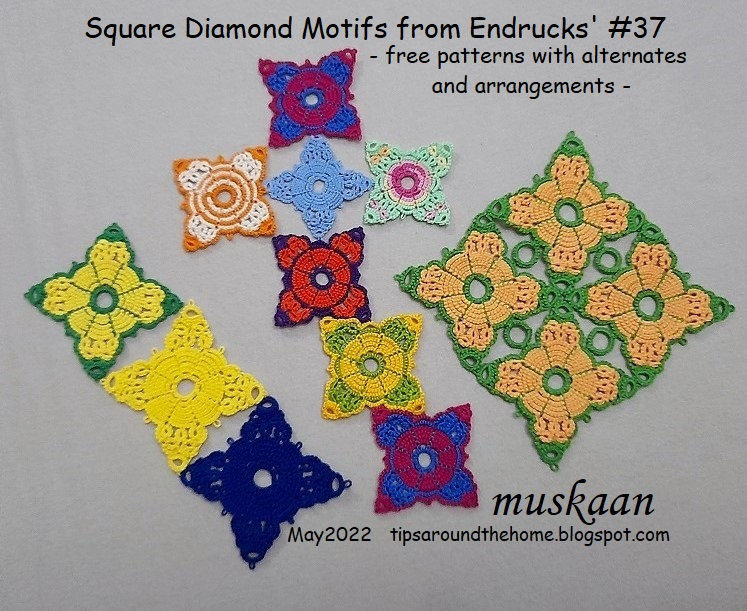
Square diamond motifs and mat with pattern
from endrucks (1920) doily #37
pattern pdf (click to download) :
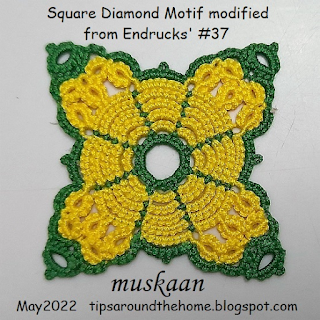
For the most part I kept the inner Rosette unchanged, focusing on the arms.
 3. Trefoil Version: This entire motif can be worked with one shuttle and ball, except for the single thrown ring at the tips, provided we decide before working the penultimate round.
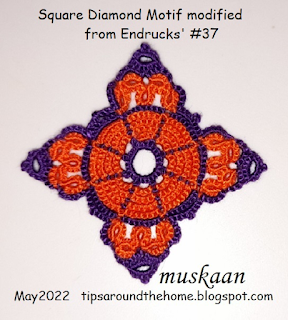
 4. Flipped Ring version: While following Endrucks' original pathway, I merely swapped the direction of the thrown ring at the tips, working it on the way up rather than on the way down. Look closely to see that I alternated the flip.
 5. Colour medley 1: Using Lock Join Plus aka Repositioning methods, I alternated the colours/shuttles within the rosette. (https://drive.google.com/file/d/17zsM3JaLO7r0ajg8VOnv5IcJ-kLNqEiU/view). You can choose any method you like, including changing colours between segments rather than rounds.
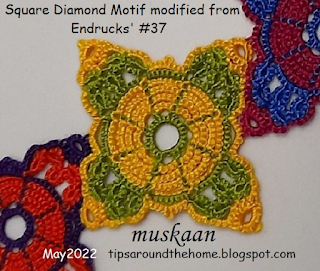
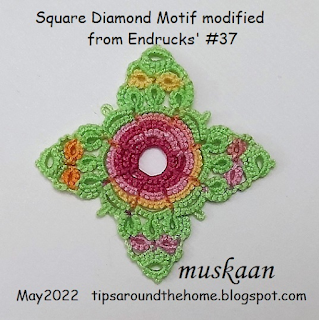 6. colour medley 2: I started with ball and shuttle for the rosette and added the green thread later, using False CTM, and snipping off the ball thread. (false ctm tutorials Part1 ; Part 2).
 7. Reduced Round: If you remember my travails with cupping, this motif was my solution by removing the final rosette round and increasing the size of the 4 joining picots.
 8. New Motif for Doily: While the doily worked fine with the above modifications (in #7), I needed to make sure it will hold up in crochet cotton thread. Hence started this new motif (but forgot to reduce the round!). I'm still a bit apprehensive about continuing .... let's see.
 bracelet, bookmark, jewellery, charm, ....: Above is the bracelet idea. I really like this offset arrangement! Bookmark with a single motif as charm at the end of a tail is another practical idea.
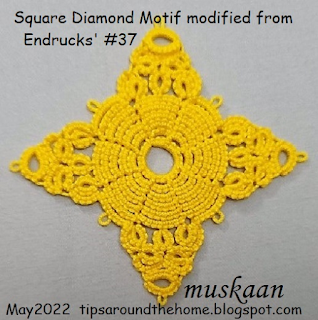
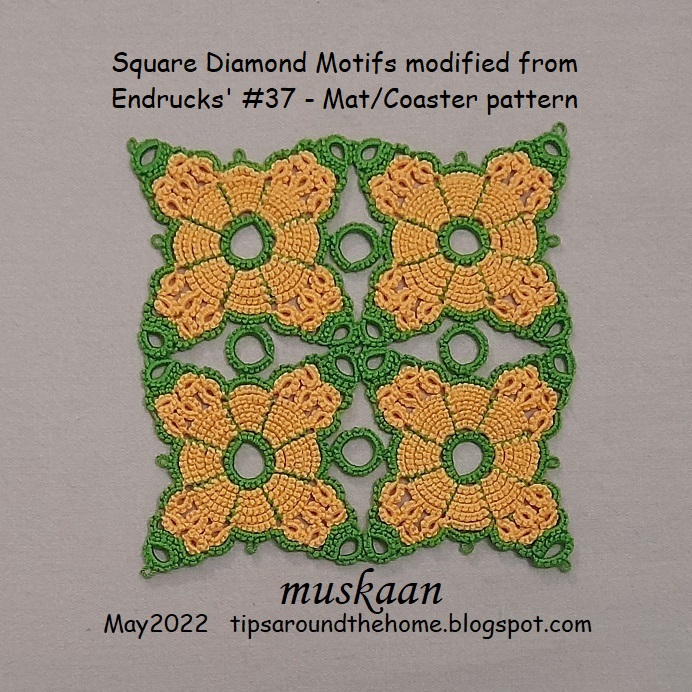
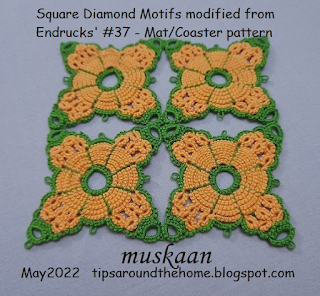 mat/coaster/table runner/table cloth ..: I was tired of working with yellow, hence chose this peach colour and the green went nicely with it. One can increase the tatted fabric to deserved size by joining as many motifs as required.
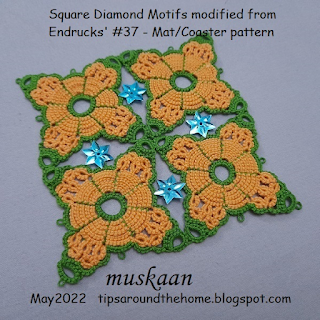 Wondering whether we needed to cover up the blank space a bit, the sequins were hubby's idea and he got the blue he'd had in mind! One can use buttons in place of sequins.
 For the purpose of sharing the pattern, I decided to see how large a ring would be required and worked these 4 rings in later. However, they can be worked as thrown rings. I was prepared to snip off the rings, but hubby liked it just fine and is using it!
 alternate tessellation or cross: If a size 40 motif is joined like a diamond to the 4-motif open arrangement (worked in perle size 8 or Lizbeth size 20), we get another variation for a mat or fabric with alternating squares and diamonds!

1. Original: This is the original unaltered pathway from Endrucks. The 2 small middle rings (lateral) face the same direction - to the right. The asymmetry is not too visible since the rings are tiny. However it intrigued me, and as a study in design, I decided to go ahead with my variations....
alternate pathways and variations ---
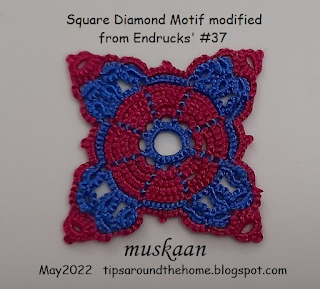
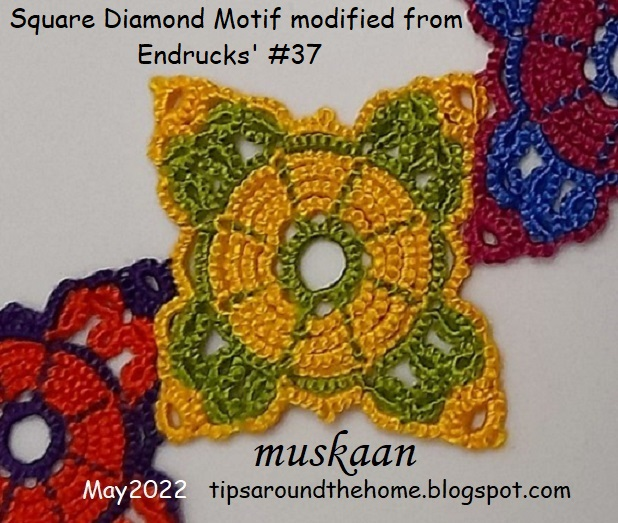
 2. Modified: My modified pathway where the 2 small lateral rings face each other for symmetry. This is used to present the stepwise pattern, loading 2 shuttles with contrasting colours.

In Anchor size 20 (~ Lizbeth 10), it measures 5cms sides and 6.5cms diagonally.


In Lizbeth 20 (with one less rosette round), it works to 3.5cms sides and 5 cms diagonally.

In Anchor Pearl cotton size 8 (~ Lizbeth 20), this works out to 4cms sides & 5,5cms diagonally.

In Anchor size 40, this works out to 3.75cms sides and 4,5cms diagonally.
arrangements and tessellations ---
The motif can be used as a square or a diamond and joined for various arrangements. Several arrangements and ideas have already been showcased here - https://tipsaroundthehome.blogspot.com/2020/11/arranging-motifs.html
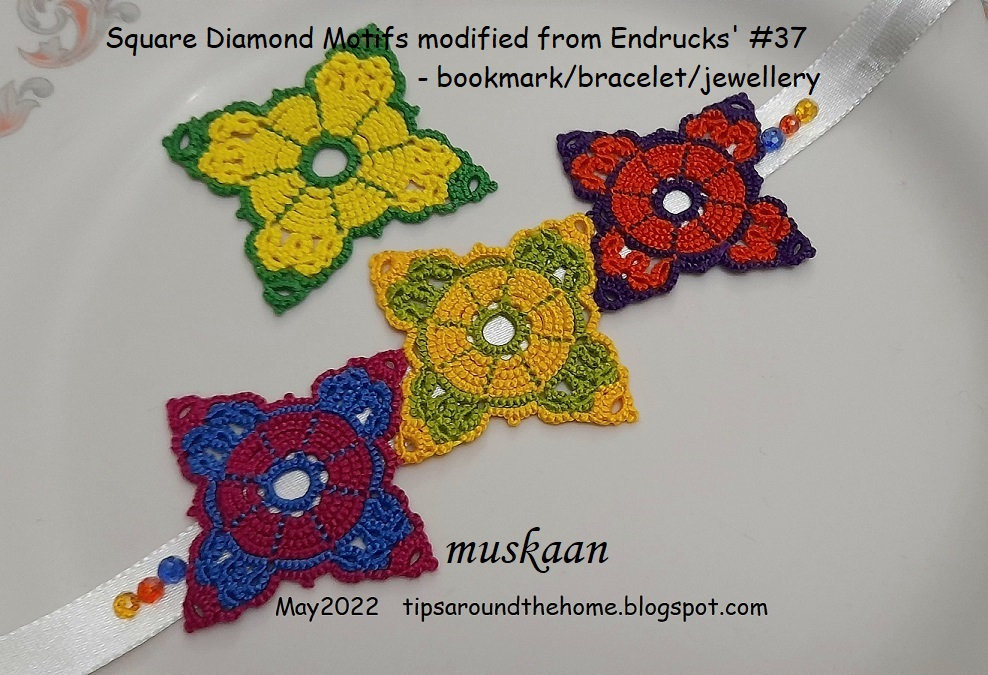
Single motifs with beads and findings can become jewellery pieces,...in fact an entire parure can be tatted.

9. Modified for Mat: The single lateral ring at the tips are larger here (7+4-4), and used for the Mat (below).
Hubby had chosen this yellow and blue combination for the mat/coaster I wanted to make him. But the solid colours didn't work out (the 2 joined motifs can be seen in the topmost group pic). However, after seeing the cute 3D Flower Cube by Lillian Yeung, I hope to convert it into one, too!

In Anchor size 20 it measures 10cmsx10cms.


In the above, if we join a couple of motifs to the orange one for a longer arm, we get a cross!
So there it is - a bonanza of choices and effects from one single motif!!!
All pattern notes and/or diagrams are included in the pdf (click to download): https://drive.google.com/file/d/1wqAPnOUZwLJ9tEUk55wDZhAMw2qCNFSj/view
All pattern pdfs and more, in modern style as well as links to the original book can be found in the Endrucks 1920 Project doc here -
The variations seem endless! It's fun to see all that you've done throughout this project.
ReplyDeleteAbsolutely, Diane 😀 I hope there will be time to tat All the projects that have been shared - original as well as derived! 💗
DeleteA lot of work, a lot of variations! Good job.
ReplyDeleteThanks, Jane, a labour of love 💗
DeleteLove the 2.modified ! It's my favourite 🥰
ReplyDeleteThanks, Nin 💗 Some of the other colours look good in real, too 😁
DeleteTotally awesome and so versatile!!! :)
ReplyDeleteLove your colors too!! :)
~Sue(Tatting Lace in Grace)
Glad you like them, Sue 😁😍
DeleteGreat exercise !
ReplyDeleteThank you 💝
DeleteAwesome Muskan. Thanks for sharing. Will try.
ReplyDeleteLooking forward to your versions, Ranjana 😍
Delete