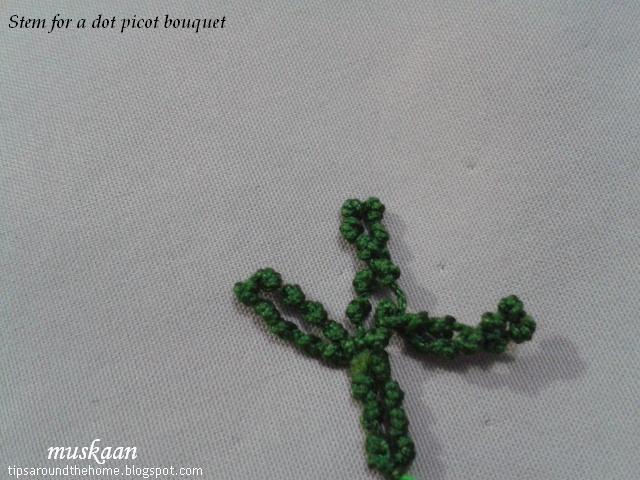
Stepwise
pictorials for dot picot leaf
and how
to use dot picot strings as fillers
I’m forever playing catch-up with my blog posts; this time, too, it is ‘in vein’ :-D That did not stop me from taking a much-needed net break. Not in vain!
Spent some relaxed
de-cluttered time tatting a lot (which means more catching-up ;-P) and watching
another net - the grass court season in tennis ! I'm sure this is Federer's
swansong year and wouldn't want to miss his matches. And what a match the Halle
In my previous post, I was asked how the veins were joined to
the leaf. Posting a pictorial showing my ‘hack’.
Dot Picot Leaf and Veins
Step-wise pictorials

This freeform leaf is worked in size 20 thread, and the
veins in size 40.
Techniques : large ring, dot picot on ring, dot picot string, whip stitching end tails, tatting over tails (knotless start. this is optional.)
I already shared how the leaf was worked, with 1 dot picot
on ring at the tip, in this collage. Posting again to bring it all in one place.
 |
| Dot Picot Leaf (with Dot picot on ring) pictorial |
Complete sequence is notated in pic#11 below

1. What is ‘missing’ in the collage is that I started with
both the leaf and the vein threads joined at the base as seen in this pic. The
vein thread is merely 15-18 inches long. I used knotless method, but a weaver's knot can easily be used.

2. After completing the leaf to desired size and shape (it
is not bilaterally symmetrical), I turn it over and work the veins from the
back side, tatting over the tail in the first few dot picots.
Vein is simply a dot
picot string.

3. We make the middle vein first & when the
desired length is reached, unwind thread from the shuttle and thread the end through a
tapestry needle.

4. Insert needle at the tip (point B) - specifically at the base of the dot picot on leaf and ….
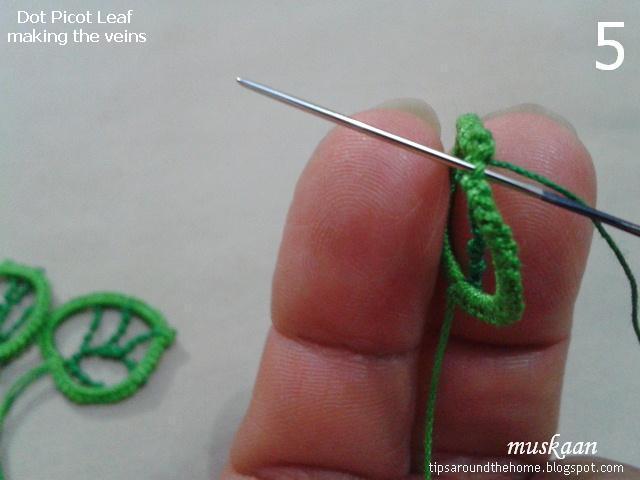
5. whip stitch
under the caps on the right edge for a few stitches.
((Yes, the entire vein can be tatted on a needle. But I’m
not that skilled/confident yet.))

6. This is how it looks on the older leaves – invisible !
Despite the different shades, the dark green does not show up at all, only partly
because it is thinner.

7. At desired point (point C) , I rewind the thread on to shuttle and
tat the shorter vein.

8. When the required length is reached, pull a loop around
the main vein, pass shuttle through and ….

9. tension carefully. Something like a lock join. It stays
in place due to the notched texture.

10. Continue with the left side vein for required length
and join to the edge (point D). With a needle, whip stitch along the left edge for next
pair of veins.

11. Tat the vein, join to main vein & continue last vein
which is attached to the right edge. I continue to whip stitch down this edge
right up to the base. This pic shows how the entire pathway. Black arrows depict whip stitching.

12. This is how the leaves look from the wrong side.
These measure just about 1 inch.
NOTE : Instead of dot picot strings, one can make the veins in Lock Chains, Twisted Picots (as in rustic leaf), or simple bare threads ! Even regular chains ! Improvise & enjoy :-)
This effect can be used as a filler for any ring or mock ring ! Fancy some petals, wheels, et al ?!
NOTE : Instead of dot picot strings, one can make the veins in Lock Chains, Twisted Picots (as in rustic leaf), or simple bare threads ! Even regular chains ! Improvise & enjoy :-)
This effect can be used as a filler for any ring or mock ring ! Fancy some petals, wheels, et al ?!
The leaves are freeform, asymmetrical, & I eye-balled everything.
If you
wish, you can draw a sketch-to-size as reference. Remember this rustic leaf sketch turned into tatting ?
no tatting is ever in vain J