I’ve sensed this for a long time & this medallion
confirms it. Anchor Crochet Cotton that is made in India by Madura Coats is thicker
than the size 20s & 40s (of any brand) that I see you tatters using. In
fact, it is thicker now than the old thread I have ! Makes it very difficult to follow a pattern with long picots.
Robina Melville
first published in Ring of Tatters Newsletter #72, Spring 2016
first published in Ring of Tatters Newsletter #72, Spring 2016

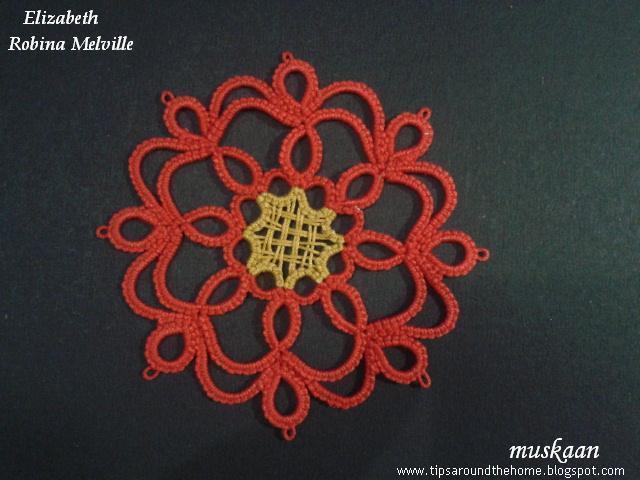
This is such an elegant pattern !
Materials
: Anchor Cotton size 20, Art. 4054. Golden yellow – 0307 ; red – 046
2 shuttles ; picot gauge : 2.5cm & 3 cms
Techniques I
used : long picots, woven picots, split rings, thrown rings, lock
join, SSSR to climb out.
Round 1 :
1⅛”

My first attempt failed, as I had sensed, due to difference
in thread brand :-( The last ring didn’t even have any space to fit in (top right in pic) !
Increased the picot sizes & the 2nd attempt
worked.

TIP : I used a threaded tapestry needle to easily weave the
picots, otherwise it was a bit fiddly in the cramped centre.
Climbing Out
For my own recollection, there many ways 2 colours can be
used in 1st round & still climb out to next round without tying
& cutting both threads.
1. Climb out with a SSSR in red, while hiding the yellow
tail in first half of the SSSR.
I had to do this, because I didn’t think ahead & I
wasn’t sure what colour(s) I wanted for next round.
2. Wind 3 shuttles : Sh1 with yellow; and 2 shuttles wound
CTM with red. Thus while climbing out, we hide the yellow within a split ring.
This is what I could’ve done.
3. Double Core SSSR to hide the yellow within & keep the
SSSR red. This, in fact, gives us the option to continue with both colours for
next rounds, yet keeping the ring a single colour – either red or yellow. I had tried this for the first time here, with a slight adaptation.
Round 2 :
2¼”
Round 3 :
3”

I absolutely Love this medallion & enjoyed tatting it.
Hey, even my long chains behaved !
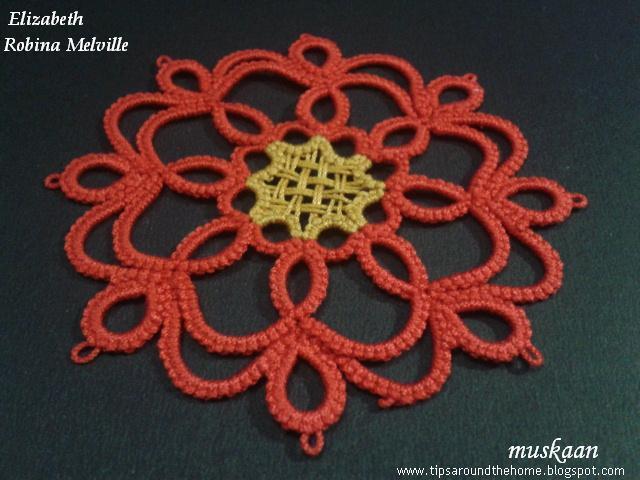
Although, I did make a mistake – a picot in one of the outer
chains – an expected outcome of trying to watch the Olympics & tat. Noticed
too late, so folded the picot behind & glued it. Will sew it in later.
Flashback to May 2014
My very first attempt at woven picots was when I saw these
lovely earrings by Lilas Lace. I was going through a phase of learning different picots & effects - the net kept throwing up such gorgeous tatting !
So these earrings both inspired & intrigued me & using her basic idea, I attempted to tat it.

The stitchcount is my own & I included 2 colours & Josephine Rings. Didn't have findings/hooks... This can work as a pendant, too.

This is the 'before' pic. More practice with picot gauge was needed then, but blocking the piece now has helped a bit.
and this one is for
Michelle !

Remember this, Michelle ? A while back I had tried to
duplicate the look of that tatted model in pinterest that you shared. Tried a
few things in size 40, but don’t know where I’ve misplaced them. Will turn up
some day.
Before posting, I usually do another round of online research for resources. And guess what - Karen already Has a video of these !!! They are called Interlocking Picots (why do the tutorials turn up After I've gone through the grime ?! I need better perception & recognition).

Had some thread left on the shuttles after the medallion,
and quickly tatted another for this post before I forget again.
Many thanks to Robina
& Georgia,
to Lilas, & to Karen
happy tatting :-)

