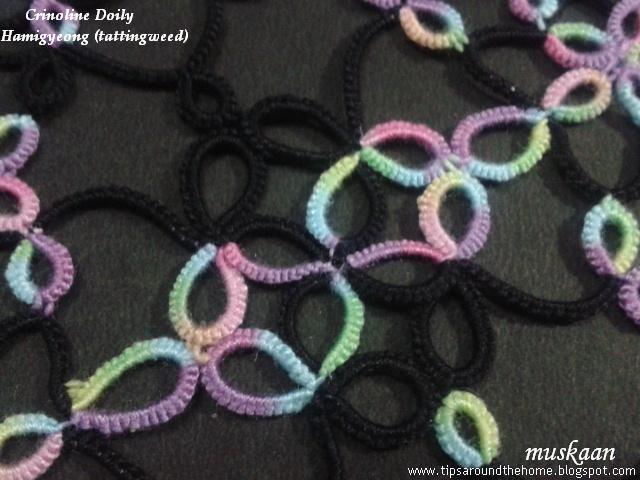
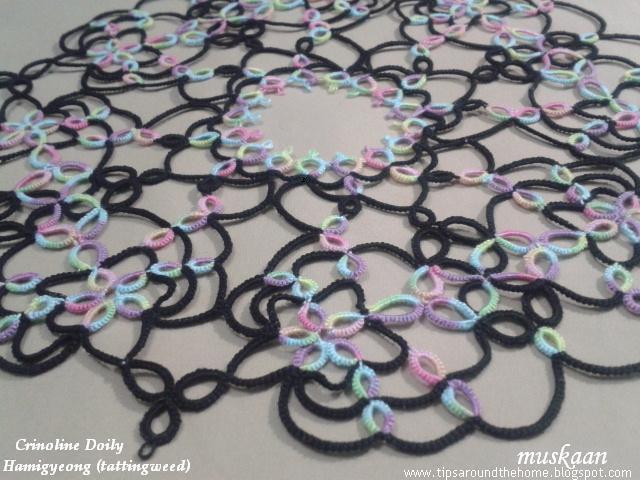
I had written this post some days back, while still less
than halfway through the doily. Didn’t get a chance to either take pics or to notate
them and post. Meanwhile, I completed tatting the entire doily a couple of days
back. Life is a bit in the way, and that has forced me to break the
presentation into 2 posts. Here, I will share my working notes (the Boring stew), giving me time to
complete the presentation of the finished doily (the yummy candy).
My Working Notes
for
There is quite a bit of interest in this beautiful doily.
Before I start to forget, I’d like to share my working and thoughts ….The doily
is not blocked, so please excuse the pics
Abbreviations used (in order of appearance):
SCMR –
self closing mock ring
DS –
double stitch
RODS –
reverse order DS
SLT –
shoe lace trick/overhand tie
p – picot
shs – 2nd
half stitch
fhs – 1st
half stitch
RS –
reverse stitch (unflipped)
RW –
reverse work
1. Worked
completely in
one pass !!!
Divided into 4 quadrants ; each further divided into 2 mirrored halves
(thus we get 8 sectors or pizza slices). Each quadrant (made of 2 sectors)
forms one complete repeat.
 |
At this stage it looks like a bull’s head !!!!
|
2. When considered for the doily as a whole, the
overall direction of work is counterclockwise. However, within each sector, we work in many different directions, including ‘up and down’, ‘in and out’. It’s serpentine movement reminds me of the
magic square and
Iris Niebach’s doilies.
3. The
pattern as such is simple, worked with
two shuttles : Rings and chains with reverse work. 4 SCMRs, few
split rings, and a few rings made with 2
nd shuttle. That’s
about it! What makes this doily an arguably advanced or skilled pattern is
the movement of the elements and segments – not easy to memorize.
4. If one is doing directional (frontside/backside) tatting, then we encounter ‘blocks’ or
segments that act as a “unit” – thus we start with a segment where rings are DS & chains are RODS; then switch to the next segment where rings are RODS and chains DS. Those who have tatted
Mary Konior’s Spinning Wheel Glass Mat in directional tatting (or in 2 colours) will understand how one half of the wheel ‘spoke’ works as a unit/block/segment.
5. Exception to #4 : There are also what I consider
‘thrown’ rings (even though they may not strictly be on a chain) ie. rings made with the other/auxiliary/second shuttle. They, of course, will follow the order of the ‘chain’ (RODS or DS)
6. I did
add some complexity of my own (
yes,
I can’t seem to leave well enough alone !) by customizing the
placement of colour using Reverse
Join or simply laying one thread over the other (instead of SLT.
See, I’m not much of a stickler for
rules, nor a lover of SLT ;-) ).
7. To
turn direction, I used ‘
folded
chains’ ie., (p, 2shs) or (p, 2fhs). These were included in the
stitchcount of the chain (1DS). The folded chain also helps to keep the
colour of chain constant.
TIP : In order
to fold the chain, I made a picot
and continued with the Same half stitch twice, as the last half stitch ; thus
there are 3 same half-stitches in a row.
Note that
in directional tatting the
order switches after folding, because the chain has turned back over itself!
Thus, when folding a DS chain : (p,2shs) , continue next
chain with RODS
Conversely, when folding a RODS chain : (p,2fhs) , continue
with DS
8. I love the way tattingweed has sketched & notated over the scanned doily with little red arrows showing the direction of tatting – very clear. While tatting, though, I did miss the numbering on rings. Hence, halfway through the 3rd sector, I took another printout & inked the ring sequence. It really helped ! I also added the stitch count for the mirrored Sector 2. in the first printout.
9. There are some rings that need picots, while other elements join there. Due to changes in direction, it was sometimes difficult to tell which ring came first and had the picot. I made a black line on that ring, in the printout. But with the rings numbered in 2nd printout, it was easy.
10. Using Reverse Stitch for chains is another way to keep track of the pattern. RS helps us tat from the front, reducing RW to a minimum. This makes it easier to read the printed sketch. However, if a segment has many ‘thrown’ rings, then RS is not such a convenient option (unless one uses Reverse Rings or Rings in RS!)
As it turned out, I didn’t use the RS much for various reasons. It did come to the rescue in the very last segment, when joining back to the first sector. Here, one has to work inwards, and it became too confusing. When I switched to RS, I could accomplish the tatting and joining all from the front.
Spot treatment
There were a few mistakes where I had to retro-tat the
element. But one mistake was discovered very late and a lot of tatting would
have to be cut – I had joined a ring to the wrong picot! This called for some
minimally invasive localized surgery.
Here’s what I did :
Cleared some space in the ring by moving the stitches and
snipped the stitch thread - Not the
core thread ; Not the entire ring.
Logic : It would give me
plenty of thread at either end when the ring was unraveled. Luckily it was a large ring and I had more
than enough length to sew in the ends to adjoining elements.
Pull the core thread to unravel all the stitches.
Add new thread and tat the ring.
This was also completely knotless method of hiding ends – tatting over tails and sewing in opposite directions to adjoining elements
As I write this, I realize an easier way – I could’ve done
a Mock Ring using the core of snipped ring! Waaaaah
:-( Or may be I had already closed
the ring and it didn’t seem worth the trouble to unravel it. Memory evades; but
nevertheless a solution to keep in mind for future.
As a reward to those
who have diligently read through all this, I’ll keep my mouth shut for the most
part of the grand reveal in next post, letting pics do the talking. Ummm, at
least I’ll try my best ;-p
happy tatting till
then :-)