Showing posts with label organizing yarn. Show all posts

Friday, 9 December 2016

all in rings

Pin It now!

Sharing 2 more patterns . It’s all about rings this time, though the piece turns into a perfect square.

Inchies are 1 inch squares. I’ve seen them made with paper & fabric, but not yet with tatting. I Loved designing them. (How about Twinchies – 2 inch squares - next?)
And for photographic effect, in keeping with the season, they have been paced over baubles as embellishment. Now if only there were some beads in there !!!

Inchie - One

Most of the prototypes (& patterns) shared in last couple of months were created with This Way or Tat? in mind – I wanted something quick & small, incorporating the rules presented in TWoT diagrams. Little pieces that one could tat & explore with thread left over in shuttles. The difficulty level ranges mainly from beginner to intermediate.

Inchie One is a simple single-shuttle square with inward facing rings. Tension is important, though, to get the exact dimensions of a square. 
The pdf provides details of tension, considering the difference in individual tatting, thread brands, etc. But it would be a good idea to draw a square or use a grid. Use this as a template to cross check while tatting.

Realised only now that I haven't even blocked this piece.


Inchie - Two
(a prototype)
Inchie Two can be worked with split rings, thus avoiding lock joins. But
  1. the direction of the split rings would change – I wanted all rings to seemingly radiate from the center.
  2. It would necessitate knowledge of working the split ring.
  3. I wanted to see for myself the antique tatting style – I’ve been an admirer of Mme Reigo’s Bunch of Grapes !
For these reasons I chose to go with the old world style of tatting. Antique patterns use a needle to attach bare thread to picots, before the chain was invented; I chose to make a lock join where required. The lock join helps me manipulate the position of the small rings, without resorting to split rings, yet gives an idea of how directions & sides (front, back) change between elements.

Reverse Work (RW) between each ring.
Inchie One is tatted all from the front.
Inchie Two can be tatted using directional or frontside/backside tatting. The small rings can use reverse order of double stitches (RODS).
Take care to hide the bare thread behind the 3DS of small ring before joining to picot of that ring. This will remain hidden on the back side of the piece.
Also make sure that there is just enough slack to cover the distance – thread will show if too loose; tatting will warp if too tight.
This requires a bit of practice the first time.
In my sample, the rings to the right are properly made with the traversing threads carefully hidden. This really Has to be tatted again properly!

I like the old world charm here, but would certainly like to see how the SR one would look.
These are not glued down or secured - only inserted for a photo-op - an inspired idea last night !
I think both Inchies can be used as charms for bookmarks. Or they could be joined to make a larger fabric; or joined tip-to-tip to make a bookmark or a headband adornment. Or simply sew on as embellishments.

happy tatting :-)


Rings of Wool 

Remember my August pinterest challenge? I took it a notch further and completed my wool yarn inventory this month ! That leaves only beads and related accessories, for which I bought containers last week.
These tiny crochet rings are all 6 Chain using size 13 or 2.25mm crochet hook, for consistency and comparison. Many of these are between 5-10 gms only, after their inclusion in my Memory Afghan.
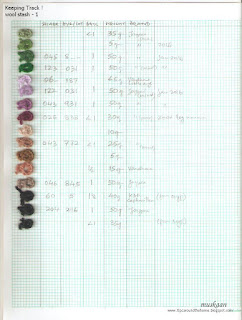
That afghan used up over 60 colours/shades/yarns includig all my old stash (most of which did not even make the grade to 5gms !), and around 6-7 brands . That was part of the ojective - mission accomplished !
By the way, the afghan weighs 1.25 kg - not as heavy as my earlier ones. But oh so pretty!

I may be forced to hold off on commenting as well as a lot of my desktop work, coz now my keyboard is playing hookie!  Have ordered a new one but will be delivered only next week ! Even this post has been corrected on my tablet. Many slip betwixt the cup and the lip ! 

HEYYYYY ! I'm back for a quick update. DH was chatting, saying I must've uploaded 100 posts & I said they are closer to 200. And guess what, when I checked, this is my 201st post ! In 3 years precisely. Not bad, eh?!


Related Posts
TWoT - Rings Only
complete TWoT at present
Organizing Thread Stash
Memory Afghan


Sunday, 16 November 2014

Quick TIPS : Winding Threads & Yarns !

Pin It now!
4 Quick Ways
to wind thread/yarn for use in 2-shuttle tatting ;
track a multicolour yarn stash palette for crochet/knitting ; &,
convert hanks/balls into skeins for embroidery.

I. Winding Thread, CTM
Inspiration : Susan BT

All these years, I had been tatting with one shuttle & ball directly. I would buy at least 2 balls of same colour so that the shuttle could be loaded from one ball, while the 2nd ball stayed attached to the work being tatted. It reduces the number of ends to hide, too, especially when working with single colour & long edgings, etc.
But when I started tatting with 2 shuttles, & the pattern asked for Continuous Thread Method (CTM), I would measure the length of thread required for shuttle #2, cut it from the ball, & then start winding the shuttle from this end.
Obviously, long lengths meant taking care of all the tangling; one had to work in a large open space to keep the thread from entanglement.
Then I came across this idea shared by Susan, on the erstwhile InTatters : she uses a cardboard to “hold” the thread ….. Read on …

All you need :
Shuttles – 2 &  Thread , of course.
A cardboard, a broad thread winder or a temporary ‘holder’ (I used my spectacle case )

When winding 2 shuttles CTM : 

Fig 1.
Fig 2.

After winding 1st shuttle normally, continue winding the thread on another piece of cardboard or, in my case, I used my reading glass case which was at hand (Fig 1). Wind to desired length. When one knows the length of 1 complete circle around the holder, then the number of rotations/rounds will give you the total length !
Cut thread. (Fig 2).
Fig 3.
Now reverse-wind from holder, starting from the cut end, on to the 2nd shuttle, till all the thread on the ‘holder’ is over (Fig 3)! Simple !!!

Advantages :
  1. No Long tangle-prone threads to manage ! Winding is easy, smooth & fluid.
  2. No twisting or knotting of thread while winding. Since there is ‘reverse’ winding from holder back to shuttle #2, the initial twisting gets neutralized to a large extent.
  3. Any possible twisting can be Easily taken care of by suspending Shuttle #2 itself. With a loose end, it becomes difficult !
  4. And the Icing on the Cake : No more measuring with arm span or measuring tape …. One can measure the required length by simply counting the number of winds on the holder !!! The holder acts as a Gauge.
eg. one complete round around my spectacle case = 6½’ ;
40 rounds = 260’ or 6.6m
This is just enough to fully load the bobbin of the blue plastic Shuttle #2 in fig !
For my steel Shuttle #1, where I now use sewing bobbins, 45 rounds are required.
And clearly, if one needs a specific shorter length, that can be easily calculated. All one needs to know is the length of 1 single complete wind around the winder/holder. And then simply keep count of the number of rounds one is winding !!!

Check out Carollyn's superb tip here, when using 2 colours together ....

My sincere thanks to Susan for this simple, yet practical & effective idea, & for allowing me to share it here.
                      **************** 

II. Quick & Handy Yarn Stash Samplers
Inspiration : Lucy (Attic 24)

Since I’m talking about threads, organization & winding, here’s another quick tip I’d like to share.
I first came across it here. Since I do not have the wooden clothes pegs she uses, I took the first thing that came to hand : index cards from days of yore !

Simply Cut & Folded them into strips.
Wound samples of wool around part of it.
Hid the starting end as I began winding ; hid the tail end by pulling/pushing through the center of the folded paper.
Wrote the amount of thread I had on top (I did not mention the weight coz do not require it).
Wrote some additional details such as brand, dye & lot details wherever necessary, within the fold. One can write any and all details wherever & as one wishes…. This was not part of my current requirement, hence I limited the details to suit my current project.
My intention in doing this is very simply to track all the possible ‘scrap’ colours so that I can decide the combos as well as sequence when I crochet the diamonds/squares.
And it has worked very well !!! I do not have to keep rummaging through the whole big carton of wool to find combinations ; simply choose from the strips & then pick out the ball.
TIP : Another level of organization : The balls are sorted according to main colour & kept in transparent bags inside the carton. eg. all blue shades in one, all purple shades in another, all brown shades in a third, & so on.

The immediate reason for this organization is the Floral Fiesta Afghan designed by Maggie Weldon I have started for this winter, the reason I needed to see the yarns & shades I wanted to use & their approximate quantity. More about the project in future .


I thank & highly recommend Lucy's blog Attic 24 for the sheer magic & inspiration of her colour palette artistry ! Lots to learn, too.
 ****************

III. From Hanks to Skeins !

In keeping with this “thread”, here is my answer to a query Deepa left in this post on how to convert hanks into balls :“Now I am wondering how to convert a hank to small skeins, as in embroidery threads. There must be some way to wind them in that manner as anchor or DMC does.”

All you need :
Hanks of embroidery thread
Cardboard (6.5 inches across)
Paper strips/tags
Glue & scissors
Pearl-headed Pins for 2nd technique.

An Anchor Embroidery skein is 8m long with about 24 ½ complete rounds, where the diameter (or length from end to end) is 6.5’ or 16.5”.
[ (6.5’ x 2) x 24.5 rounds ] = almost 8m

1. Using Cardboard :


The lid of a tea bag carton is the exact length one wants (6.5 inches) as can be seen in the pic.
Wind around (I used wool so that each round is easily visible); trying to keep each round adjacent rather than jumbled up. After 24 ½ rounds, cut thread. Make sure to keep the finishing tail end visible, towards the outer side, so that one can tug at it easily. The starting end is neatly hidden in the depths.
If thread details are required, add a paper tag around the newly wound skein.

2. Using Headed Pins :

Pearl-headed pins are used, spaced at 6.5’, around which the thread is wound. Use at least 2 pins at each end for stability.
To start off, make a small open knot & hold it with a pin, otherwise this end will keep flopping about & one will not get a tightly wound skein.
The slip of white paper is for the tag, with details written on the side that is hidden from view. When the 24.5 rounds are complete, glue the tag paper around the skein, like a hollow cylinder, & carefully remove the pins on either side. Voila !
It is easier to tag when using pins, obviously.
  
You can wind it in the form of ‘8’, but I would suggest against it – it will be a bit difficult to pull out the thread when needed later.

I hope this is of some help, Deepa ? For some lovely embroidery & related tutorials, check out  her blog “This and that...my random thoughts” for some lovely embroidery & tutorials.

****************
Have a great day :-)

Related Post : Winding Shuttles CTM