I had bought those Lizbeth 20
mixes in order to work my own patterns in that thread so as to have a more
universal, uniform, comparable, and easily convertible measurement. Unlike the
newer Anchor (Madura Coats India) size 20 which is all over the place and way
thicker than a Lizbeth 20. With the finished dimensions provided earlier and now, you can
easily see the difference in the old (Anchor 20) and the new (Lizbeth 20)
snowflake!

So, when I saw the vintage motif pattern trend last week, it spurred me to revisit some patterns. And on my
journey I noticed a little omission here and there, but am not well nor
motivated enough to rework the pdfs/diagrams. Sometimes it is a boon if your
patterns are not popular – the mistakes remain buried ;-P

I loaded 2 shuttles with Lizbeth
size 20 thread and got to work. It felt good to tat a done pattern in
softer ice-blue shades after all those colourful blossoms. I am sharing only
tweaks here, with stitches inked in the respective picture. Links are provided
for the detailed patterns.
T
Hexagonal
Motif snowflake
Instead of a central picot which accommodates all subsequent rings, I linked adjacent rings through very small picots. This also meant that decorative picots can be added in the central negative space.

Measurement: 1½ inches point to point.
Main techniques : 2 shuttles, ctm.
Thrown/floating rings (TR) which require switching shuttle (ss) before and
after.
R1: 4 vsp 2 p 2 vsp 4.
rw
**Ch: 3 p 3 ss TR
(2p2p2) ss Ch:3 p 3. rw.
R2: 4 + 2 p 2 vsp 4.
rw.**
Repeat ** to ** till
there are 6 inner rings. Finish off with chain.
Pentagonal
Motif star or snowflake

Measurement: 3 cms wide.
Since I didn’t want to change the
count, a central picot becomes essential here. Thus advantage of central picot
is that it is easier to adjust the number of rings around. I bent a double loop
across 4ds for the central picot. This picot is sufficient to hold the 5 inner
rings. (see Stitches as Picot Gauge on page 5 of Measuring the Picot)
T
I had shared the design process
for this flake and the reason why it had bilateral symmetry instead of a
6-order rotational symmetry. This time I ‘corrected’ it and all clovers have
the same count.

Measurement: 3½ inches
[ Round 1 : 1¾” or 4½ cms ; Round 2 : 2¼” ]
Techniques include :
2 shuttles, ctm ;
floating Josephine rings/knots
(JK), hence 2 shuttles required for rounds 1 & 2;
lock join (missing in written pattern);
Victorian sets ;
padded double stitch or pds (2 wraps on each half
stitch).
- We can climb out with a split ring in clover and mock picot, thus tatting the entire snowflake in one pass.
- Instead of slope and roll join, I used lock join throughout, and counted it as first half stitch.
Round 1 Clover
[Ring1 : 6 - 3 - 3
Ring2 : 3 + 8 – 8 – 3
Ring 3 : 3 + 3 – 6. rw.
Chain : 6 ss JK6 ss 6
rw.] x 6
Round 2
Chain : [12 vsp 1 lj ,
ss JK8 lj ss, 1 vsp 12, lj ] x 6
Round 3
Chain: [4N6 lj 2, 2pds – 2pds, 2, lj 4N6 lj]x6
(4N6 = alternating sets of 4 half stitches 6 times)
T
I didn’t change a thing here,
except for the thread of course.
Measurement: 4 cms from point to point.
Techniques : 2 shuttles, ctm ;
turn work ; lock join ; floating Josephine knots.
TIP : All chains in 2nd round can be worked from the front
without turning work at all. Use reverse (unflipped) stitch for the 6ds chain.
This is just like block tatting, and here instead of lock join pull up a loop
of ball/shuttle2 thread, pass core shuttle through it, and tension.
T
Again, I used small picots to link adjacent rings in central medallion instead of the original central picot. All the rest remains the same as in Version 2 of the pattern.
Thus each inner ring is (7-6-7), although one can add decorative picot, thus working them as (7-3-3-7).

Measurement: just over 2½ inches.
Techniques :
Graduated picots,
Floating dots
Floating Josephine rings
It is interesting how the dot is
smaller than the JR, despite having exactly same count. Also notice the outline
– dot has an irregular outline as compared to the smooth circle of a JR.
For a pointier outer chain, work
the JR as a SCMR instead of a thrown ring. Although I like the gently curved
chain.
T

Although not mentioned, all my
tatting is directional – frontside/backside.

Winter is the season
for tatting ....
as is spring, summer, monsoon, and fall !!!
T
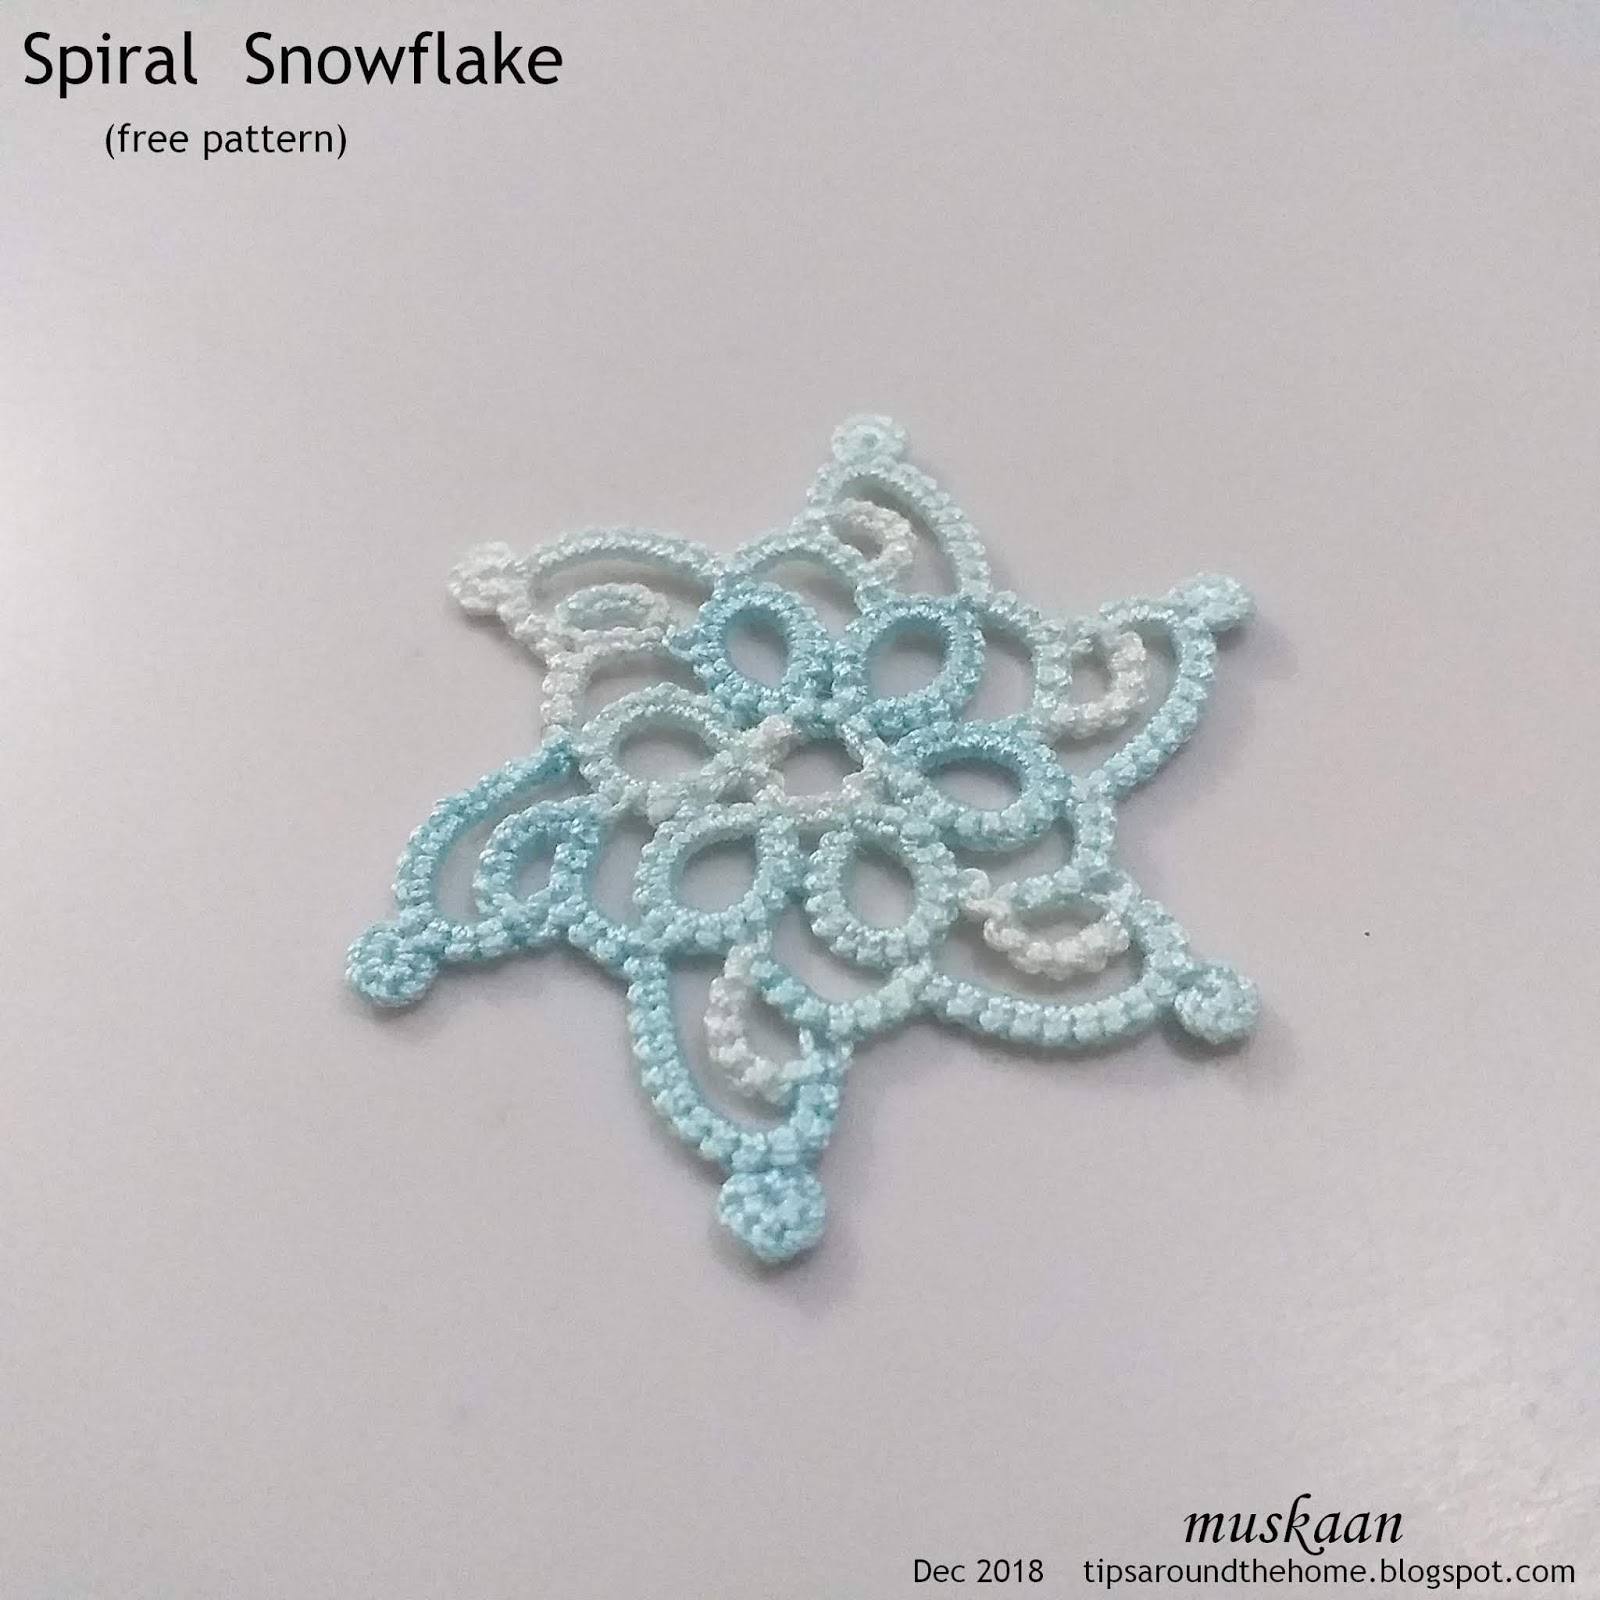
I love them all and I think the spiral is my favorite one 😄
ReplyDeleteSpiral is my favourite as well, Carollyn!!! I'm hoping to use it as the center of a doily or a repeatable motif in future.
DeleteI like the spiral one best too. The thread is perfect for snowflakes, better than white.
ReplyDeleteSpiral the best :-) Amazing, all are amazing :-)))))
ReplyDeleteBeautiful snowflakes and helpful tips:-) I will try the spiral, it is very original pattern!
ReplyDeleteThey're all lovely, don't worry if there was any oversight in your patterns (the same happens to me) you can amend easily :) It seems that tatters around the world are all in the snowflakes' mood, I still resist! How long? Lol!
ReplyDeleteI have always adored crochet snowflakes, but tatted ones are even more lovely!!
ReplyDeleteIt is wonderful how each season has its own special inducements for tatting : D
Thank you so much everybody , you keep me smiling :-))))
ReplyDeleteJane I loved this thread when others used it and was thrilled to have it in the Ice mix pack! And the tint is so subtle that a down picot join is not visible ;-P
Justyna, you are too kind :-)) I've seen the amazing entries for last month's I Love Tatting!
Olka, I'll be eager to see the spiral snowflake in your beautiful hand!
Nin, why resist? If not now then when ;-P
So true, Emily - love the seasonal components of tatting!!!
I think tatted flakes have one advantage over crochet ones - they don't always need starching/stiffening ;-P
I welcome all of you back for a few more patterns soon ....
Wonderful snowflakes!!! :)
ReplyDeleteThanks, Sue :-)))
DeleteI am a tatter. Where in India can you get lizbeth thread?
ReplyDeleteAchala, I bought them online from Amazon.in (their global store). If you go there, make sure to buy Only if it is Amazon-fulfilled (I've had a bad experience when it wasn't).
DeleteHowever, you can buy from Amazon.com or directly from Handy Hands, Tatting Corner, and such other online stores if you have a PayPal account or some similar method of payment. In fact you will get their entire range of Lizbeth threads there.
Oh OK thanks.
ReplyDelete