Roll
away mental block
Don't
pin me down !
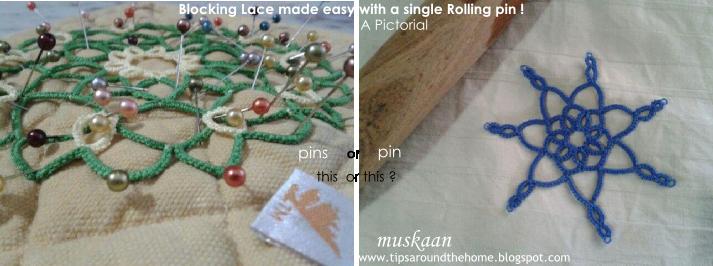
It may not have improved my tatting, but it absolutely
improved the finished look.
I heard of blocking finished lace only in 2014. Before that
I simply ironed the lace.
I detested, therefore procrastinated the pinning of each
element – too much work !Around the middle of 2015, Ignes posted a photo of her doily on Craftree, with a rolling pin beside it. My mental block towards blocking tatted lace vanished !!! Now I am eager & ready to block before photographing, using the trusty rolling pin.
Of the many ways to
block lace, I have done the following :
- Place a muslin cloth over the lace & iron over it on medium to high setting. (very good results, flat but not crisp)
- Place
the smaller pieces under/within a book & weigh it down with more
books. (limited to small pieces & fine thread & does not always work)
- Dampen the lace & pin the lace at regular intervals or chosen points to shape . (very good results, flat & crisp, but too much bother).
- For appliquéd or sewn lace, when the fabric & lace is still damp after a spin-dry from the washing machine, gently pull the tatting into shape on the clothes line. (This is very effective for long/broad edgings on sari or bed-sheet & makes for easy ironing later. I continue to follow this).
- Rolling pin !!! (I’ve become a convert & die-hard fan! Simple, quick, effective).
Due to recent interest in this last method along with a
request for pictures, Ignes has graciously allowed me to share the rolling pin
method. I have prepared a step-wise pictorial & converted to pdf file for
convenience. It can be downloaded here : How to Block Lace using a Rolling Pin
Here I will share a few of those pics & others of my
past tatting Before & After blocking with a rolling pin, some of which you
may remember.
* click to download complete pictorial

Anchor size
20 thread was used for the snowflake. I have tried this method on size 10, 20,
& 40 threads ; on small snowflakes, coasters to the 22” Snow Doily. I think
it gives the quickest & crispiest results with size 40 for obvious reasons.
 Dunk in water till core thread is wet. Adjust with fingers. Then roll over it. I like to
place the item wrong-side up, in contact with the rolling pin. Rolling the
pin just 2-3 times over the lace, with even pressure, is sufficient to remove
excess water.
Dunk in water till core thread is wet. Adjust with fingers. Then roll over it. I like to
place the item wrong-side up, in contact with the rolling pin. Rolling the
pin just 2-3 times over the lace, with even pressure, is sufficient to remove
excess water.
 After excess water is removed, place over/under dry towel & gently roll again. (the water mark can be seen on the right in above pic)


In case of
larger pieces, one may need to change the towel once.
 TADA !
One can do spot blocking if that portion or picot misbehaves.
Download complete pictorial here


One can do spot blocking if that portion or picot misbehaves.
Download complete pictorial here

- Cannot be used if there are
beads in the tatted lace.
- Each individual picot is not
addressed. If the picots behave during tatting, then they will block fine.
An odd picot here & there can be adjusted with fingers or spot-treated
later with blocking pins. But this rolling pin method will not produce very
sharp picot points.
- And, of course, 3D pieces
cannot be blocked (although layered
tatting can see heart pic below).
- Personal preferences as well as thread
characteristics. What works for/on one may not work for/on another.

Advantages
- No advance preparation. Simply
walk into the kitchen & block on counter, board or any floor tile.
- Materials. All one requires is
a rolling pin & dry towel. No need to gather a blocking board/foam, iron,
blocking pins, stiffener, etc. Consequently, no storage & space issues.
No waiting for the iron to hot up.
- Instead of a rolling pin, one
can use any cylindrical object to roll, including a baton.
- Very Quick & easy. Dries
fast & crisp. Ironing does not give as crisp a result as the rolling
pin.
- It is possible to apply even
pressure to the entire tatting with the rolling pin.
- Layered rings/tatting can also be blocked with this method.

I have not
used, nor needed to use, any fabric stiffener or starch so far (I prefer drape). But if one
wants a stiff piece at the end, Ignes uses hair gel in a spray bottle. In her own words :
‘ "Concrete
gel" i.e. super strong. It's my go-to blocking help, after just drying
fast. I wouldn't use it on articles that should be worn, but it keeps my motifs
and smaller doilies nicely stiff. The more gel, the stiffer. On the big doily
in the picture I just used a little bit, per surface area, so it stayed quite
soft.’
Who would’ve thought
that the quintessential rolling pin used to straighten an errant spouse,
could
be used to straighten delicate lace as well ;-p
What is your preferred way to block tatted lace ?
Related Posts : Lene’s Day 2 Snowflake

