Showing posts with label decorating fun. Show all posts

Saturday, 27 April 2024

taking wing

Pin It now!

Just as I had visualized and hoped for! The wings with gathered picots! Yes, I'm doing the happy dance for sure, soaring on wings of fancy :-D

The Pattern -- 'Life is Bliss' butterfly by Antonia Lai, derived from Endrucks' pattern #32 (or E32). Here is the pattern - https://drive.google.com/file/d/1F_2y-JQn-noKF2AvegujNQIP4IYXRqWZ/view . For all links to Endrucks' docs and patterns - https://docs.google.com/document/d/1w1TZBg-HIzseGEUoJ-rko7tNbtSgZY5A18Oy2Y9Hh0Y/view


The Game -- This is my entry for the #PicotMeEndrucks April 2024 game in the Endrucks 1920 Project FB group. I had this in mind ever since I was preparing the presentation, etc., yet could not get around to tatting it for various reasons. One morning probably a week back, I actually woke up reaching out for the butterfly I had finished tatting (in my dream literally, but it was oh so vivid!!!). Yesterday I finally took hold of myself and belted it out for real.

The Thread Colour -- Deliberately chose a bold but lighter shade. Variegated or dark hues would probably mask the picots or appear too busy. Worked in Anchor size 20 (equi to Lizbeth 10) mercerised cotton. The lower ones are my butterflies for the #PickMeEndrucks game last Feb (https://tipsaroundthehome.blogspot.com/2023/02/indisciplined.html) These two models were a great help in deciding placement and size of picots.

The Decorative Picots -- gathered picots; double picots and some variations; twisted picots (floating) with Josephine ring/picot at the tip; twisted double picot; chain picot; graduated picots. Phew! 

I had roughly sketched my idea of where I wanted which picot. Once shuttles were picked up, some of these were changed.

I have labelled the various picots in this pic. Easier to show than explain. All picots used a 1/2 inch picot gauge, though the long picot was made with the gauge held horizontally. The graduated picots were eye-balled.

You can find a whole visual list of decorative picots here - https://drive.google.com/file/d/1D6l4gQWeGu1Se1ZXAhP2vWLQMd4lfzMJ/view

It wasn't all smooth sailing especially since it was to be both a first trial and the final. I often had to retro-tat, including opening up closed rings. But so worth it!

The Sequence -- I started with the inner onion ring, going clockwise. The entire body and right wing were tatted continuously. However, for bilateral symmetry of the gathered picots on the left wing, I had to join the threads at the base of the onion ring and tat the wing from the back. This also meant joining the picots from the back. It took me three trials to get it right. 

The Tweaks -- The only addition I made was to add a shadow chain with graduated picots along the outer sides of the top rings. I think this provided the motif with balance and body. I didn't use a CWJ for the onion ring, opting for a lock join so that the chain picot could be made properly. For the double picots I divided the 6ds of ring to 4 picot 2. One inadvertent mistake was 2 stitches instead of 3 between the joining picots of side rings. 

The Finish -- I needed to dampen, shape, and let the motif rest to tidy up all elements. However it could've done with some better blocking but I was too excited to see 'finished' and photographed ;-P. 

🦋🦋🦋Now that the metamorphosis is done, let me enjoy my flight to the skies 🦋🦋🦋

Related Posts
https://tipsaroundthehome.blogspot.com/2024/03/happy-itd-2024.html
https://lelia-stitchesoflife.blogspot.com/2024/04/picot-me-endrucks-april-2024.html
https://tipsaroundthehome.blogspot.com/2024/04/no-excuse-to.html

Friday, 12 April 2024

no excuse to

Pin It now!

 no excuse to not decorate!!! Check out the diversity of decorative or ornamental picots in tatting! 

This collage is a small glimpse into way more picot types than we would ever use, or use sparingly. Yet it is a pity they get glossed over. Now we have no excuse to skip them, when visual models are laid out in this pdf titled DECORATIVE  PICOTS  IN  TATTING - https://drive.google.com/file/d/1D6l4gQWeGu1Se1ZXAhP2vWLQMd4lfzMJ/view
It can act as a quick reference to make our choices.

Backstory - It started with Net Best's upcoming book ' Six T's of Shuttle Tatting' that I am editing. She had listed the names of several picots/elements in her glossary without any pics. It was understandable because the book was meant for beginner/intermediate level tatters. And since it was going to be a physical book, there were limits on the number of pages. 

Now we have decided that only a few copies will be hard copies for private circulation. Sales will be in the form of a digital book. (It was an option she had veered towards before her death.) Phew, that takes away the page pressure. We also decided to shift the elements to a separate chapter to showcase their variety. To that end, I have been tatting up these samplers.

Meanwhile we started the #PicotMeEndrucks game this month in our FB group. [You can read the details with links here - https://lelia-stitchesoflife.blogspot.com/2024/04/picot-me-endrucks-april-2024.html  Carol, thanks so much for the shoutout!]. We felt that perhaps a visual reference would spur more interest and effort, although we already have some spectacular entries. Hence I focused all my energies on tatting all the picots I had on my list in order to share with our members in time. Obviously I haven't had time to tat my own butterfly version yet, LOL. 

In the pdf there are no details about each picot. They are arranged alphabetically despite the fact that there are underlying similarities and several can be grouped together. Well, I need to keep something for the book, right?!

If you know of any picot that can be added, please do let me know. Or any input is welcome.
Meanwhile, I hope you join in if you can and choose your picot to style your butterfly! Send me your version if you are not on FB. 

Thursday, 8 September 2022

game of extraction

Pin It now!
No fears of any tooth extraction!!! We are talking about extracting motifs from a specific pattern.

Last month's game of the month brought us so many prettified hearts and even a few patterns! I will showcase them soon in this blog. This month we have a slightly different game with lots of creative imagination in play.

You can play along, too, and join our FB group (Endrucks 1920 Project) or send pictures of your work to either Ninetta Caruso or to me.

Game Of The Month – EXTRACT ME SEP 2022

The pattern we are using this time is Endrucks' #25. Pattern #25 is an extension of #24 which was presented by Ninetta Caruso and now we have a composite of both diagrams in the #25 pdf.
[Pattern #24 pdf link - https://drive.google.com/file/d/1ZpHou6AOWM3LZJVbEMNB_gurWqtjazRx/view ]

What you see is what you extract!


Take a look at this lovely model of Endrucks’ pattern #25 tatted by Elisabetta De Napoli alongside Endrucks' original diagram. Can you spot different shapes and objects? 

If we break it down into motifs and view it from different angles, we can easily see a flower, a sun, a leaf or pod, a rainbow, perhaps waves or a fence, perhaps a sunflower, a tortoise, a tree, ….For instance the motifs extracted and tatted by Ninetta Caruso.

Our task is to extract one or more of these motifs, tat them, and then glue them on a card in any arrangement or composition.

  •  You are free to choose colours, thread sizes, embellishments, etc.
  •  You are also free to tweak the motifs to suit your composition and imagination.
  •   You can choose to tat a single motif multiple times or several different motifs.

We are fast approaching autumn and festival season in many countries. The card you make might come in handy for gifting!

In case you face any issue, or have any questions, ask freely.

==================

As in the previous event,

* Please write your name on the pic.

* Use the hashtag #extractmeEndrucks and #Endrucks1920Project in the description and any other detail you want to share, whenever you upload to any platform.

Looking forward to your creative tatting and cards
Muskaan & Ninetta 


Remember you can find so many many more patterns - original and adapted - in our EP doc - https://docs.google.com/document/d/17LEVftXweztBIOWh4sL4BB7bX65ssoOsOn4oXIgCepY/view

Monday, 15 August 2022

pretty me heart fun

Pin It now!

Now that all the main patterns from Endrucks' 1920 book are in modern format, barring 2, Ninetta and I decided to start holding occasional events in our FB group. The first such official event or Game of the Month is a simple heart that tatters need to embellish or use to embellish something. We also decided to open it up to our non-FB tatters, if you wish to participate.

pretty me aug 2022 - Endrucks 1920 Project Facebook group event

Do you remember this maroon heart I shared here (now updated with diagram and written pattern for alternate path) - https://tipsaroundthehome.blogspot.com/2022/06/to-and-fro-inspiration.html

We chose it for the event in our FB group and are throwing it open to all tatters. 
Download the one-page pattern pdf with diagram, model, and written pattern and begin decorating - https://drive.google.com/file/d/1t3DhpAeXUBi4oZegOty-q5Ux-zfntdYf/view

There are several paths one can take to tat the heart, including starting from a different point. While only the basic path is shared in the pdf (which should be easy for needle tatters and relative new shuttle tatters), I updated my blog post with diagram and written pattern for the path shown there initially. Check it out if you prefer to tat clockwise all from the front - https://tipsaroundthehome.blogspot.com/2022/06/to-and-fro-inspiration.html

This is my tricolour earring prettification. We are celebrating 75 years of Independence today and I see the Tiranga (our Tricolour) everywhere! 
Worked in Anchor Pearl cotton size 8.
I didn't have time (or the right size/colour beads) to decorate further.
A small ring 8ds was added in the topmost heart to hold the hook.
I used my Floating Beads method to attach the teardrop without stringing it on the shuttle.

UPDATE - The following explanatory para is added in response to a couple of queries - 
How to interlink the hearts - 
Each heart was interlaced in a very simple manner through the final chain. Start from the topmost heart, then work your way down. So, tat the 2nd heart till the very end but leave the last chain unattached. Cut off tails and then insert the 'free' chain through the 1st heart, join to the base of the starting rings, tie and cut and hide ends. 
Repeat the same when interlinking 3rd heart to the 2nd.
NOTE: For fs/bs tatters, start the 2nd heart with backside rings so that the final chain is on the right.


There were other ideas such as decreasing the heart sizes (hut didn't have colours in required sizes); joining at the tips (but I kind of preferred this free-style effect with a bit of twisting when worn)....

The heart is Eye Spy Heart from Endrucks' edging #3 which I spotted when tatting the square derived from the edging. 

Use beads, decorative picots, tatting effects or techniques, or colour-play to make the heart pretty or use it to make enhance the beauty of something else.

We have already received several variations of the heart pattern, besides beautification, and those patterns are also being shared! You can join our FB group with your version of the heart, or simply send the pic to either Ninetta (https://ninettacaruso.blogspot.com/ ) or to me, with your name and any project details you might wish to share. 

There is a special album (pretty me aug 2022) to collect all pics though at present it is missing a lot of the pics which members have shared on the Home page; and a hashtag for a focused search - #prettymeEndrucks.

So are you ready to participate? This is such a quick little pattern that needs very little thread! Come join the fun. Remember the butterfly beautification project where I received a thrilling response - https://tipsaroundthehome.blogspot.com/2018/04/make-me-pretty-please.html ? Can we expect a similar response this time, too? 

All patterns from Frau Endrucks (main and derived) can be found here - https://docs.google.com/document/d/17LEVftXweztBIOWh4sL4BB7bX65ssoOsOn4oXIgCepY/view

Sunday, 5 July 2020

welcome intrusions

Pin It now!
It has been amazing - the interest and the exploration that has already moved far and wide ... almost overnight! I cannot thank my tatting mates enough for their enthusiasm and for embracing the potential of Intruding Picot (ip)!


In chronological order -
Wally Sosa - This multi-talented and creative lady had also discovered this picot, calling it 'Evil', and dismissing it! Above is a nice comparison between, and combo of, normal and intruding picots.

Wally Sosa - Introducing the Rolled intruding picot! She combined her rolled picot with the ip to create such an interesting effect. And there's more - she has already tatted a beautiful motif/pendant using these and will be sharing a tutorial soon. Can't wait ....

Ruthie May - She interrupted her doily to try out her first intruding picots (thankfully she didn't close the ring - who wants to open a ring?!) and she has created this lovely pearl tatting/Maltese ring effect! It is something that had not occurred to me.

Ninetta Caruso - Can't keep her away from metallic threads and beads ;-D
Such a wonderful Beaded ip - as seen from front and back! Think of the scope for play....

Anita Barry - Independently, she came up with the Pearl tatting effect.
In the trefoil, one can see the dimpled effect in the side rings, and she has pulled up the ip in the middle ring! Creates a matted/woven effect.

Anita Barry - sent in this exploratory trial piece as well. The messy one on the right makes me think of snipping the ip and ruffling them!

This is my Filled Ring trial using ip. Didn't come out right, but I can put it down as proof of concept at this stage. Had thought of twisting them, but that was too fiddly. However, it can be quite easy if done on a chain.
I want to try it with SCMR. I also want to try it with folded rings and chains. Could we weave them as well or am I getting way ahead of my skills, head in clouds?
Lots of homework ;-D

UPDATE : Jane McLellan created a lovely bookmark using interlaced rings and intruding picots! Check it out - https://janemactats.blogspot.com/2020/07/muskaan-bookmark.html

Present Summary -
So, what a spread, with many more ideas to try out besides a downward facing picot - Rolled, Pearled & Maltese (using a single thread is now possible!), Filled, Beaded, Dimpled, Ruffled (inside!), Mock rings, Onion rings, bead in center of ring and other functions ..... this is just the start of the Intrusion!
UPDATE : I have used it successfully with dot picots, dot picot strings, double picot, twisted picot, and even a half-closed ring with twisted picot as it's base!


And speaking of welcome intrusions, a few more prettified butterflies flew in after 2 years! Did they get lost in migration - I hope not. Care to send in more Make Me Pretty Butterflies?
Corinne worked her cute version for an event by Association Francaise de Frivolite.

 Krystyna Mura posted her version - I couldn't even recognise it - so great is the transformation!

Madhur Dadlani was inspired by Corinne's version and posted this cool freshness!

Related Posts showing pictorial and functions of intruding picot - 

Keep Intruding, dear tatters. No 'stings' attached :-))) 

Thursday, 13 February 2020

dress my heart

Pin It now!
design along (DAL)


What bug have I caught?! And why am I trying to spread it around? But then we are already 'suffering' from ATS - Addictive Tatting Syndrome, so what’s one more play-along?!

Recently I revisited this NeoVintage Heart. I gave the prototype pattern in 2015 – a 2-round continuous pattern. This time I ran out of thread after the 1st round and it struck me that there are So Many possible designs that can go around those chains! Since I cannot do them all, here’s a design-along (DAL) for you. You can choose to create your own outer round, although I have given my 2nd round pattern in the pdf

SCROLL DOWN FOR PDF LINK.

In Anchor Pearl cotton size 8,  it measures around 4cms×4 cms

I’d just like to state one rule : Keep Round 1 essentially the same (although you can add beads, etc.). Design Round 2 or more as you wish. It will be interesting to see the variations.
Kind of reminds me of this make me pretty please butterfly and the wonderful diversity that flew in!
Please do share your work either here (comment) or tag me on facebook , on Instagram, or email a pic that I will then upload here.

click to download the one-page pdf - NeoVintage Heart DAL 2020

TIP : Dora Young Join (Knot) is exactly the same as what we now know as Catherine Wheel Join,  except that it is made with the same shuttle and no thread is encapsulated. .


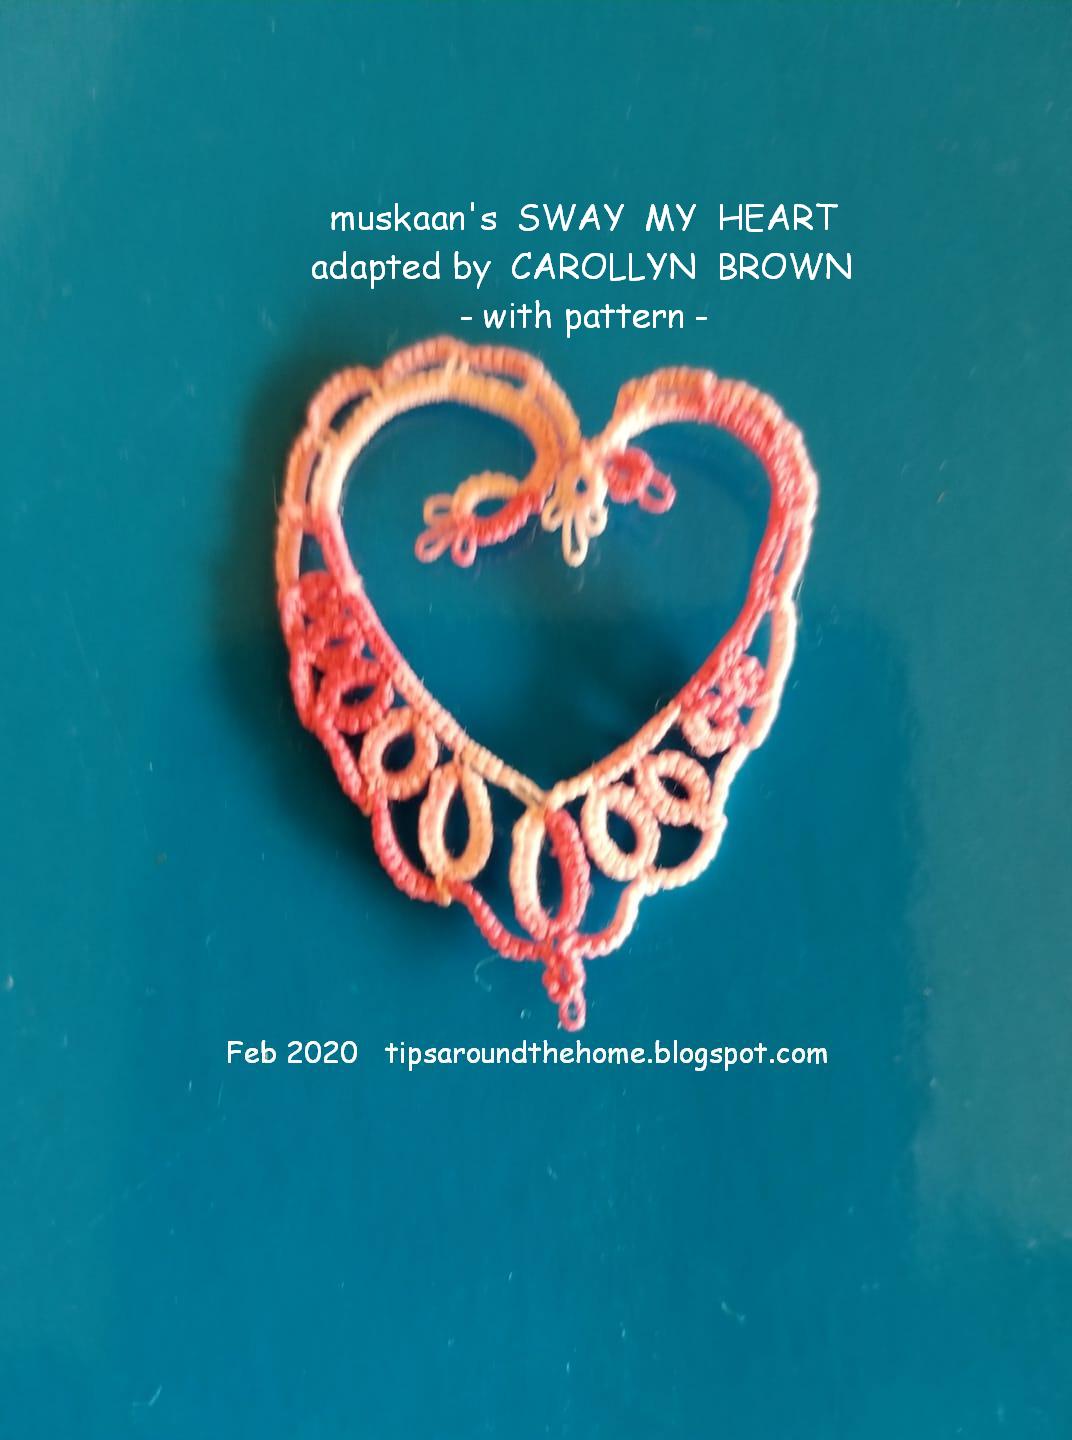
And before I leave you to play, here is Elisabetta De Napoli’s beautiful version of Sway My Heart. All set to be a pendant on a necklace !!!


Sue (His Kid) also added a 2nd round using treble tatting – check it out!


Friday, 7 February 2020

such sways and swaggers

Pin It now!

Oo, là là ! Such sways and swaggers! Such are the hearts here – all a-sway with built-in swagger!

So the green one is my 'official' version – much closer to my original sketch. It still needs stiffening if it is to be dangled. But now that I have the shape I want, I will experiment with some techniques and looks to keep the shape without the use of wire or stiffening.

Look what popped up as I worked around the center ! A possible paisley.

After round 1 - This time I thought of not adding an extra ring around the inner one. But on comparing after it was completed, and confirmed by hubby, I added that outer ring using scrap thread. This is why you see some pics with only 1 ring. Although hubby did say that it can be given as an option.
I like the look without any out round! 
Please note, that this round will need to be dampened and shaped before finalising it and proceeding to next round.

The green one, in Anchor size 20 (≡ Lizbeth size 10) measures 3”x2”.

All picots are very small. 
I think the ring on the left of the 14-14 ring should be 12-12 rather than 11-11 for a more natural gradient.
The rolls/wraps in the outer roll-tatted chains can be adjusted to suit your tatting tension.

With only the lone inner ring. As mentioned, the outer one was added later as additional decoration.
This motif can be worked continuously by climbing out with a 3ds split chain.
For detailed process, tips, and pattern notes - Round 1 ; Round 2 

Many thanks to those who played along! 
You can join the fun and tag me (facebook/instagram) , leave a comment, 
or send me pics of your versions!

Elisabetta de Napoli started a beautiful center in metallic [UPDATE- see complete heart here], 
and Sue worked in size 40. [UPDATE: treble tatting in 2nd round]
Margaret Davies used spiral/Josephine chains instead of roll tatting. 
And then there are Victorian sets that also provide visual texture.
Carollyn Brown tweaked the pattern as you can see, and shared her count and notes. She seems to have straightened out the errant swagger ;-P In her own words ….
"Well I started at top and placed picots every six ds after the initial 2 rings and chain of 3 ds. This way I could go around twice. I had size 80 which was on shuttles and should have used larger thread but it was fun to make thanks can give more counts if needs be
Here are quick numbers I still used 4ds inbetween and I feel this could be tweak some more maybe less stitch count on out side outline.
 This last picture is the count for outer part no cutting threat till end."

Ninetta Caruso sent in her version – oh my it is already part paisley! And true to form, she has used s small curled ring (sCR) with bead, as well as treble tatting. She also linked adjacent thrown rings . The pattern in her words ....
"With one round only, mine should be sewn up somewhere to keep its shape. Otherwise it needed wire in the core, that would be something worth a try.
The inclination to left or right is just personal taste, in my version for example I would tat it again because at the end I like the other face up, but the sCR defines the front side.
I forget to tell you that I started from the bottom mock ring, then this and next rings are connected, that is the first is mock ring: 4-8-8-4, next is ring: 4-7-7-4, etc. decreasing the joint, till the last that is ring: 2-1-3.
I finished in the little heart at the bottom. "

UPDATE : 2 more decorated hearts !

As they say, 'it takes a village …' I love adaptations/derivations and also get to learn and improve my own work. So, unfortunately, this heart is still not ‘completely’ complete. There’s a lot of play left, right?! ;-D
Only after I am finally done with the ideas, I will release a proper pattern. But this should be enough for you to play along and to experiment.

happy tatting

Saturday, 1 February 2020

are you playing?

Pin It now!
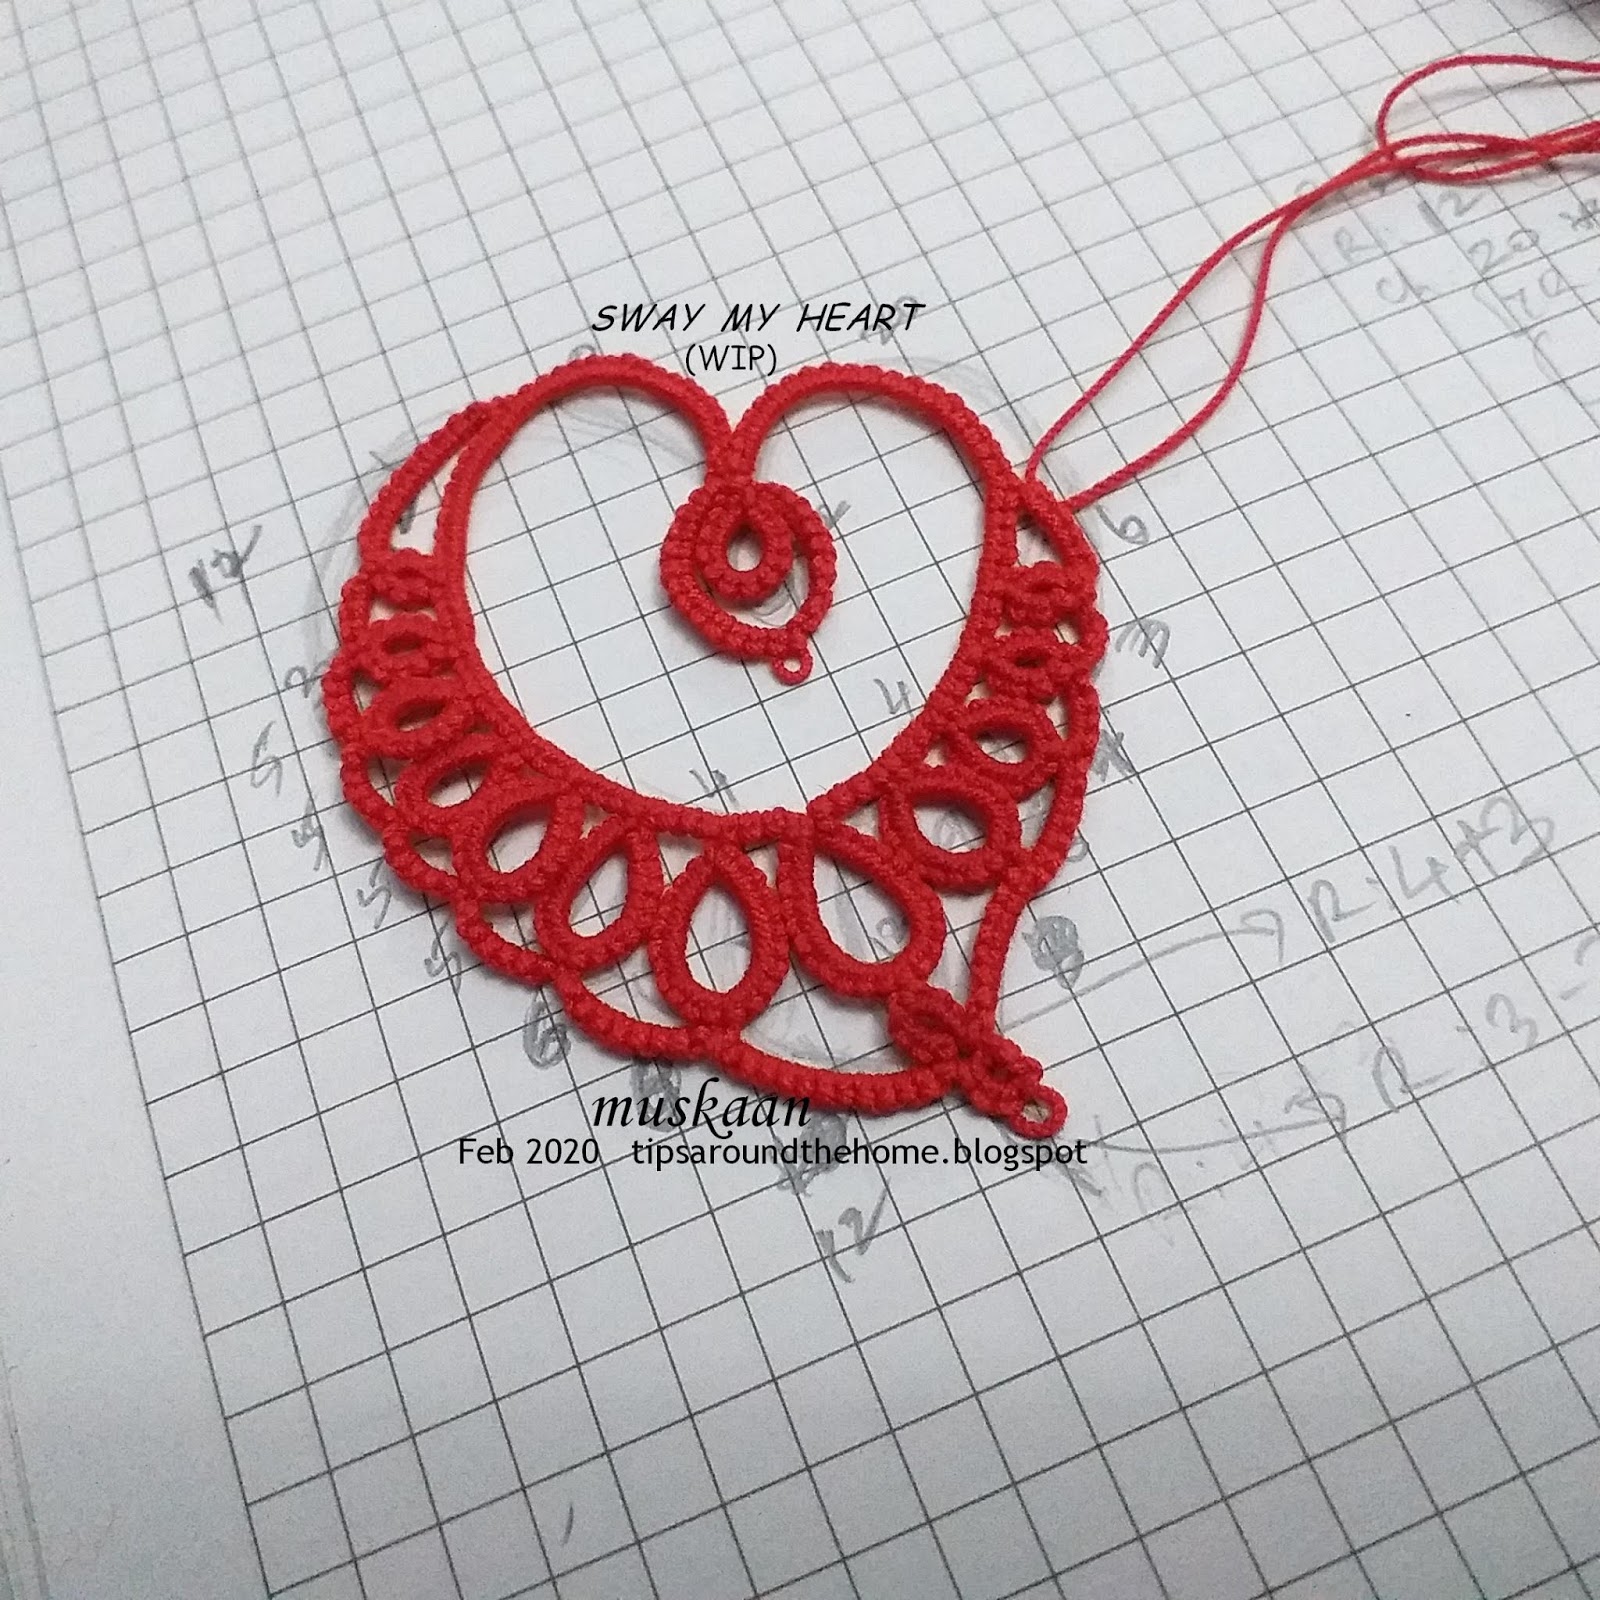
Continuing with the next round … I am still tatting on this first trial piece hence there are a few limitations.
It is a simple round when tatting from a pattern. But it took me well over an hour to get it to look ‘good’ – there was a lot of retro-tatting! And I also changed the right side chains – all facing inwards didn’t look good at all, unlike the sketch.
As before, I invite you to work as you please, tweak and adjust as you will, sway my heart! The notes are for reference only.

SWAY MY HEART
prototype round 2
Pattern, Notes  &  Ideas

  1. This is mainly a chain round with 2 tiny rings at the bottom.
  2. I pulled out about 3/4th yard for core thread, continuous thread.
  3. It can be made with shuttle and ball, ctm, if the ring at tip is worked as a mock ring.
  4. Since I would be constantly placing the motif on the drawing, I started on the top left side, using direct tatting (reverse or unflipped stitches) - no reversing work!
  5. Stitch count is given in pic above. I would reduce the 12 chain on top left to 10 ds.
  6. The first chain segment on the bottom right after the 2 rings, faces INWARDS - hence the count is in brackets. All the rest face outwards.
  7. For the join between segments, I did not use a lock join. Instead I pulled the core thread through picot and passed shuttle through it (remember I was direct tatting). This creates a bit of texture, but more importantly it gives a clean dip, enhancing the curves. I did not count the join as part of the chain.
  8. When placed over the sketch, it coincides fairly well overall. But I still want to increase the asymmetry a bit more.
  9. Now I had this idea to continue around the chains for stability, hence left the threads uncut. But I was also apprehensive that the concentric chains would become too thick. My solution – roll tatting! I do wish there were picots to join to - I will include it in the final pattern. You, on the other hand, can pre-plan your strategy and options.
    TIP: I didn’t remember to jot down the rolls/wraps, but just like in Josephine chains, I wrapped 5, then adjusted/smoothened and snugged. It kept the long roll-tatted chain looking good. 
  10. My other ideas for this round – a. work it in finer thread to keep emphasis on main heart (round 1) ; b. add picots (frayed!) to left side chains and also to the left side of the central ‘ring’ to imitate a gentle sway, a soft breeze :-D


Remember #3 – alternate ideas to stabilise the long chains in round 1?
I remembered one more way to make the round 1 chains stiff. Add up and down beads after every stitch, as in this necklace. 


Please share your thoughts and your work ... So far I've seen 2 beautiful hearts of which Carollyn has already tweaked and has offered to share her counts.


Thursday, 30 January 2020

come and play

Pin It now!
I have been engaged in tatting-related activities though my shuttles have been gathering dust for the most part. Didn’t stop me from generating ideas or doodling.

When I opened my tatting diary couple of days back, I found this heart doodle from Jan 20-2020 and felt compelled to tat it! Here is the first or foundational round. I shared a collage on facebook to a heartening response and have decided to share the count along with my notes/ideas. This is still a prototype.

I invite you to make any tweak or alteration you wish to; play with it ! But do share your work either here (comment) or tag me on facebook , on Instagram,  or email a pic. I’m sure you will do a much better job at it, going by past experience.
I will include your variations, with due credit, when I write out the pattern. You can all be my test-tatters and experimenters And Playmates !

Y

SWAY  MY  HEART
prototype round 1 
Pattern , Notes  &  Ideas

  1. The asymmetry is deliberate. But it is easy to make a symmetrical heart using either of the sides and tatting a mirror image - 3 hearts in 1!
  2. Worked in Anchor size 20 (≡Lizbeth 10), 2 shuttles, continuous thread. 
  3. For stability, thick thread is advisable, or stiffening it on completion. Alternate Ideas: padded tatting (multiple or thicker core threads); padding the stitch (BDS), treble tatting stitch (especially on the left side to create a shadowy 3D effect!); metallic thread. Stitch count may need to be adjusted accordingly. 
  4. I drew an enlarged version for easy reference during trials.
  5. The entire motif is worked from frontside in clockwise direction.
  6. Initially there was only going to be that one small ring in the dip. But later it felt too tiny, and hence I continued the chain by making an under-over/alligator join across the base of the ring. If you want this, you can make it an onion ring at the very beginning.
  7. Perhaps we can eliminate one of the left side rings OR increase the linking chain from 4 to 5ds, since there is a bit of overlapping.
  8. I would like to increase the left chain a bit more – about 5-6ds maybe. At present the motif is 2¼” high and 2” wide.  
  9. Also, add a small picot in the right chain to which the left can be linked towards the end. This is another way to keep it flat and stable.
  10. Do not snug the chain stitches too tightly. Try to keep the gentle curve of the heart. Keep shaping with your fingers.
  11. All outer rings are thrown rings, except for the largest one at the tip. That one is a mock ring (I worked it as a SCMR), and after closing, I made an unflipped 2nd half stitch to accentuate the dipping point.
  12. Notice the tiny picot in each ring? It is for the next round – to attach chains as seen in the sketch.
  13. I tugged at a couple of the larger rings to give them a longer shape.
  14. Adding beads to those rings, and earring or pendant findings would make it look so cute and wearable, don’t you think?


Go ahead and Wow me, dear tatters. Sway my heart.
Feel free to change what you will, and design the next round(s) differently as well. I’d love to be inspired by you.

Y

Sunday, 2 September 2018

gifts with tatting

Pin It now!
for a relative – a card, snood and handkerchief... 

gluing old tatting to a card
is creative ; not at all hard!
Remember the Butterfly Edging card when I elicited suggestions? 
This is the After pic, with 2 more Josephine chains on opposite corners.

I think this simple addition has been successful in 
maintaining the integrity of the composition, 
while closing in the bare white space ?

And I finally found my stick-on embellishments (flat-based pearls, rhinestones, etc). So keep an eye out for more SOUP cards  ;-P  

a doily is very good
for an instant snood!
Remember this beautiful Cherry Blossom doily by Hye-oon Lee? 

To cover the large negative space and add body, I tatted a central medallion (all rings : 7+7). 
I wanted to maintain the beauty of the lovely pink round, hence chose brown. 
On second thoughts, pink would’ve created a much better dahlia-like effect!

With a diameter of 4½”, it was the perfect candidate for a snood for MIL. 
This specially tatted one I gave her was small (at 3½”) and instead she’s been using Konior’s spinning wheel glass mat (4” in size 40).

Including the finished size of projects in my posts has helped.
And what a coincidence! The name of the doily has blossom in it ;-D Serendipitous! 
TIP : With all those rings in the outer blossoms, one can easily weave the ribbon differently and alter the size of the snood.

on an edging pattern raid
I found Jane’s leaf braid!
Remember the Blossoms corner motif? 
What's a hanky without an edging?! Jane McLellan's Leaf Braid was the perfect candidate. 
Worked in size 40, the rings resemble the motif leaves and is not overbearing.

 Here they are, all sewn up, on the hanky. I think the braid was 39" long and 5 to 7mm wide. 

TIP : I tat a slightly shorter length of edging than is required, and start sewing it to fabric. This gives me an exact idea of how many more repeats are required to connect to the start. It works for me - whether it is for a cushion cover, saree, or hanky.

This time I sewed down through each picot, since it is meant to be given away….
for myself, I would’ve shied away from that extra sewing! 
White sewing thread and stitch at the back is hidden within the folds of the hem. 
I actually went round twice - first tacking between rings, then zigzagging through picots..

Hope you enjoyed this post. Some of my next posts might be pictorials of multi-coloured Cluny tatting – fair warning ;-P I’ll try to intersperse them with regular tatting and patterns to keep my sanity as well as yours!