Pin It now!
Reworked
patterns from Frau Eleonore Endrucks-Leichtenstern’s ‘Die
Schiffchen-Spitzen’, 1920, for Endrucks 1920 Project.
This little pattern has interested many tatters and each ‘foster family’ loved and groomed it to their best ability. But each home wanted something even better for the foster child that they could not provide, hence the child travelled, leaving behind a virtual trail of trials and learning, until the final adoption.
 |
| adopting, not foisting, the foster child... |
House #1 (
Ayşe
Özgür):
An enthusiastic & immediate start but life halted for 10-11 months. Starts with chain and work moves form right to left. Good use of 3 colours.
House #2
(Douglas
Hill):
Enthusiastic choice in the 2nd volunteer list, and mutual collaboration, # 2 conceded that #3 (adaptation & tatting) was better. Starts with chain, with inward picots for bilateral symmetry, and work moves from right to left.
House #3
(Julie
Santos Villegas):
An immediate & willing response but later needed help which #4 provided, but health forced another shift. Starts with a ring and work moves from left to right..
House #4
(muskaan):
Formally adopted and continued to maturity. Starts with a ring and work moves from left to right. With options shared.
TWoT (This Way or Tat?) and Diagram Notes :
 |
| original model |
Considering Frau Endrucks did not like decorative picots, all her edgings have a line of free picots along the top side (as seen in her tatted model pics) ostensibly to sew down the lace along that side while the other dangled.
 |
| original diagram |
However her diagrams are ‘upside-down’ and this line of picots lies along the bottom.
But there is a 3rd aspect. Her diagrams are read from left to right. Most of the patterns start with a chain, and when we actually tat a chain normally (not direct tatting) and continue, the working progresses from right to left (as in Houses 1 & 2).
I find myself doing mental & physical callisthenics in order to sync her diagram with the work in my hand. I like to know where/how my very first element faces, and where the threads emerge to continue – this orients me correctly till the very end. This is especially true for her patterns which involve frequent changes in direction.
Hence there are 2 solutions I have employed –
 |
| original diagram flipped |
1. Try to start the pattern with a ring. It has obvious advantages, including CTM and hiding tails. It is how I presented this pattern, shifting the start from a chain to a side ring. (Julie had first started her adaptation sampler with the central ring and diagrammed it accordingly, moving from right to left). Now the work progresses from left to right as in the diagram.
2. Draw a working diagram where we follow the pattern exactly as Endrucks has written starting with a chain, but the diagram shows this first element on the right instead of left. And the diagram then moves leftward (as in the flipped diagram above). No need for any brain callisthenics – simply lay the work against the diagram and you are facing the ‘right’ way.
One more
common feature of several patterns is that the central ring at the base (from which chains radiate) is tatted at the end of the motif. The only reason I can think of is to make it easy for a designer to estimate how large the ring should be and avoid multiple prototypes. Anyways, several of our pdfs show this ring as per the original. I have always shifted it towards the start of the motif joining chains to it, rather than joining the ring to chains.
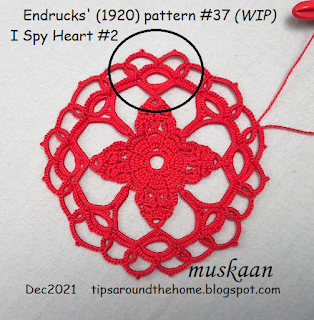
TIP: Potential Pitfall : Joining to the wrong picot!
This is one area where I frequently made a mistake and had to retrace my steps! This final one I noticed too late but fixed it by carefully snipping the joined picot (and glued the cut ends), and sewed the correct picot in place.
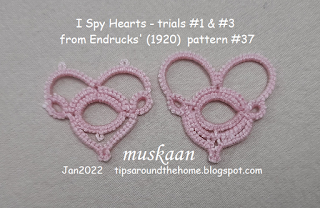
This is the 1st motif I tatted in early October to understand and explain the pattern to House#3. By November, I had to tat one more (no pic) to refresh my short memory and then went on to the sampler below ...
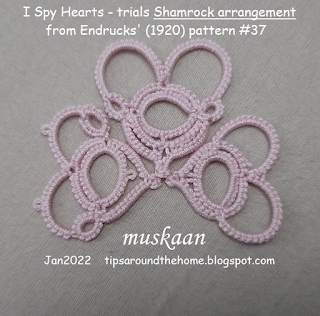
Each motif, especially with decorative picots, has the shape of a petal.
Gather up a row of motifs to create a 3D flower! Alter the length and width
and you get more layers and visual variety!
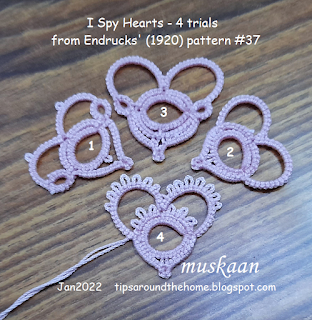
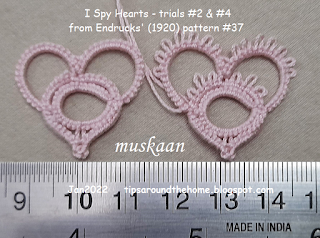
Of the 4 motifs in the sampler, the first 2 follow the pattern, each colour giving a clear idea of which shuttle forms the core thread, in other words, which shuttle is in the hand.
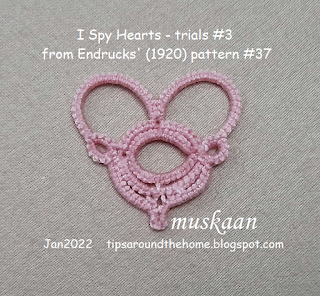
In the 3rd & 4th motifs, I added decorative picots along the top edge of the rings, and Catherine Wheel Joins in some chains for a smoother look. Remember to count the CWJ as 1 stitch (as in 4th); notice how smooth and symmetrical the inner negative space is? I also played with colour placement, using Reverse Join, Twist Work, etc. (see
Lock Join Plus for more options).

This is one more idea I had – tat the entire motif with bilateral symmetry. The best part? No need for paper clips and inward picots - no BBT (block below tatting)! Notice the central ring is worked as a split ring and the innermost left chain is tatted first.
But some tweaking is required especially on the right side ... when I get my bearings back ;-P
Before signing out, let me quote my partner
Ninetta -
“I would say one more time that this project taught us a lot also in terms of collaboration. The n.7 changed family but each time "we" added a new piece in the puzzle, that is always an improvement, for both understanding the pattern and learning how to present the modernized version.”
Remember, you can find all of Endrucks' patterns (& derivations) in English here -

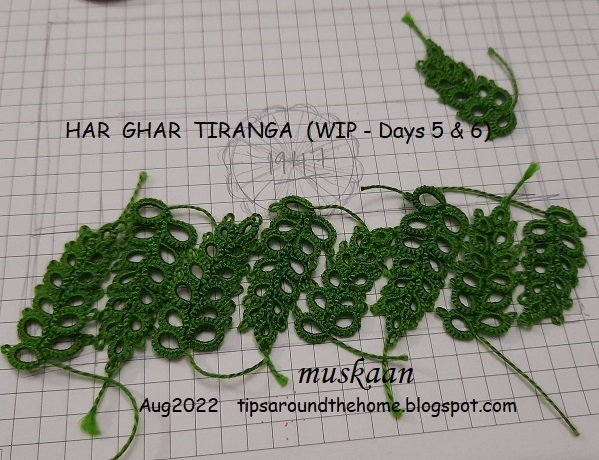
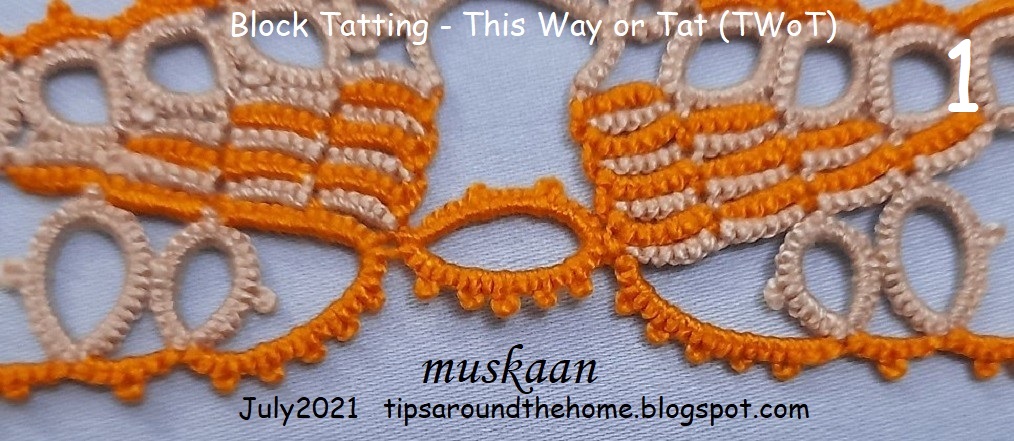
 ... a motif from the E13 edging looked like a butterfly's wing in profile!


 The pattern itself is a scroll - alternating rings and chains - throughout. In fact each wing is worked with a ball and shuttle. Yet, it is not a pattern one can easily commit to memory. The rings and chains are cleverly arranged and attached and require mindful tatting.