Just as I had visualized and hoped for! The wings with gathered picots! Yes, I'm doing the happy dance for sure, soaring on wings of fancy :-D
The Pattern -- 'Life is Bliss' butterfly by Antonia Lai, derived from Endrucks' pattern #32 (or E32). Here is the pattern - https://drive.google.com/file/d/1F_2y-JQn-noKF2AvegujNQIP4IYXRqWZ/view . For all links to Endrucks' docs and patterns - https://docs.google.com/document/d/1w1TZBg-HIzseGEUoJ-rko7tNbtSgZY5A18Oy2Y9Hh0Y/view
The Game -- This is my entry for the #PicotMeEndrucks April 2024 game in the Endrucks 1920 Project FB group. I had this in mind ever since I was preparing the presentation, etc., yet could not get around to tatting it for various reasons. One morning probably a week back, I actually woke up reaching out for the butterfly I had finished tatting (in my dream literally, but it was oh so vivid!!!). Yesterday I finally took hold of myself and belted it out for real.
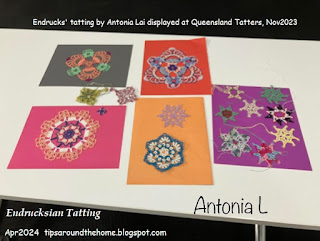
The Thread Colour -- Deliberately chose a bold but lighter shade. Variegated or dark hues would probably mask the picots or appear too busy. Worked in Anchor size 20 (equi to Lizbeth 10) mercerised cotton. The lower ones are my butterflies for the #PickMeEndrucks game last Feb (https://tipsaroundthehome.blogspot.com/2023/02/indisciplined.html) These two models were a great help in deciding placement and size of picots.
The Decorative Picots -- gathered picots; double picots and some variations; twisted picots (floating) with Josephine ring/picot at the tip; twisted double picot; chain picot; graduated picots. Phew!
I had roughly sketched my idea of where I wanted which picot. Once shuttles were picked up, some of these were changed.
I have labelled the various picots in this pic. Easier to show than explain. All picots used a 1/2 inch picot gauge, though the long picot was made with the gauge held horizontally. The graduated picots were eye-balled.
You can find a whole visual list of decorative picots here - https://drive.google.com/file/d/1D6l4gQWeGu1Se1ZXAhP2vWLQMd4lfzMJ/view
It wasn't all smooth sailing especially since it was to be both a first trial and the final. I often had to retro-tat, including opening up closed rings. But so worth it!
The Sequence -- I started with the inner onion ring, going clockwise. The entire body and right wing were tatted continuously. However, for bilateral symmetry of the gathered picots on the left wing, I had to join the threads at the base of the onion ring and tat the wing from the back. This also meant joining the picots from the back. It took me three trials to get it right.
The Tweaks -- The only addition I made was to add a shadow chain with graduated picots along the outer sides of the top rings. I think this provided the motif with balance and body. I didn't use a CWJ for the onion ring, opting for a lock join so that the chain picot could be made properly. For the double picots I divided the 6ds of ring to 4 picot 2. One inadvertent mistake was 2 stitches instead of 3 between the joining picots of side rings.🦋🦋🦋Now that the metamorphosis is done, let me enjoy my flight to the skies 🦋🦋🦋
Related Postshttps://tipsaroundthehome.blogspot.com/2024/03/happy-itd-2024.html
https://lelia-stitchesoflife.blogspot.com/2024/04/picot-me-endrucks-april-2024.html
https://tipsaroundthehome.blogspot.com/2024/04/no-excuse-to.html


