Showing posts with label afghan. Show all posts

Saturday, 2 February 2019

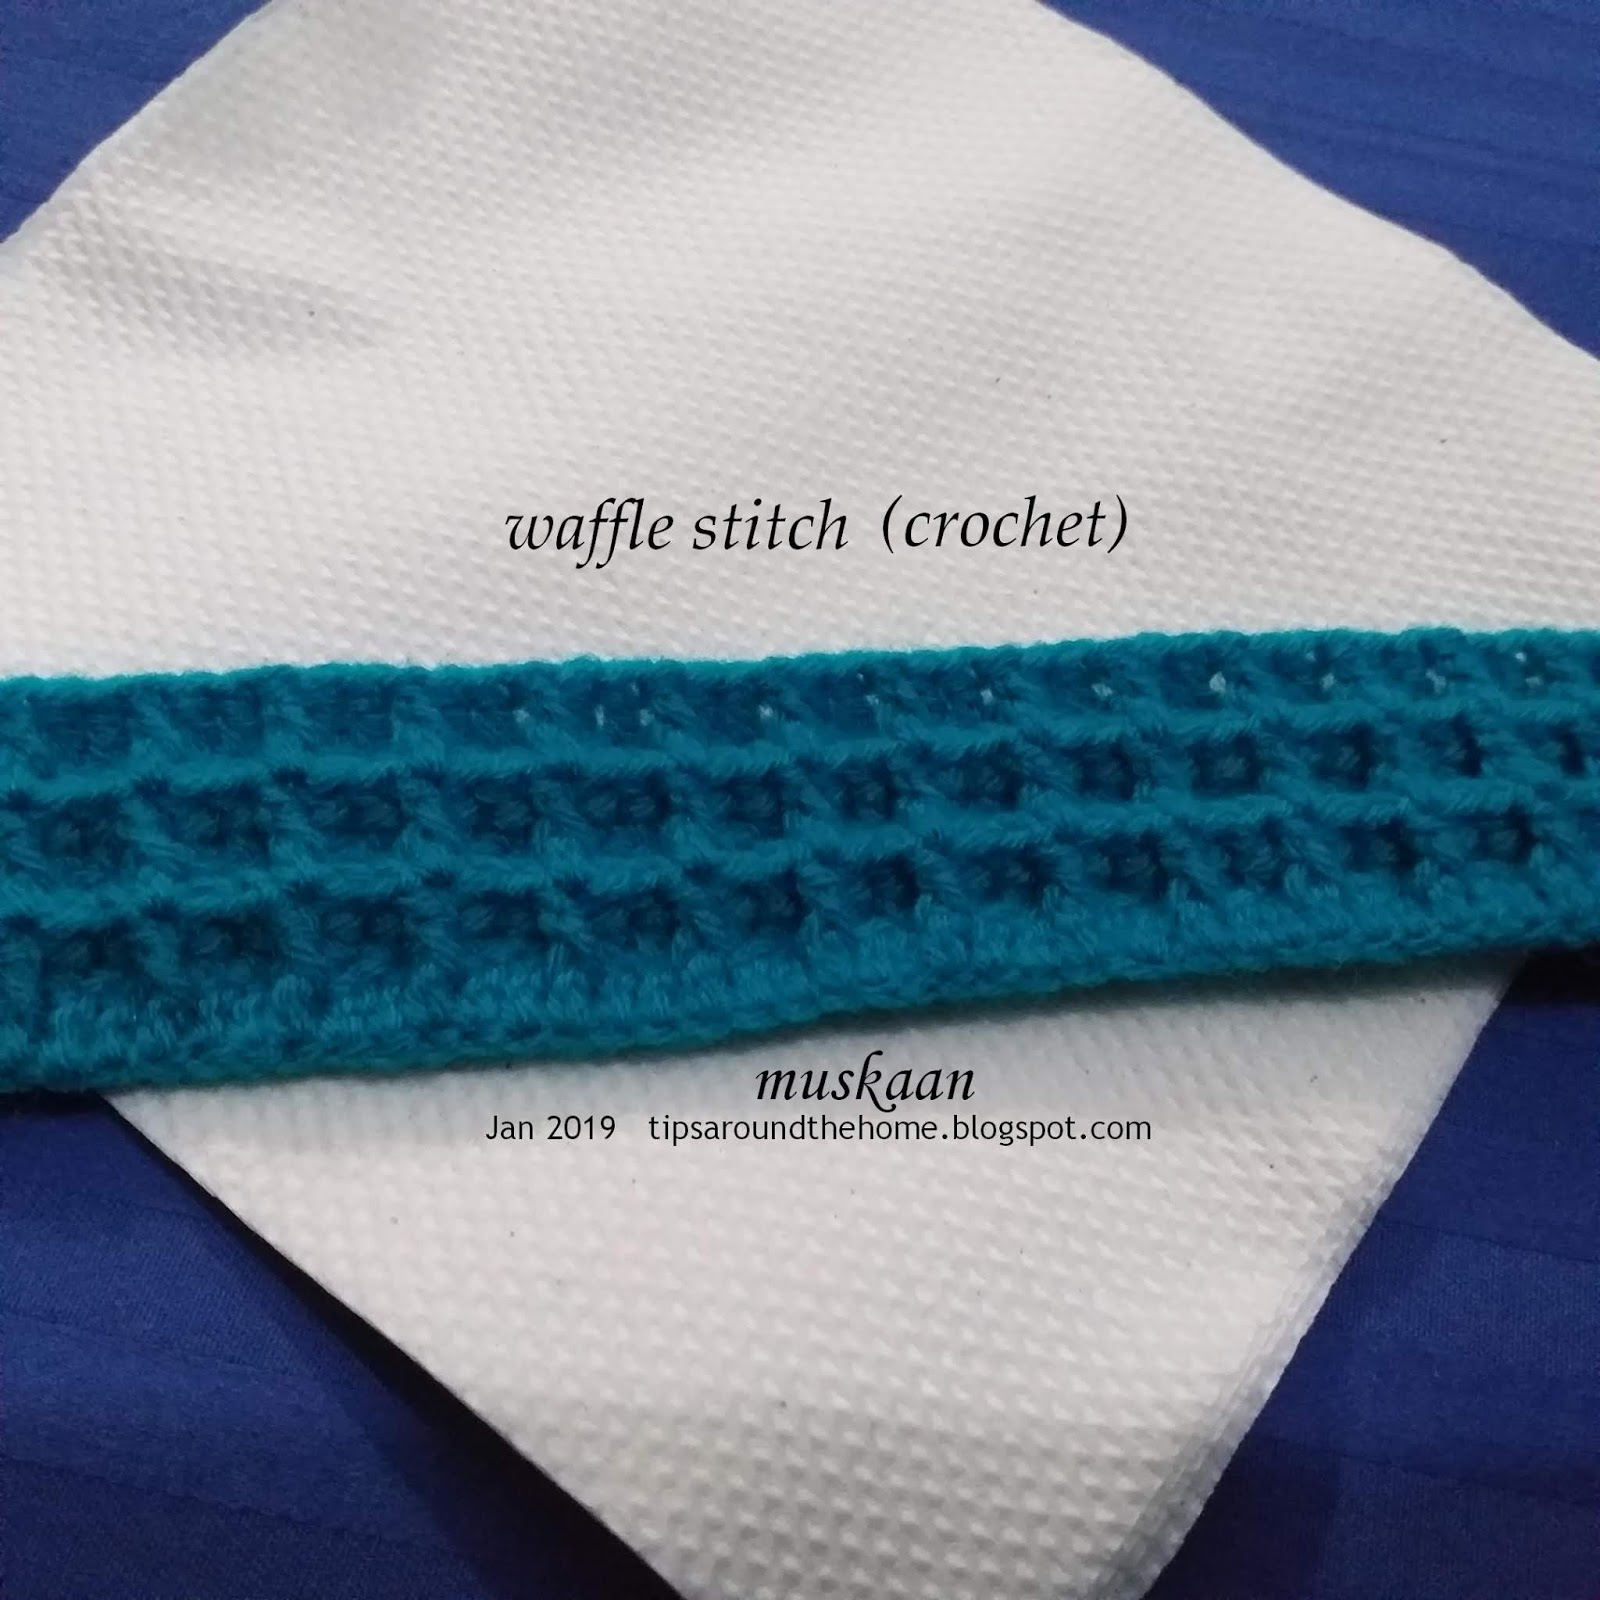
waffling

Pin It now!
‘waffling’ [North American]  : fail to make up one’s mind.
Apt! 
I first saw Diane’s admirable waffle stitch afghan(s) and immediately liked the texture! Several months later, Denise’s enthusiasm proved too contagious to resist. And the timing was right as I was convalescing in Dec.

 
After these learning trials, I set about crocheting a cushion cover for hubby’s chair. Which is why I started out with a 15” length. But started to get bored with the single colour (wish I'd factored in some white!) and tied off, changing my plan to an afghan. This first strip is worked along the length, but rest were worked up from the shorter side.

8 strips worked so far in 4 different colours. Each measures around 15”x3½” and weighs about 20gms. Jaypee knitting yarn/wool and 2.25mm/size13 hook.
Multiples of 3 and 2 extra chain stitches to start off, so that I get the same effect on either side.
I used only 2ch to turn.
Wanted to lay them flat before posting, but …

I need plenty more, but don’t know how to arrange them yet. Lots of arrangement ideas jotted in my grid pages, however my current waffling hampers progress!
Meanwhile I had other deadlines to meet, stuff to finish.

One thing is for certain; the entire afghan won't be waffle stitch. I intend to knit a few panels/blocks using different stitches – perhaps in batches of 8.

I kind of got into a rhythm with the stitch and it went fairly quickly; it consume a lot of yarn.


‘waffling’ [British] : speak or write at length in a vague or trivial manner.
Yelp! I’m leaving I’m leaving ;-P

Sunday, 31 January 2016

coPINg with memories

Pin It now!


Jogging your memory on this Memory Afghan from the Floral Fiesta Afghan pattern by Maggie Weldon. I started it in Nov 2014 & completed on Jan 10th 2016 spanning two winters. 
I am entering this as my very first Pinterest Challenge. The challenge has entered its 2nd year and we are now the Pin Chicks !!! It is a novel idea started by 2 bloggers Suzanne & Margaret to choose one pin every month & do the project/task/activity. It can be Anything you wish, and everybody posts on the last day of the month. Adding to the fun & mystery, the project remains a complete secret till posted. 

So why am I picking this as my first Pin Chick project ? Because it all started two years back with this pin on pinterest ! The image immediately caught my fancy – such a beautiful pattern that would use up my yarn stash! A stash that had built up over the past 20 years from leftover yarn. Later, in my bid to work out a border/edging, I referred to several other pins.


I will let the pictures do most of the talking, even though the photographs have failed to replicate the cheerful brilliance & subtle shade differences of actual colours … And remember, there is more to come (read on)

Following the strong & almost unanimous preference here to use a lighter colour for border, I had lined the periphery with darker colours/shades. This would create more of a contrast with a lighter border.After joining 12 motifs, laid point-to-point, along the breadth & 18 along the length, I decided it was complete, and required only a border & edging. 

Maggie's pattern does not have any border/edging ; she weighs down the points with tassels. Tassels look very pretty but are not always practical. So I had to figure something out. I did so want to keep the ridges intact - no plain old rectangle ! 

Following is some of what I tried. This is inspired by another pin here, with image only & no pattern. I looked at many other pins on my Crochet Stitches & How-tos board for inspiration & pattern, but loved the slight overlapping effect created by the spike/dropped stitch.

  • Spike/Dropped stitch : Insert the crochet hook through the base of previous row & pull up a loop to crochet.
  • Picot : chain 3, slip stitch in 3rd chain from hook.
  • All stitches are worked in/through the back loop.
Trial 1 : 
1 in pic, in white :  Row 1 - slip stitch in back loop  
                           Row 2 - single crochet in back loop, & spike/dropped                                                stitch at the notches   
2 in pic, in yellow : Row 3 - sc in back loop, & spike stitch at notches
3 in pic, in black :   Row 4 - slip stitch in back loop, and spike stitch at                                                  notches.
 Trial 2 : The single yellow row got lost between the white & black. Hence I added one more yellow row, worked same as Row 3 above. Thus 2 white, then 2 yellow rows. The spike stitches are more clearly visible here, although the lack of contrast between white & yellow masks everything.
The last row in black, with slip stitch in back loop & the spike stitch at notches, adding a picot at the tip. 
I liked the well-defined arched look, & tried it around some more motifs for colour-play. After the final black row, the edging seemed to flatten out too, & I hoped that with usage, it will flatten out further. 
So, got right down to work around the entire afghan.
 Two rows of border completed, using off-white/cream wool.
Started the 3rd row, but the ruffling only increased ! I did not do the math properly & this cream yarn was thicker & looser than the baby wool in the trials :-(
Note to self : always do your homework first , use Same yarn for trials as for final version, & don't bite more than you can chew !
This is where I left off last season.
So what did I do next ? 
Continued / Corrected / Changed / Chucked ??? 
For the grand reveal to this great suspense, wait a while coz I still have to take photographs, teehee .

A couple more pics .... 
 from front, and
from the wrong/back side. Yes, lots of ends to hide ! 


But don't leave just yet. Please take a few minutes to 
check out the immense talent of these Pin Chicks 
(in alphabetical order ; click on name for respective blog)!
We will gather again on the last day of Feb. Hope you join us as 
a pin chick &/or reader :-)


Pinterest Challenge 2016 #1
Related Posts : Just Starting

Happy Crocheting & Pin Chicking  :-)))

Sunday, 29 November 2015

Knit Afghan 1

Pin It now!
The  Ugly  Duckling


This has quite a story behind it … a case of the unloved,  unwanted  Ugly   Duckling.......

Before the turn of the millennium,
At store … bought blue wool coz I wanted to use my #0 needles.
At home, … didn’t like it – too thick ! Unloved.
Left it with MIL to give it away (for free) to anybody who wanted it – nobody wanted the unknit yarn even for free ! On returning after 2 years, it came back to me. Unwanted.
========================

Square to Diamond  Sampler  Afghan 

.... and it's evolution &  transformation into a graceful swan !

I decided to knit a rug or mat to give away. Because of the thickness of the wool (& no circular needles at the time), I went for small squares with just enough stitches to fit on the needle, to be joined later.
All motifs begin with a normal knit row.
BLUE Square : 7¼” sides ; total 20 ; approx 550 gms wool ;
Pattern #24 from “The New Knitting Stitch Library” by Lesley Stanfield 
UK#6 needles ; Cast on 35+2 stitches
========================
Enjoyed the process & idea, so made squares in red & white leftover yarn, each with a different pattern.
WHITE Square : 7” sides ; total 10 ; ~200 gms
Pattern #291 from “The New Knitting Stitch Library” by Lesley Stanfield
UK#6 needles ; Cast on 33+2 stitches
========================
RED Square : 7” sides ; total 9 ; ~200 gms
Pattern #200 from “The New Knitting Stitch Library” by Lesley Stanfield
UK#6 needles ; Cast on 30+2+2 stitches
========================
As the numbers increased, I sketched out a possible arrangement to form a design, but preferred a diamond arrangement.
Boring Squares !!!! This is how it would've looked if I'd arranged as squares ...

TIP : Easy way to change squares into diamonds! It is easier to knit squares rather than start & end at a point in case of diamonds. But simply lay the square as a diamond &  join/sew as diamonds !


========================

Another dilemma emerged : what to do about the huge triangular spaces along the sides?!
Chose yet another pattern & adapted it for triangles. Not quite happy with the result. If I were to do it today, I would be better able to handle it with this or some other pattern. 
  
BROWN & BEIGE Triangles : 10” base, 7” sides ; 8 each (total 16) ; ~100 gms
Pattern #137 from “The New Knitting Stitch Library” by Lesley Stanfield
UK#6 needles ; Cast on 51 stitches
Since the background in all purl, the central pattern gets raised - nice texture. But it was not visible in black wool; hence chose these leftover colours.
========================
All squares & triangles ready. But how to join ?!

I was looking for a lacy, open effect, and crochet interlinked chains seemed to be the way to go.
Notice how insipid it looks without the black outline in the white & red Boring Squares pic above !
Done in black wool, all around the squares. I crocheted around one entire square. Then started on the adjoining square, joining to previous motif chain as I went. 
BLACK Crochet Chains : I think it is a ch6 (3, slip st, 3).
========================
There were still gaps at the meeting points of 4 squares. Took me a while for the idea to emerge … created the blue & red baby wool stars joining as I crocheted. These stars really brightened up & ‘completed’ the project.

RED & BLUE Crochet Stars : Wendy’s Baby wool 
20 red, 18 blue stars.
Each arm is (ch3,  sl st to black chain, ch3, sl st to center) x8, around a central ring of ch6-8. 
One can use the magic ring/circle, too.

========================
Finished off with a crocheted black chain scallop edging along the borders. I had an idea to sew some satin fabric as a border around the afghan – like a quilt. But that wasn’t necessary – the all-wool piece looked fine.
This is not a regular rectangle. I did knit 4 corner triangles, but preferred the diagonal corners. Hence, this is strictly an octagonal afghan.
FINAL measurement : 49”x71” ; weighs over 1 kg
========================

Okay, all this may seem very simple … but it was a watershed project for me. I had never ever seen anything like this before – no knit/crochet woolen blankets/afghans/quilts. To me, each step required a lot of thinking, evolving, & figuring out. The triangles were done the next year. And the little stars were added the year after that!

What may be a natural in some cultures, was a brainwave for me. It was my very own idea from scratch. Hence, I may be excused for ultimately not giving away the finished piece ;-P 
Yup, I kept My ugly duckling !!! Evolution &  transformation was complete ! And it is so soft & warm (especially the blue wool !!!) & works well as a lap-rug too, while I work at the desktop in winters.
All pics were taken after more than 10 years of use & wash . It is finally on it’s way to being discarded :-(
========================

happy  knitting :-)

Saturday, 10 January 2015

Crochet II

Pin It now!
Memory Afghan (part 2)
Pattern : Floral Fiesta Afghan designed by Maggie Weldon (click on link for pattern)  

Thought it was time to update my Memory Afghan with a few pictures & musings. It is still in progress; about 60% complete when these pics were taken (now it is 75-80% done). Have visualized the border; still need to put it to hook to see if it will work. It can wait .....

Some Thoughts / Update :
Small motifs crocheted & joined in this pattern uses up even small scraps of wool.

As mentioned in my earlier post, I have used all kinds of yarn, of varied thickness.  While the size of each motif remains more or less the same, the density may vary, as well as the amount of yarn used. Thicker yarn is used up more & has a denser, fuller appearance.

Pony crochet hook #13 (2.25 mm) used for joining at corners ...


At 190 motifs, the afghan weighed 500 gms and was one diagonal short of the halfway mark. 250 motifs made so far. 12 motifs across (42') & 18 or 19 motifs long to get around 72'. The 35+ colours have kept me motivated, & I am still trying out new combinations.  (Since writing & photographing this, I am now less than 90 motifs short of completing the afghan! Then on to the border)
◊◊◊◊◊◊◊◊◊◊◊◊◊◊◊

After the initial random joining of motifs, I systematized & settled to joining from left to right, diagonally, resulting in a growing triangle (till width of 12 motifs is complete). And these are some possible alternate uses of this pattern ….

Some Alternate Applications :

Triangular Wrap
If one works in a triangle, starting from one corner & joining diagonally as one goes, one can create a beautiful Wrap !!! In the pic, the ‘last’ row is still incomplete, but it gives an idea, doesn’t it ?!

Throw Cover or Handbag, with flap
This same triangle can be folded from the corners in the manner indicated by the arrows & numbers; sew on the bottom edge. Voila! We now have a square throw/cushion cover with a flap ! To make the flap stay in place, simply sew on a beautiful button & loop.
If you sew on some strings on either side, you have yourself a handbag or shoulder bag or a jhola bag!!!

 ◊◊◊◊◊◊◊◊◊◊◊◊◊◊◊

 Incidental Advantages
Back to Future Memories :

Colour Palette
An incidental advantage of using so many colours : it acts like a colour palette !!! Trying out various combinations, some in 'unconventional' and unorthodox combos gives rise to some really unexpectedly lovely 'mergers'. Such a project can act as a guide to future colour selections and combinations !

Replacement
In this pattern, not only does one get to use up small scraps of wool, but Just in case some part gets frayed in the future, one can Easily Replace it with another motif !
And if one is using colours in no regular arrangement, then one can replace the motif with whatever colour & yarn is at hand !

Create Memories
One can Deliberately cut off a motif & substitute with scrap yarn from new projects !

◊◊◊◊◊◊◊◊◊◊◊◊◊◊◊

Back to School Memories :
Another incidence of why this has turned out to be truly a Memory Afghan. 
It sent me back in time, to school lessons in Maths & Science !

Pythagoras theorem 
Size of each motif, as mentioned in the pattern : 2½” sides & 5¼” diagonal
I got the sides correct & carried on. Eventually when I measured the diagonal, it turned out to be only 3¼” !!!
How it That possible ?! If Both sides are equal, making it a Square, & I got the tension right, why was the diagonal not conforming ?
Pythagoras Theorem to the rescue. Applied it, and turned out the dimensions of my motif were right …. Phew !

Static electricity 
There are so many ends to cut in each motif. (I cut them as soon as one motif is complete). I keep collecting these yarn bits in a little glass jam jar (that has a lid), & throw them out when it fills up.
I also needed a needle frequently, to weave in the ends after each round. To keep the thread lengths short, I used the shortest needle I had. This needle fit in easily in the jar ; easy to pick & put back, whether there were yarn bits in the jar or not. Basically, the jar acted both as a temporary litter-container & a pin cushion ;-))
And look what happened : Static Electricity, resulting in magnetism !!!
Took me way back to my 5th or 6th grade ;-P


TIP : So, how about using yarn bits to stuff in a pin cushion ?! Yes, next time I make a pin cushion. Good recycling, too.

◊◊◊◊◊◊◊◊◊◊◊◊◊◊◊

One minor drawback :
Cannot crochet on the go, especially if one is using many colours.
This can be minimized by –
* using very few colours,
* letting the thread ends of each round hang, and
* hiding all the thread ends together at a later stage.  (Not something I relish - too many loose dangling threads, plus such a chore to tackle it all together.)
◊◊◊◊◊◊◊◊◊◊◊◊◊◊◊ 

Related Posts : Memory Afghan 


Friday, 5 December 2014

Crochet - I

Pin It now!
Crochet Memory Afghan

Pattern : Floral Fiesta Afghan by Maggie Weldon


Winters mean shifting to wool !
True to form, I have picked up my wool stash to make my 4th afghan. Except that this time it is a crochet one, not knit.
The free pattern can be found here


It is a 3-round motif pattern, joining as you go. The 2nd round in each motif is white in the original pattern, but I decided to let my fancy choose a different colour for the 2nd round instead of only white.

A great stash-buster project !

I have used all kinds of wool yarn , all plys, (I am not too knowledgeable about yarns)
Wool yarn ranges from pure to worsted to chenille to a tiny bit of mohair ;
Yarn thickness ranges from 2 to 6-8 ply or more ;
Brands include both baby wool & normal wool from Vardhman, Wendy's, Jaypee's, and some odds & ends that I have forgotten.

With this range of yarn, it is turning out to be quite a Memory Quilt ! I have been able to use up bits of wool left over from projects completed down the years ... including some that have long since been discarded or gifted .

Pretty nostalgic.

I have used Crochet hook # 9 (3.50 mm)  because this could tackle all wool sizes. 
Each motif works out to 2.5" x 2.5" (sides) or approx. 3.25" x 3.25" ( diagonals )

I didn’t quite estimate how very useful my earlier post on winding threads, will come in handy :
  • By winding yarn around the spectacle case, I was easily able to calculate the length of yarn required for each round :


Round 1 - 8 winds x 6.6" = 52.8" (1.34 m)
Round 2 - 6 winds x 6.6" = 39.6" (1 m)
Round 3 - 25 wraps x 6.6" = 165" (4.2 m)

  • The Quick & Handy Yarn Stash Samplers (below) has done it’s job too! I simply choose & clip the pairs of colours required for the next 2 or 3 motifs … And since I wrote down the quantity of wool on each strip, it helps me decide which colour needs to be used more or used less. In fact, I found some short short lengths of leftover wool that can be used for Round 2 in a few motifs, & which are not included in the stash sampler below. So that probably takes the number of colours close to 35 !!! Still wish I had more colours/shades ;-P


Thoroughly enjoyable though a whole lot of ends need to be hidden ; hence the tapestry needle & scissors are a constant companion. I am hiding the ends after each round – better now than a mountain-load later !

Also, as the blanket gets larger, I might start a separate piece & join it to the first piece later. It is easier to handle smaller pieces, and also keeps the project from getting dirty. 
It is such fun to choose colours & placement. I wish I had even more shades & colours …. Love the warmth & coziness of colours during the grey winter days.


I am planning to crochet a black border in the end …. I think it would bring the whole thing together, especially since so many colours have been randomly used. Need to figure out some pattern/edging … Any ideas ?